08 December 2020

Simple fixes – fixing a solar pool heater leak
This repair had to be made to a joint, but it could just as easily have been made to a pipe anywhere along its length.
The important thing to remember is to ensure that the stainless steel coupling used to make the repair here, must be centred on the leak. Naturally the same rule applies if you are making a repair using a PVC joint and PVC cement to secure the join (in this case also ensure that the surfaces are dry so that the PVC cement will work properly). However, in the latter case, ensure that you use PVC cement that is rated to take the pressure. A non-pressure solvent cement might not be able to sustain the forces encountered in pressure pipe systems so you must ensure that high-pressure solvent cement is used for pressure pipelines, as in this case.
Materials:
In this case we used a 50mmØ stainless steel coupling (with two integral hose clamps) plus an optional third stainless steel hose clamp capable of handling up to 63mmØ.
Method:
- This socket has split. We propped the pipe up on two blocks to raise it clear of the roof tiles and give more space to work.

- First step was to complete the split. We used a coping saw. Take care to ensure that the cut is absolutely square – 90° – so that the coupling can be centred properly.

- This is the coupling we used to make the fix – note the two integral hose clamps.

- A top view of the coupling. It has an inner rubber sheath with a central ridge running round the inner surface at the mid point. This ensures that the coupling can be centred on the join. Also note that as this coupling is being used, there is no need to wait for the pipe or socket surfaces to dry as no PVC cement is being used.

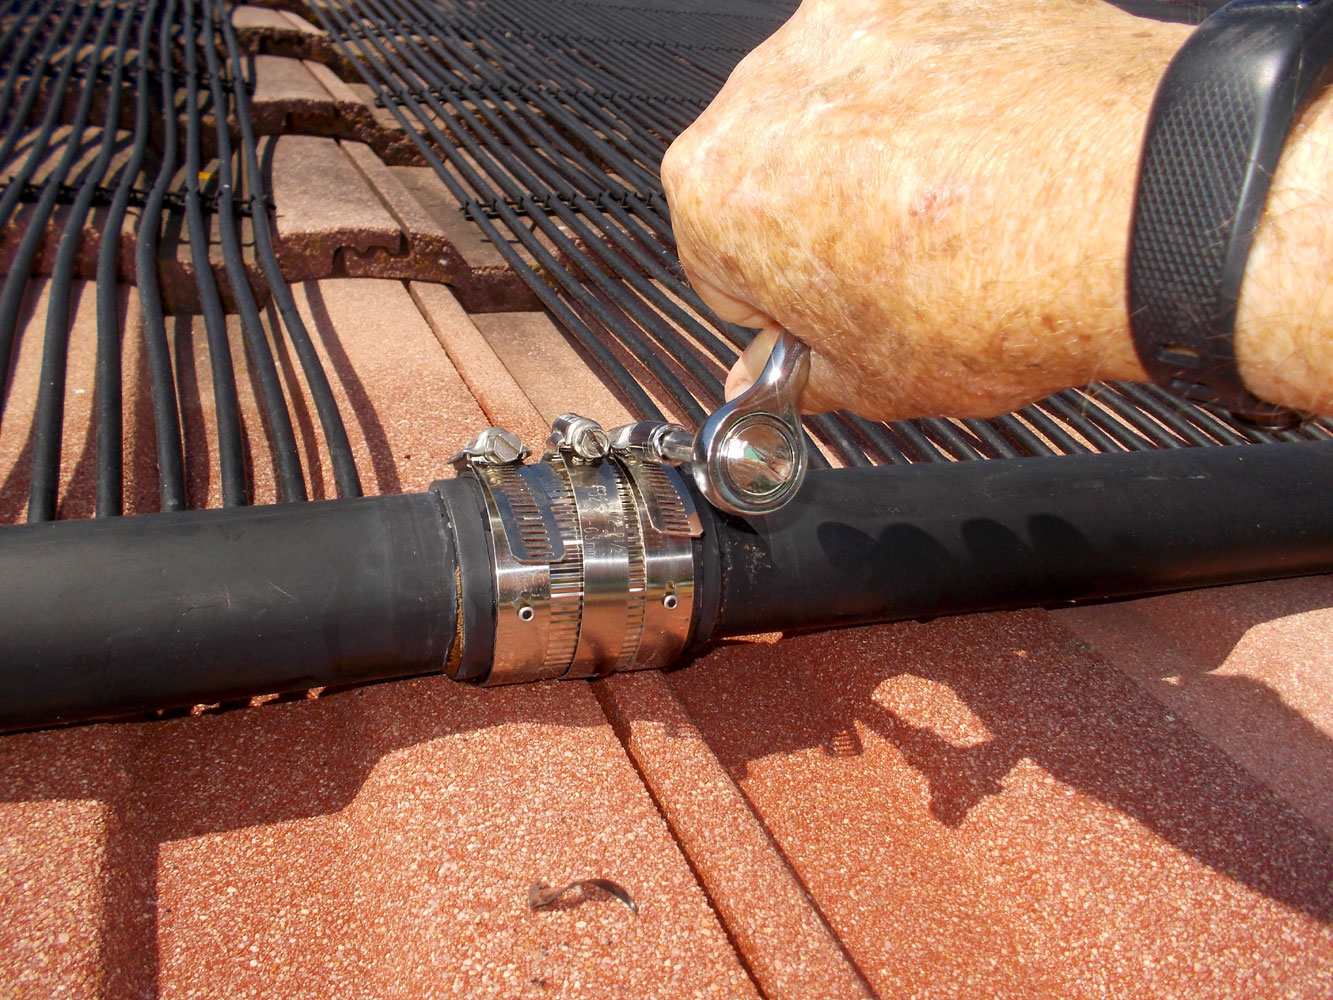
- Having added the optional additional stainless steel hose clamp between the two integral ones, we positioned the coupling on the pipe ensuring that we perfectly centred it on the crack (and subsequent cut). We also positioned the coupling so that the screw/bolt heads were facing us for convenience.

- Then we removed the support blocks so that the pipe was lying in its normal resting position on the roof tiles. Only then did we tighten the clamps to secure the rubber sleeve over the socket. It is important that this final stage be done only when the pipe is in its final position… tightening them when it is still propped up is likely to make for an unsuccessful result and both ends are at a bit of an angle, as you can see.

- Job done – and not a drop of water in sight. To test the repair we ran the pool water through the heater at full volume (and full pressure) before resetting the valve control on the heater inlet to allow only a partial flow through the heater… in midsummer it heats the water too much for comfort.

Project guide
Skill level: 1
Estimated time: 30 minutes
Cost: R75-R150… depending on whether you are using a PVC component and cement (in which case the cost is around R75) or a stainless steel coupler, as used here, in which case the cost is closer to R150 (slightly less is you do not use the third pipe clamp as we did here).
Assistant: No
Tools required:
Hacksaw or coping saw, and ratchet spanner.
Panel:
These materials are available at Selected Mica Stores. To find out which is your closest Mica and whether or not they stock the items required, please go to our store locator, find your store and call them. If your local Mica does not stock exactly what you need they will be able to order it for you or suggest an alternative product or a reputable source.