08 May 2025

THE HAPPY HOOKER
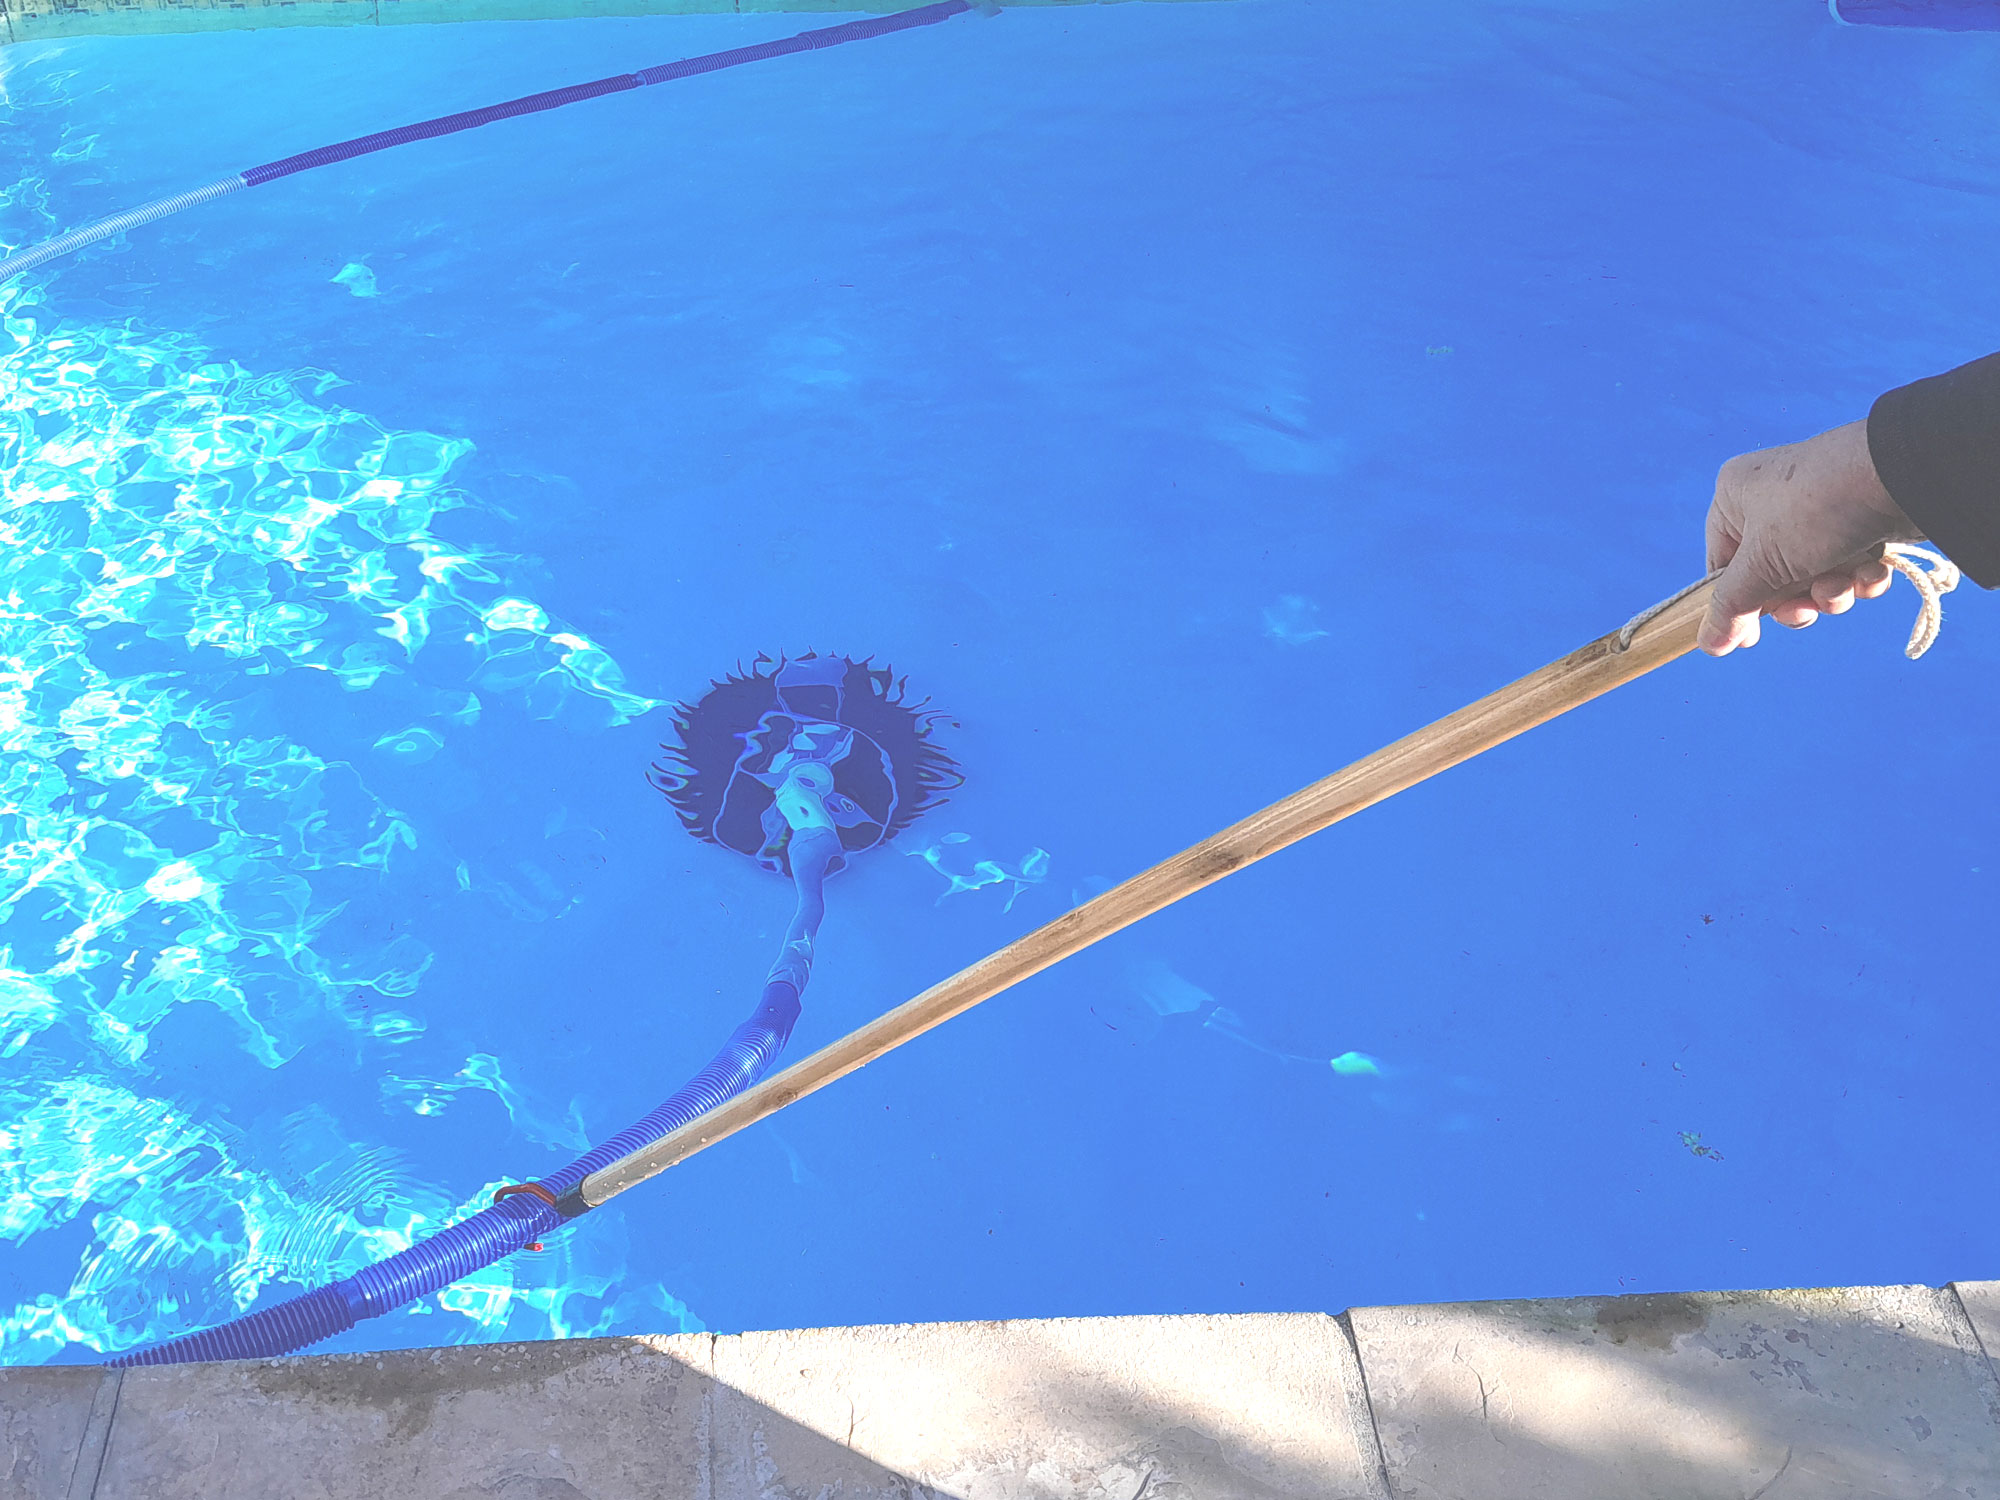
This is such a simple project, but will be such a useful one, because apart from fishing the cleaner or its pipe out of your pool, it would be marvellous for pulling a branch or two down to within reach so you can get your hands on those high-flying fruit such as those on your lemon tree… or in fact any other task where you need to pull something towards you.
As regards the use of the bicycle hook as opposed to any other, it is of a sufficiently large diameter than it will comfortably cradle a pool cleaner pipe without crimping it, and being vinyl-coated, it is well protected against corrosion.
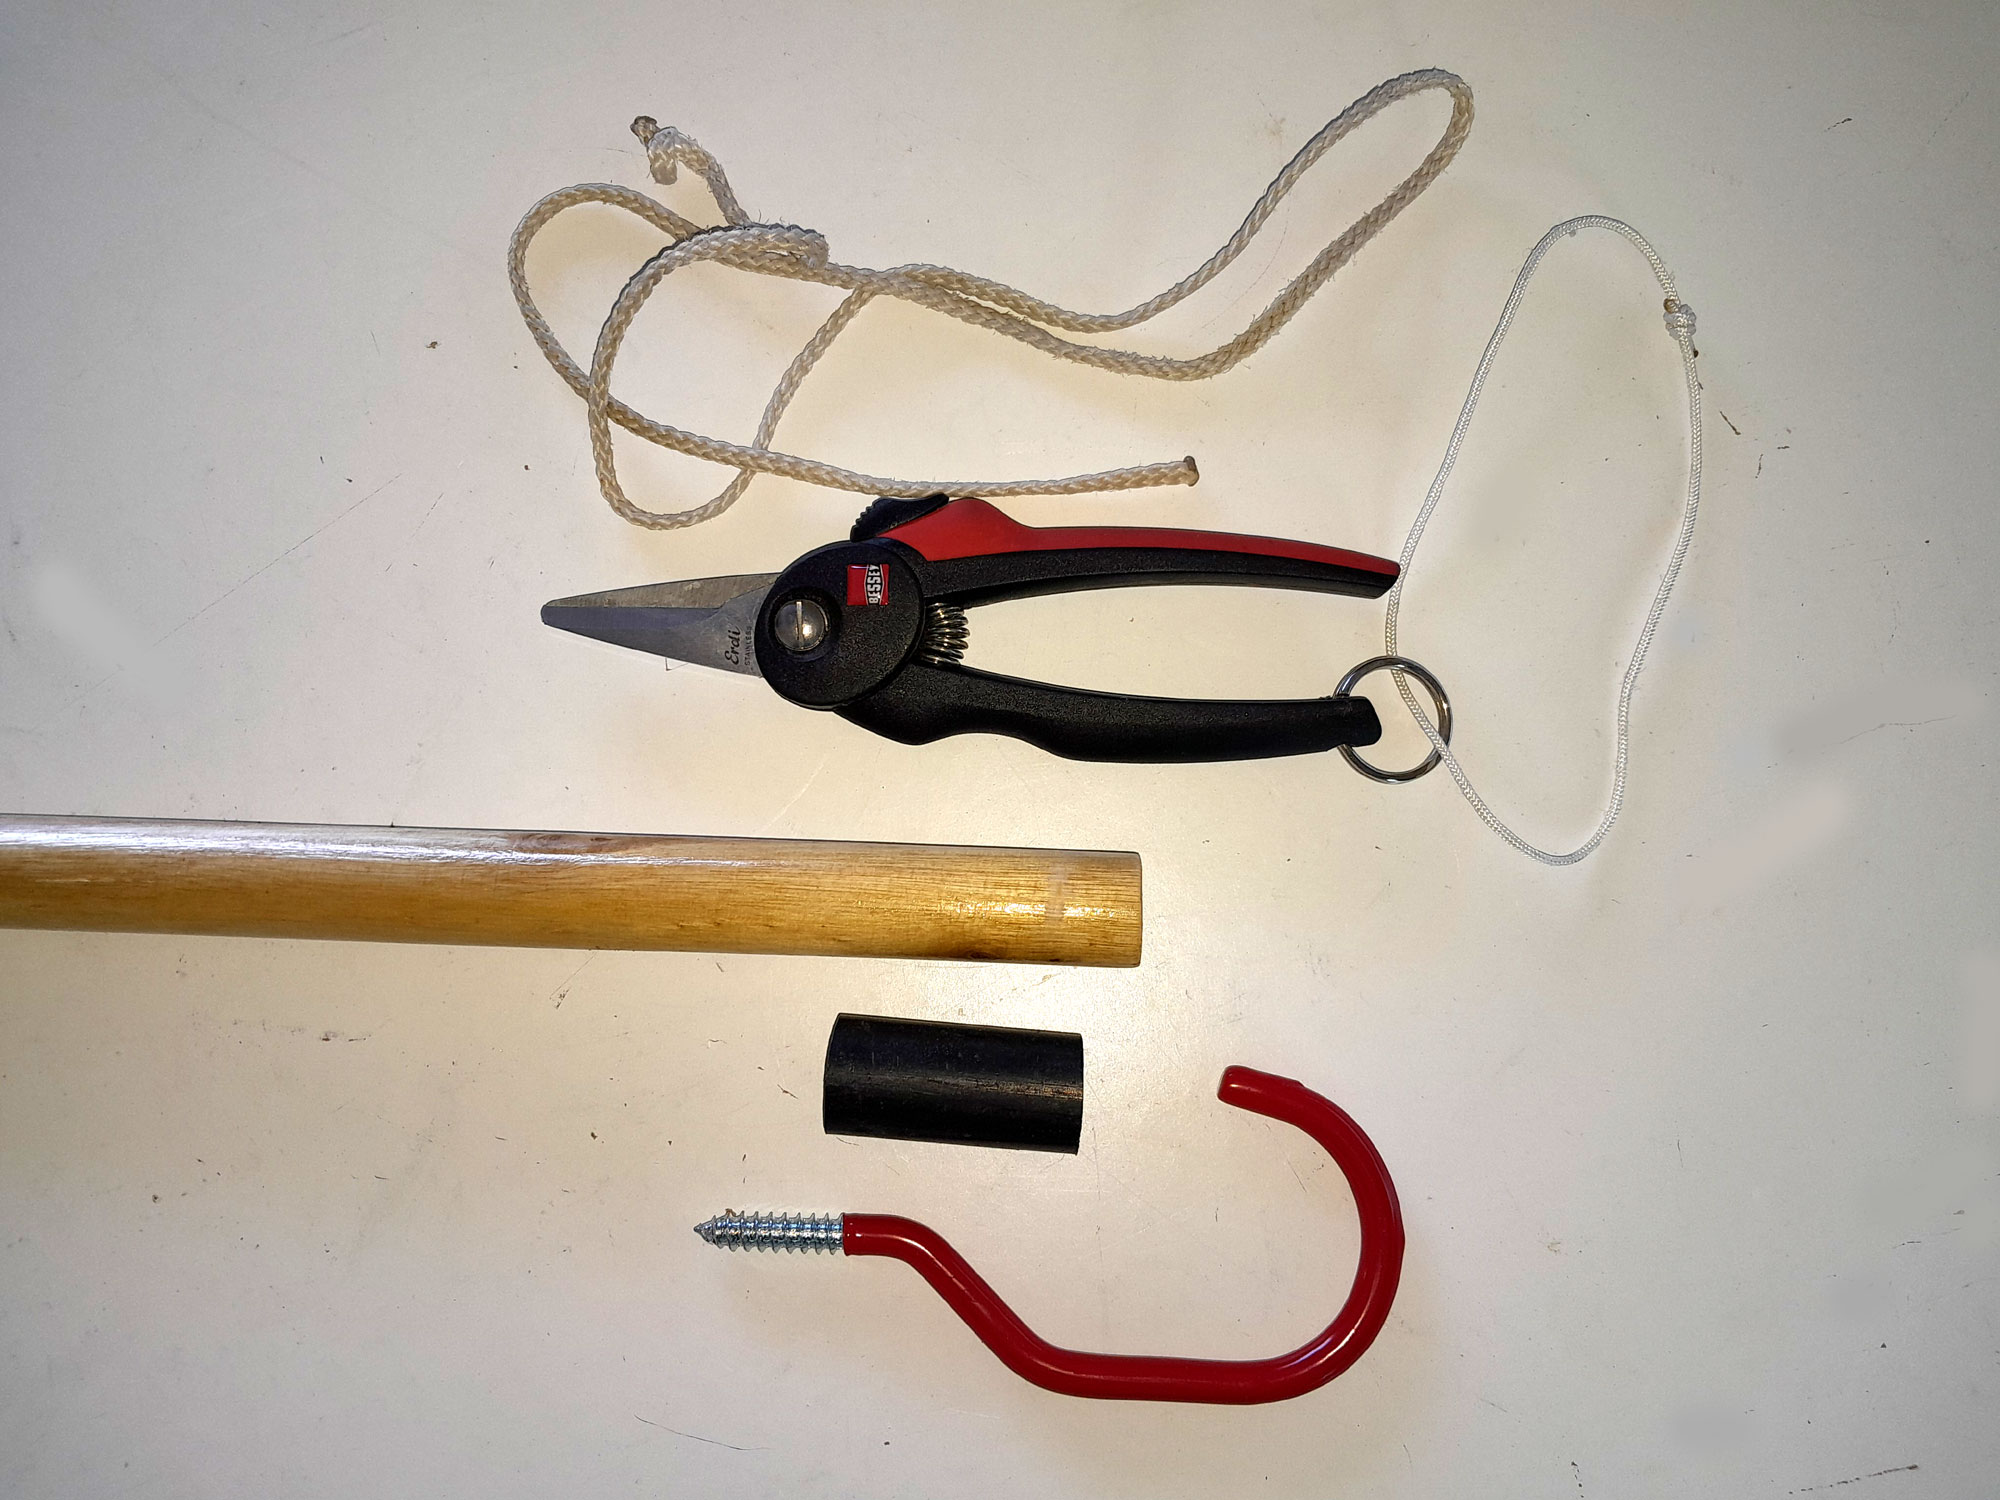
Materials:
- Bicycle hook (vinyl coated)
- 22mmØ rake or broom handle, around 1.5m long
- Marine varnish
- Solvent-base gloss enamel black paint (optional)
- 350mm length of nylon cord (optional)
- 50mm length of 22mmØ irrigation pipe (optional)
Method:
- The hook requires a bare minimum of materials, and if you have an old broom or rake hanging around, and some cord and a bit of irrigation pipe, all you need to buy is the bicycle hook.
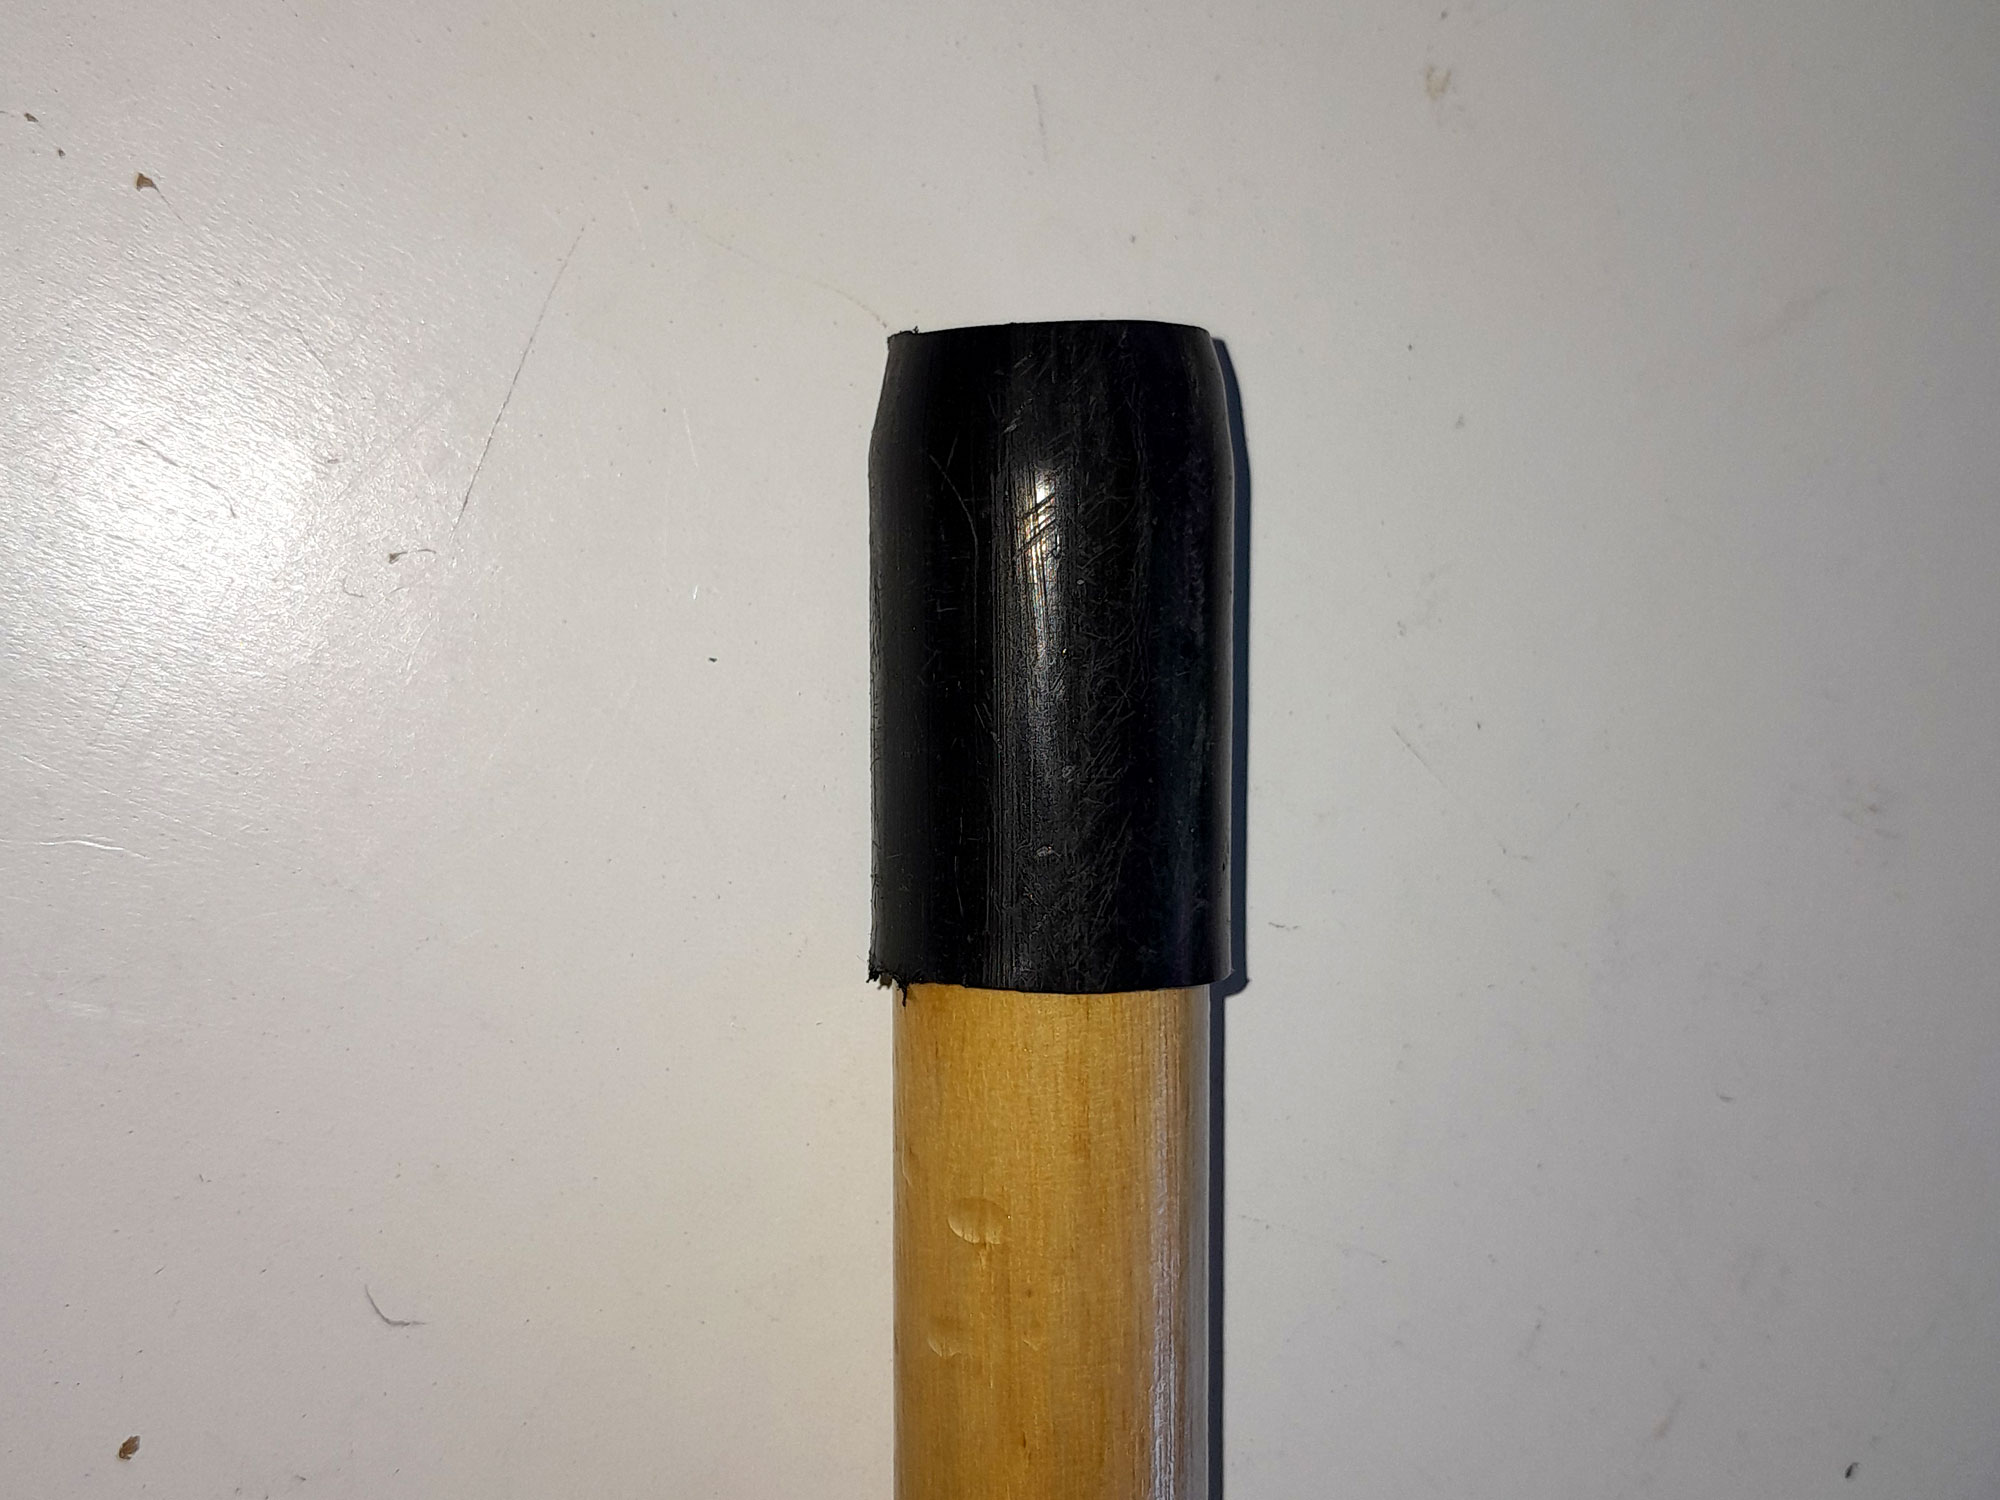
- First step – though it is optional – is to shrink the short length of 22mmØ irrigation over the end of the pole; it will be a very tight fit, so first immerse it in boiling water from the kettle, leaving it to soften for 5 minutes or so.
- Then with some effort, plus some naughty four-letter words such as “darn”, “drat”, “gosh” and similar (I don’t know any other naughty four-letter words), you will be able to push the length of pipe over the end of the pole. I did this for two reasons; protect the end of the pole, and secondly, stop it splitting.
- And there it is. Note that it extends just a couple of millimetres beyond the end of the pole, to help protect its end from any damage on the pool’s coping.
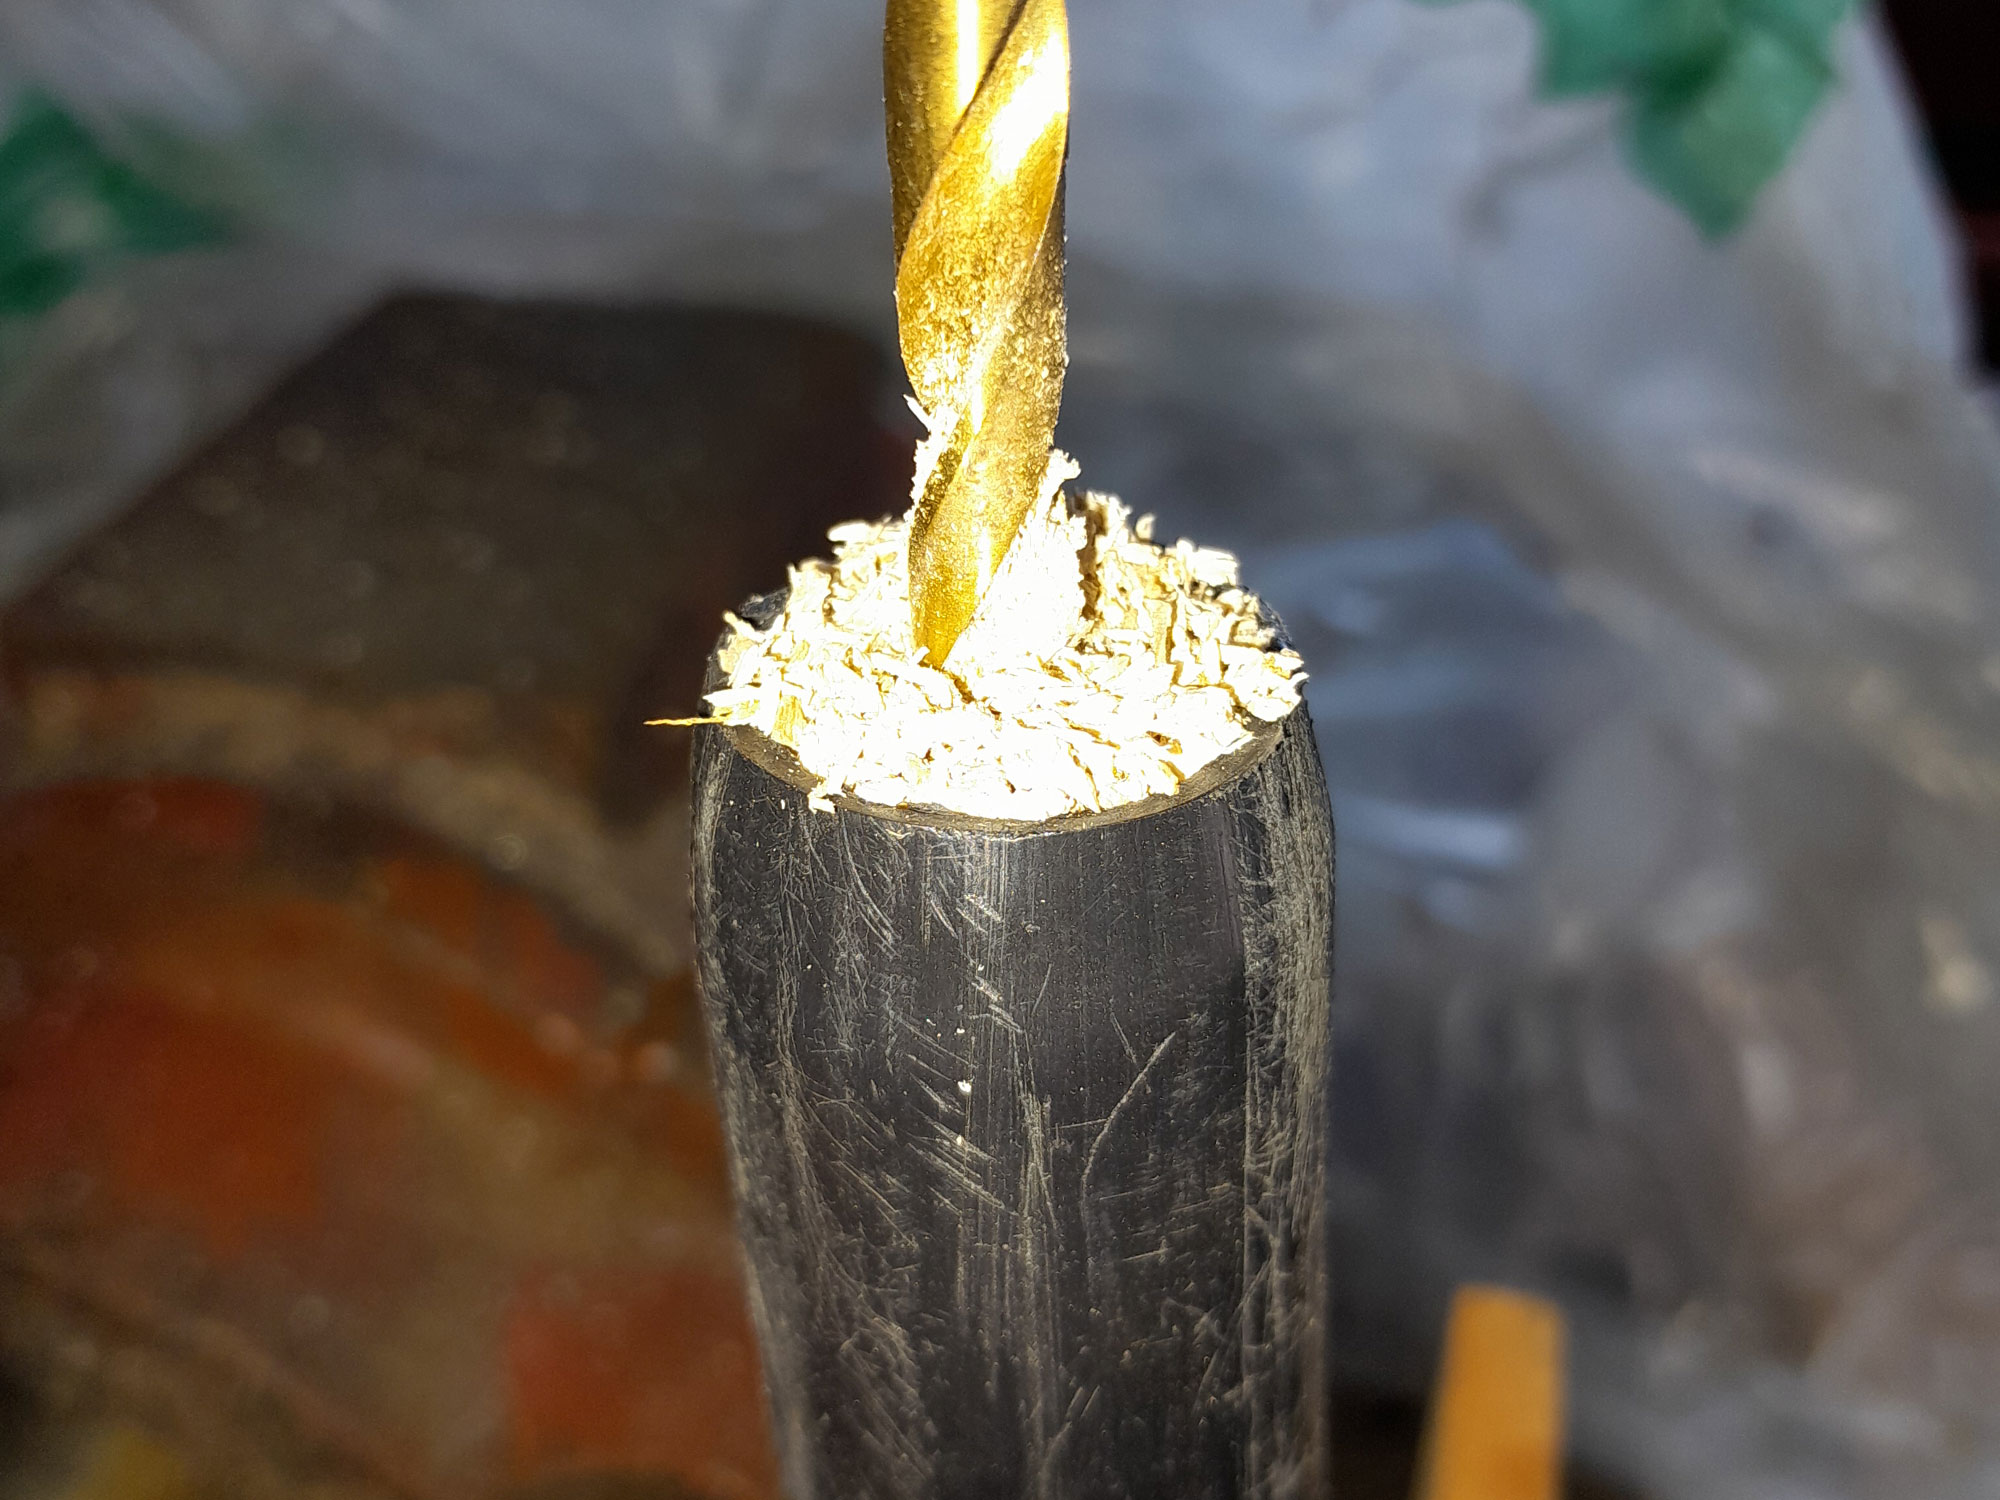
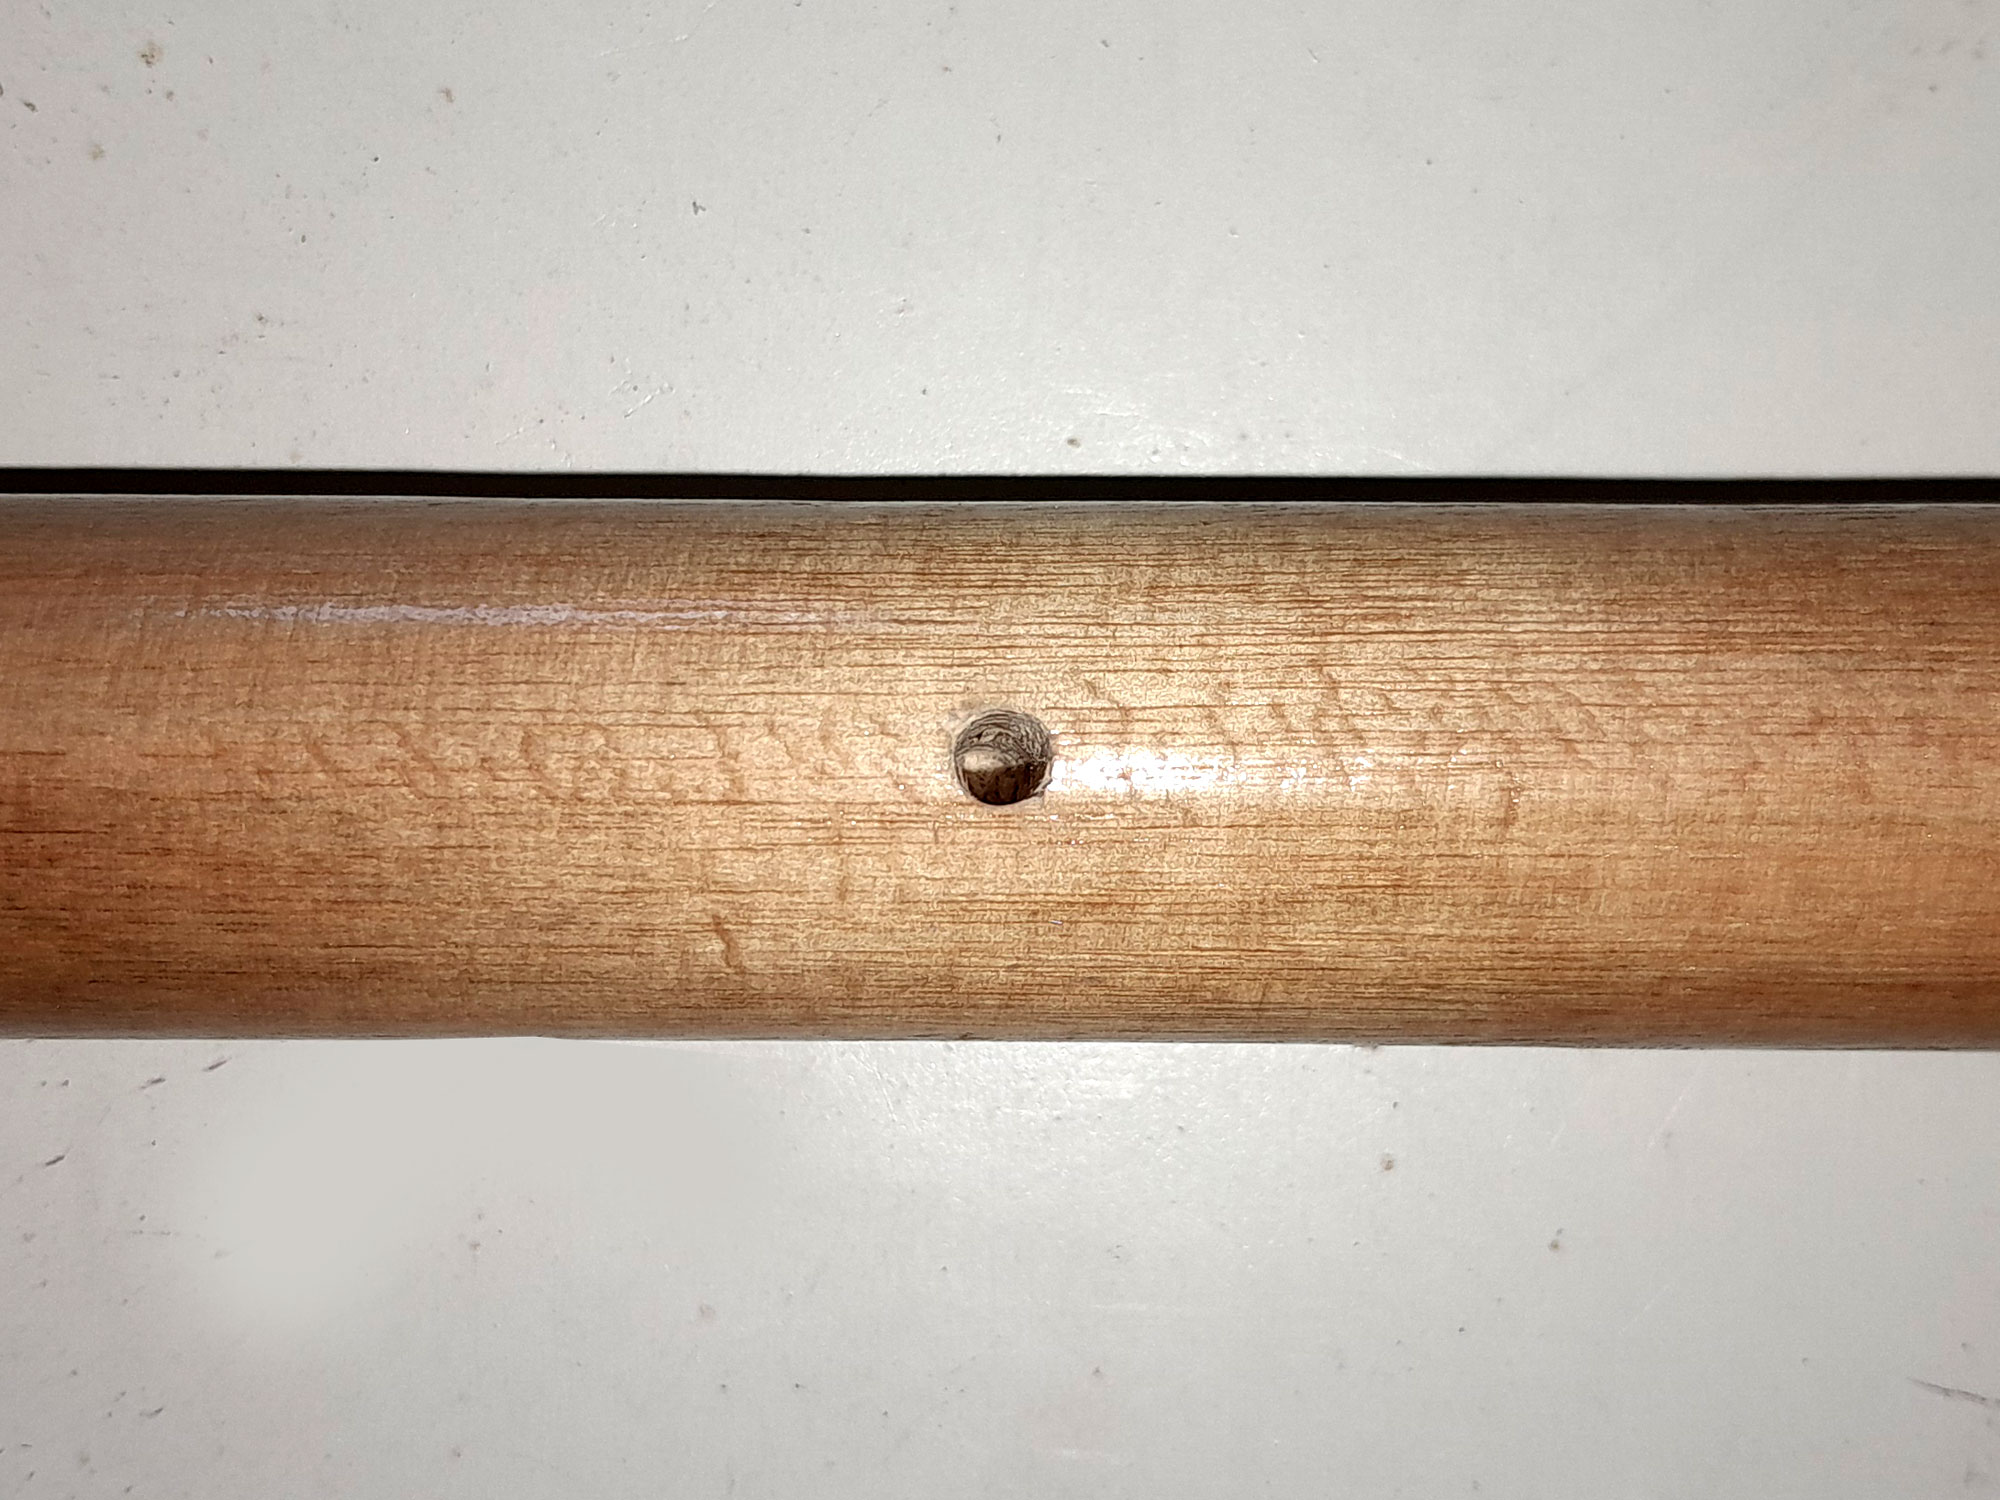
- Now, to ensure that the screw end of the bicycle hook would not split the pole, I drilled a 5mmØ hole into the centre of the end, about 25mm deep. (The threaded end of the hook is about 45mm or long.)
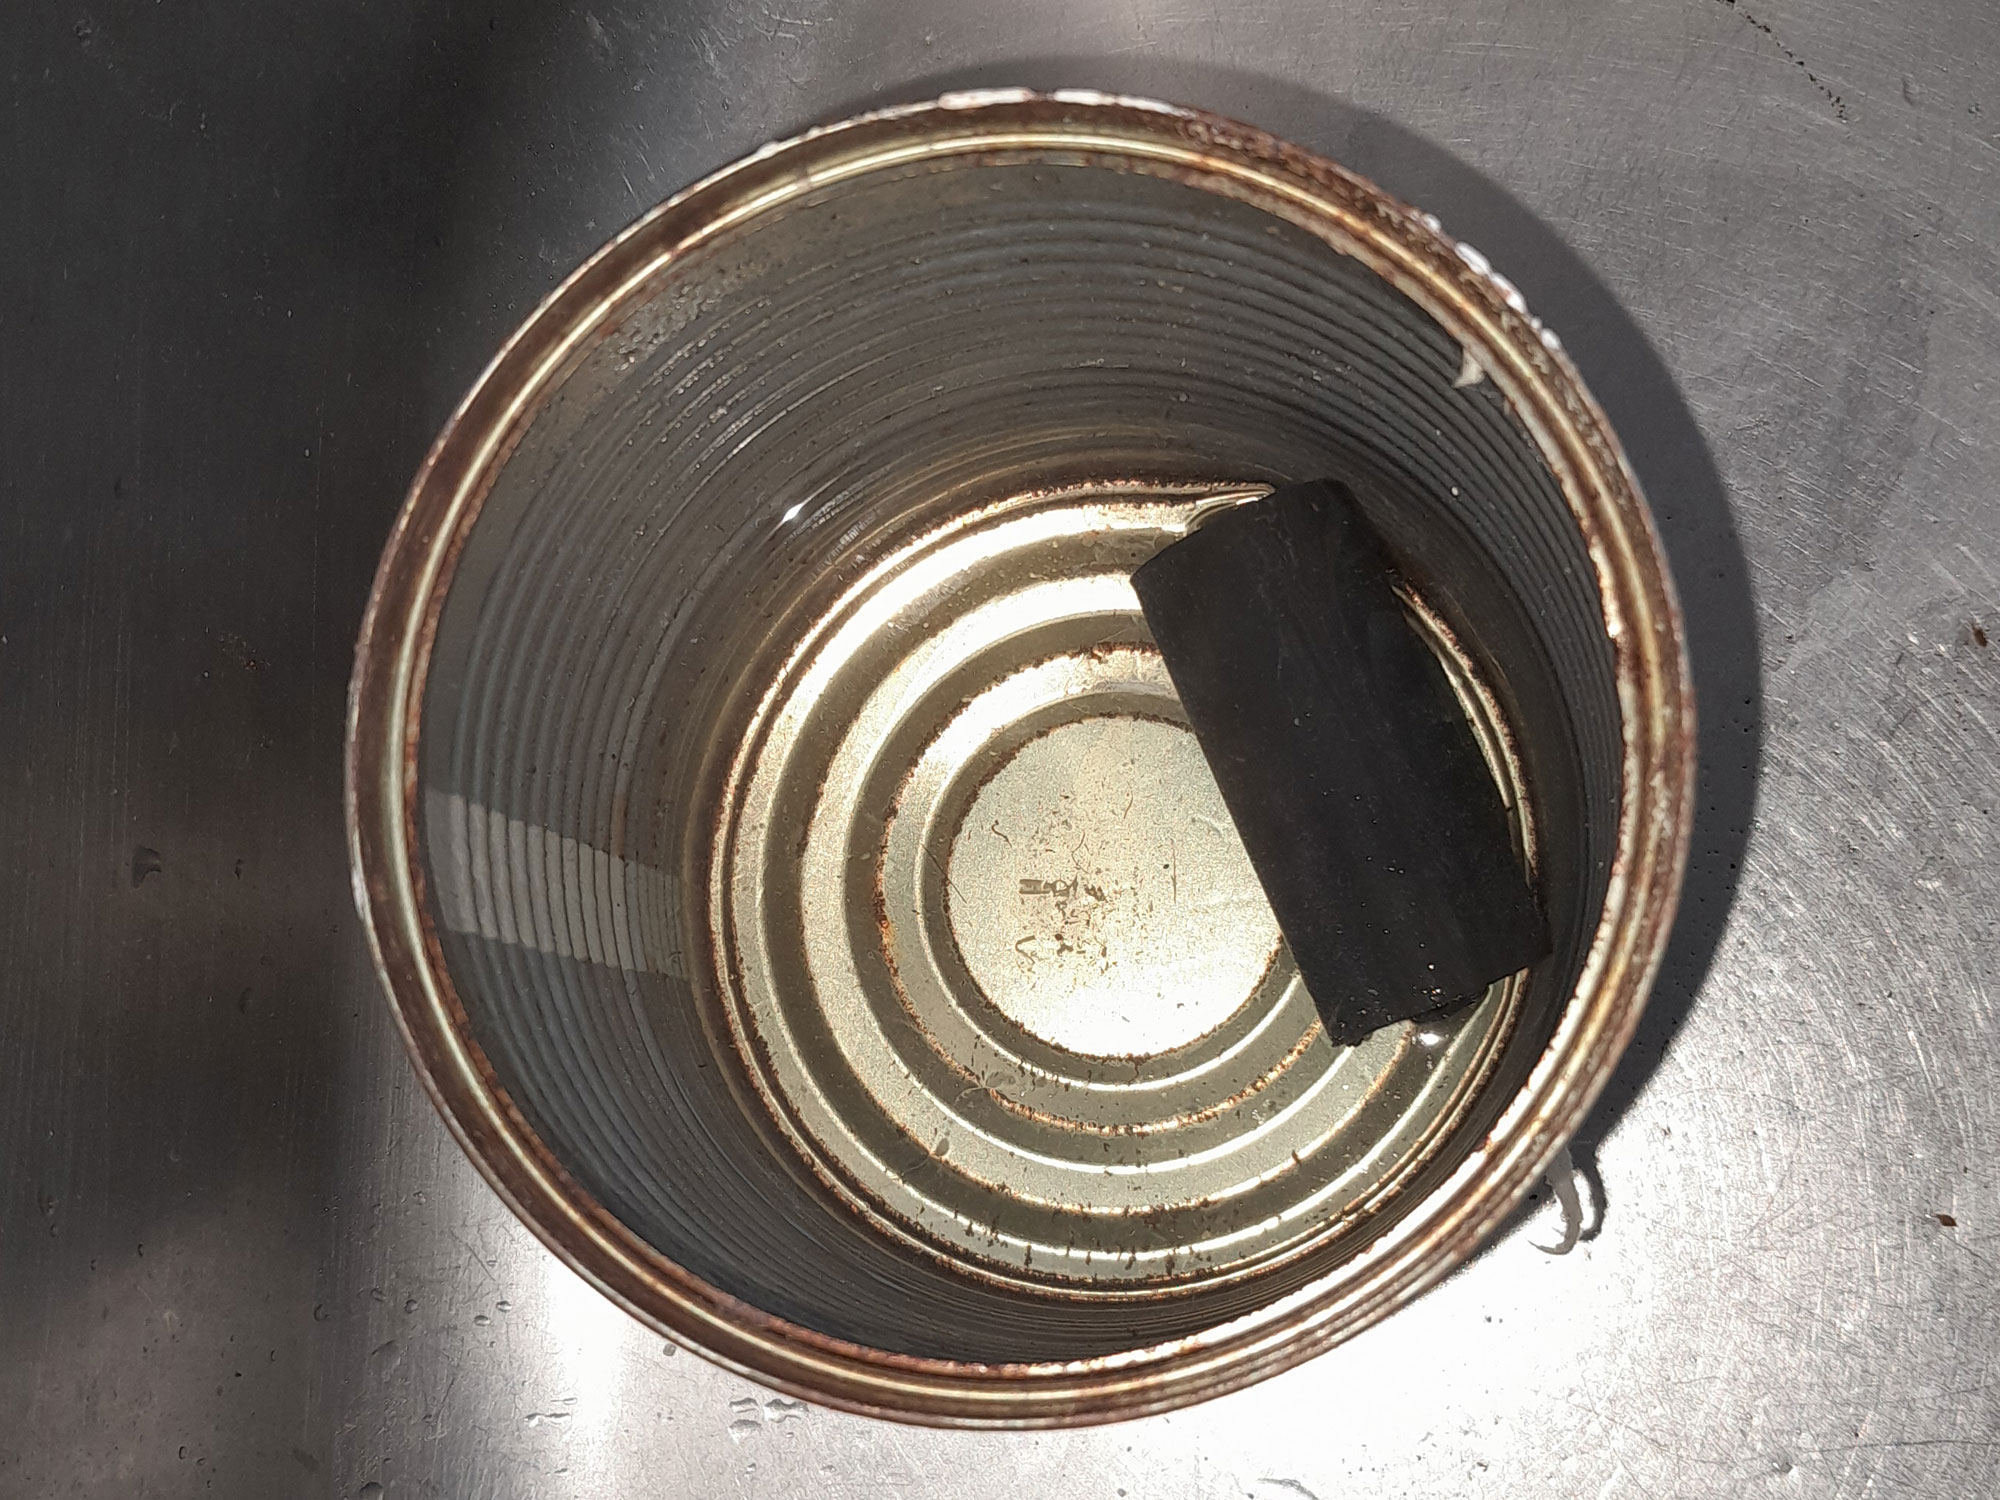

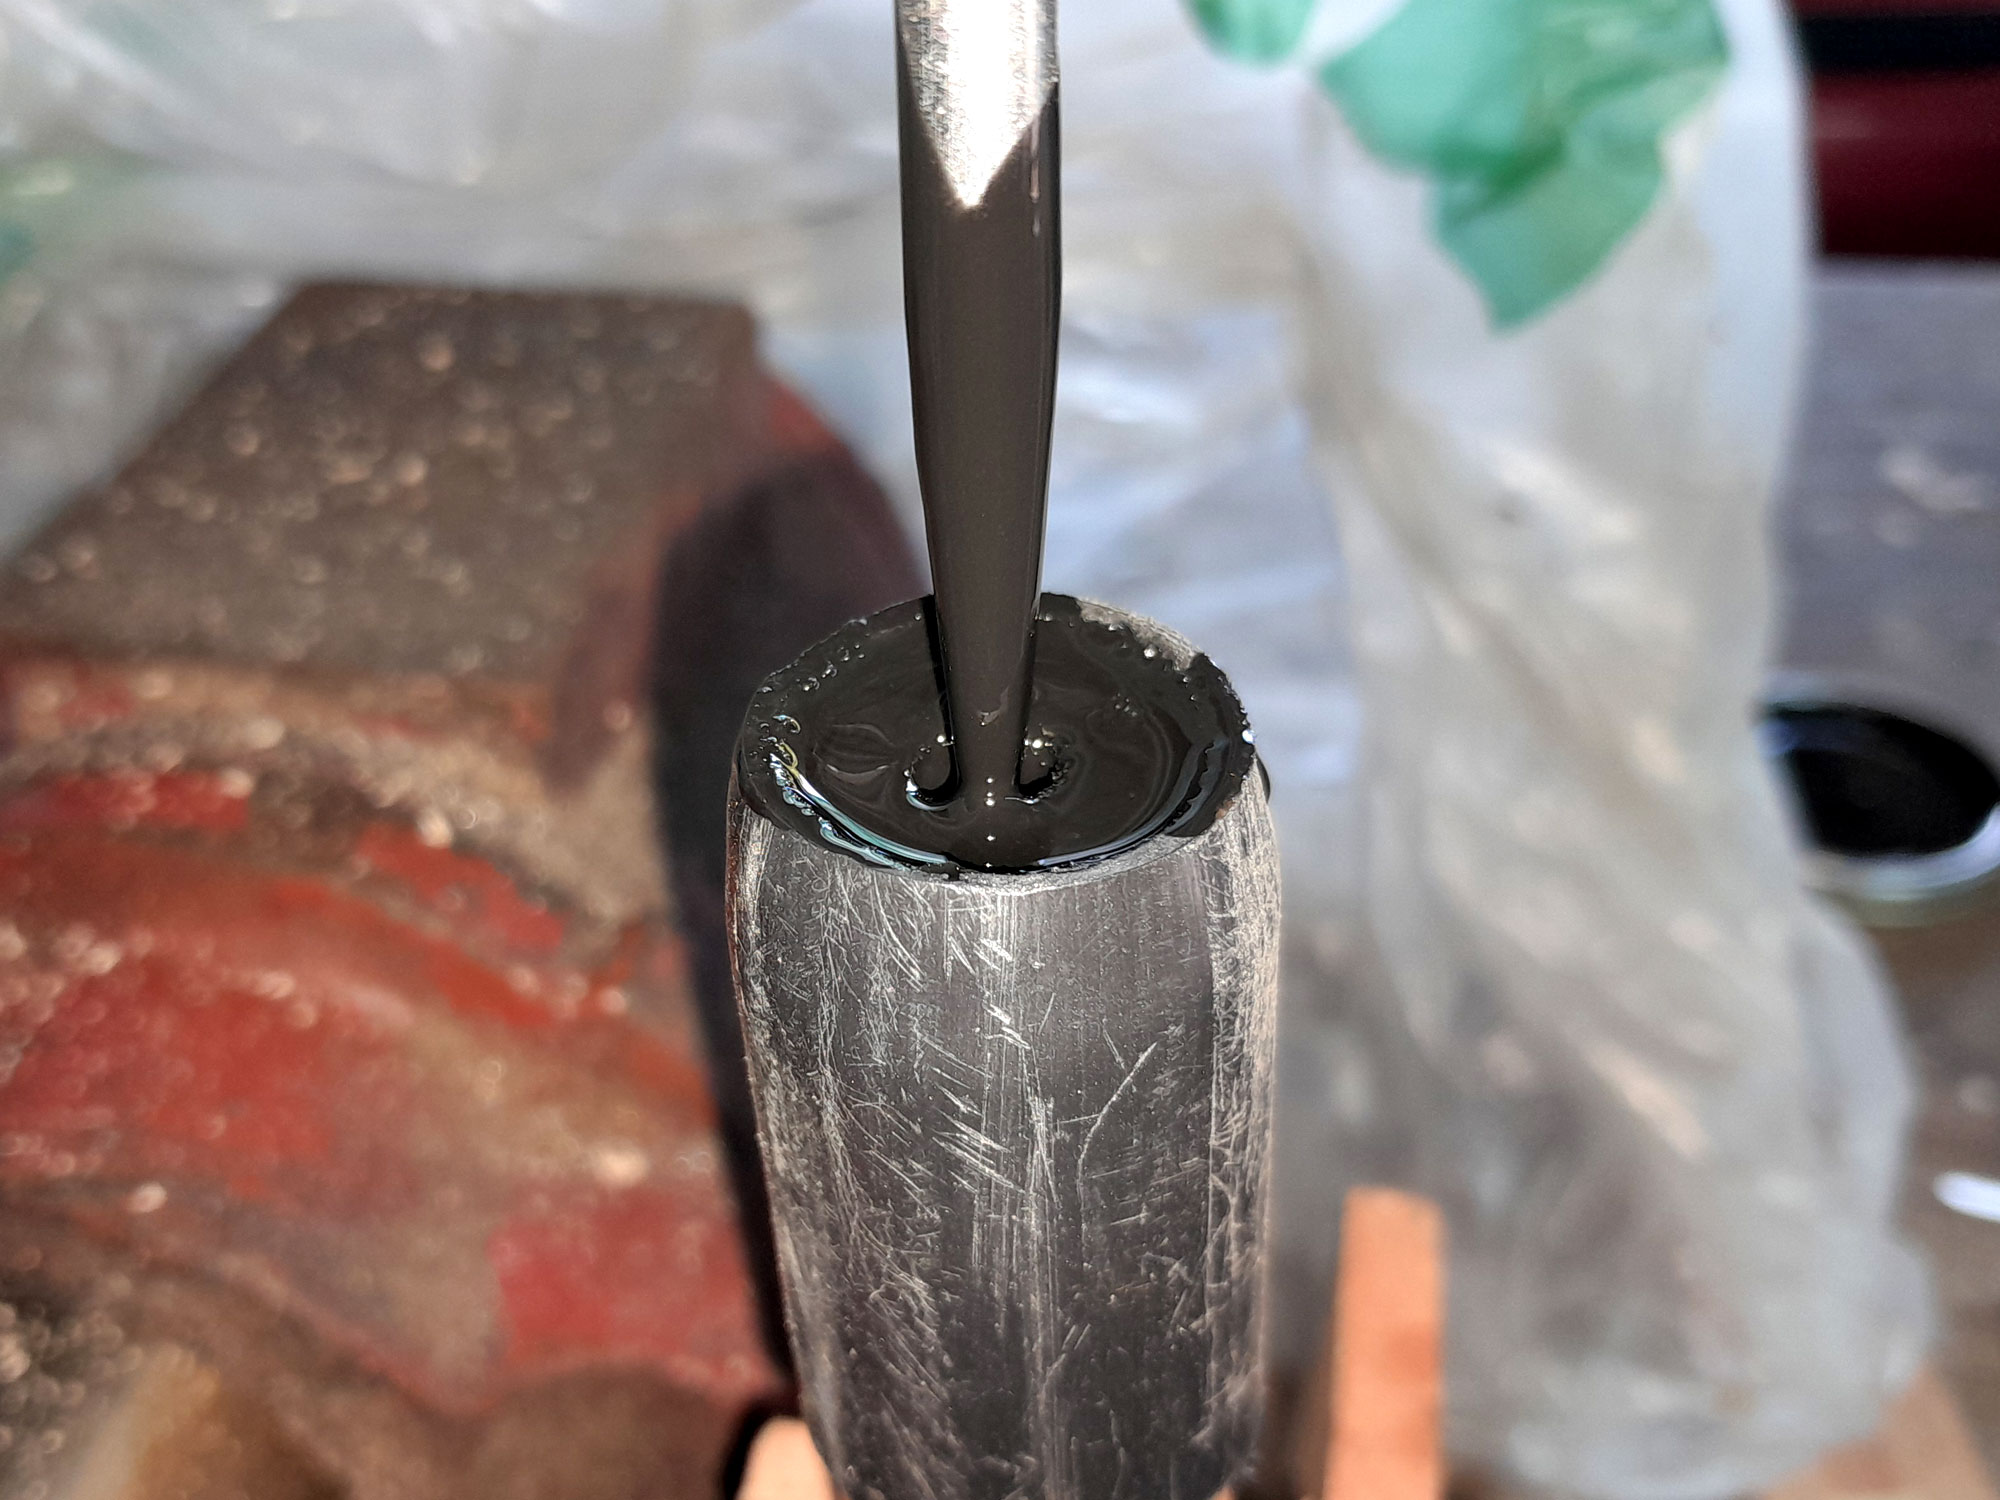
- Then I used a screwdriver tip to guide a liberal amount of solvent-base gloss black enamel paint into the hole I had just drilled, filling it.
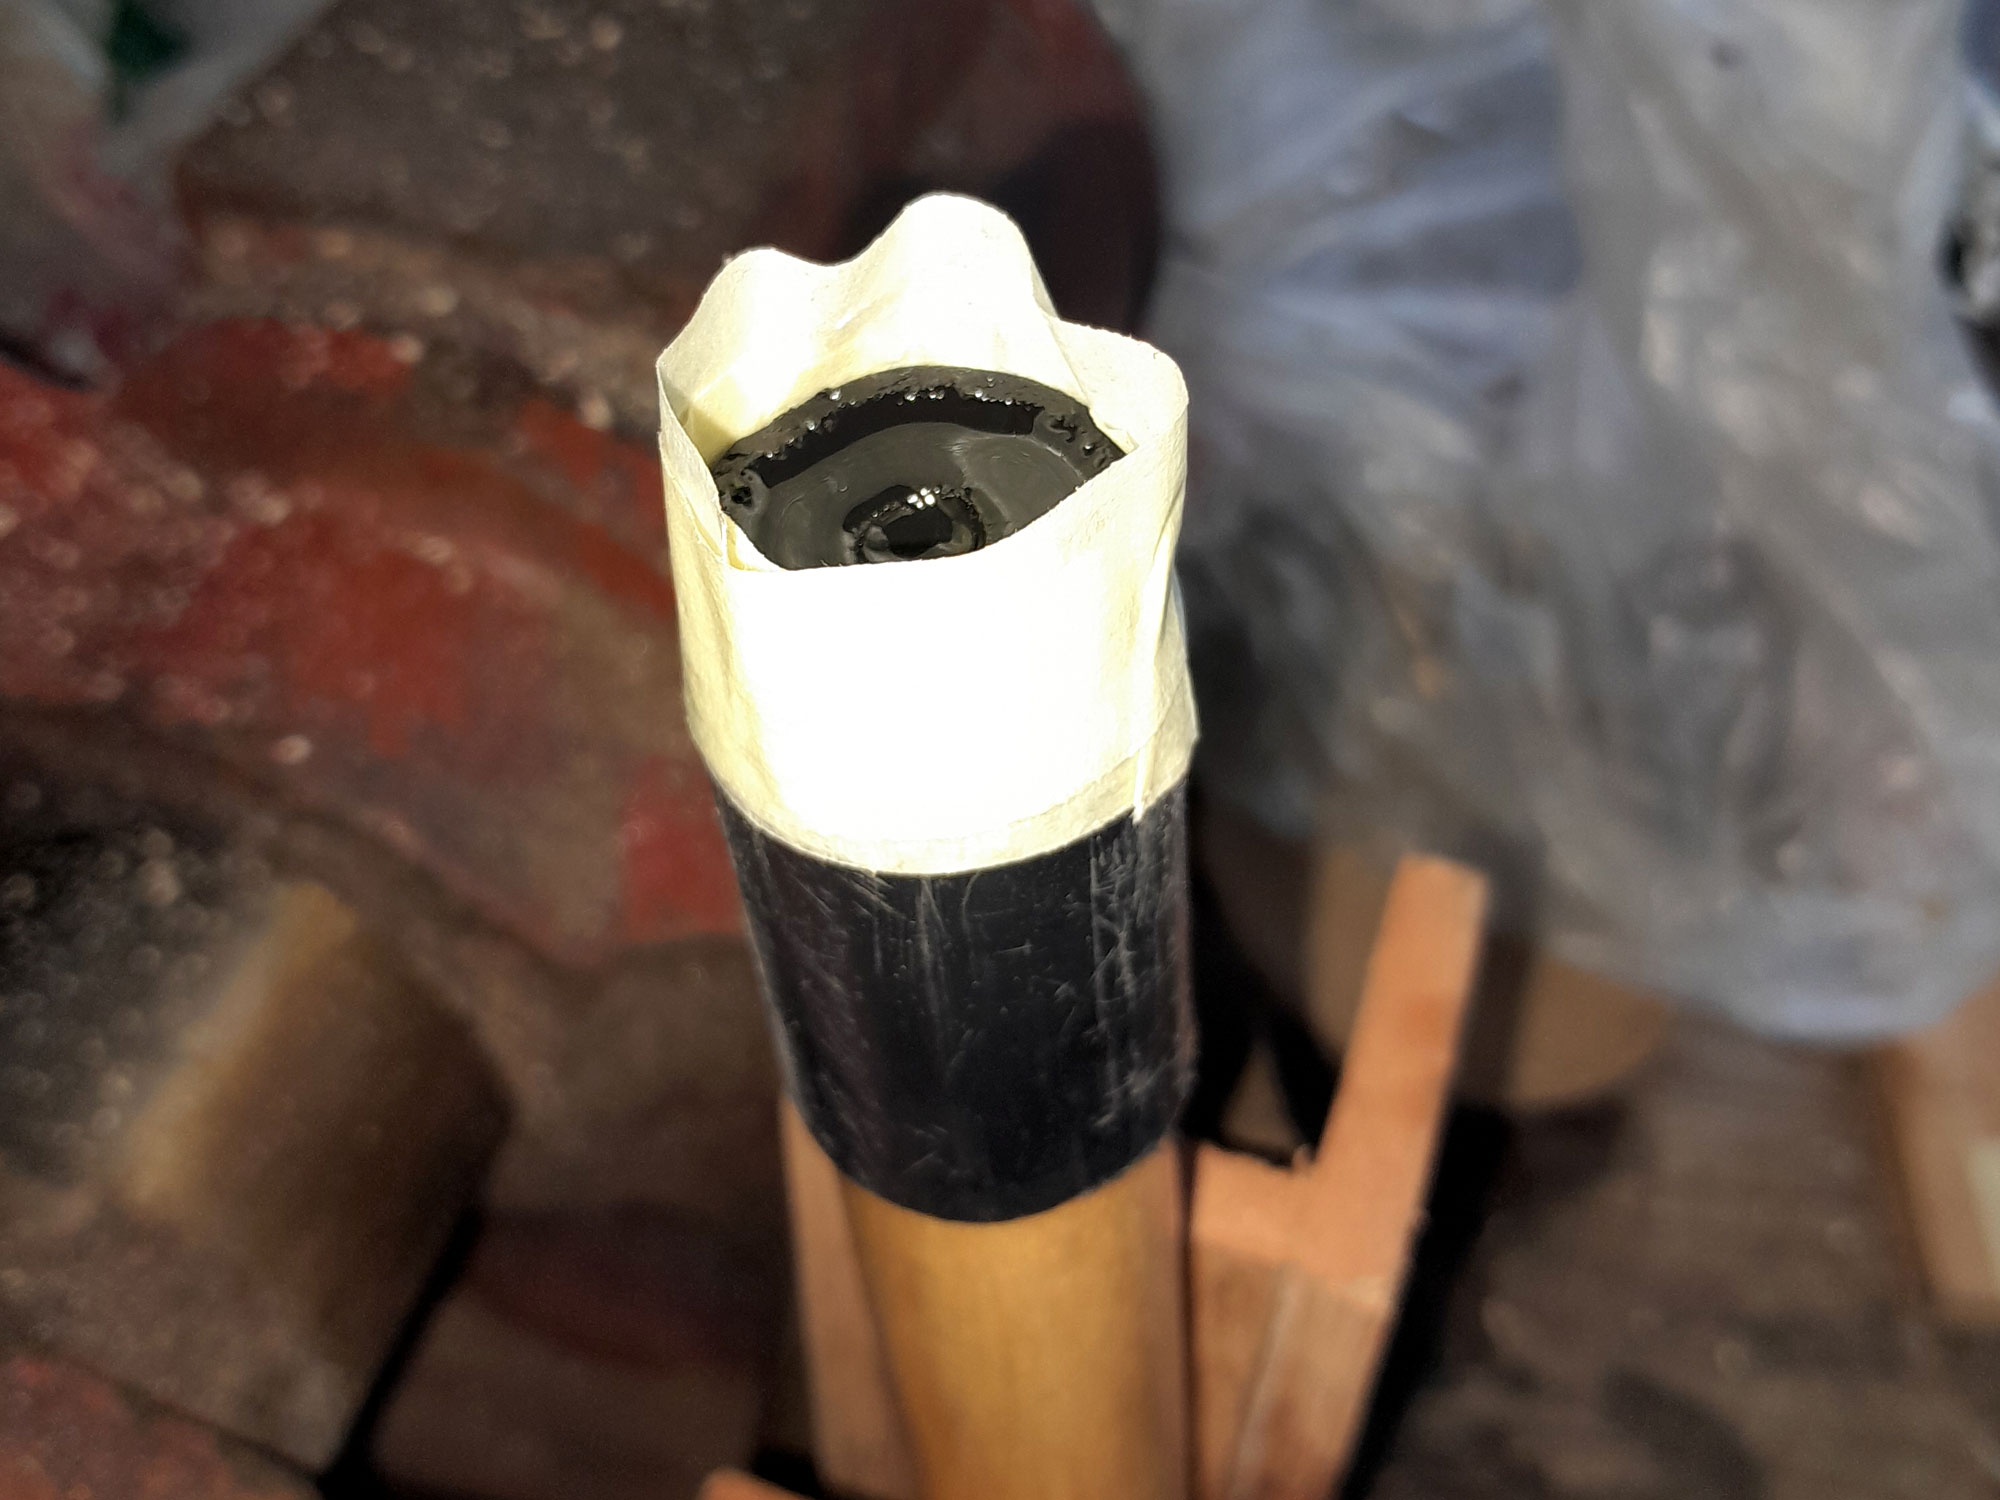
- I wrapped the end of the pole in masking tape and added more paint until there was a bit of a dam in there.
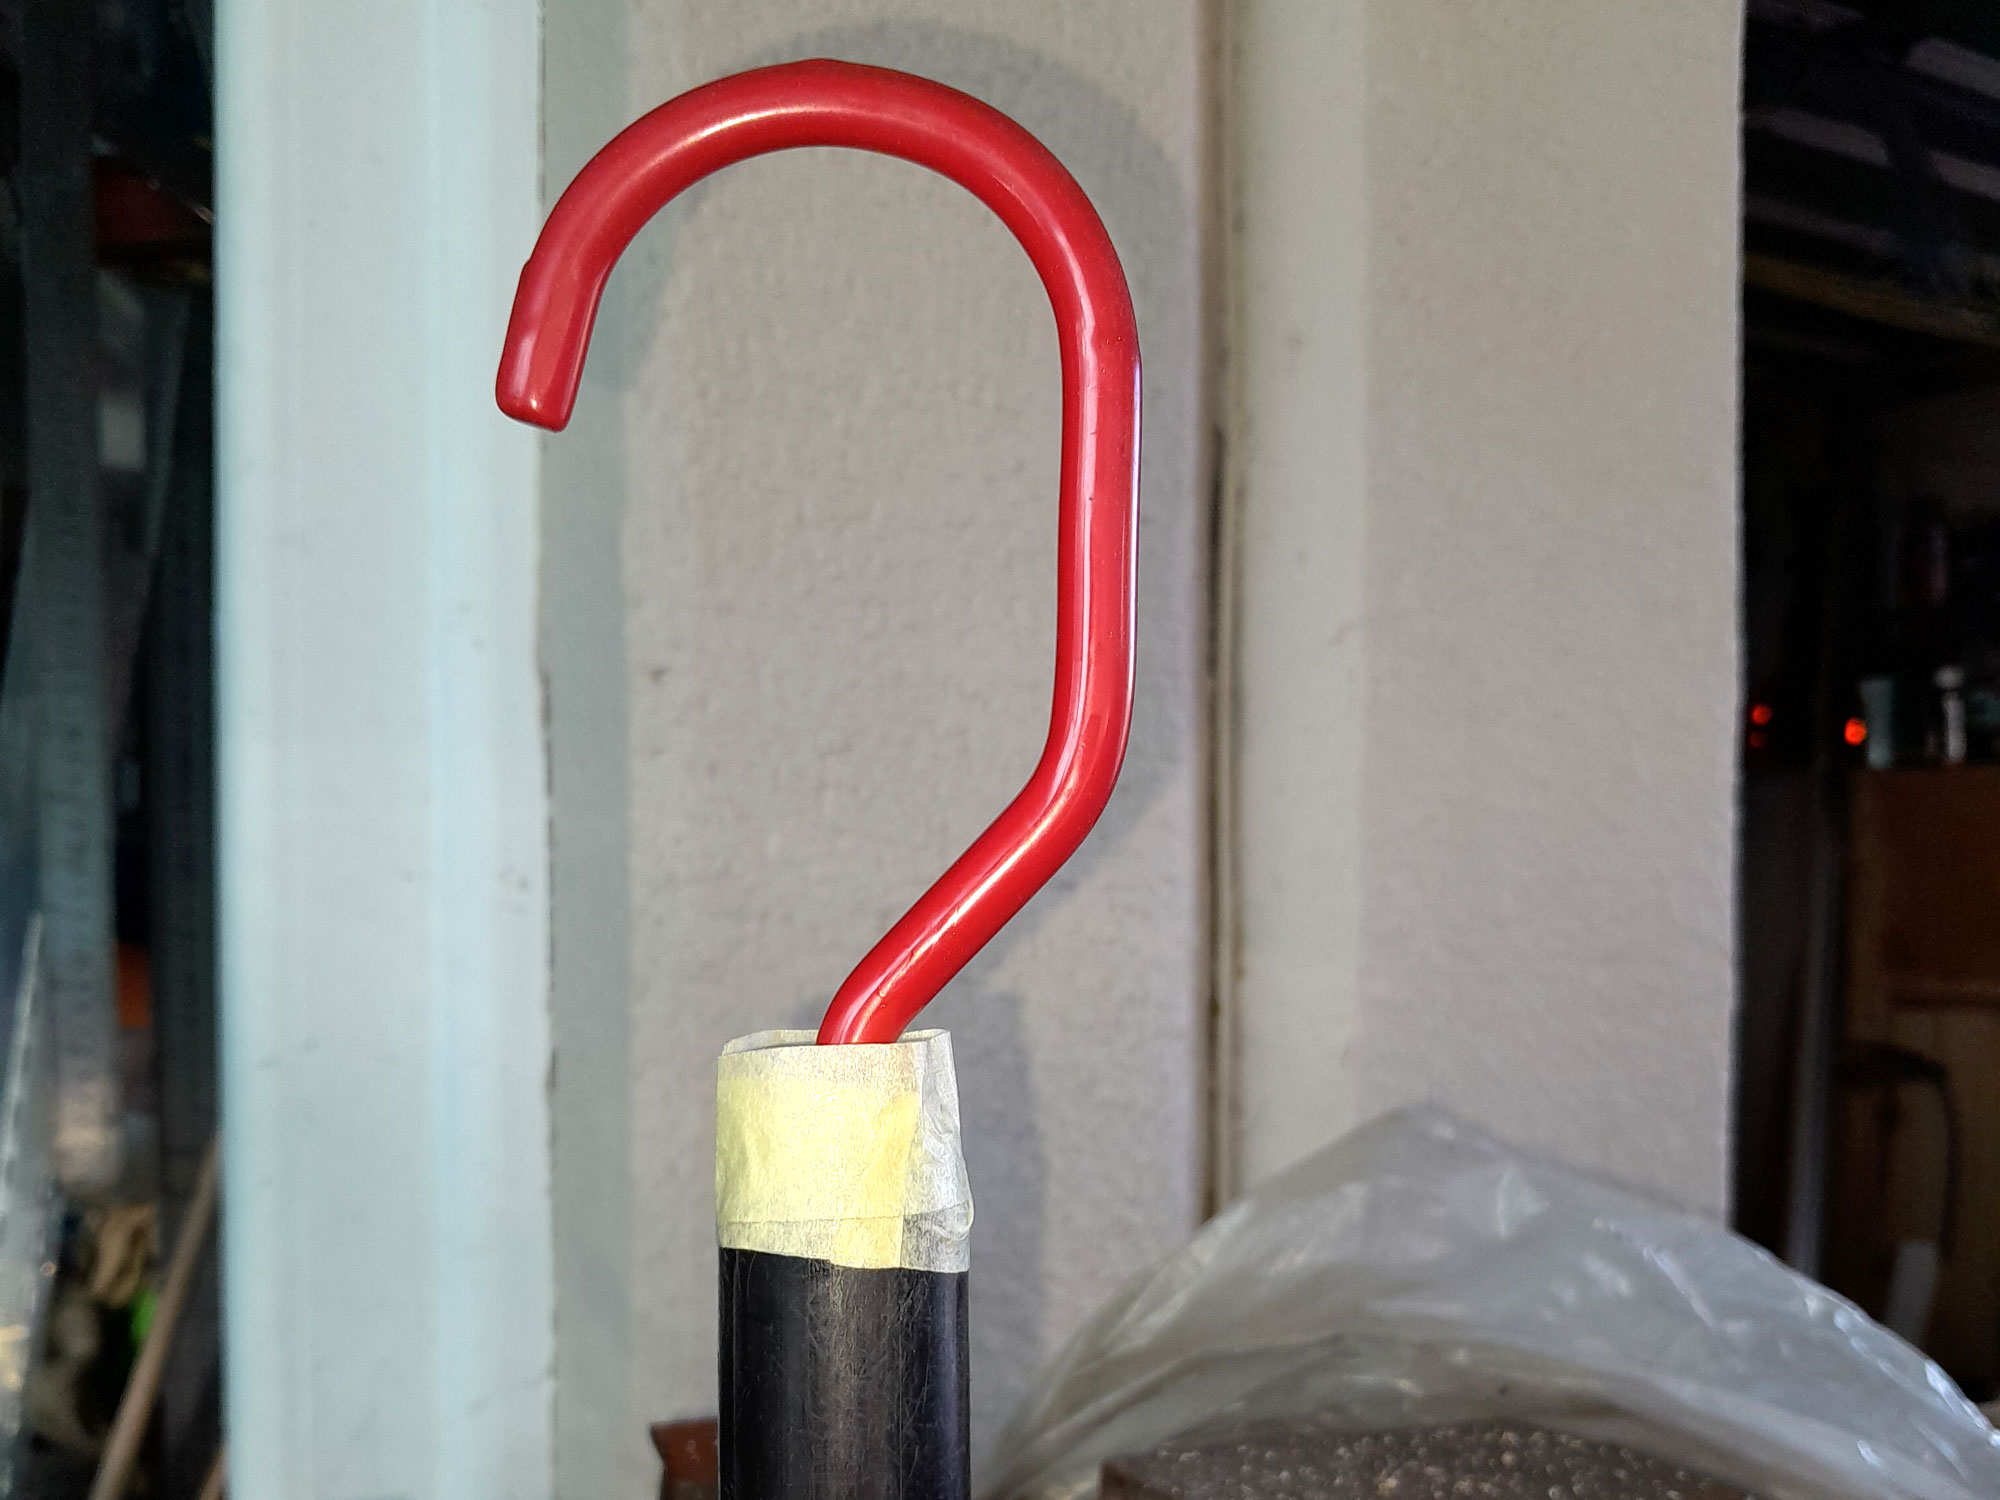
- Then I secured the pole in a bench vice, using wood cushions to avoid marring the pole’s surface, and while the paint was still wet, screwed the hook into the end (to a depth of about 40-50mm). This ensures that the screw end of the hook is very liberally coated in paint, and any excess would be forced into the wood itself, for a pretty effective rust-prevention method. I left the masking tape on and hung the pole up for a few hours until the paint has cured enough that it would not run. It completely coated the end of the pole. This also means of course that the hook was very securely seated in the end of the pole.
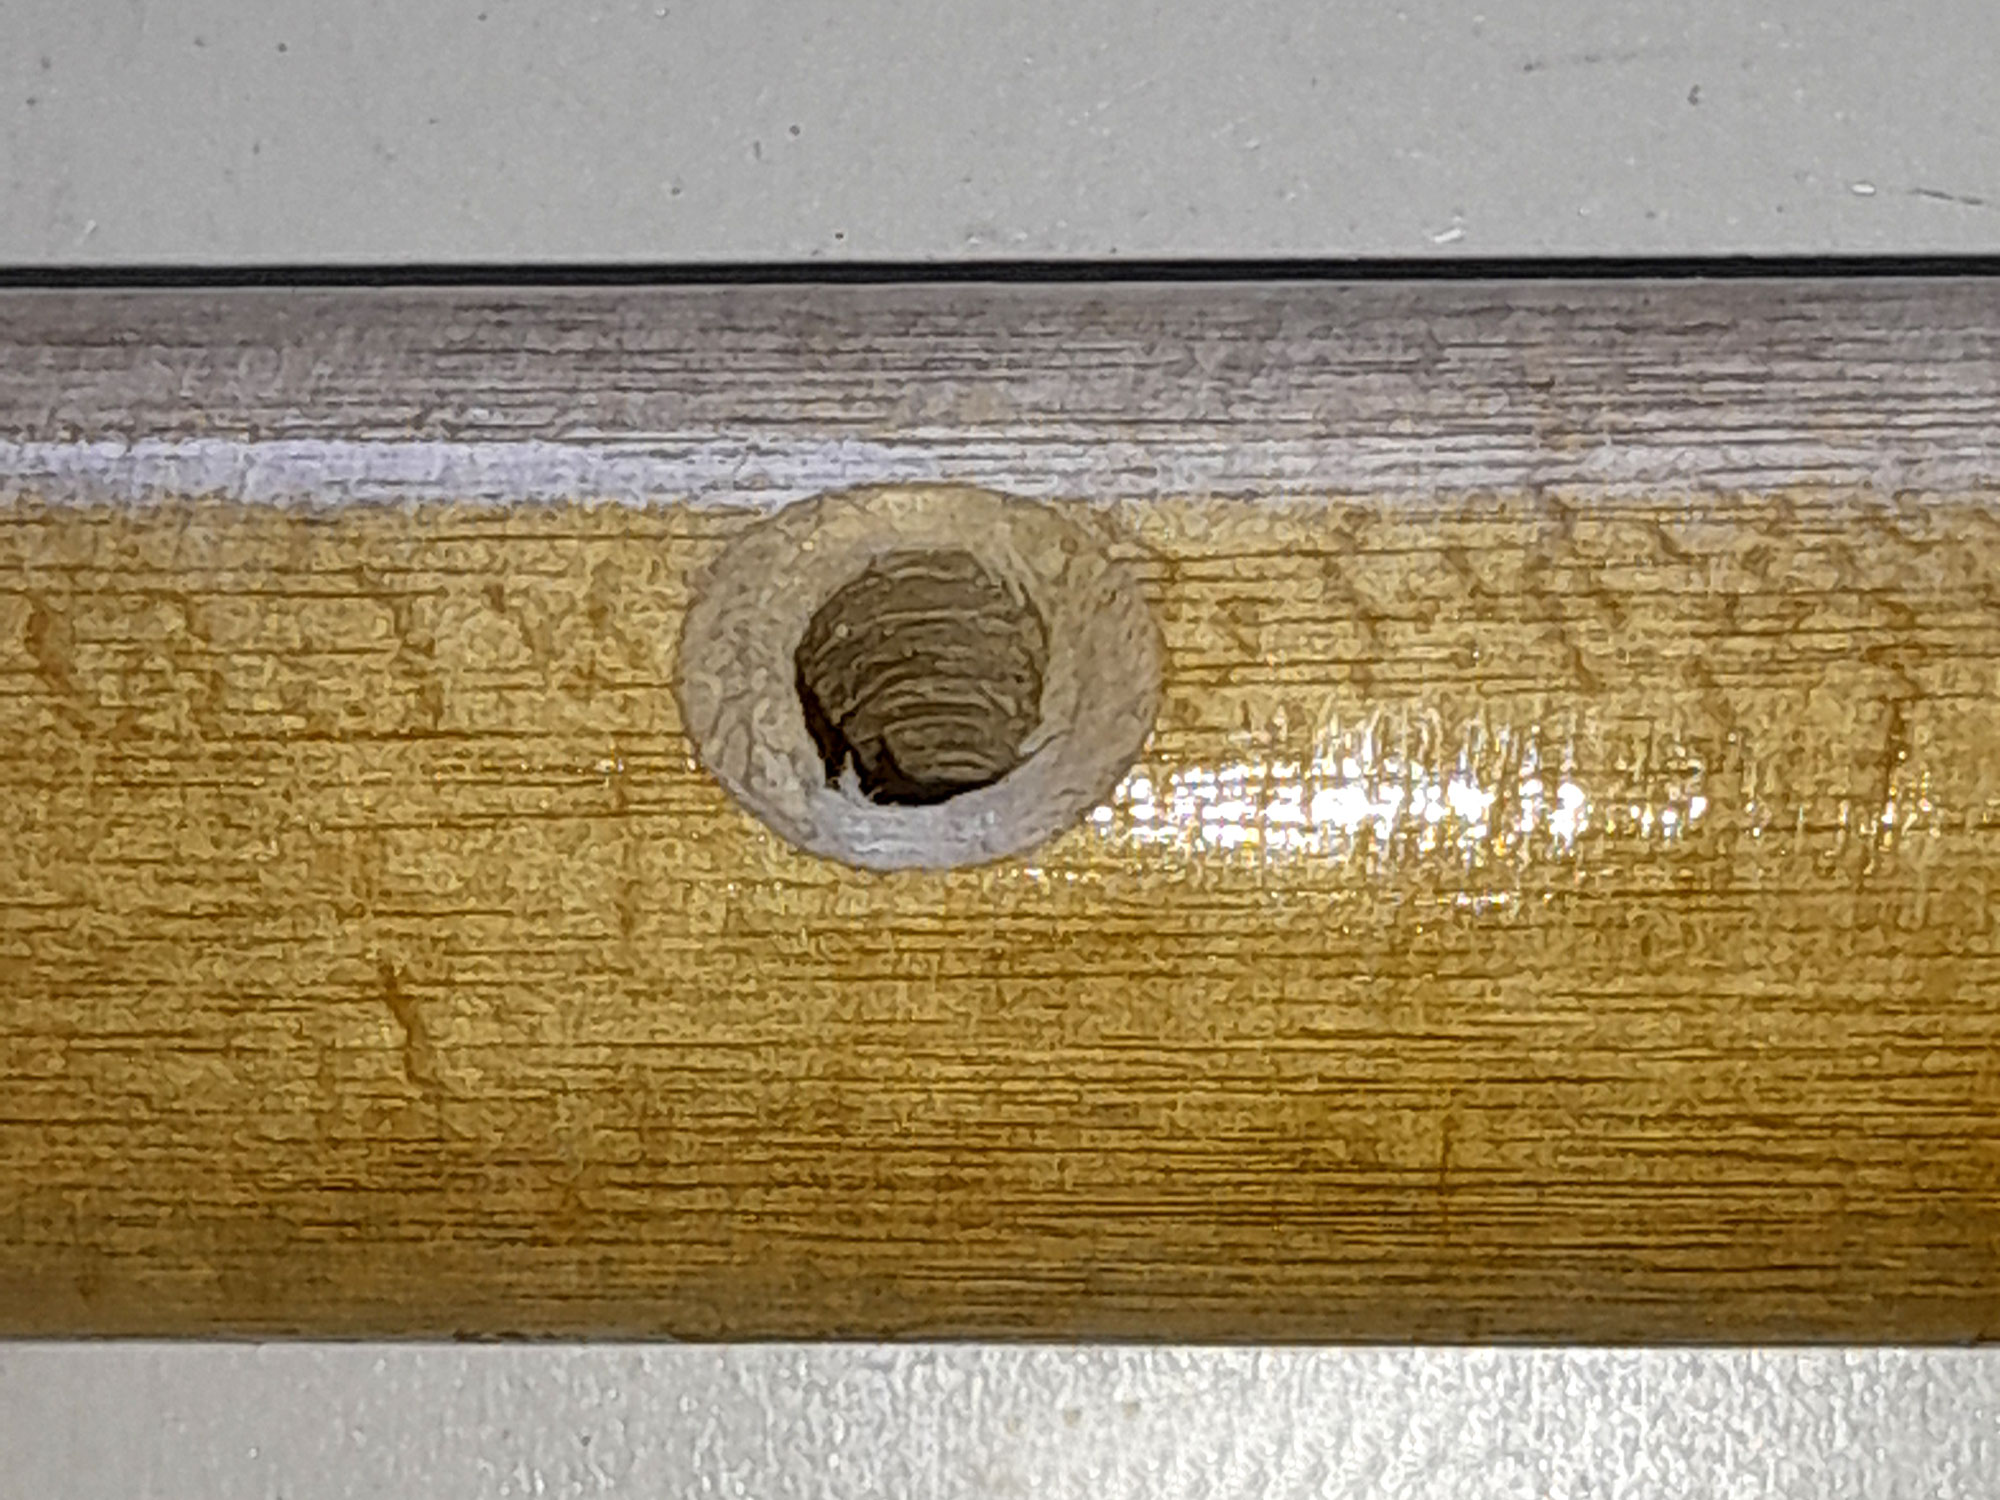
- Then I used a centring device I made to drill a hole for a cord in the other end of the pole, about 100mm in from the end.
- In the centre, Mr Venter.
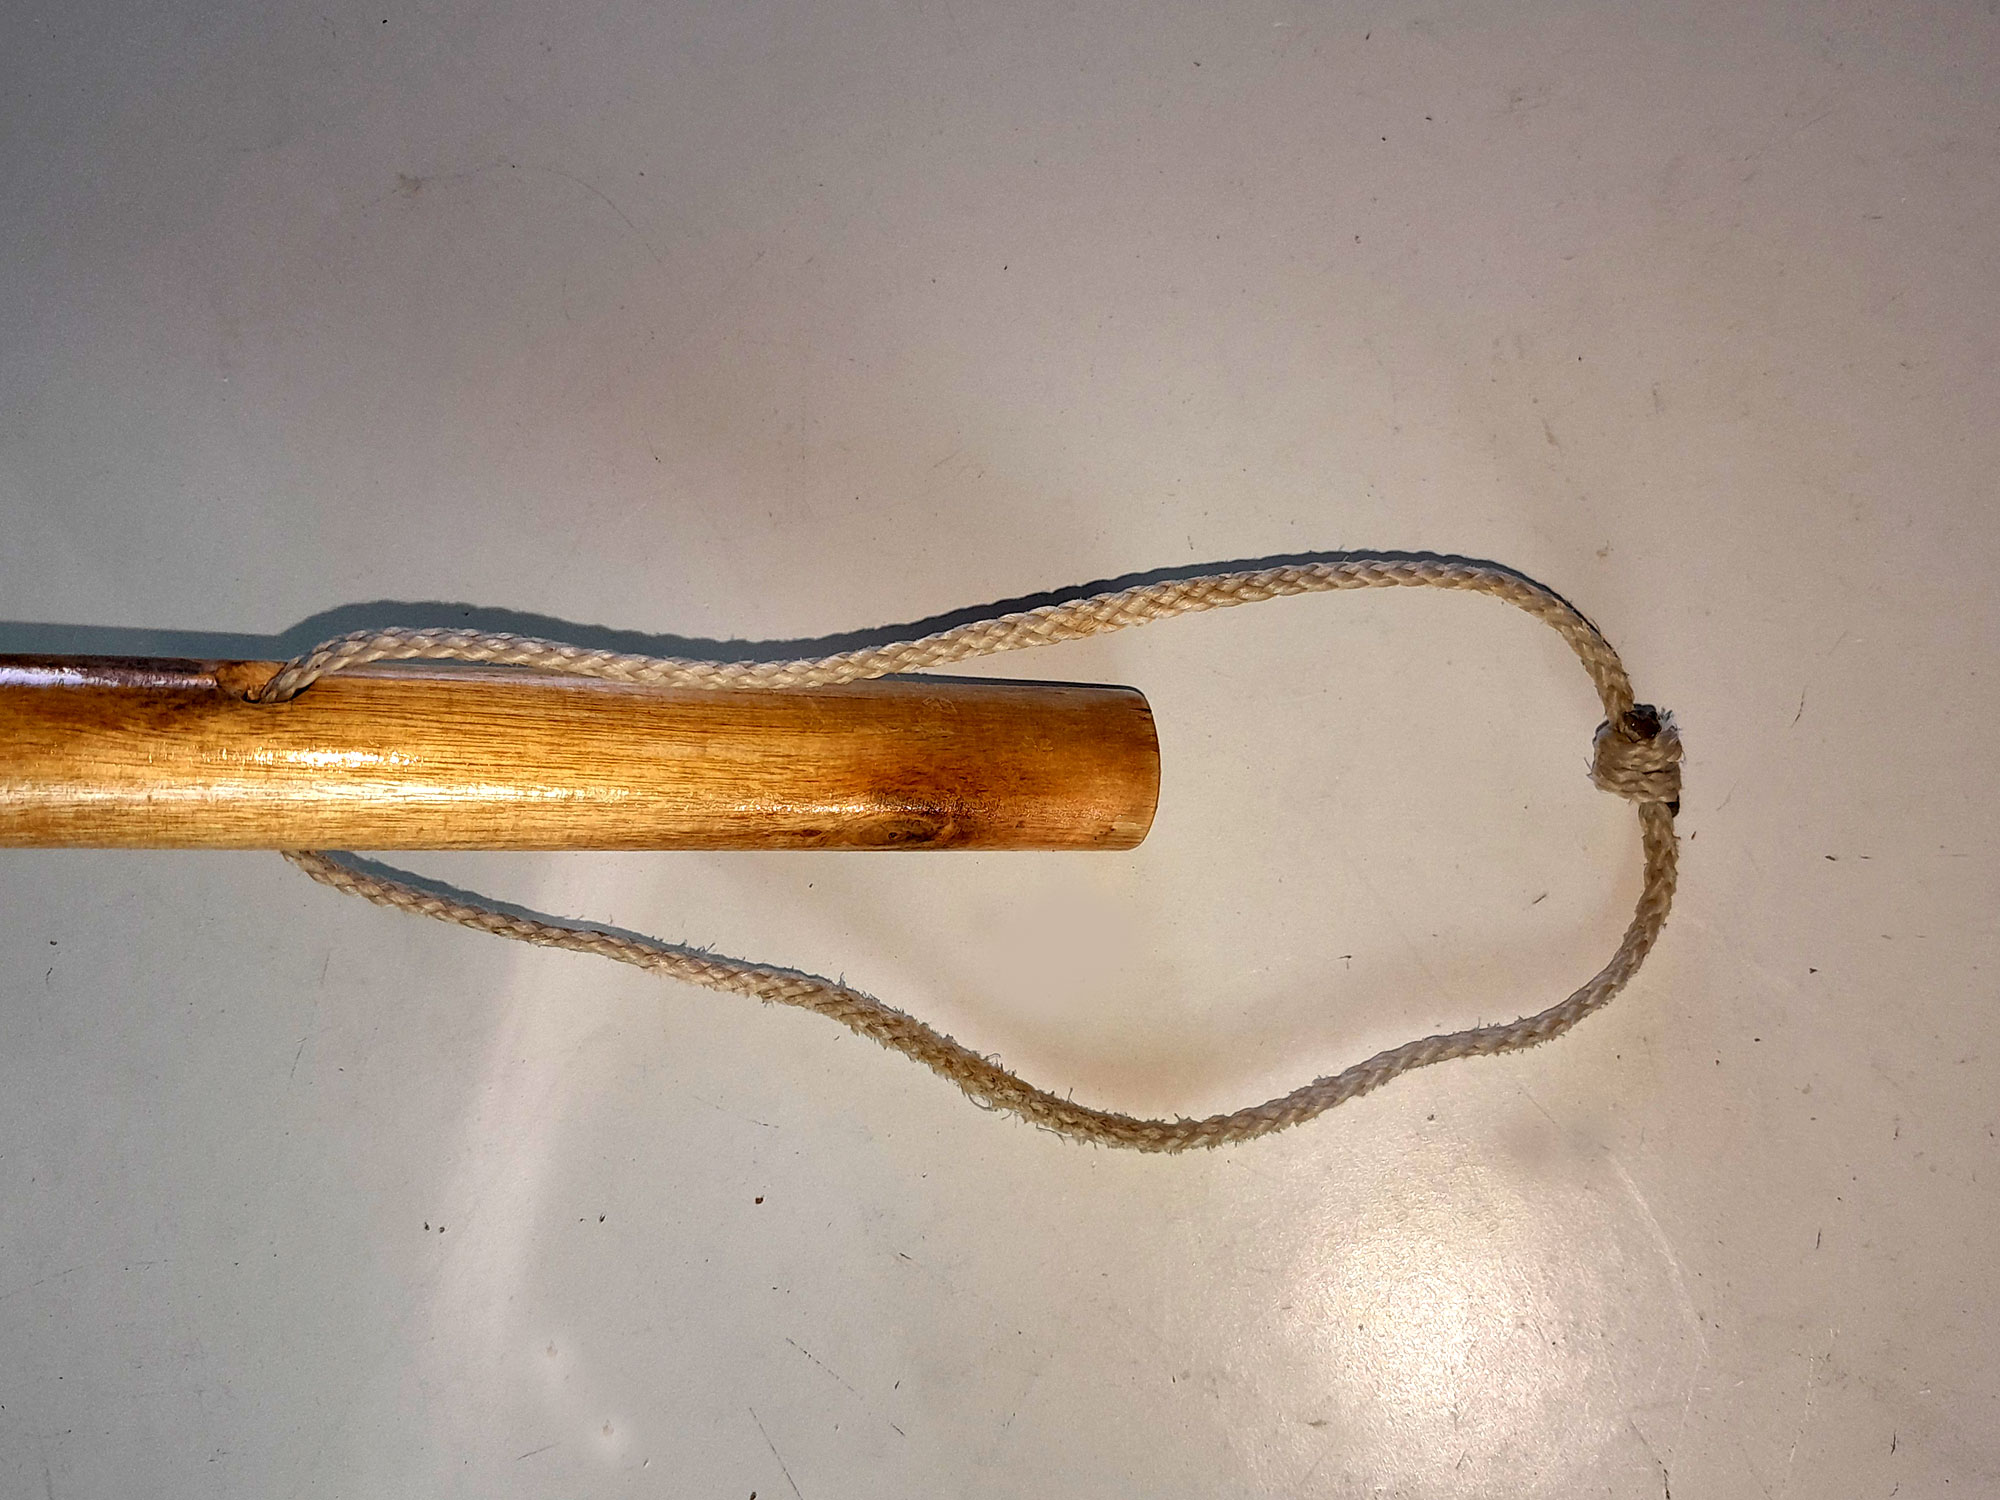
- To finish off, I used a countersink bit to “round” off the sharp edges of the hole just drilled. I followed that up by applying a few coats of marine varnish to the entire pole, from the black-painted hook end to the hand end, ensuring that I got varnish right into the hole drilled for the cord. I hung it up again on its hook for a day or so until the last coast of varnish was completely dry. Then I cut my cord to length, seared the ends to seal them, and made my hand loop. This is not essential, but it does make it less likely that you will drop your happy hooker into the pool.
- And here it is, ready to get to work.
- And here it is, at work…
Panel:
These materials are available at Selected Mica Stores. To find your closest Mica and whether or not they stock the items required, please go to www.mica.co.za, find your store and call them. If your local Mica does not stock exactly what you need they will be able to order it for you or suggest an alternative product or a reputable source.
Project guide
TIME: An hour or two, allowing for a few coats of varnish
COST: R50-R60
Skill: 1
Tools required:
Cordless drill/driver with required drill bit and countersink bit, pair of scissors, blowtorch or lighter – either are optional