22 January 2016

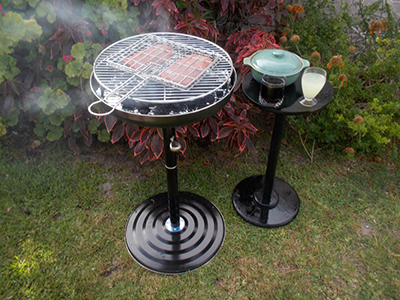
Make a Braai Table
With a total height of just 650mm and diameter of 325mm this handy table won’t take long to make but will give great service while you braai this festive season – and afterwards as well.
Project Guide:
Time: 1 Day
Cost: R100
Skill: 2
Assistant: No
Materials:
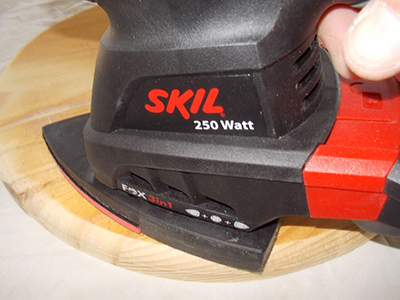
- Jigsaw
- Sander
- Hole Saw
- Drill
- Router
- Sandpaper
Materials: (measurements in metres and millimetres) (Ø = diameter)
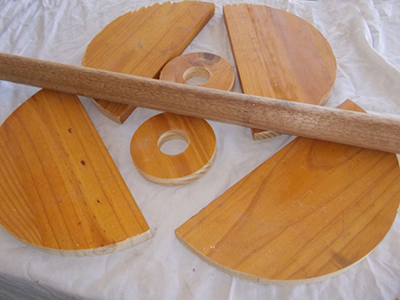
- SA pine
- Sufficient to make 2 disks of 325mm diameter (Ø)
- 2 of 125mm Ø
- 1 of 90mm Ø
- Meranti dowel 45mm Ø x 630mm long
- Wood glue
- Wood filler
- 12 screws – 30mm long
- Finish – Black Gloss Enamel
*Adapt the materials accordingly if you decide to make a table with a larger top and base.
*All materials are available at Selected Mica Stores. To find your nearest Mica and to enquire about availability, please go to www.mica.co.za, to use our store locator. If your local Mica does not stock exactly what you need they will be able to order or suggest an alternative product or a reputable source.
Method:
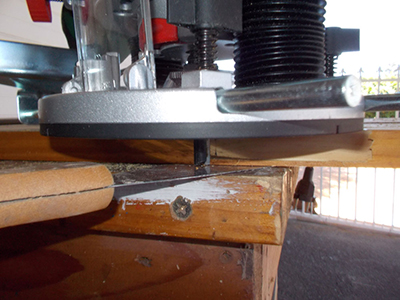
- Attach a straight cutter bit to your router and set it to a depth just a fraction less than the thickness of the wood. An easy way to do this is to place a steel spatula blade alongside the wood (but not under it) and depress the router until the tip of the bit meets the spatula blade. Set your depth stop accordingly. This means that the router will cut to about 0.5mm from the base of the wood – meaning you can happily place the work piece on a friction mat and work without fearing you will rout a groove into your table top.
- Check the depth and confirm the depth stop has been tightened sufficiently.
- Set your router to cut an arc of the required diameter – in this case it was 162.5mm and rout the circular top and base. Make the cut progressively – increasing the cutting depth by about 3mm or so with each pass to avoid overworking the router. After routing the disks, we fitted a rounding off bit and rounded the upper edges of the disks – we thought it would improve the table’s looks a bit.
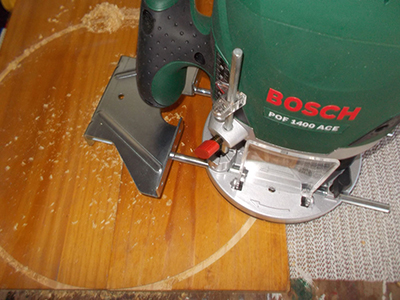
- In our case we used some planks for the unit, hence the four sections, but if you wish a single sheet of block board of the required width will make your job easier. Using the same method as above, we routed out the two smaller disks (to help reinforce the pedestal/top-pedestal/base union, and out of the centre of each made a 45mm Ø hole for the 45mm Ø meranti dowel pedestal.
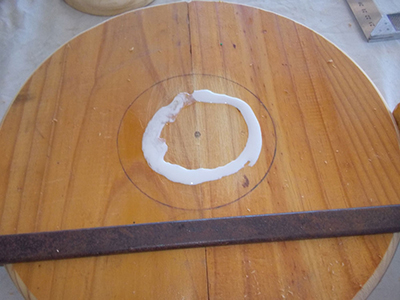
- Mark off the centre of the base and apply glue.
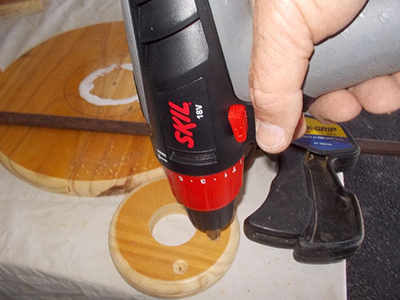
- Drill and countersink the positions for six screws.
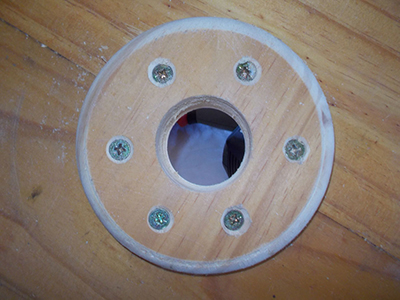
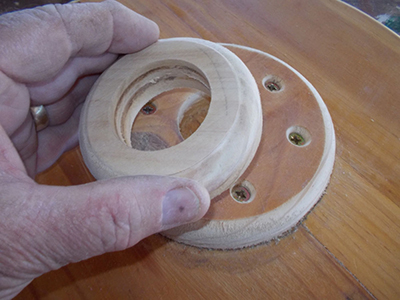
- Now attach the small disk as shown, using six 30mm screws and glue to make the join. **Note that the grain of the woods have been positioned at 90° to make for a stronger join and we have drilled out the centre again using the 45mm Ø hole saw.
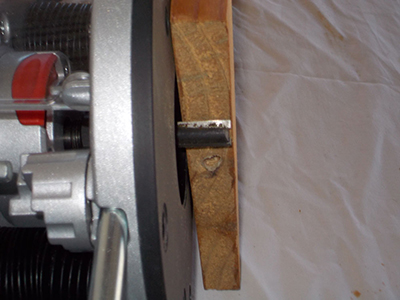
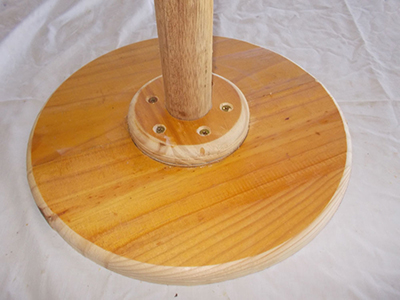
- Applying glue to the 45mm Ø dowel, we hammered it into position – as you can see, it passes right through the base – this is the underside of the base.
- The view of the top of the base.
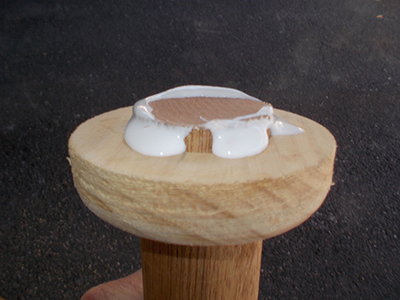
- We repeated the procedure for the top, but without drilling a 45mm Ø hole right through, as we did not want the upper surface of the table to have the pedestal visible, we made a smaller disk as shown, of about 90mm Ø, with the hole for the pedestal. This was to increase the reinforcement of the join.
- Apply glue and tap the small ring on to the dowel, and then tap the assembly into the underside of the table top.
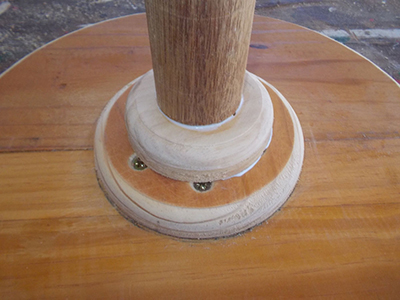
- The completed join – the junction between the underside of the table top and the pedestal – again with the wood grain being set at right-angles to each other.
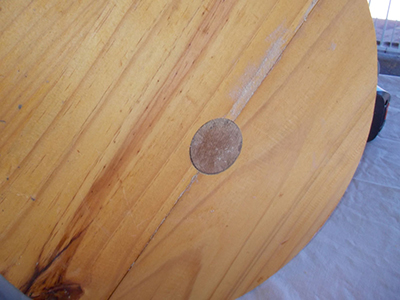
- Fill all imperfections and screw holes with filler, allow to dry and then sand down all surfaces for a smooth finish. Then apply undercoat and the finish of your choice – we selected black gloss enamel to match the braai.
- The Completed Table