30 March 2026

Are you sitting comfortably?
Using the loo is something we all do, and when young and supple, not difficult. But with age, certain medical procedures or infirmity can come challenges, particularly when getting to your feet again, so that that is when a pair of grab handles will make all the difference.
Just one caveat… these handles will be required to tolerate quite heavy loads so bear that in mind when selecting them… if one or both break free when being used, the user could be injured if they fall.
This is rather like fitting grab rails in the shower, but there are some differences in procedure.
And we’re off…
Materials:
- Two 304mm grab handles*, though if you have persons of very different heights in the house, then you might need an additional pair
*These handles are smooth, but they are also available with a cross-hatching pattern milled into them for enhanced grip.
Method:
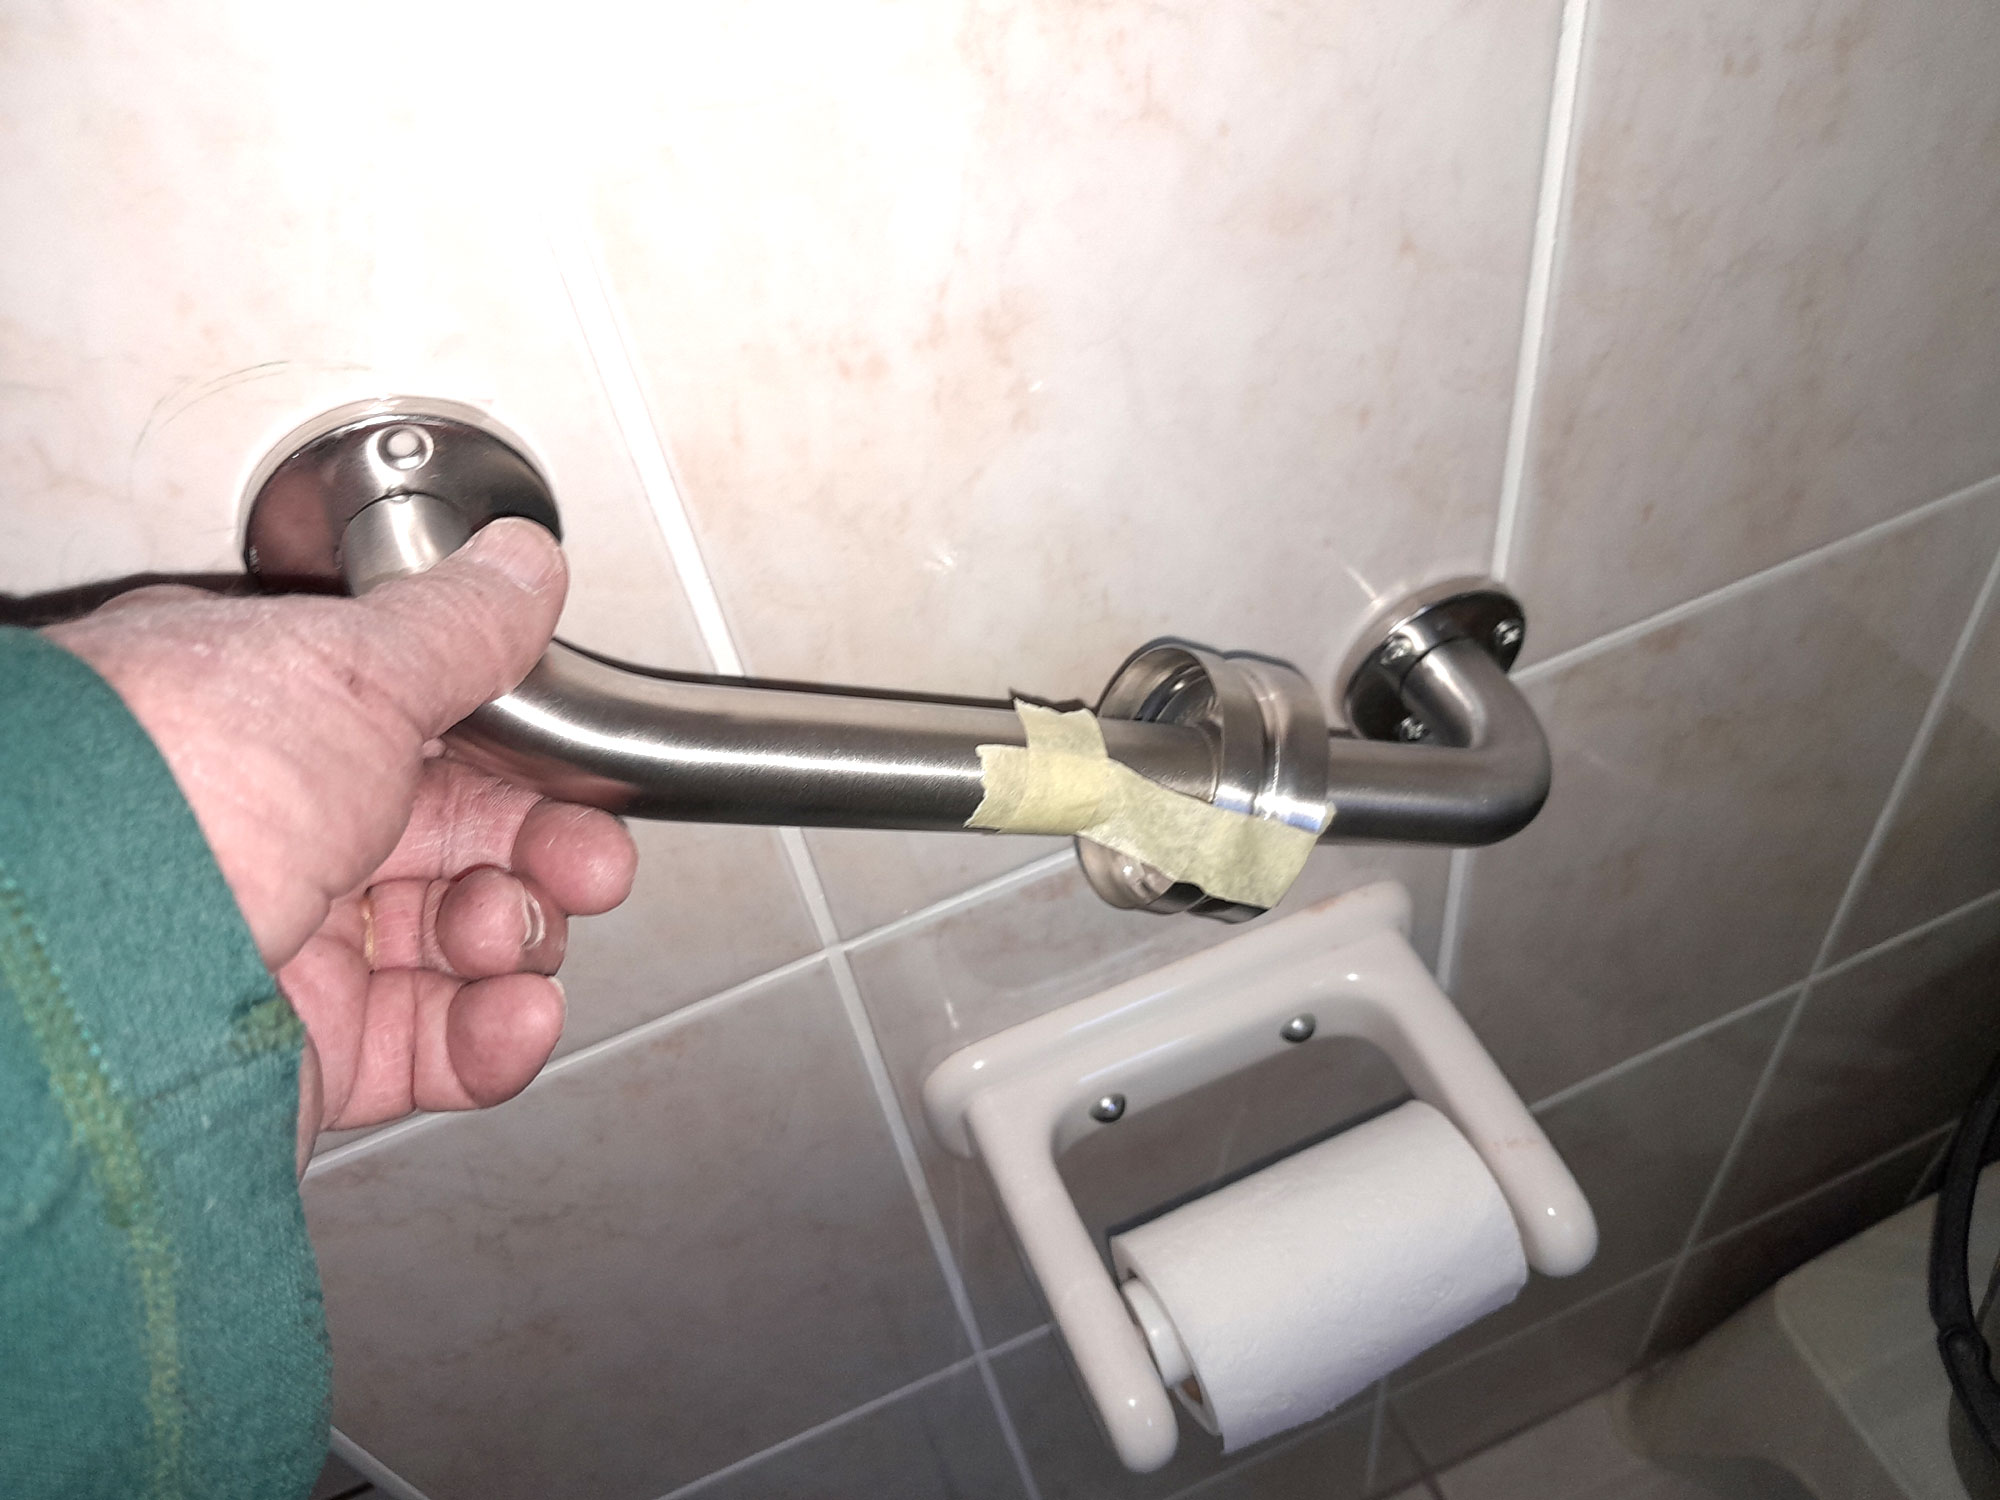
- The first step is to have the intended user or users plonk down on the toilet and holding the handles, decide where they would like them to be fitted – height, optimum angle, and distance ahead of the toilet. And mark the positions of the two attachment points on the tiles.
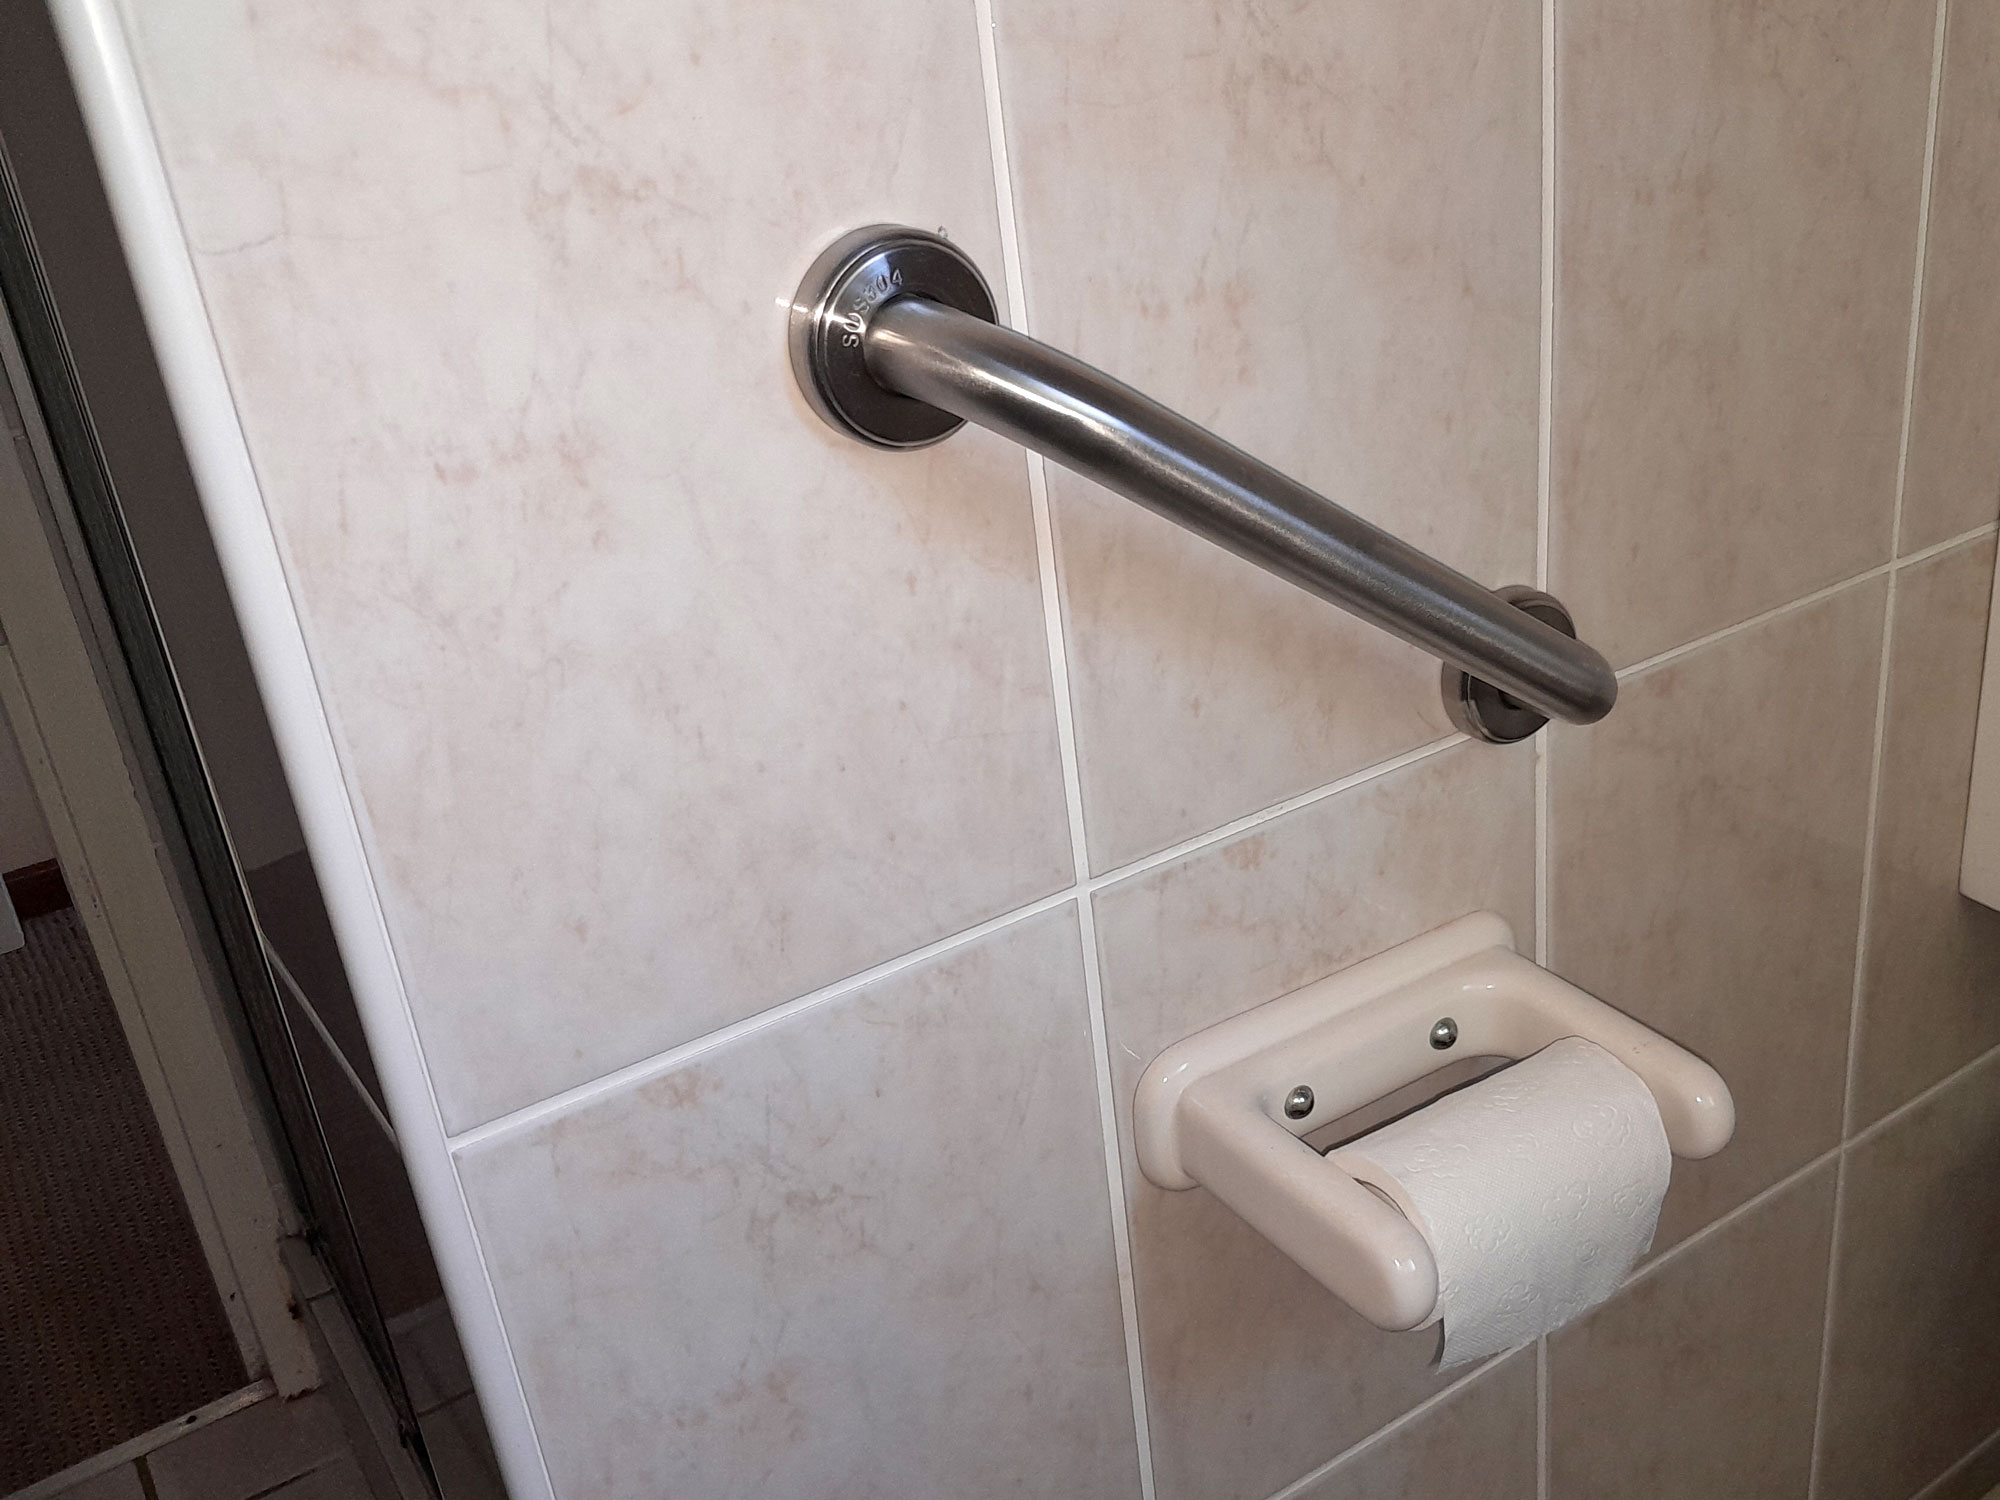
- Hold the handle in its chosen position and confirm its angle, height and position are what are desired – double-checking is always a good idea because if you get it wrong and you have to reposition the handles, you might say some naughty words. Note that as this handle had to be mounted on the wall of a shower cubicle, it could not be attached right up at the edge of the wall as this could cause cracking of the tile and brickwork substrate, so it is set back just 100mm or so.
- With the attachment flange removed from the rail (if it can be, but if not, no problem, simply hold the entire handle in position), mark the positions of the securing screw holes to be drilled…
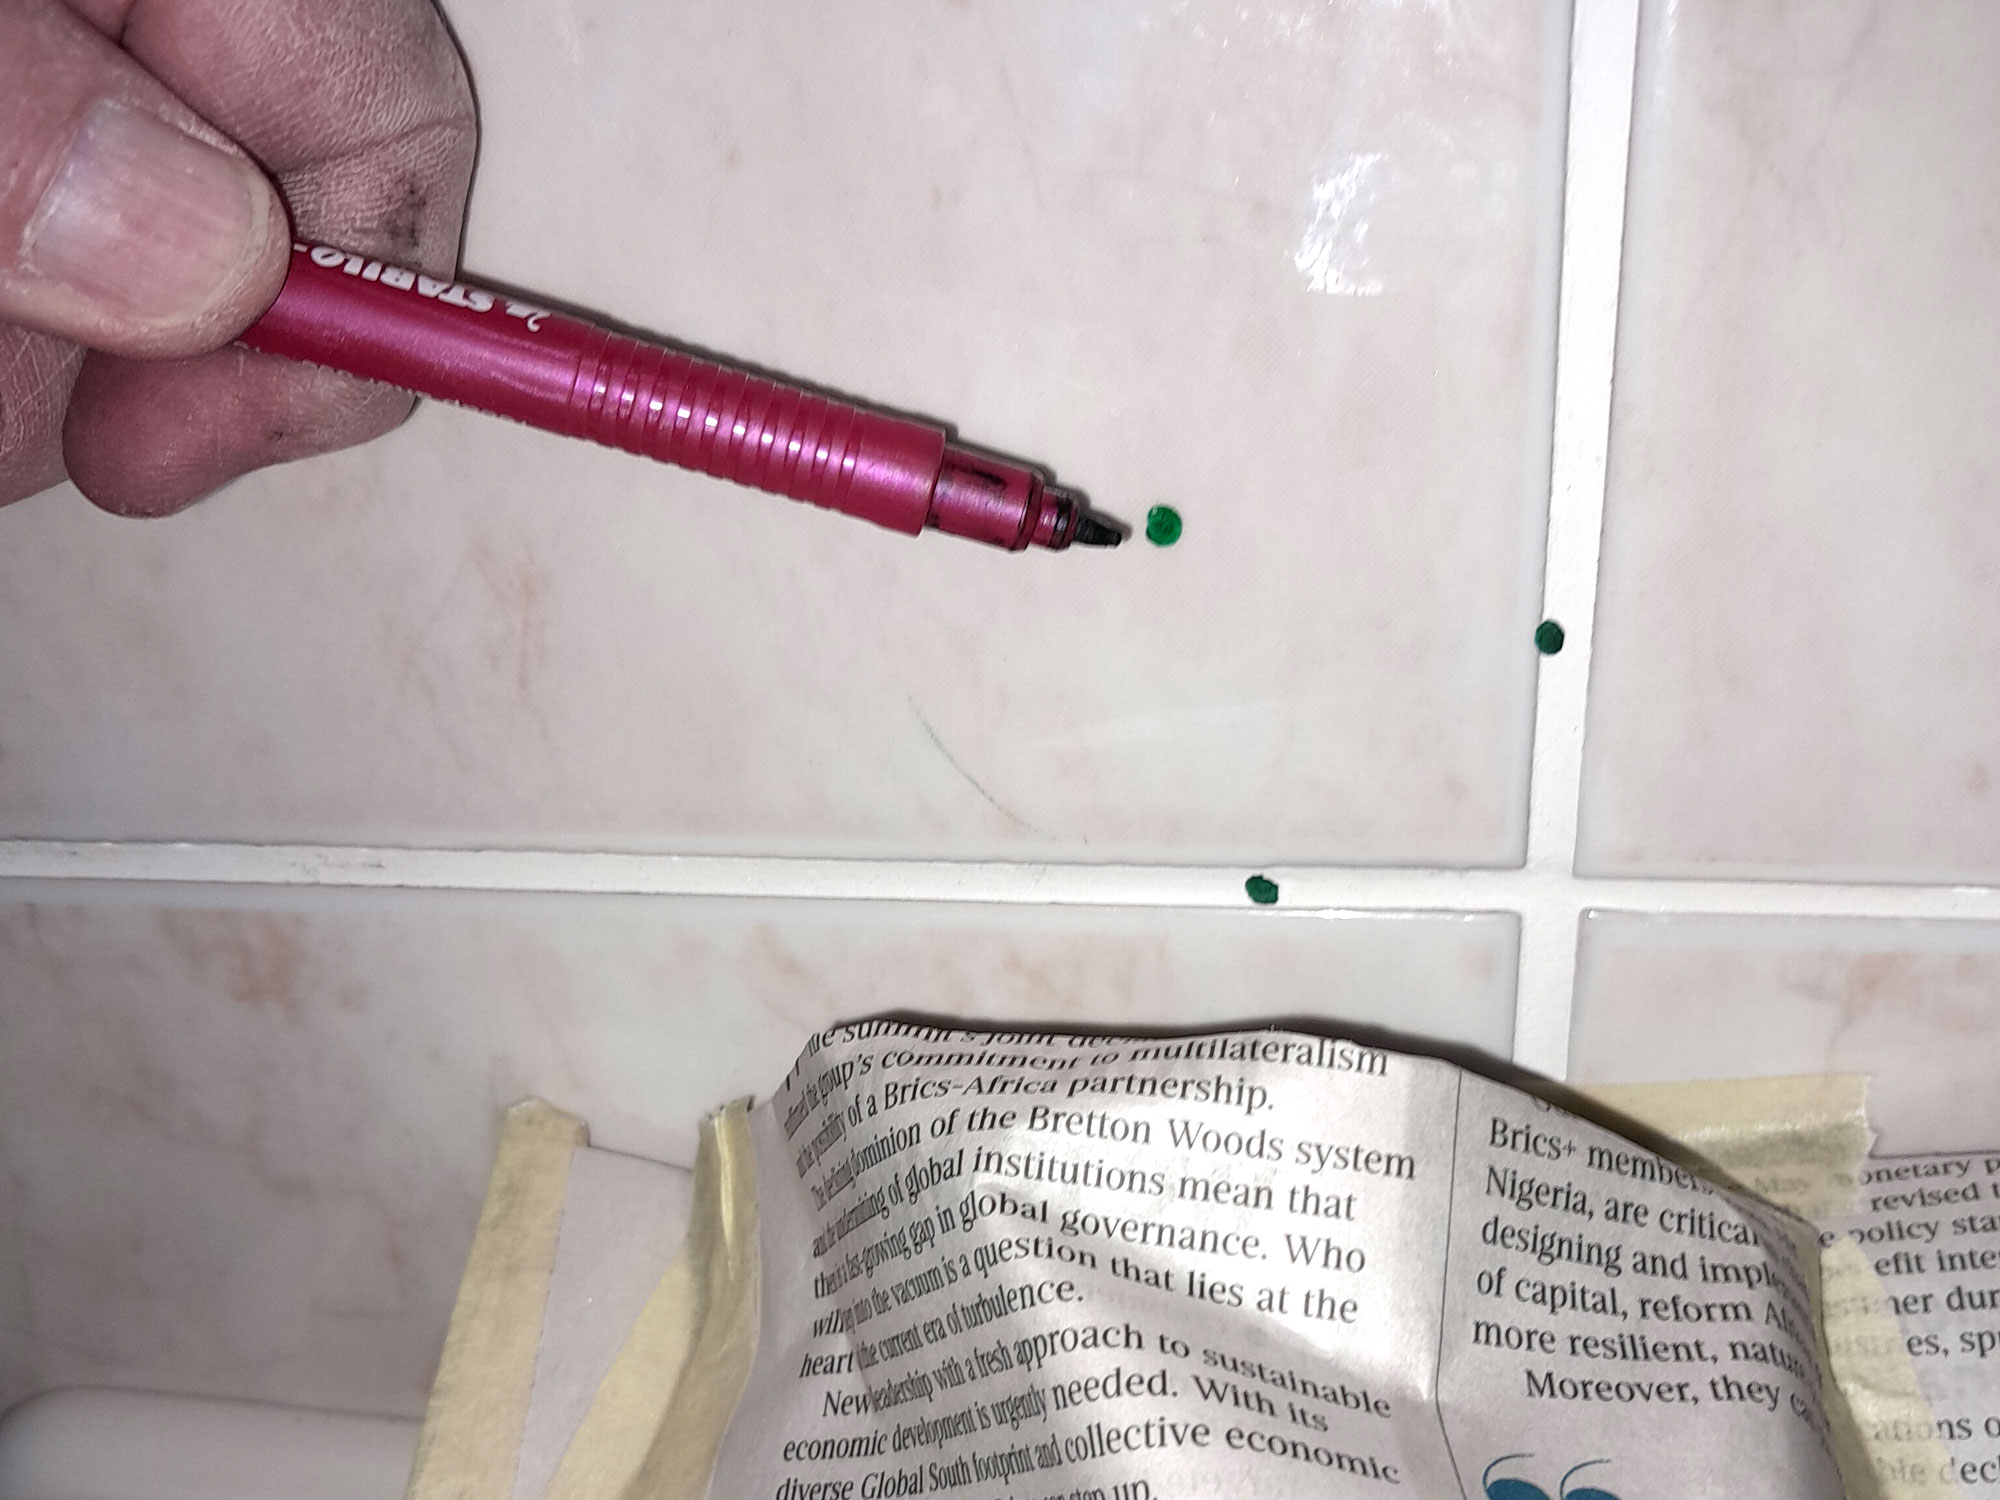
- Like so. Note that though the position and angle should be optimum, there is a little leeway, and here I have positioned the attachment flange holes so that at least two of them pass through the grouting and just the one through the tile itself. Note the use of the newspaper sack to catch debris from the drilling. I repeated the process for the lower flange.
- When drilling through tiles and masonry it can be a good idea to use a smaller bit to make the hole, and then use the correct size one to complete it – it allows you to achieve a more accurate drilling position. Most important, use the drilling mode when starting the holes, and switch to the hammer function only when you are through into the brickwork substrate; if you use the hammer action from the start, you could crack the tile.


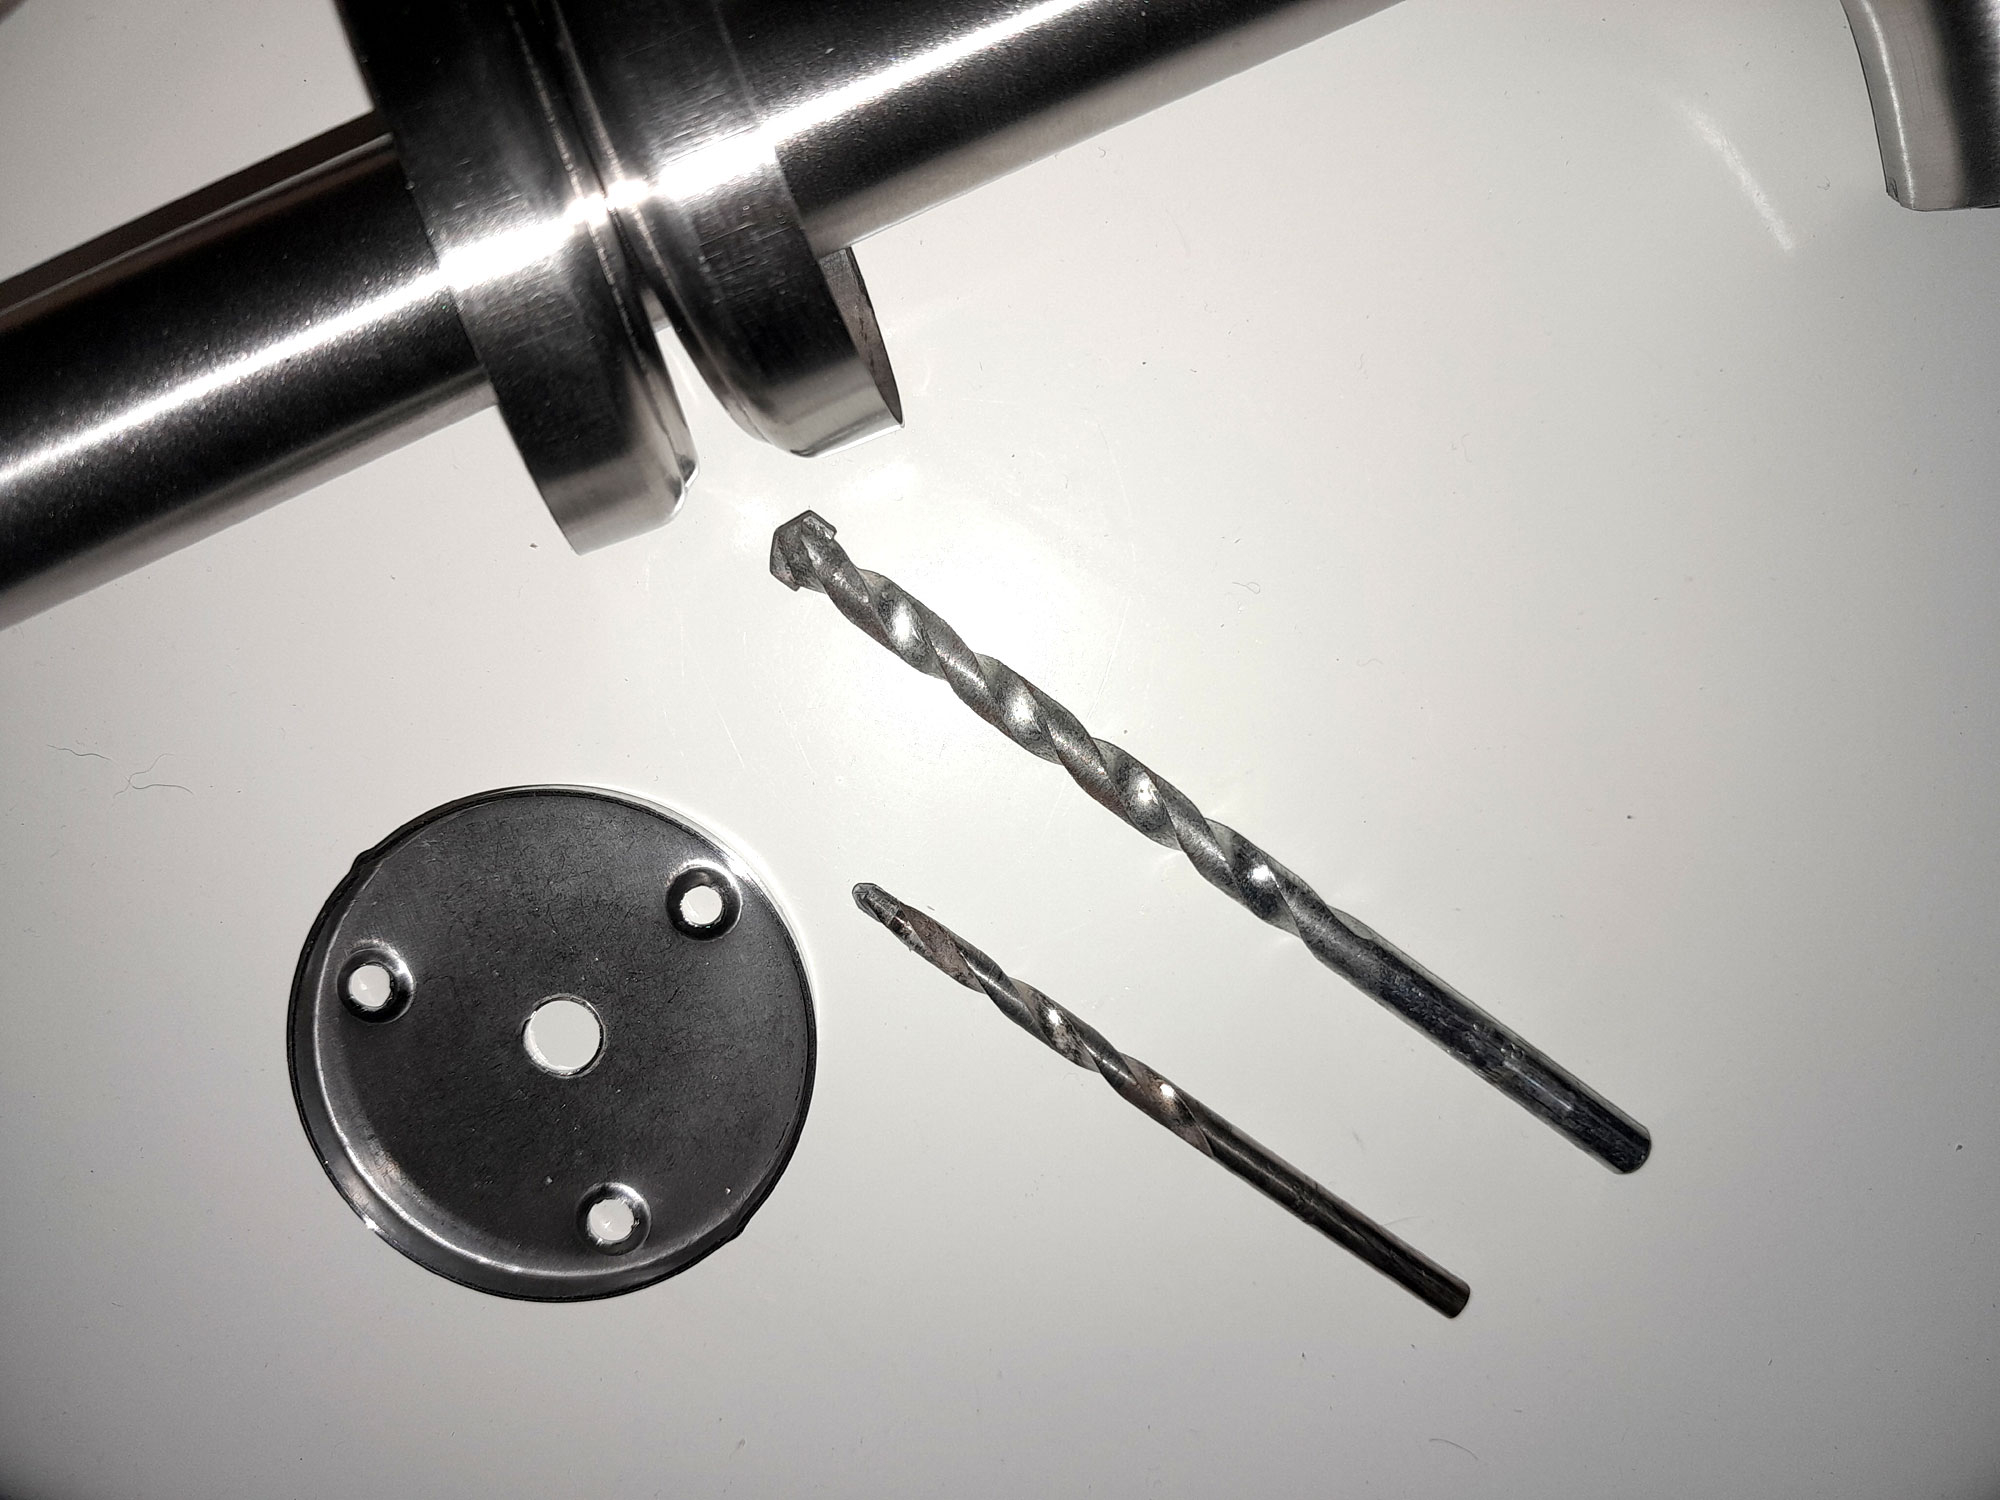
- The holes have been drilled and their depth checked with the small bit to ensure that the wall plug is fully seated. If not, drill the hole deeper. The same procedure was repeated with the lower attachment flange.
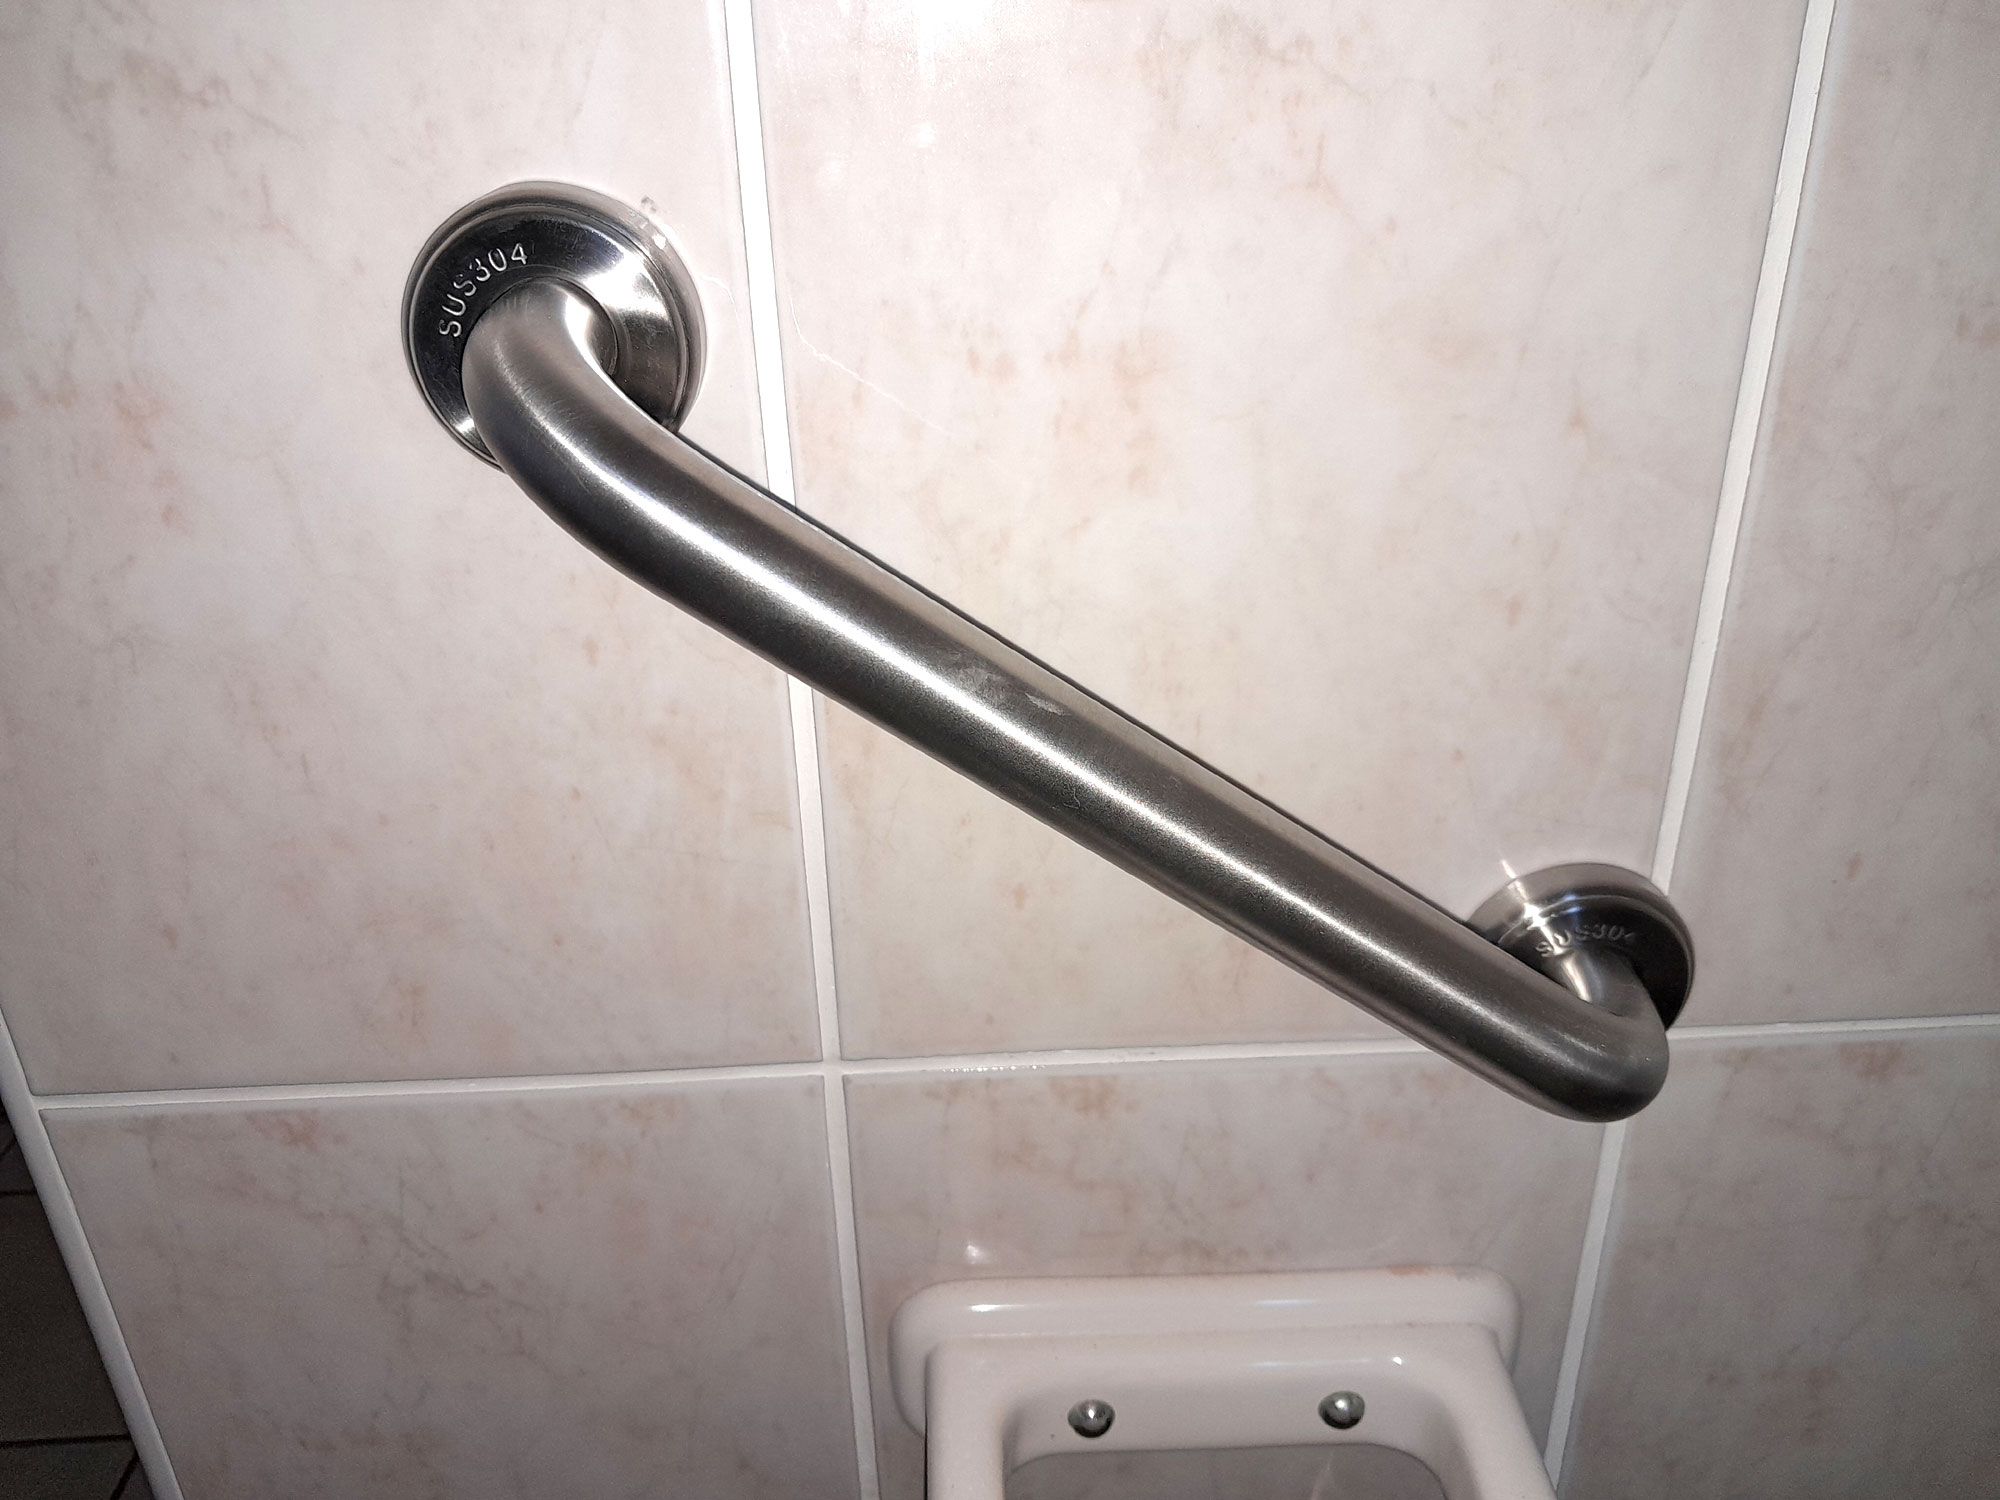
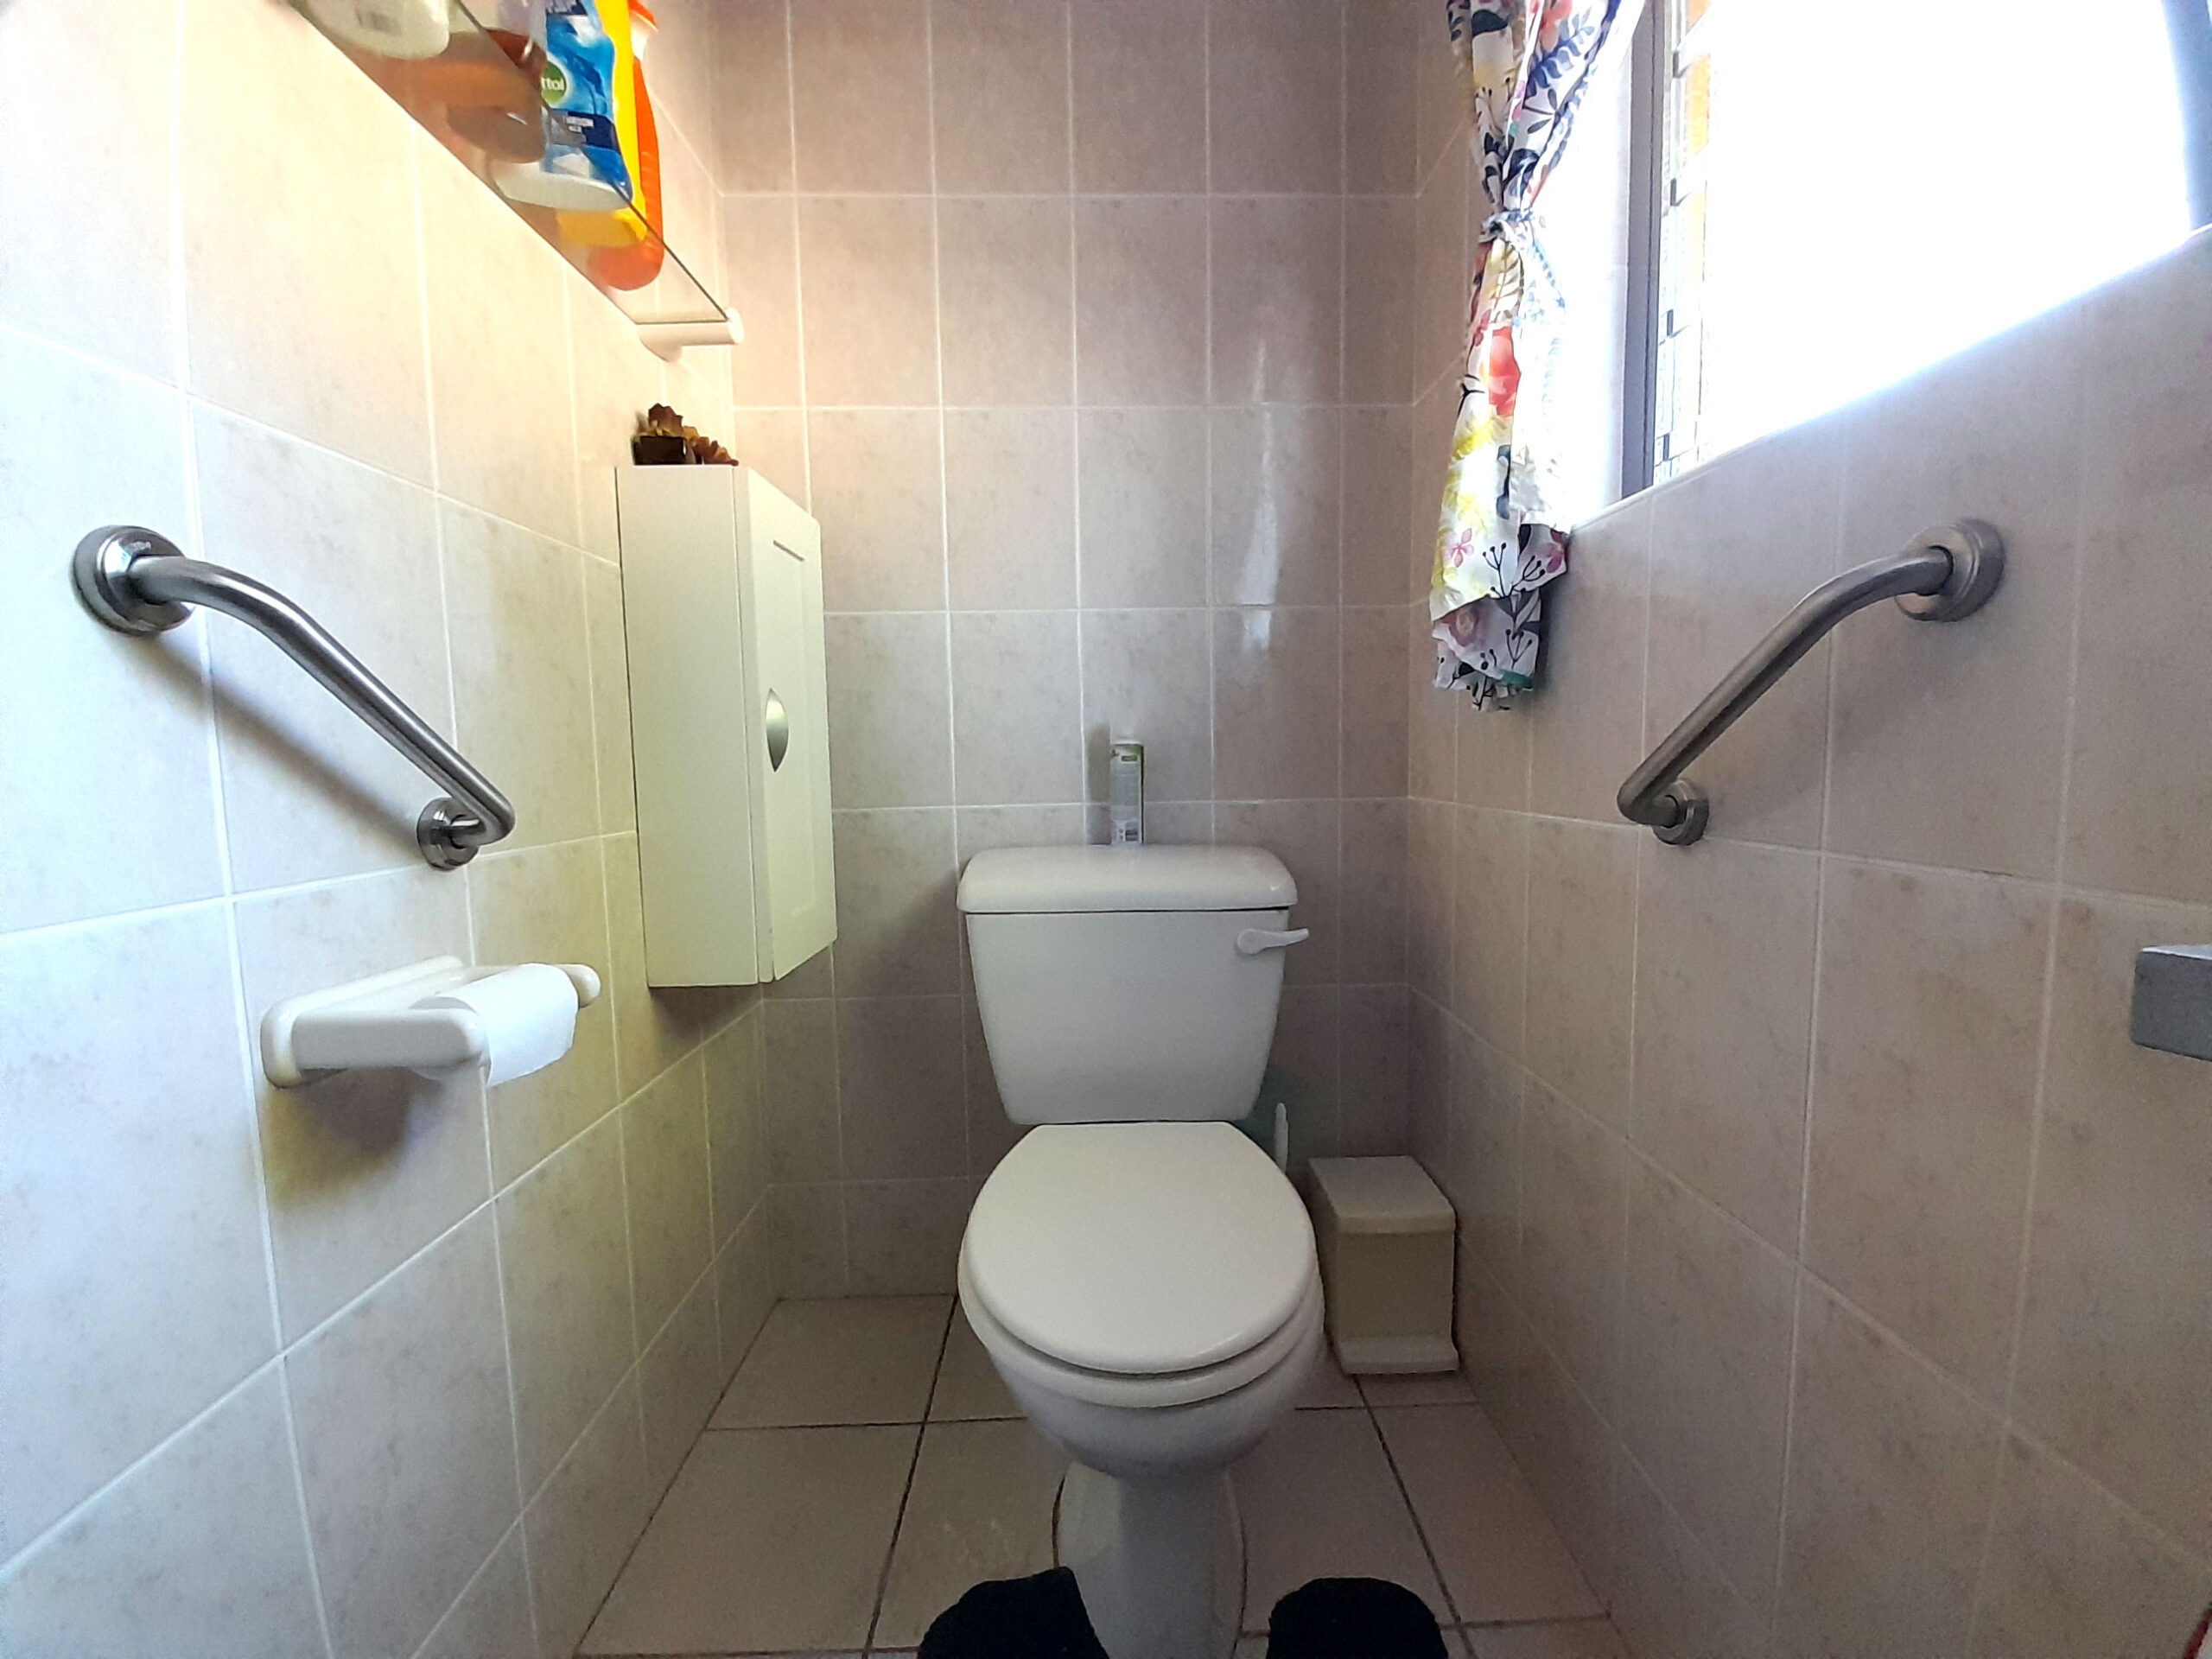
- And completed installation.
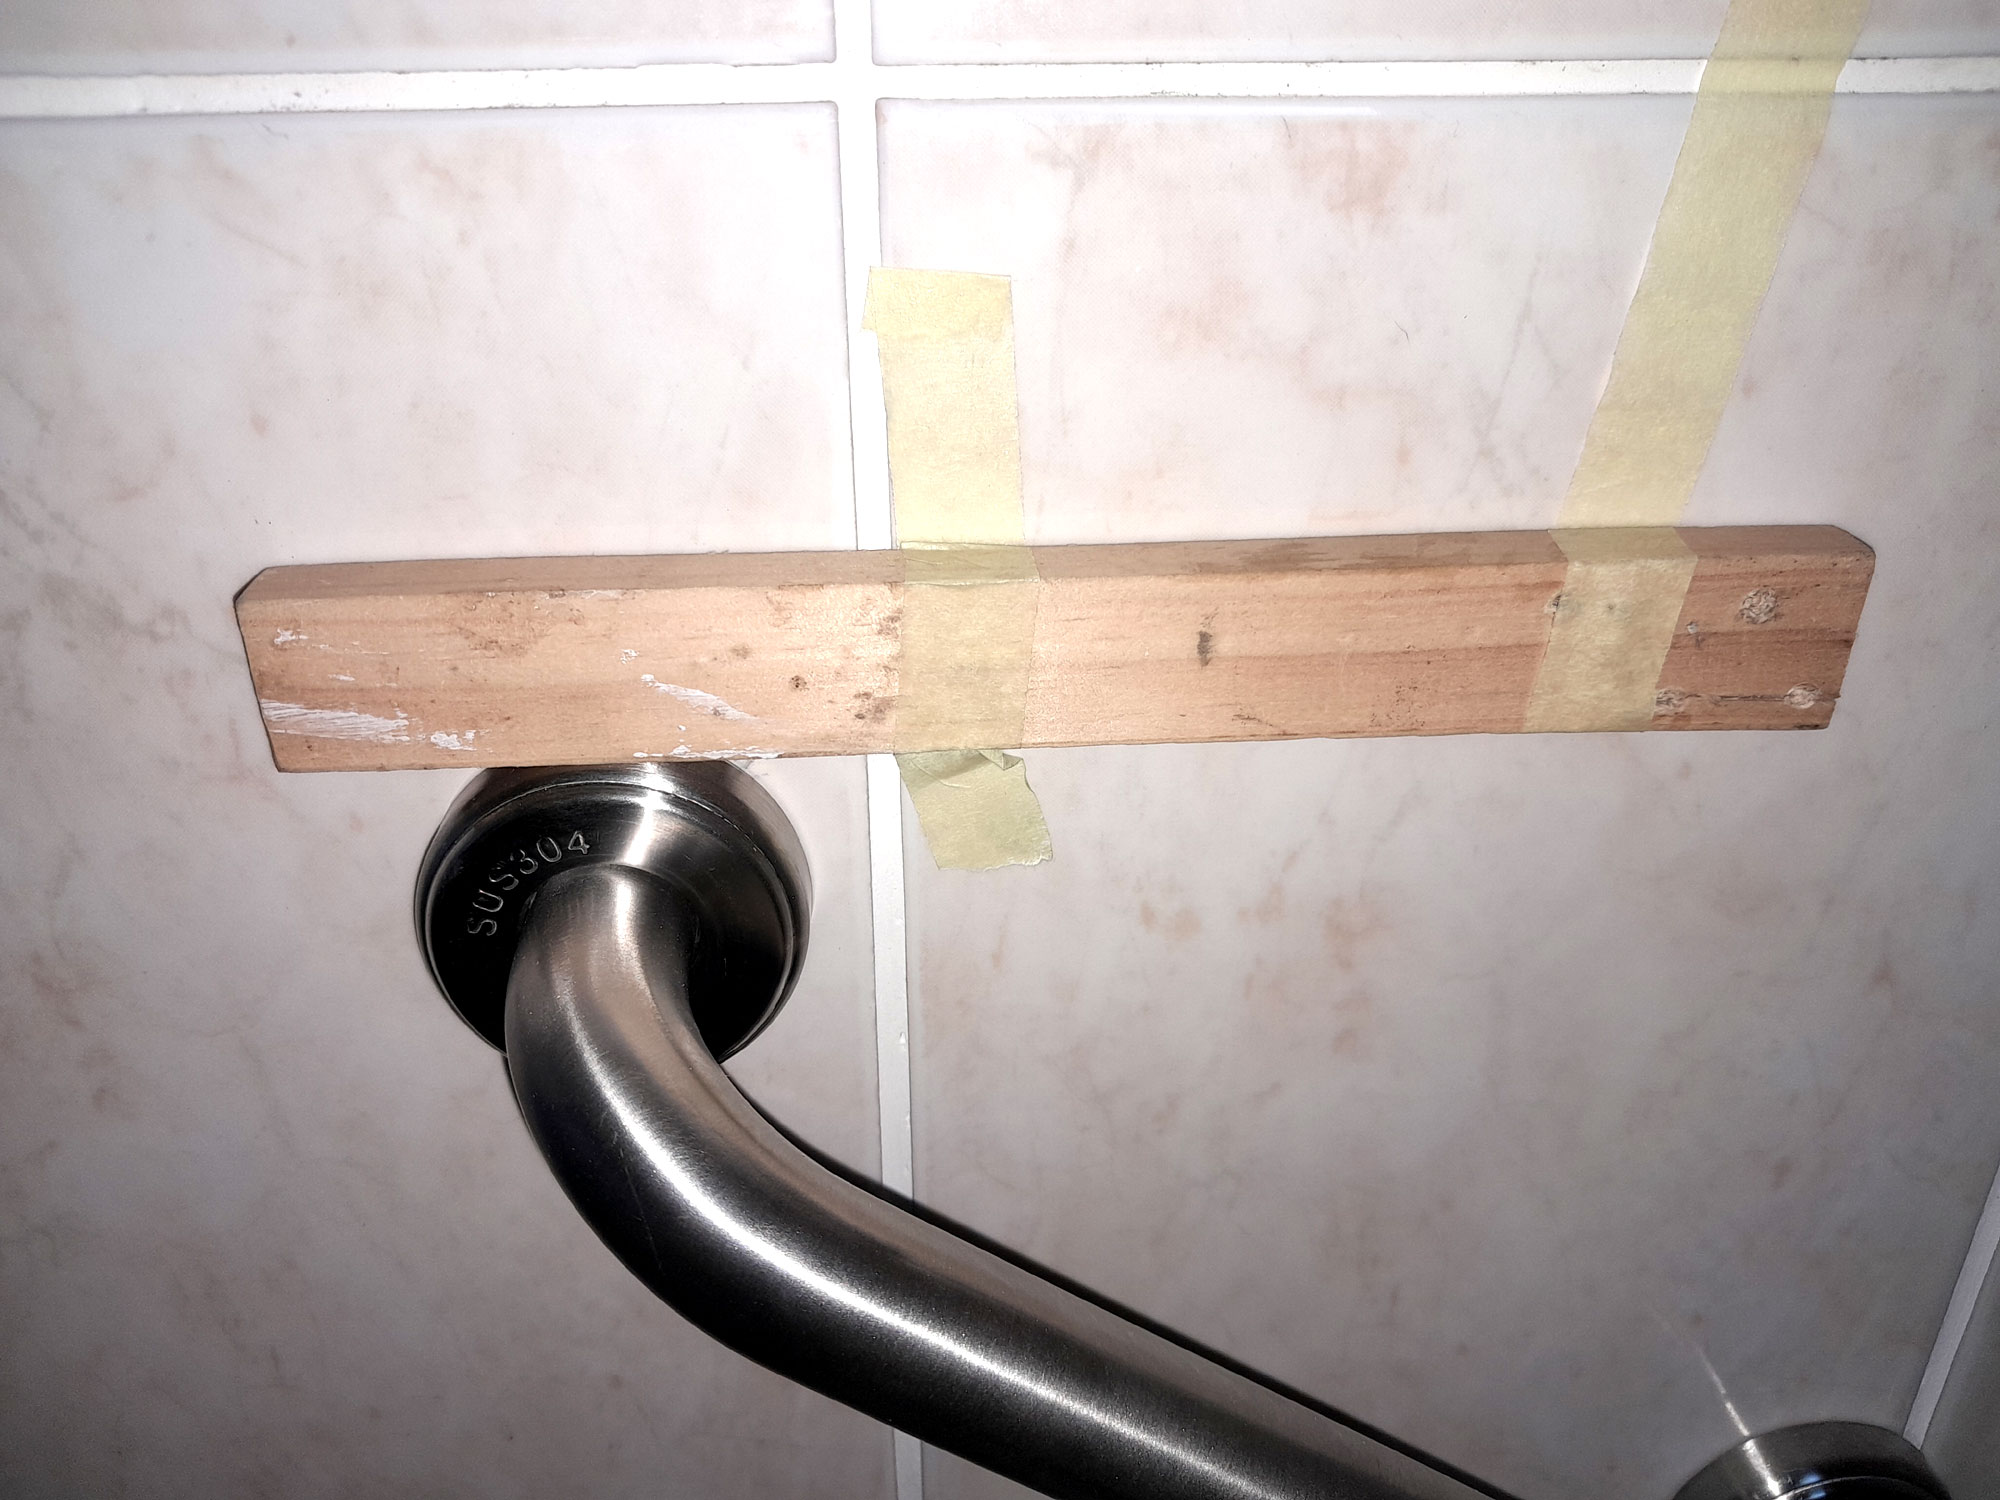
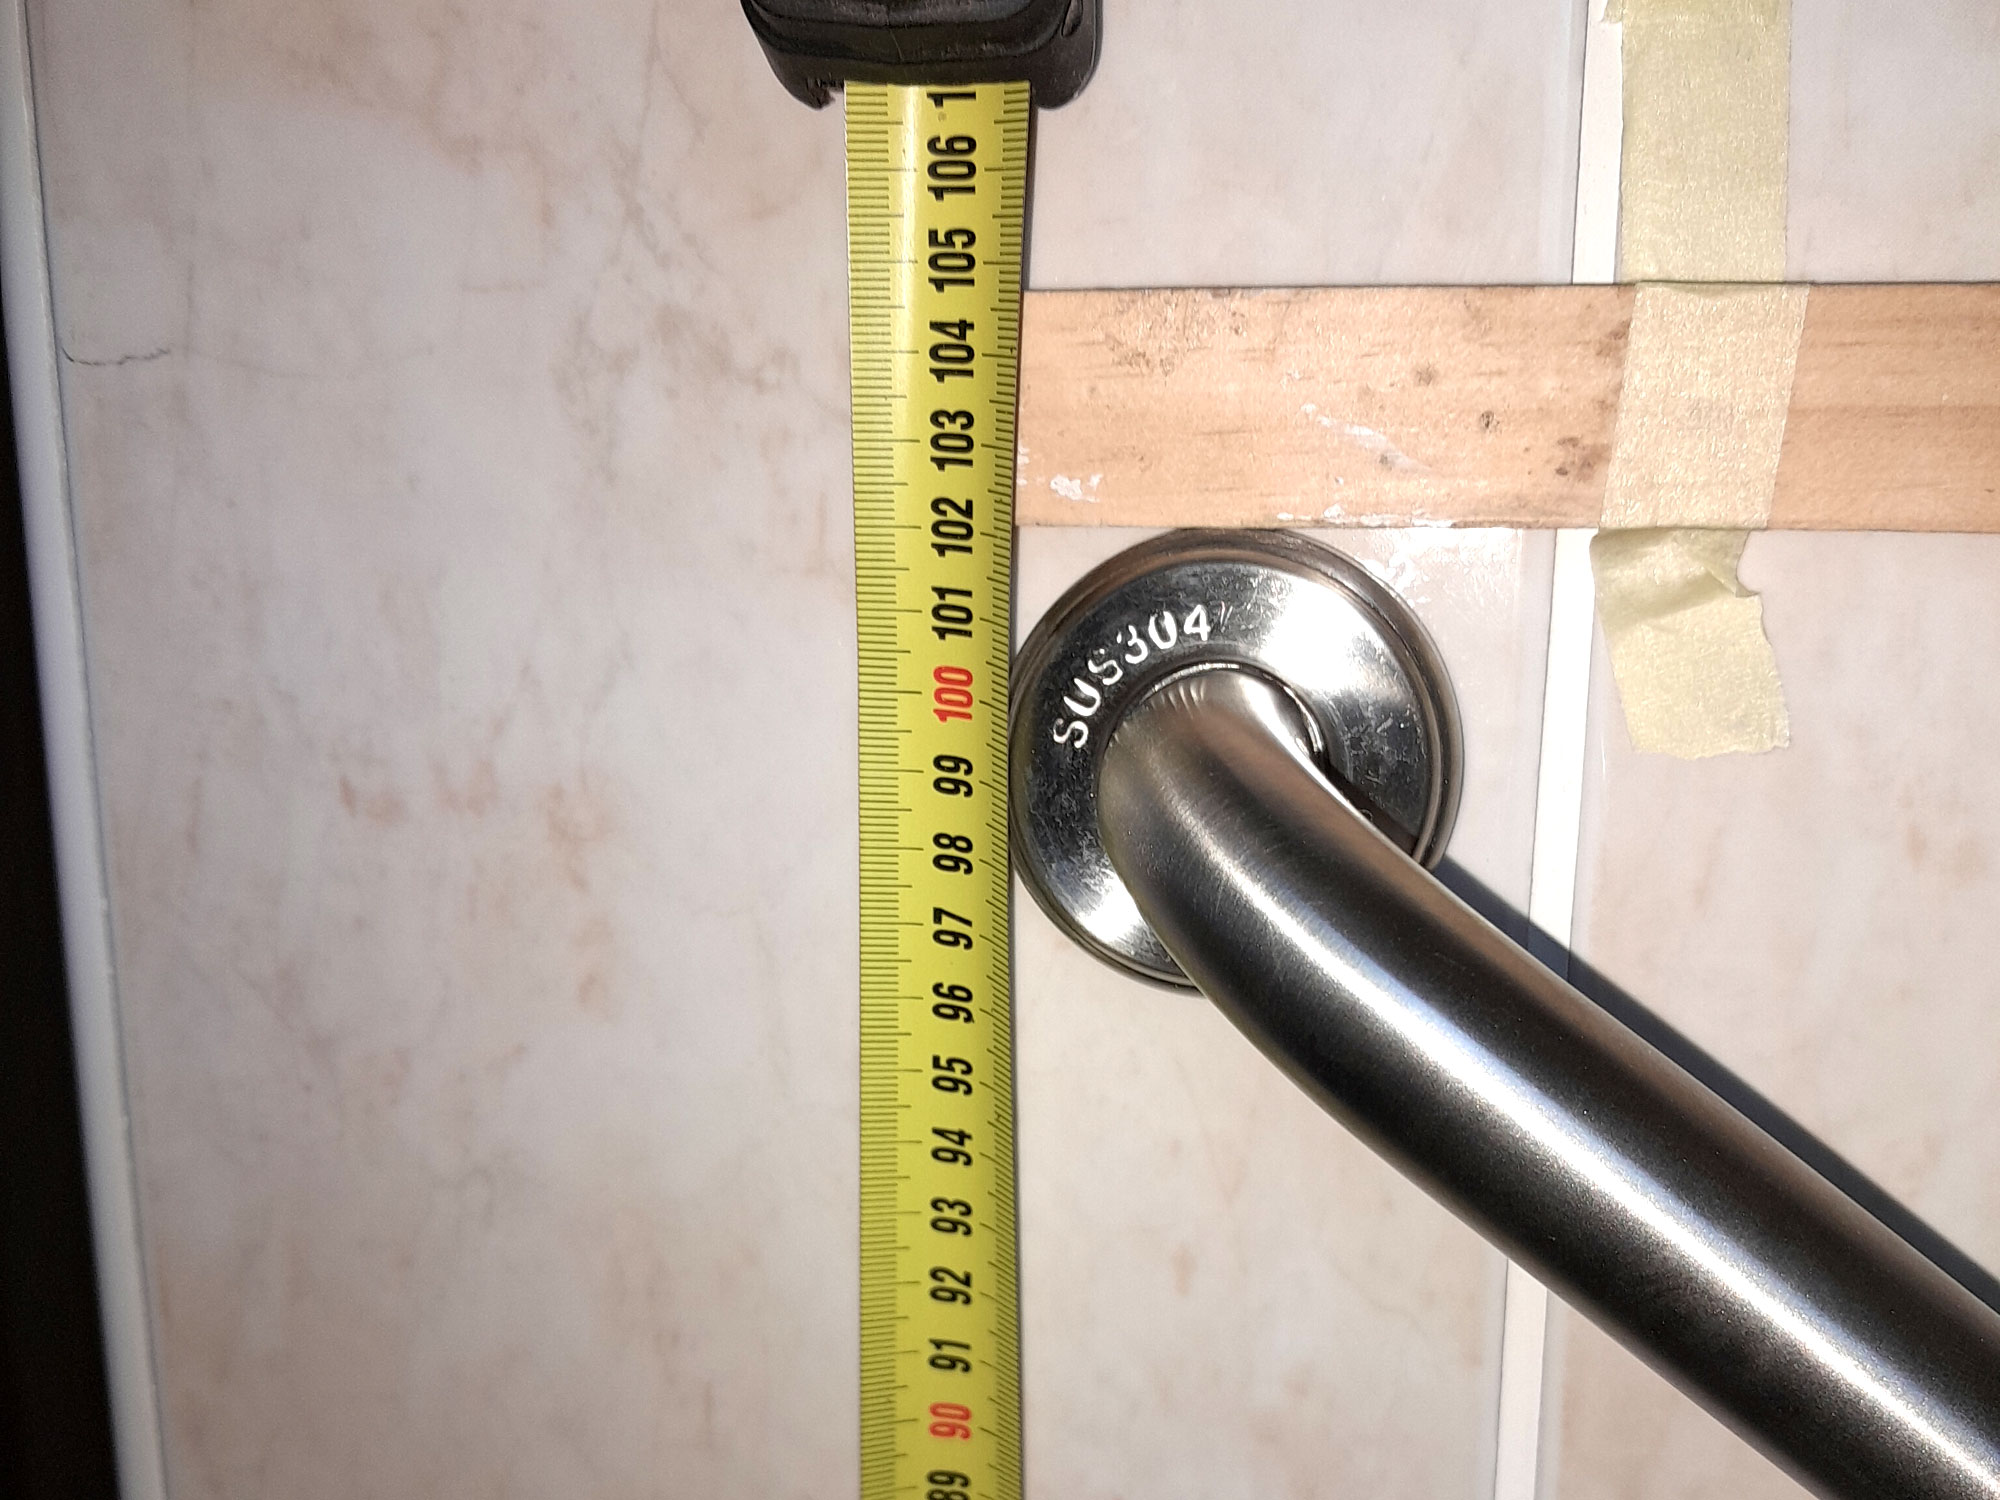
- Now the trick is to ensure that handle on the opposite wall is at exactly the same height and angle. I used a piece of scrap wood, taped to the wall dead level, as my marker.
- Then it was easy to measure the height from the floor.
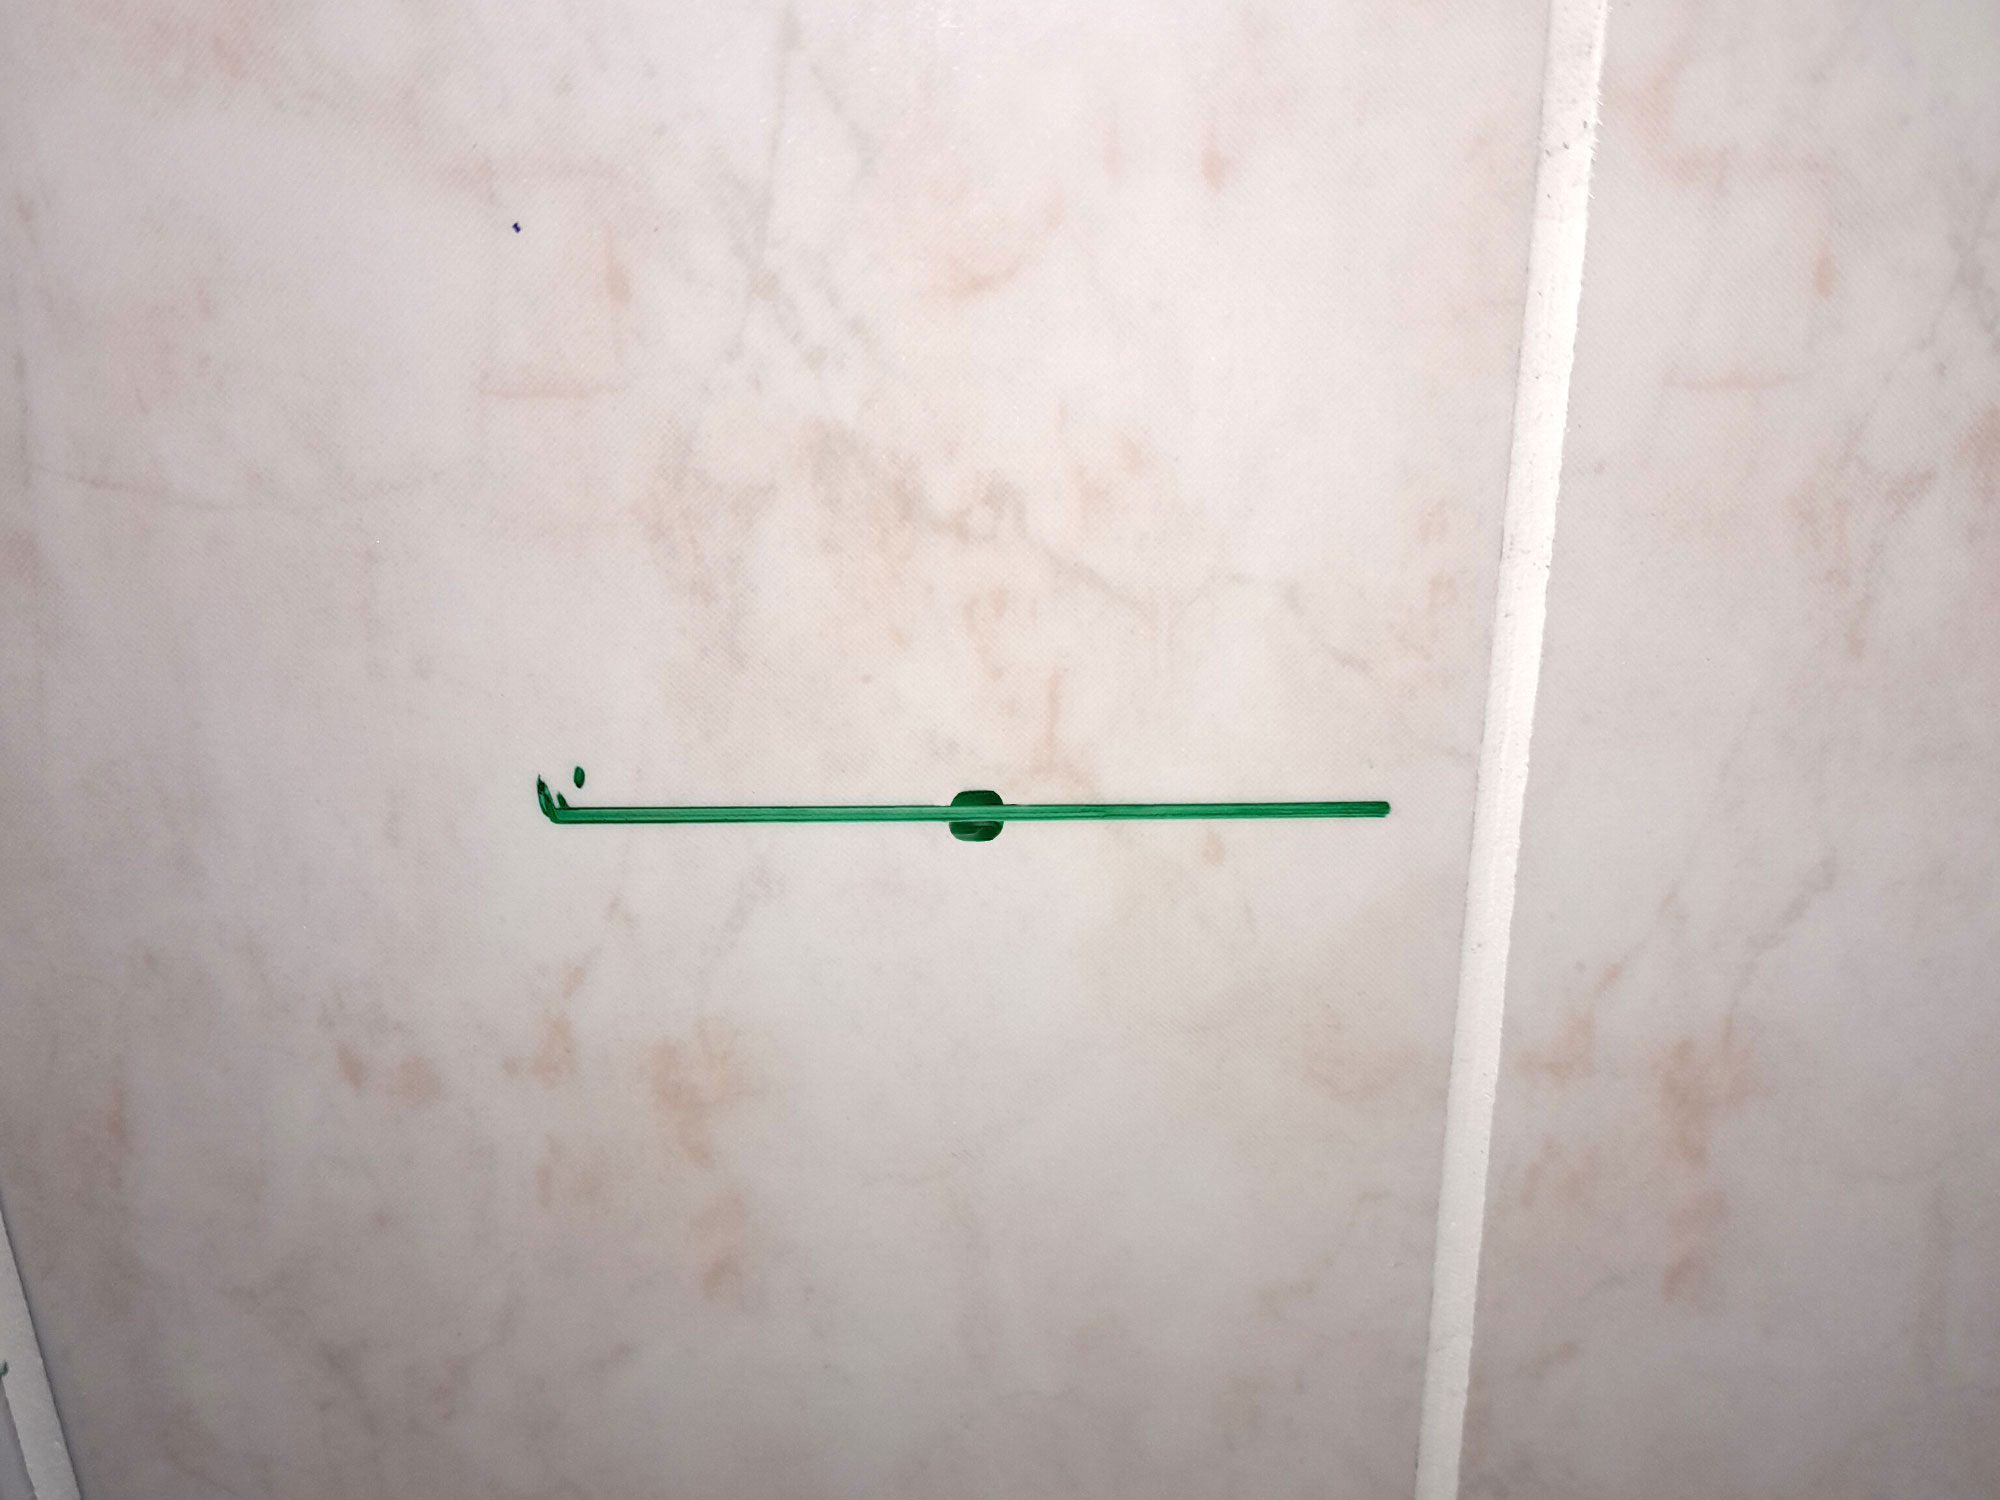
- I marked that height on the opposite wall, that below the window, with the top dead centre of the flange indicated by the dot on the horizontal line.

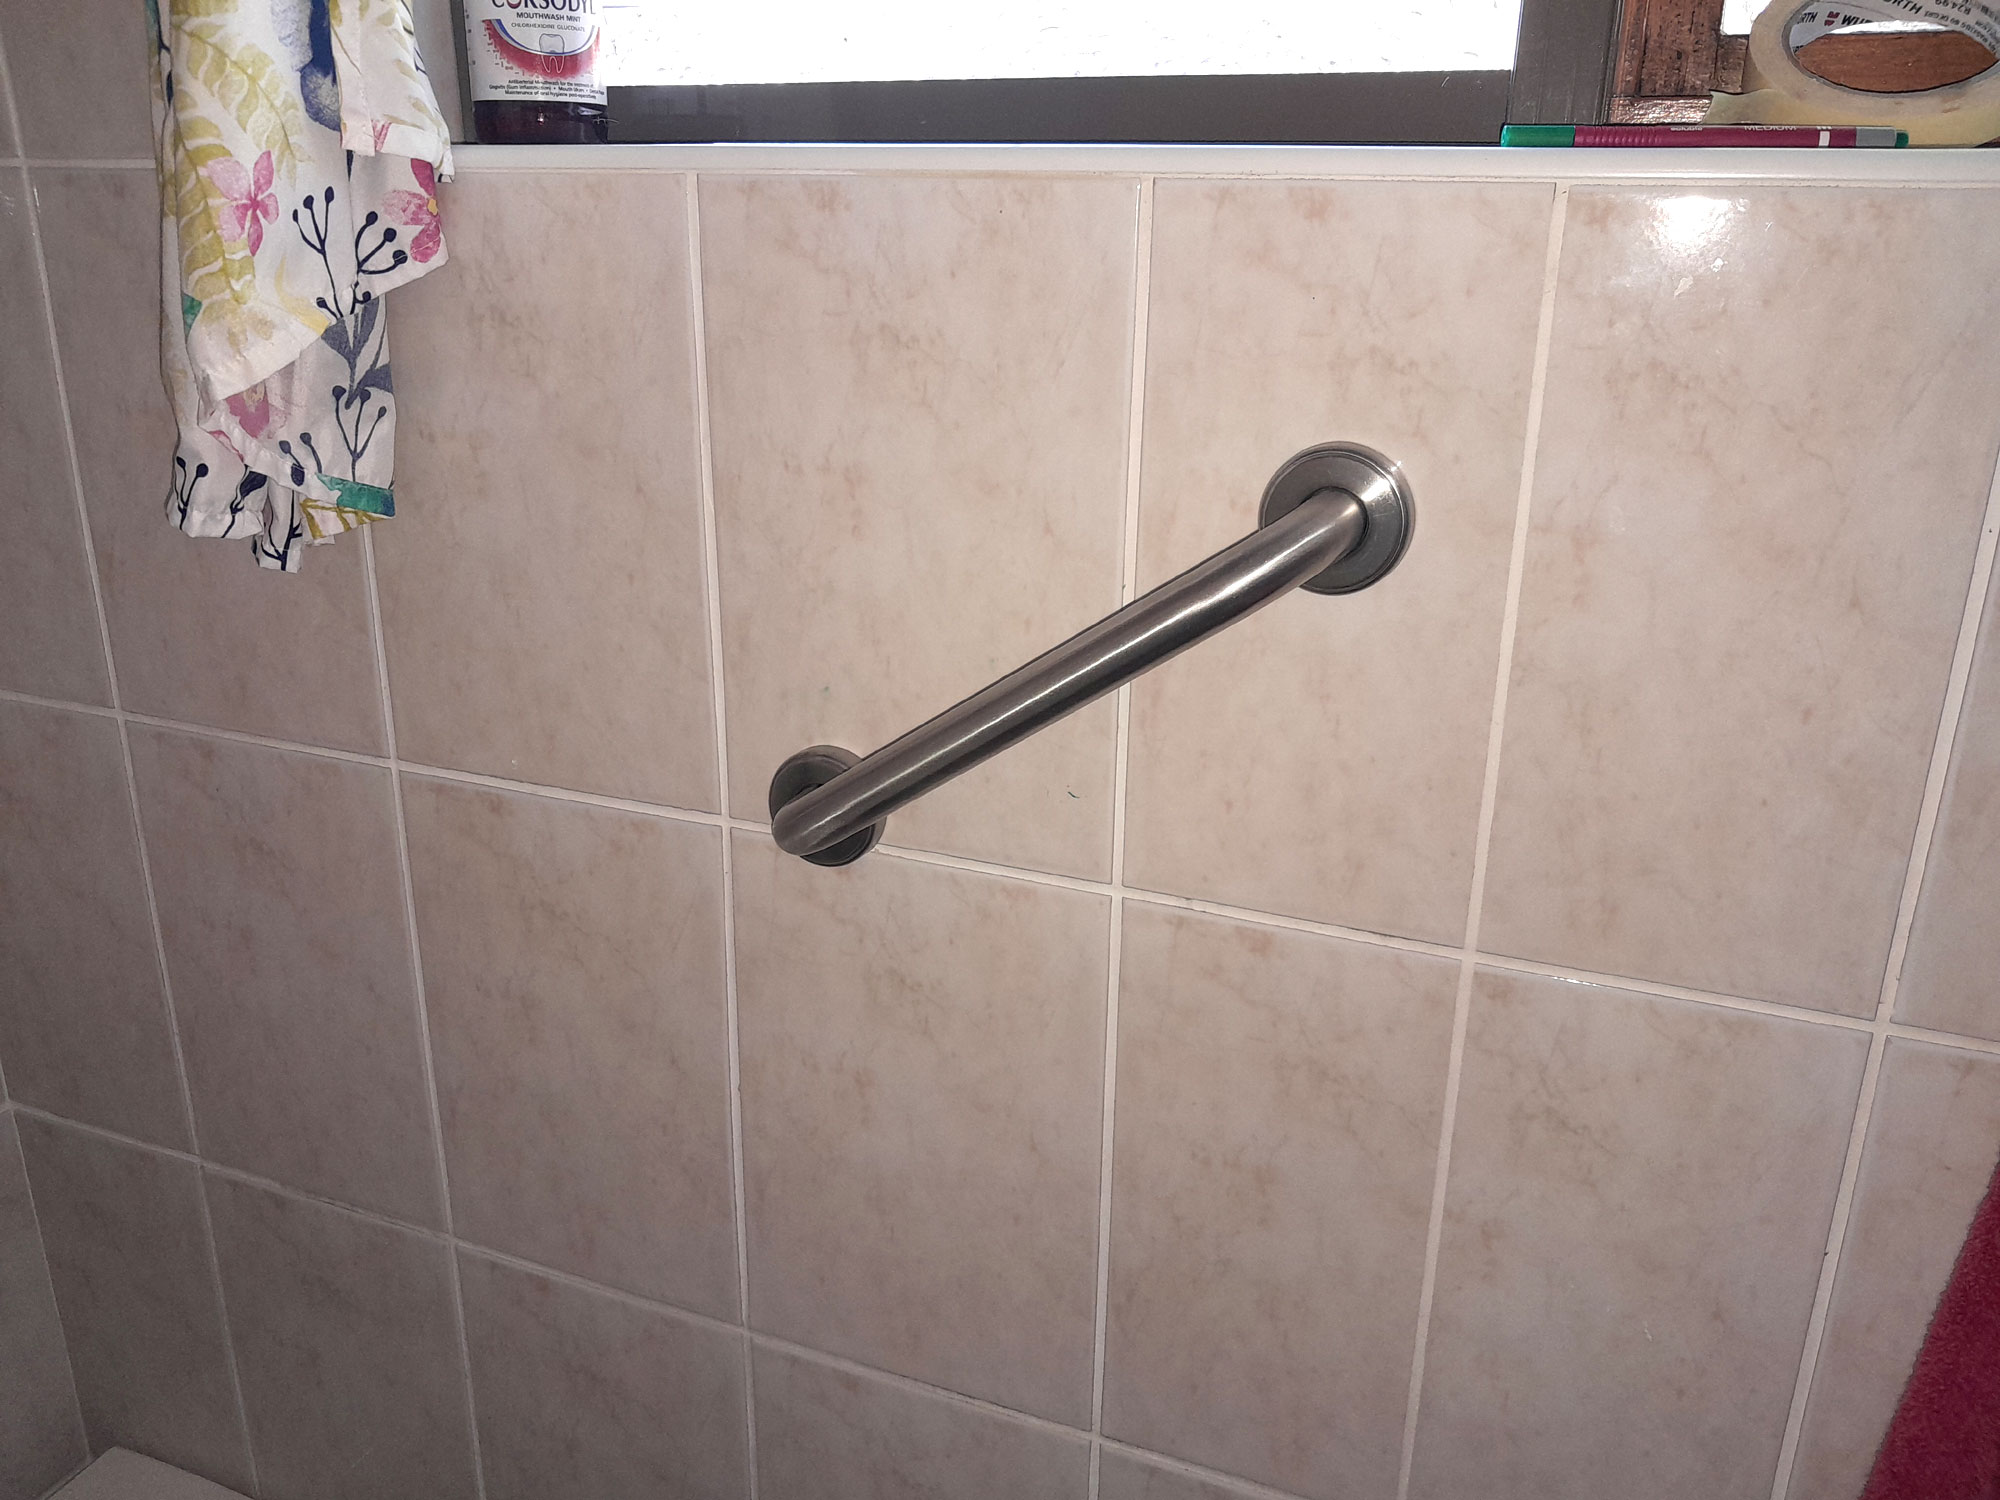
- I confirmed the angle and attached the second handle to the wall.
- It matches up perfectly with the left-hand handle mounted first.
- And here is the completed task – both handles are at exactly the same height, angle and distance from the rear wall.
Panel:
These materials are available at Selected Mica Stores. To find your closest Mica and whether or not they stock the items required, please go to www.mica.co.za, find your store and call them. If your local Mica does not stock exactly what you need they will be able to order it for you or suggest an alternative product or a reputable source.
Project guide
- TIME: An hour or so, if that
- COST: This depends on the cost and length of the handles, and the number you buy. These were 304mm long, and range in cost from around R200 and upwards, but they are available in longer lengths – obviously at higher cost.
- Skill: 2
- Assistant: No
Tools required:
Cordless or mains drill/driver with hammer mode.