10 June 2026

Something to light up your braai
When you want light on a subject, wherever it is, this could be the project for you.
This light was conceived initially to be able to bring light to a braai, but then what about other areas… over a garden table at light… bringing light to bear if you are sorting out a problem with the car? You could even set it up if one of your security lights goes AWOL because the day/night bulb you fitted has blown, or whatever and you do not have a replacement ready to hand.
CAUTION:
When using this light near your braai, make sure you position it a good metre or more off to one side and at its full height… the fitting, extension cord and even the bulb can melt if set up too close to the fire. SO KEEP IT COOL, OKAY?!
Basic tools needed for electrical work:
- Side cutters
- Wire stripper
- Multipurpose stripper/crimping tool
- Multimeter (more complicated and more versatile, but optional)
- Voltage tester
- Insulation tape
Safety first:
- Read them and ensure that you fully understand the manufacturer’s operator’s instructions and guidelines completely. In the event that you are in any doubt whatsoever as to the meaning of any aspect of the instructions/guidelines, or the safe use of the device, obtain expert assistance from the manufacturer and/or a qualified and licensed electrician. For example, many light fittings (and other electrical items) come with clear instructions from the manufacturer as to maximum voltages, maximum bulb outputs, and operating restrictions and so on. MAKE SURE YOU UNDERSTAND THEM AND FOLLOW THEM!
- Ensure your connections are correct, and secure.
- In the case of this, and other similar projects, ensure that your power cable is firmly secured, and looped (if as in this case, the light can be rotated) so that no part of the insulation is worn down on any sharp surfaces or corners.
- Please note: any work associated with electricity or electrically-powered devices can be inherently hazardous and you should ensure that you exercise all due care when operating any such device, such as testing equipment such as a multimeter (also known as a volt-ohm meter).
- Check your connections between the light fitting and the plug… ensuring that there is proper connection Live to Live, Neutral to Neutral, Earth to Earth, and no cross connections… so check the Earth against the Live and Neutral connections/pins on the plug, and Live to Neutral. There must be no connection.
- Strip off only sufficient of the Brown (Live), Blue (Neutral), and Earth (Green/Yellow) insulation to make the connection; no bare wiring should extend at best more than a millimetre or so from its connection point.
Colour codes
Standard wire colours for FLEXIBLE cables, e.g. Extension cords, cords connecting appliances such as lamps, refrigerators, TV sets, electric lawnmowers, hedge clippers, trimmers and so on to the power source, and so on. These cords, as the name suggests are flexible, their conducting wires comprising multiple strands of thin wires that can essentially slide over each other as the cord is flexed, time and again, for example when wound on to a reel. In South Africa these wires are identified as follows:
COLOUR CODES FOR FLEXIBLE INSULATED wiring
| Brown | Live (Phase) |
| Blue | Neutral |
| Green/Yellow | Earth |
Materials:
Electrical:
- One outdoor light
- Length of extension cord – I chose 3m of 1.5mm cord
- One plug
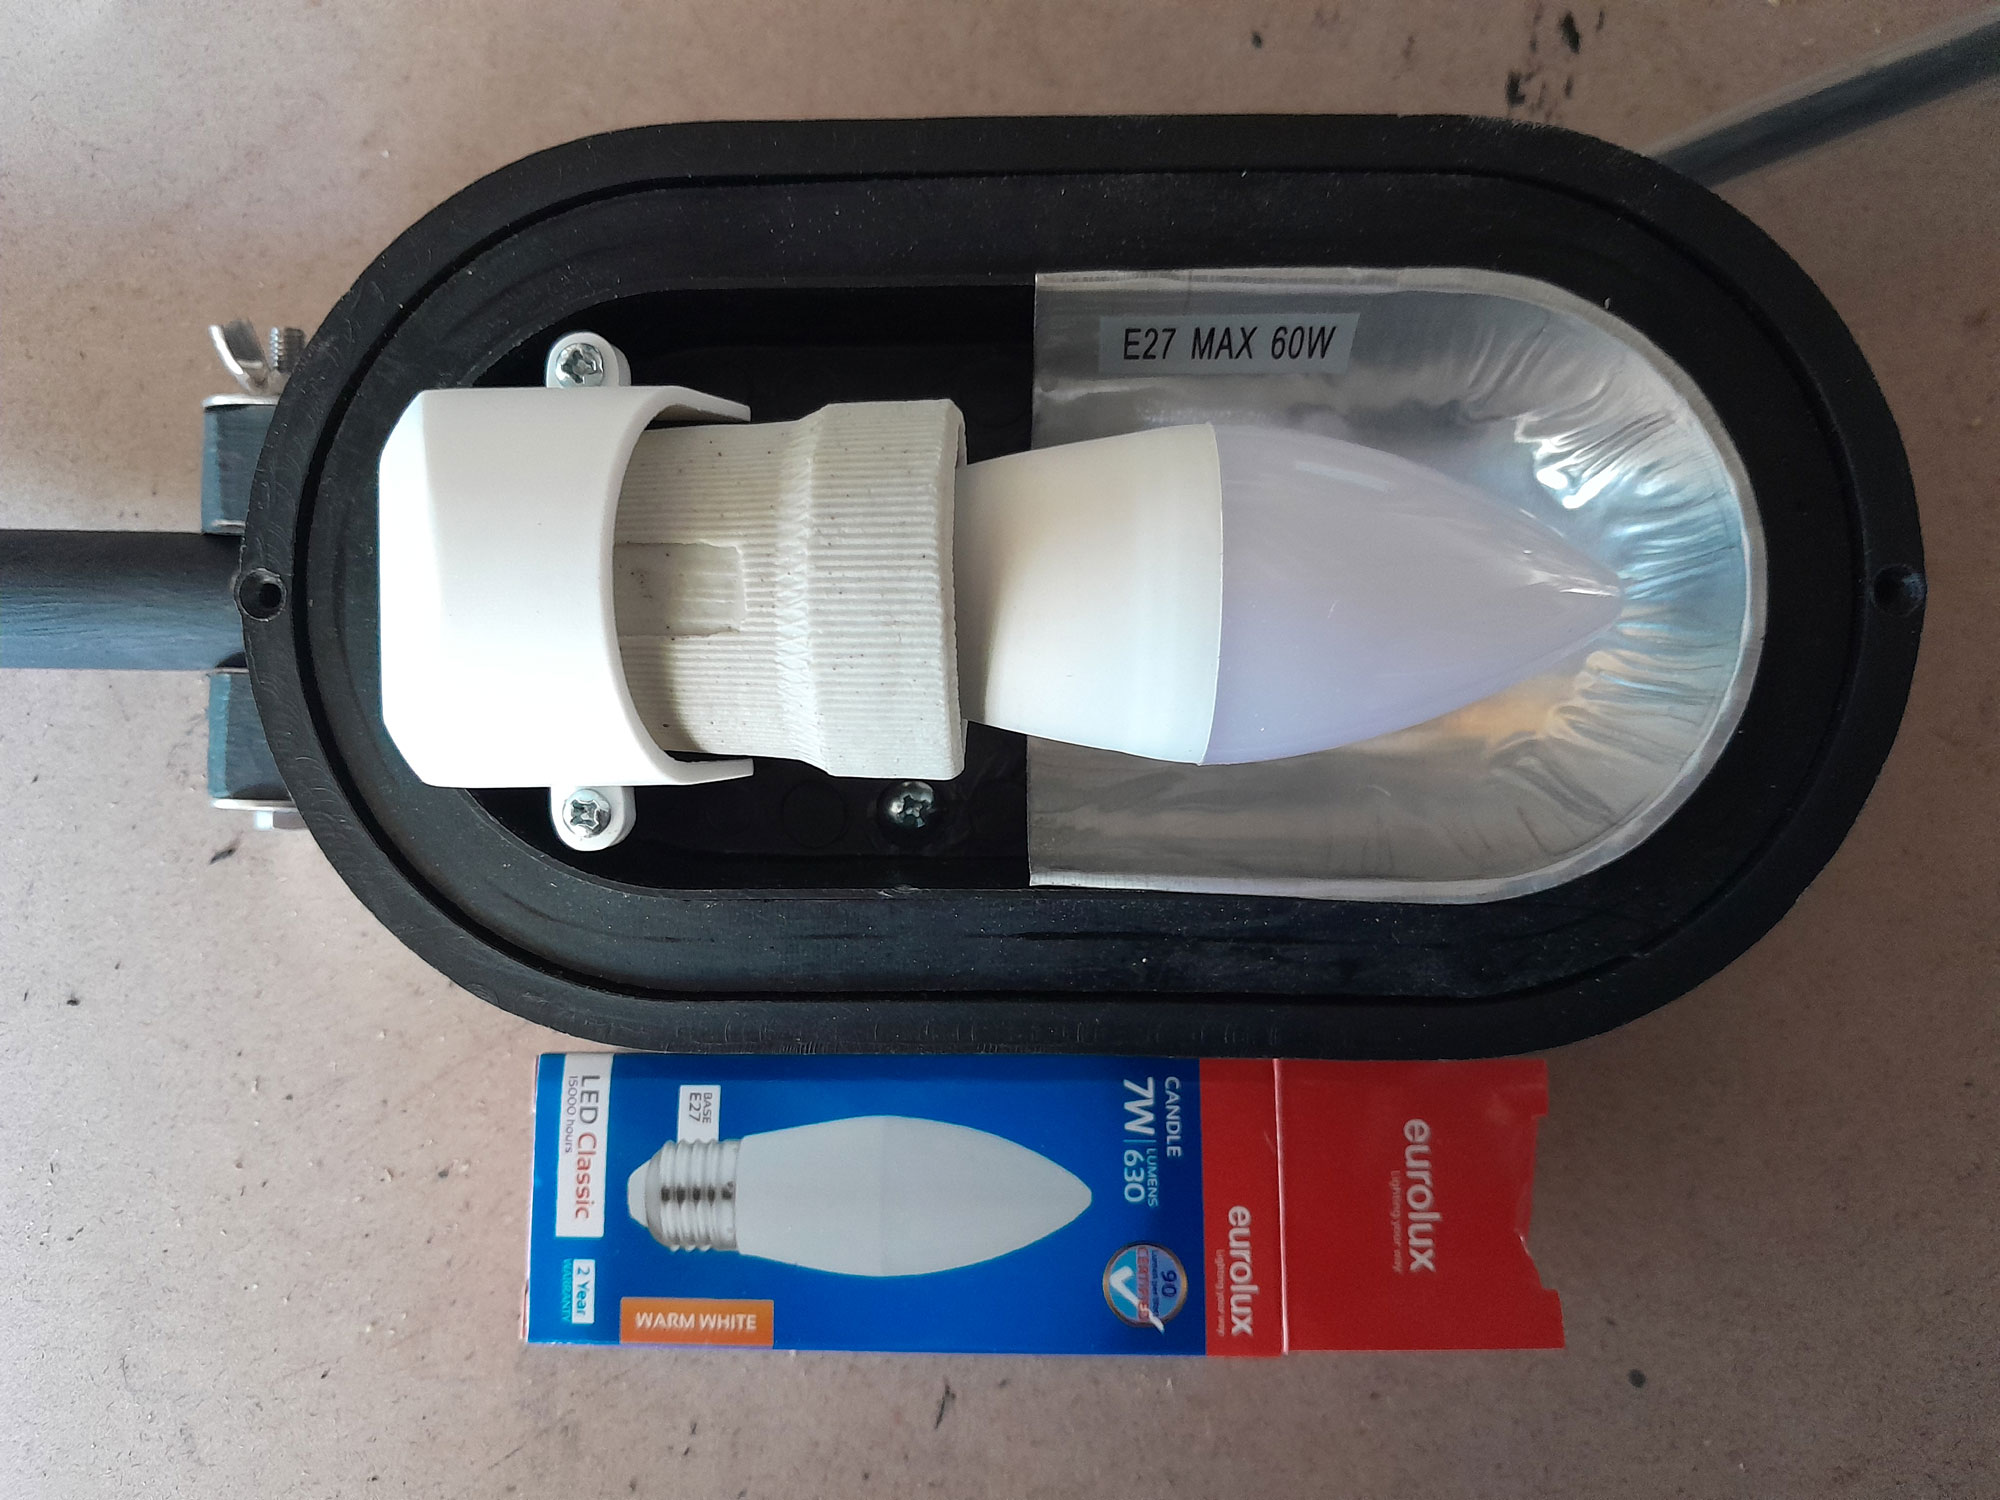
- One light bulb – I chose a 7W 630 lumen output LED bulb… very efficient, and it stays cool during operation*
SA pine:
- 22mmØ pine dowel – 1.8m length
- Offcut of 22x144mm
- Offcut of 22x22mm, about 500mm, cut to two lengths of 180mm
- Assorted offcuts from earlier projects. Some offcuts discarded or replaced along the way
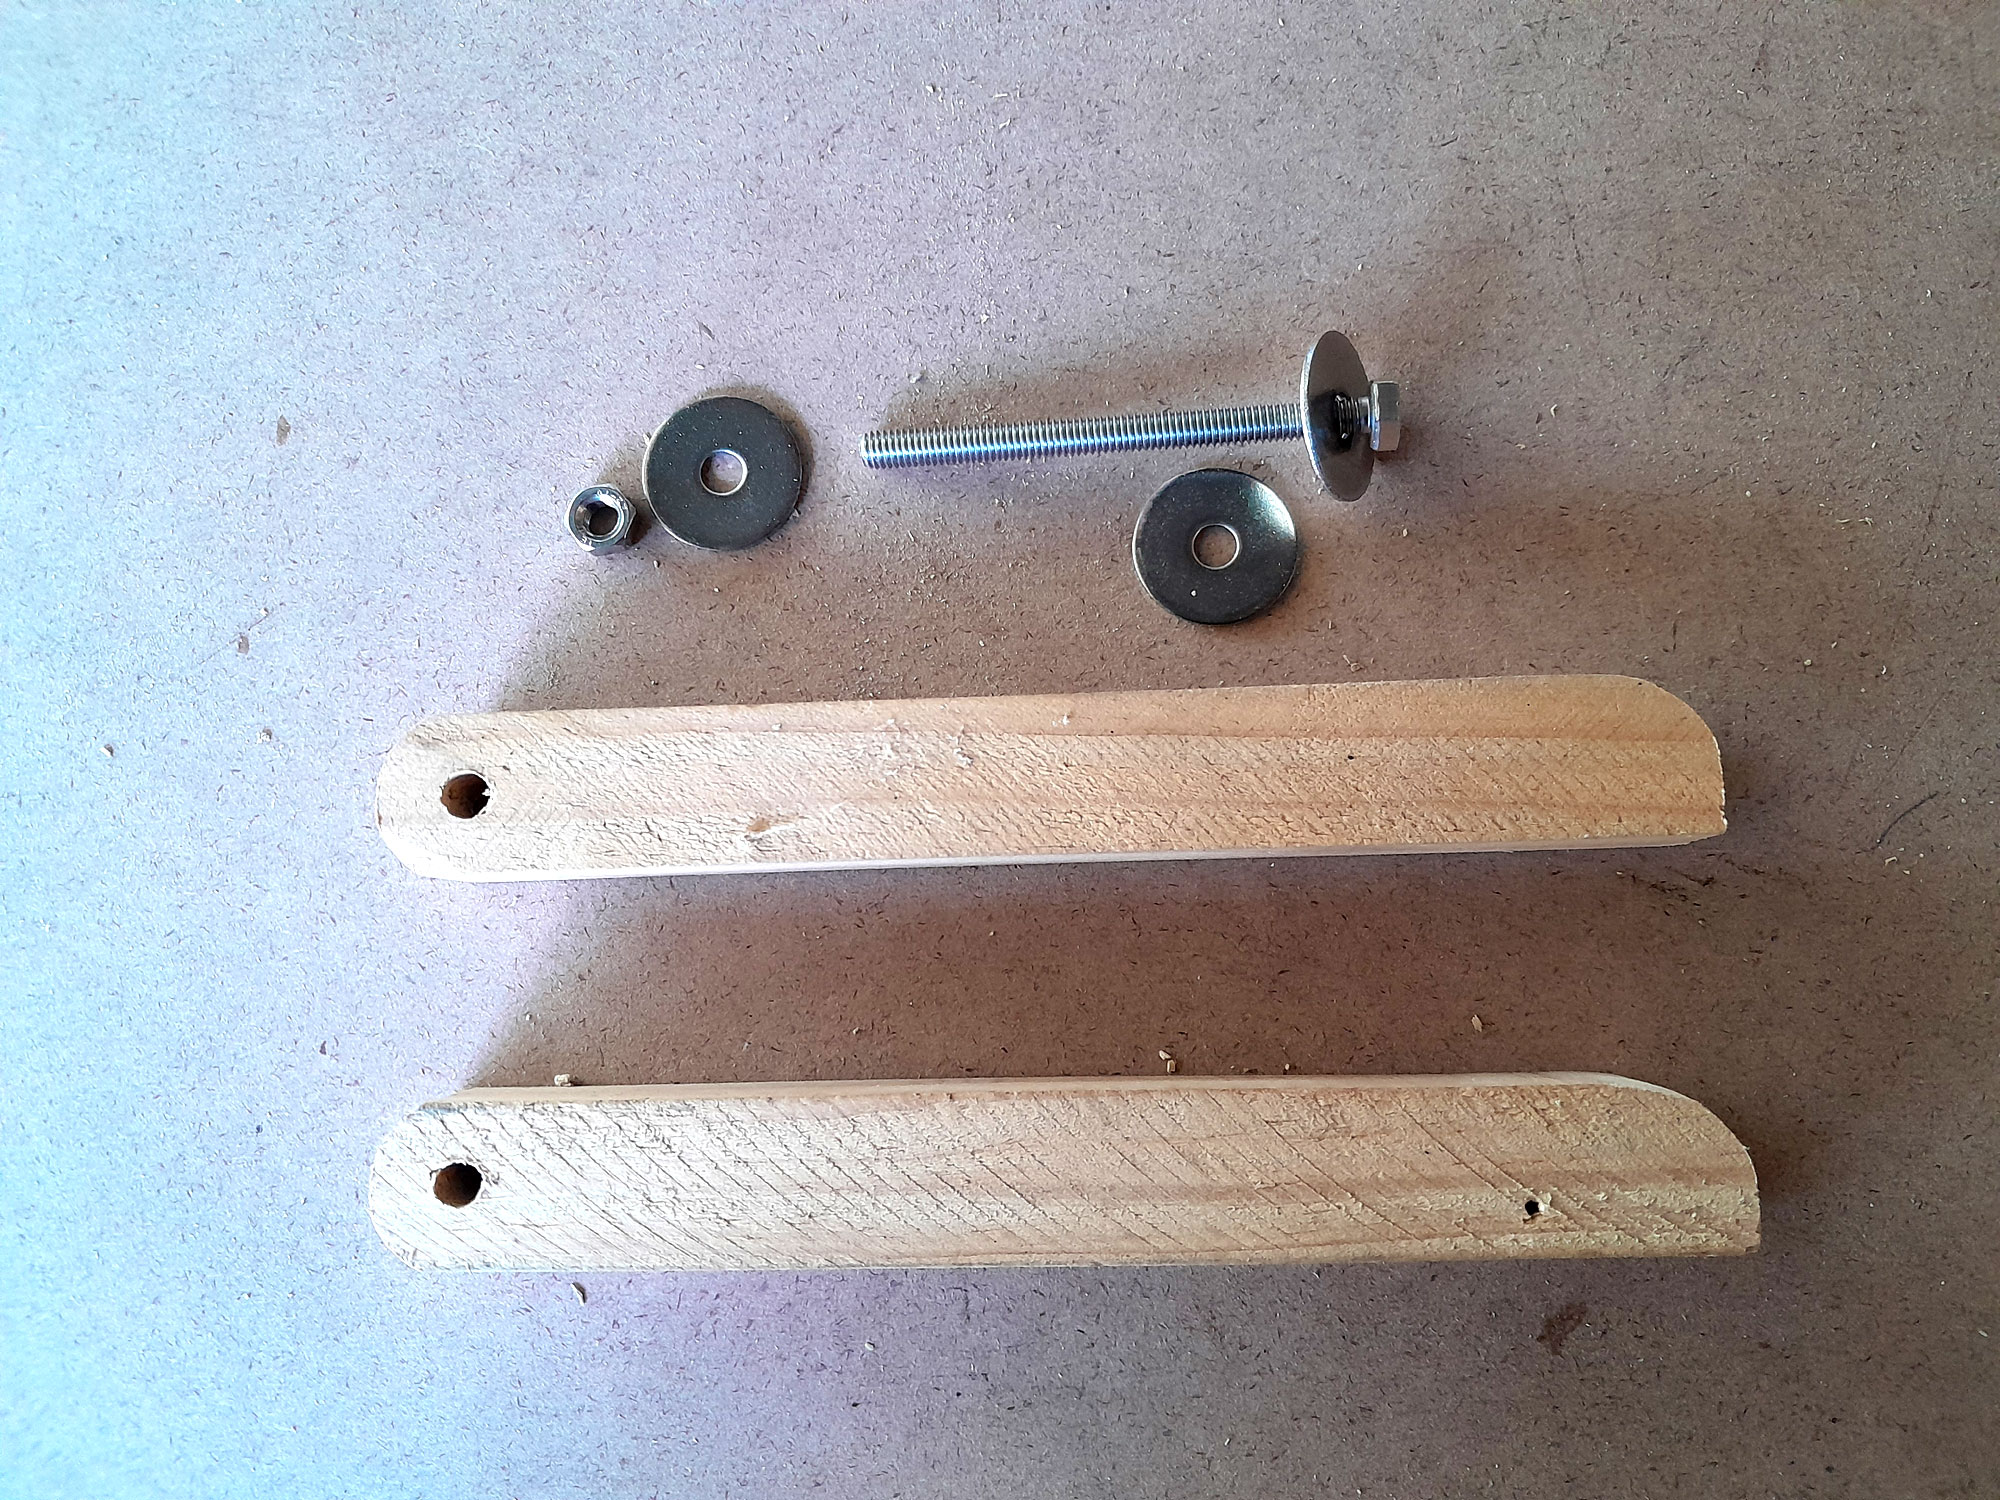
Stainless steel fasteners:
- 6mm set screws – 75mm long – one pack (one acts as the axle on which the light swings)
- 6mm fender washers – 25mm one pack
- 6mm flat washers – one pack
- 6mm wing nuts – one pack
- 6 gauge 40mm pan head screws – one pack
Miscellaneous:
- Galvanised hook
- Cable ties – black, 150mm – two
- 300mm length of 10mmØ plastic tube (optional)
Finish:
- Blackboard paint or matt black paint
*The incandescent bulbs we used to use very commonly are actually not that efficient. About 80% of the energy they produce is heat (as anyone who ever tried to touch one soon found out) and only about 15-20% is light production.
Captions:
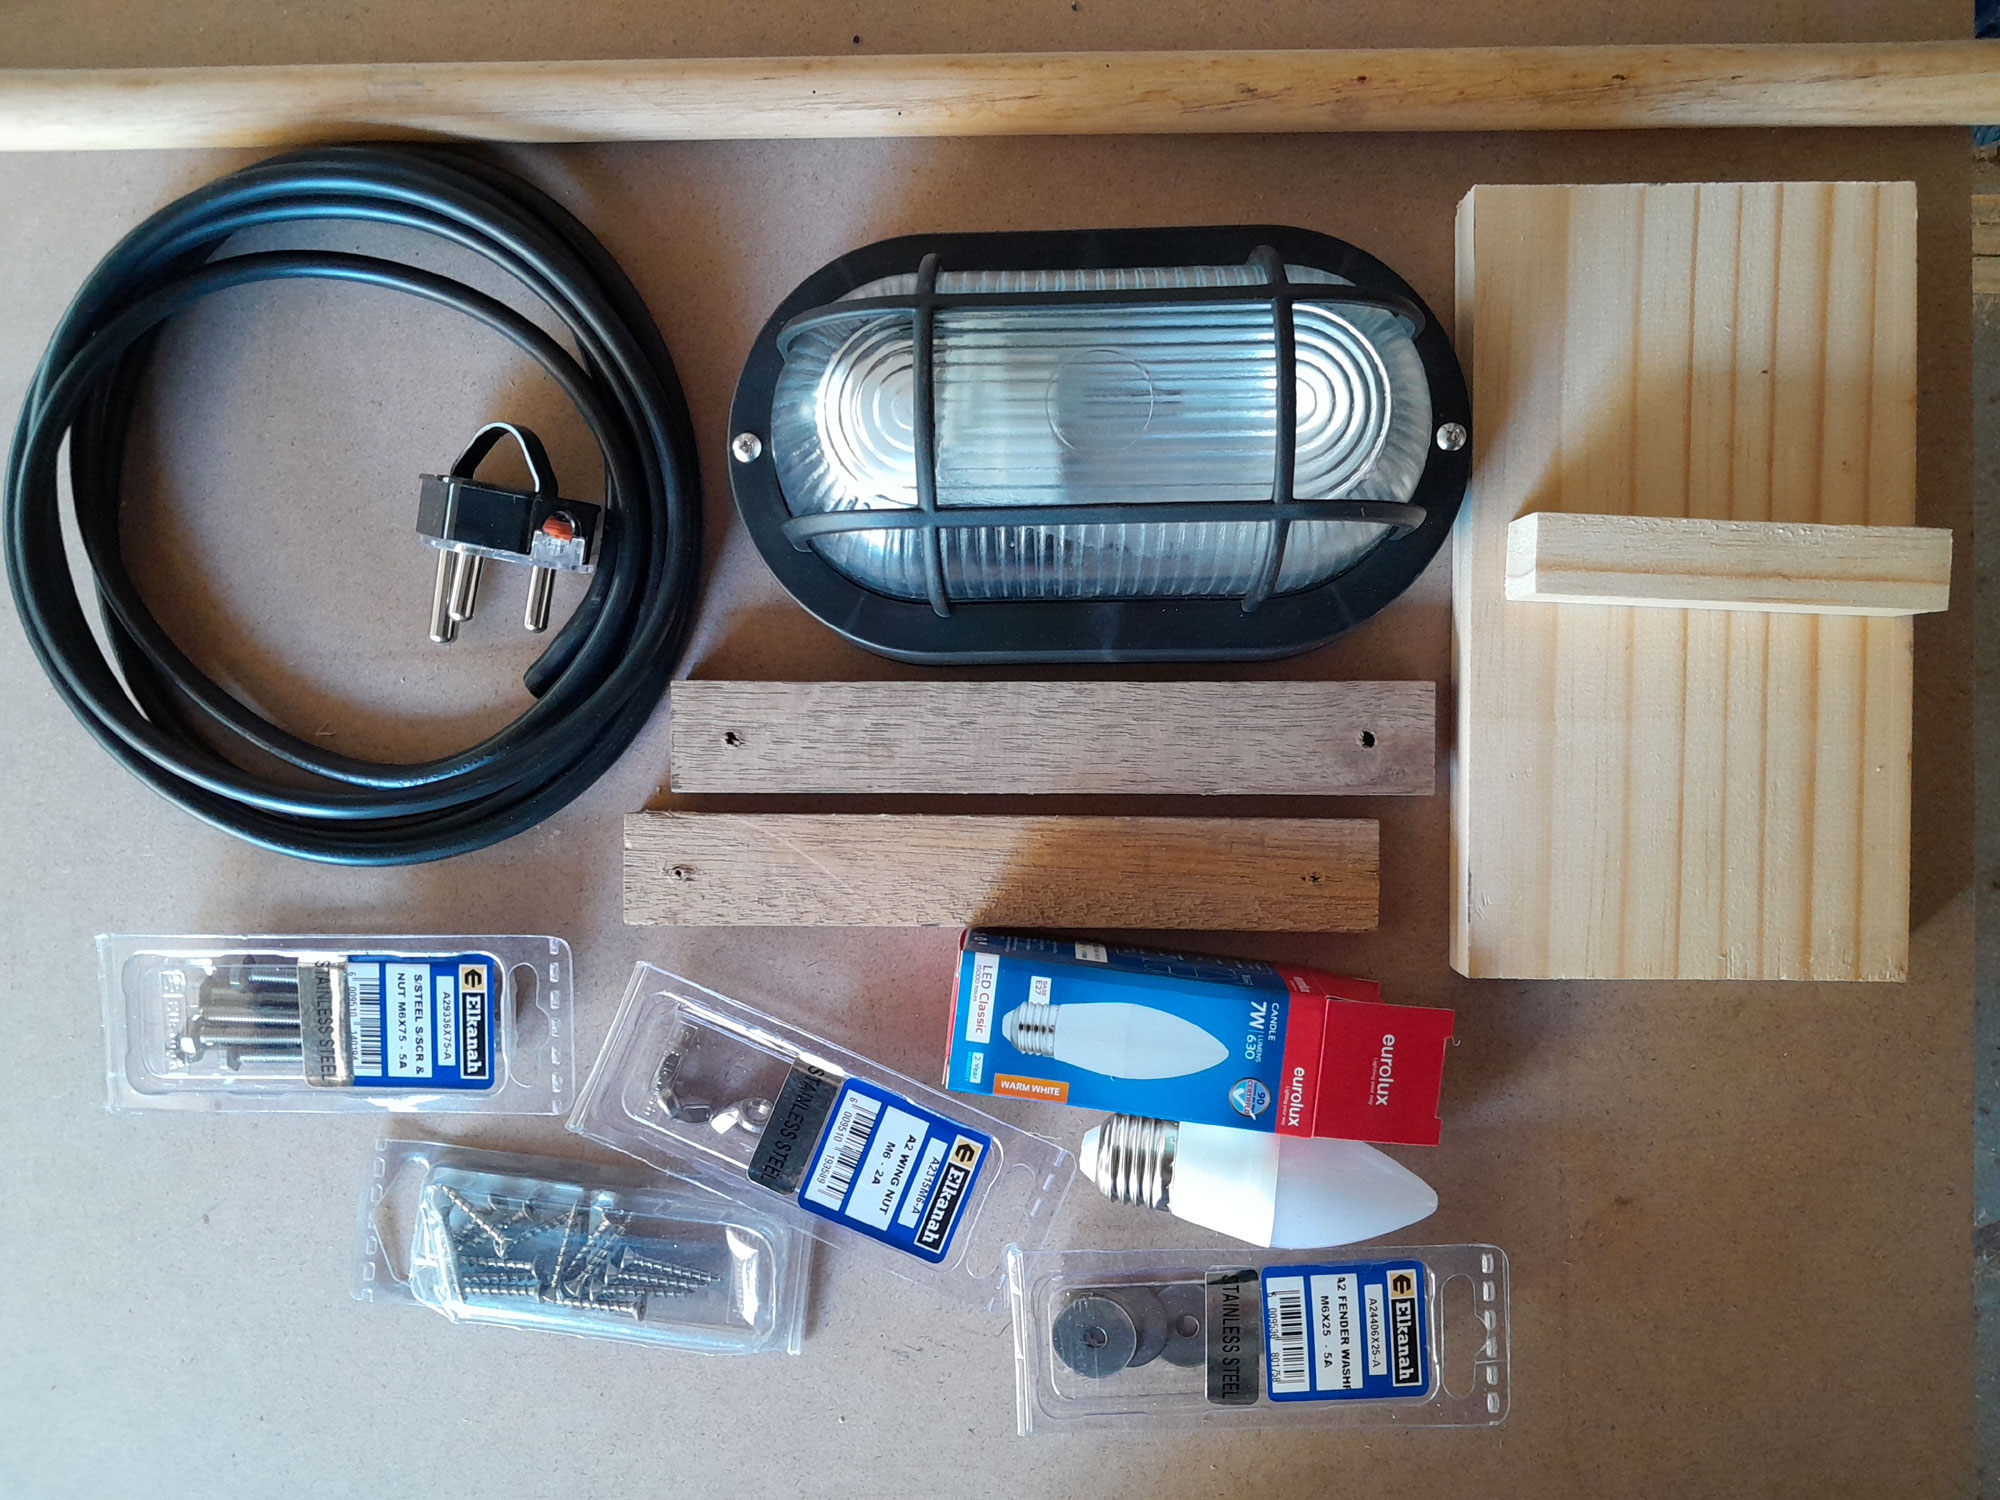
- The materials, many of them offcuts – like those two pieces of meranti in the middle – they ended up not being used.
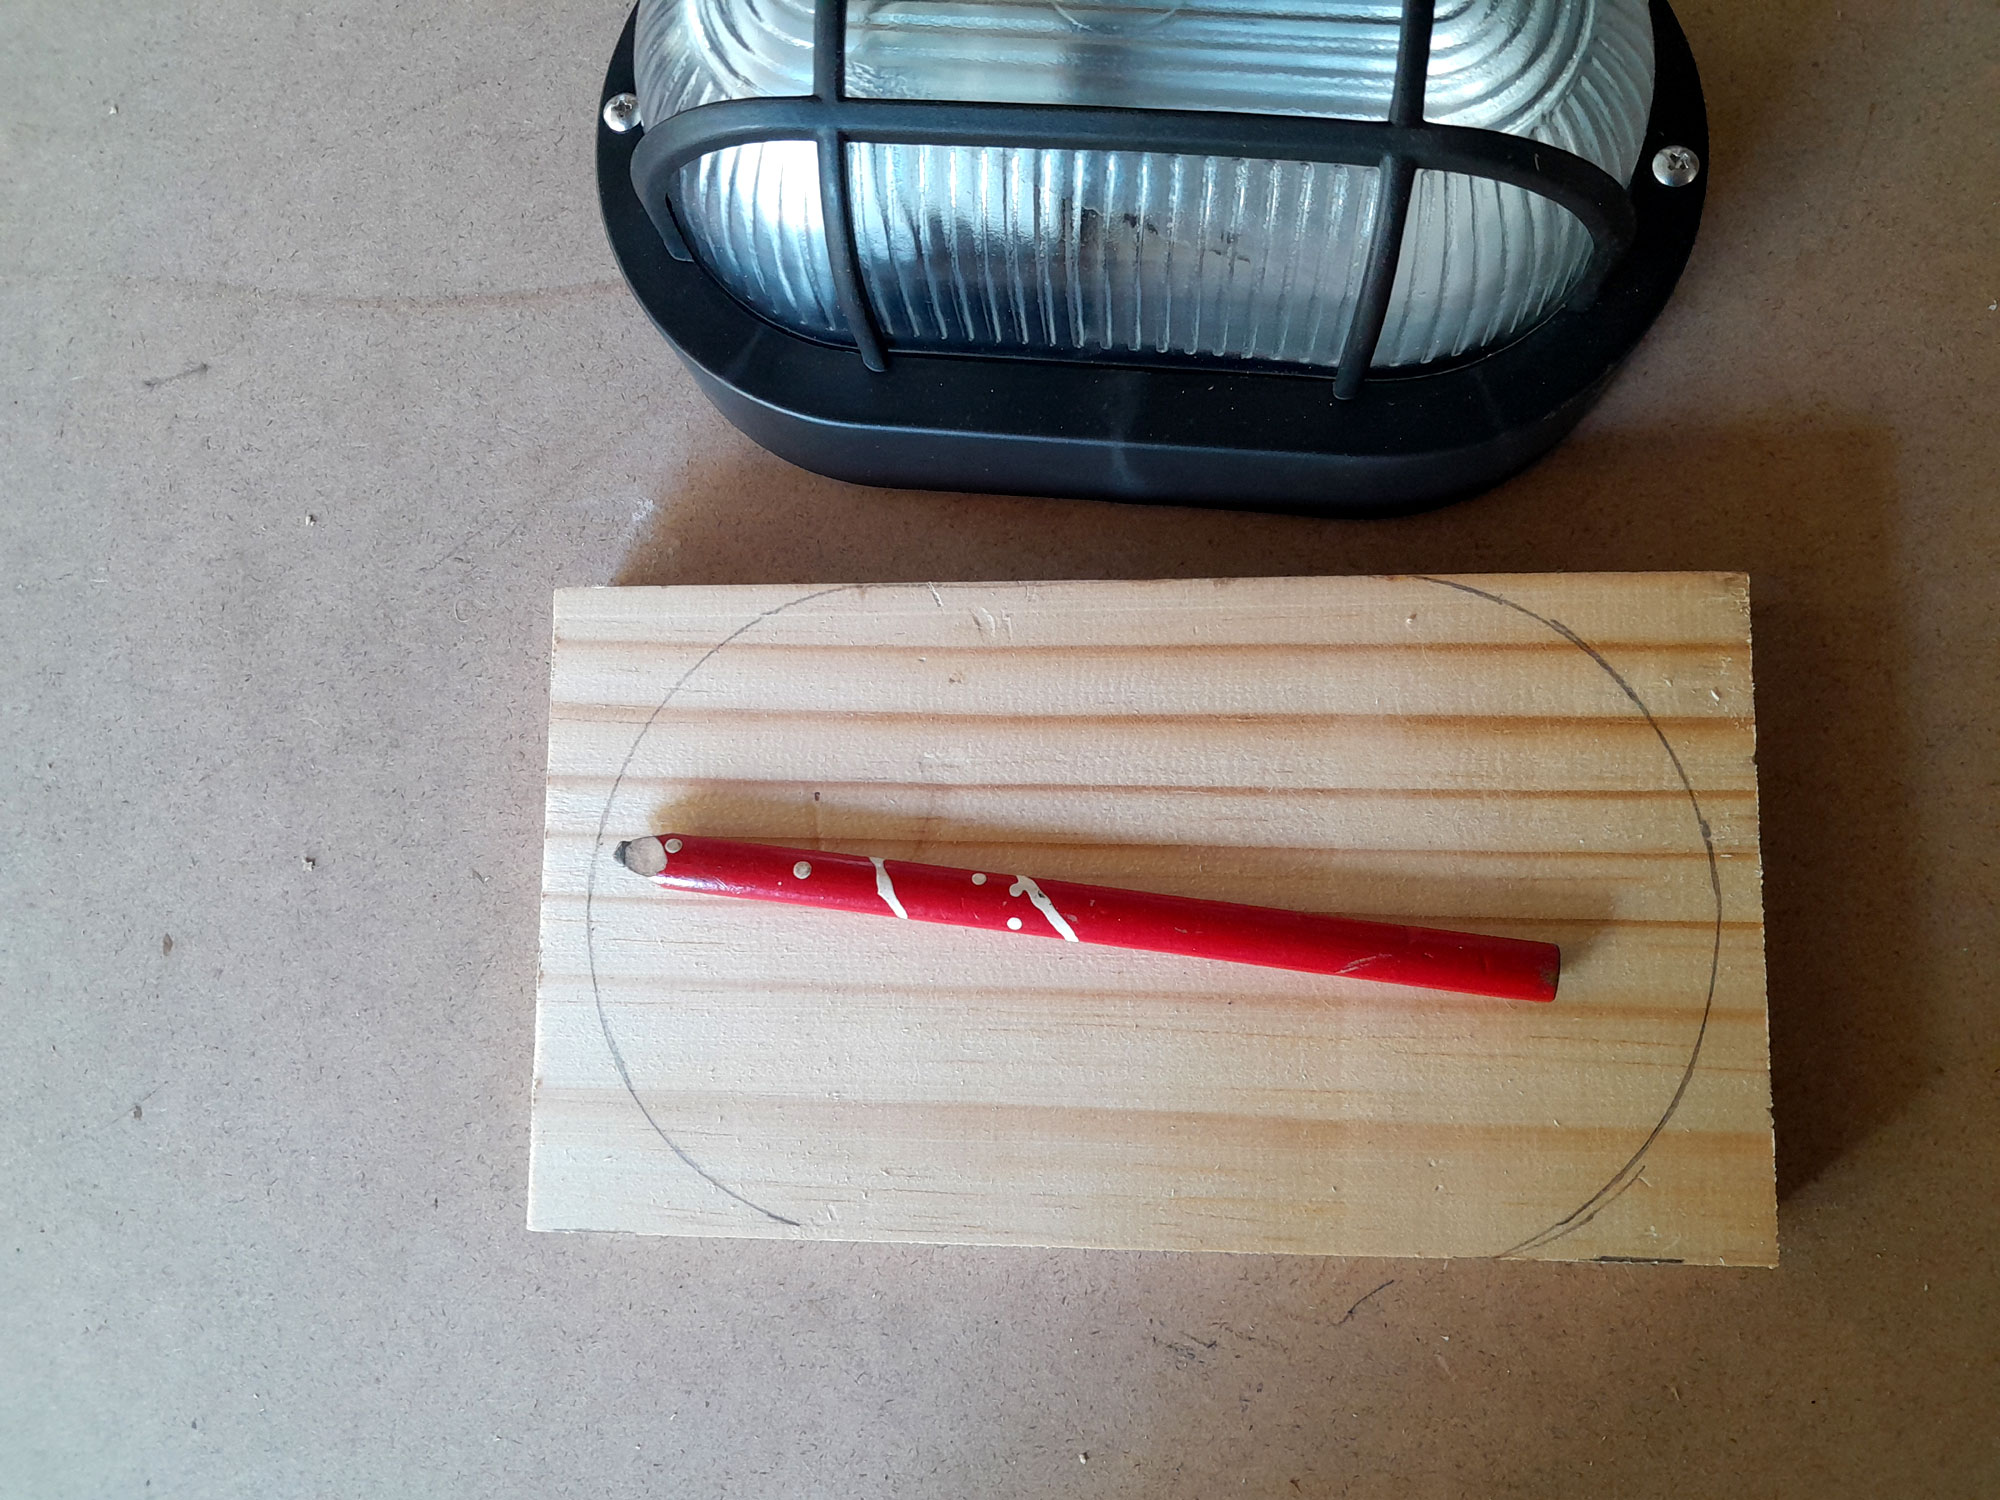
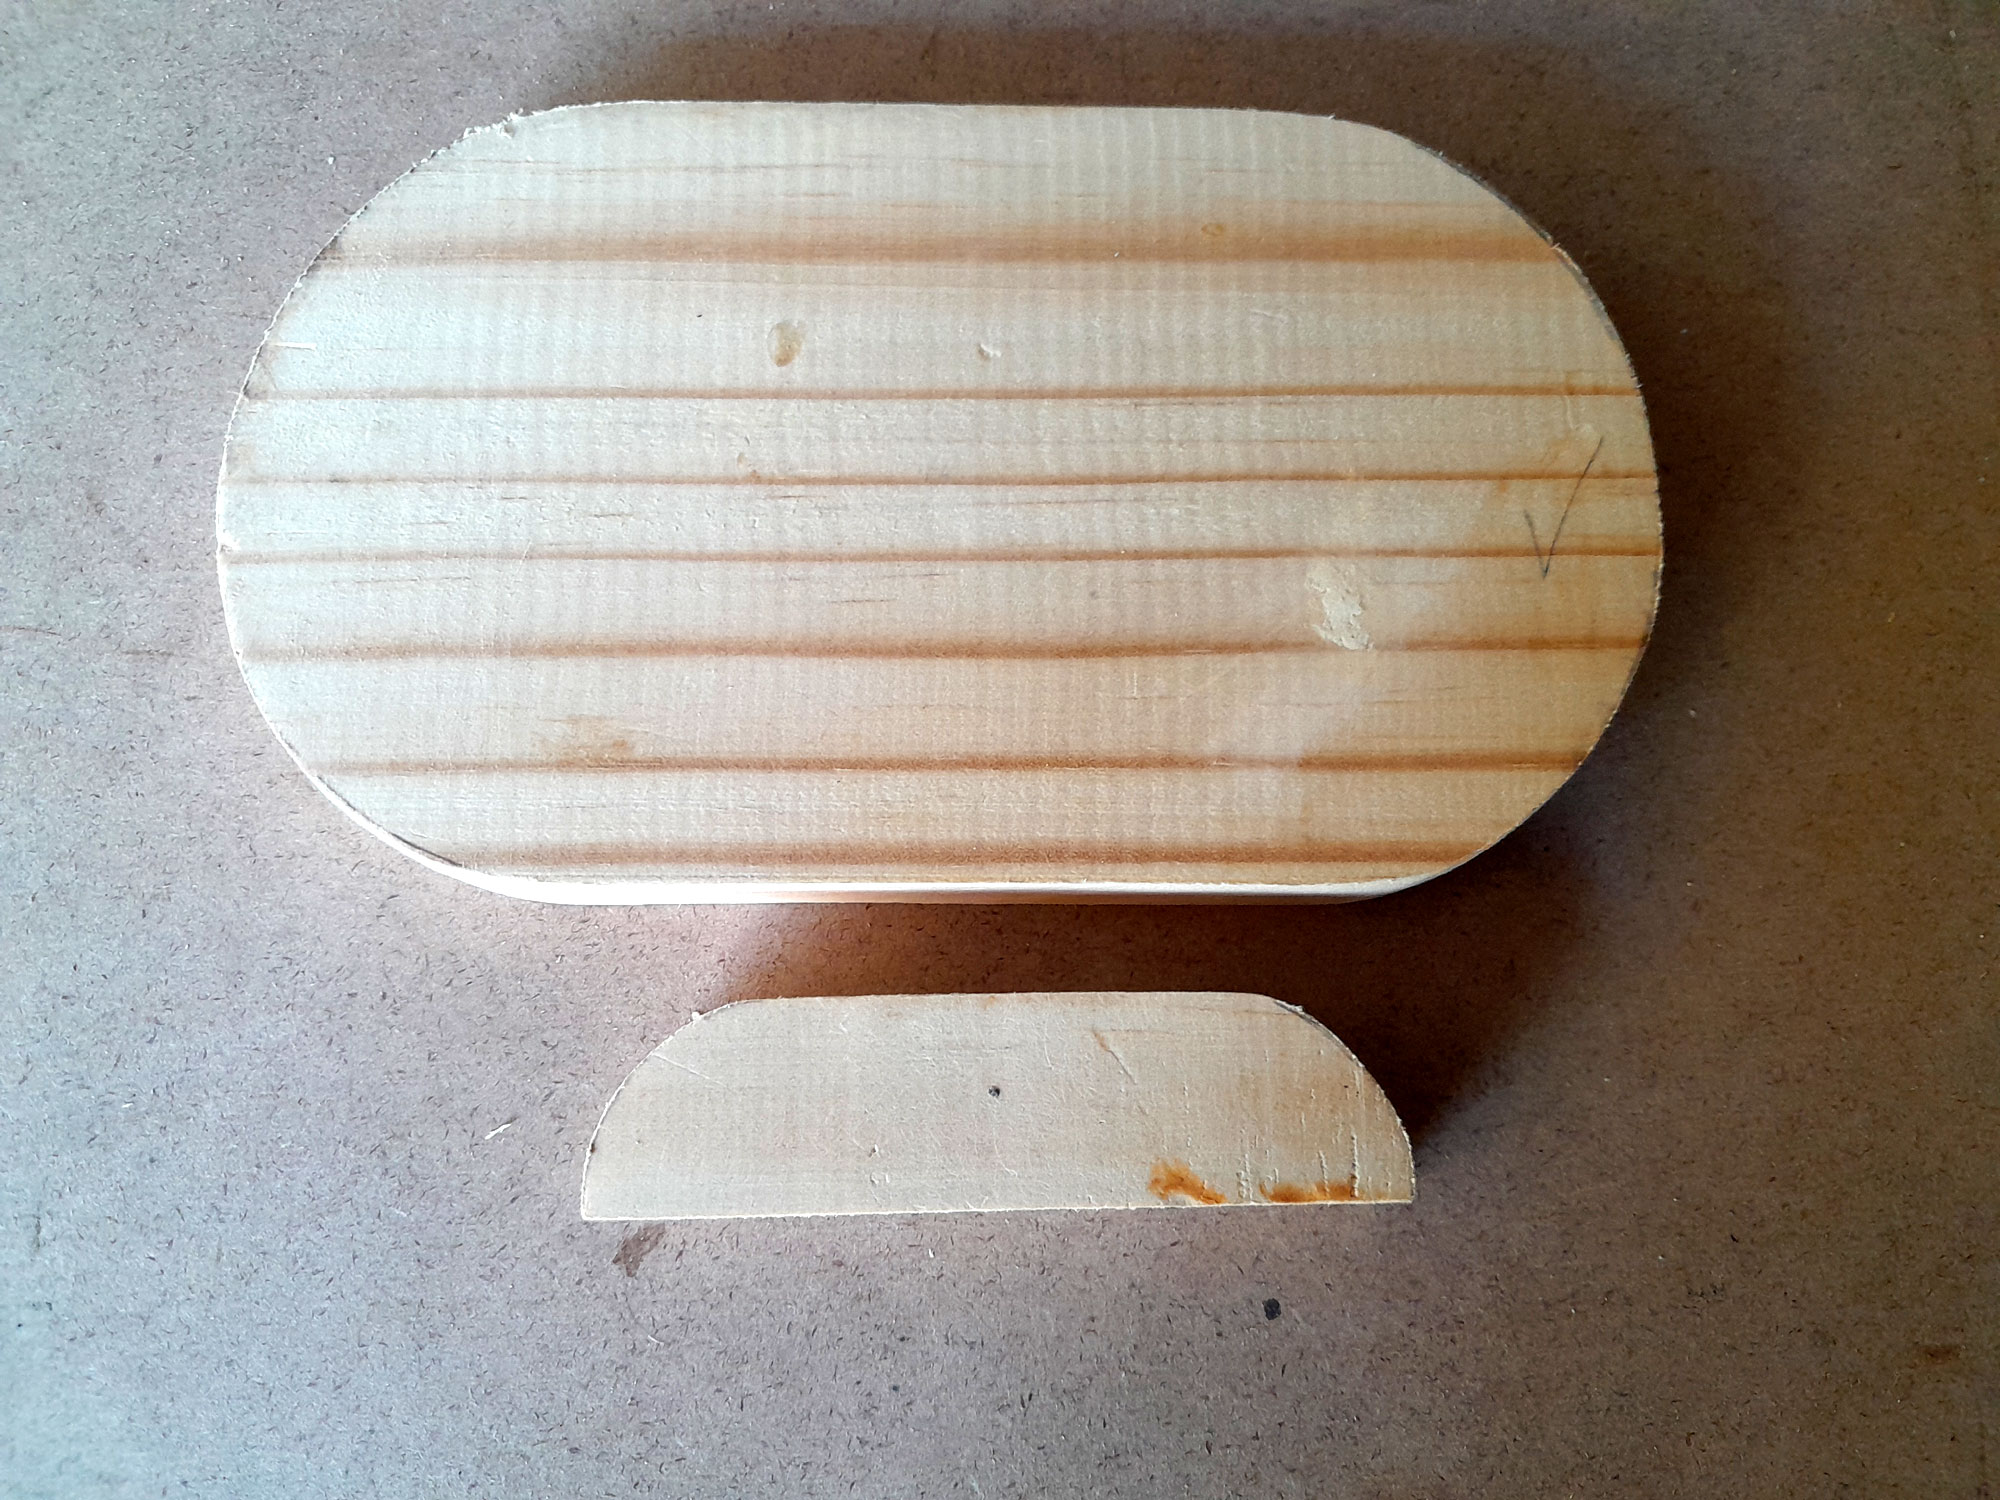
- First I used the fitting to trace out the shape of the swivelling base I was going to make for it.
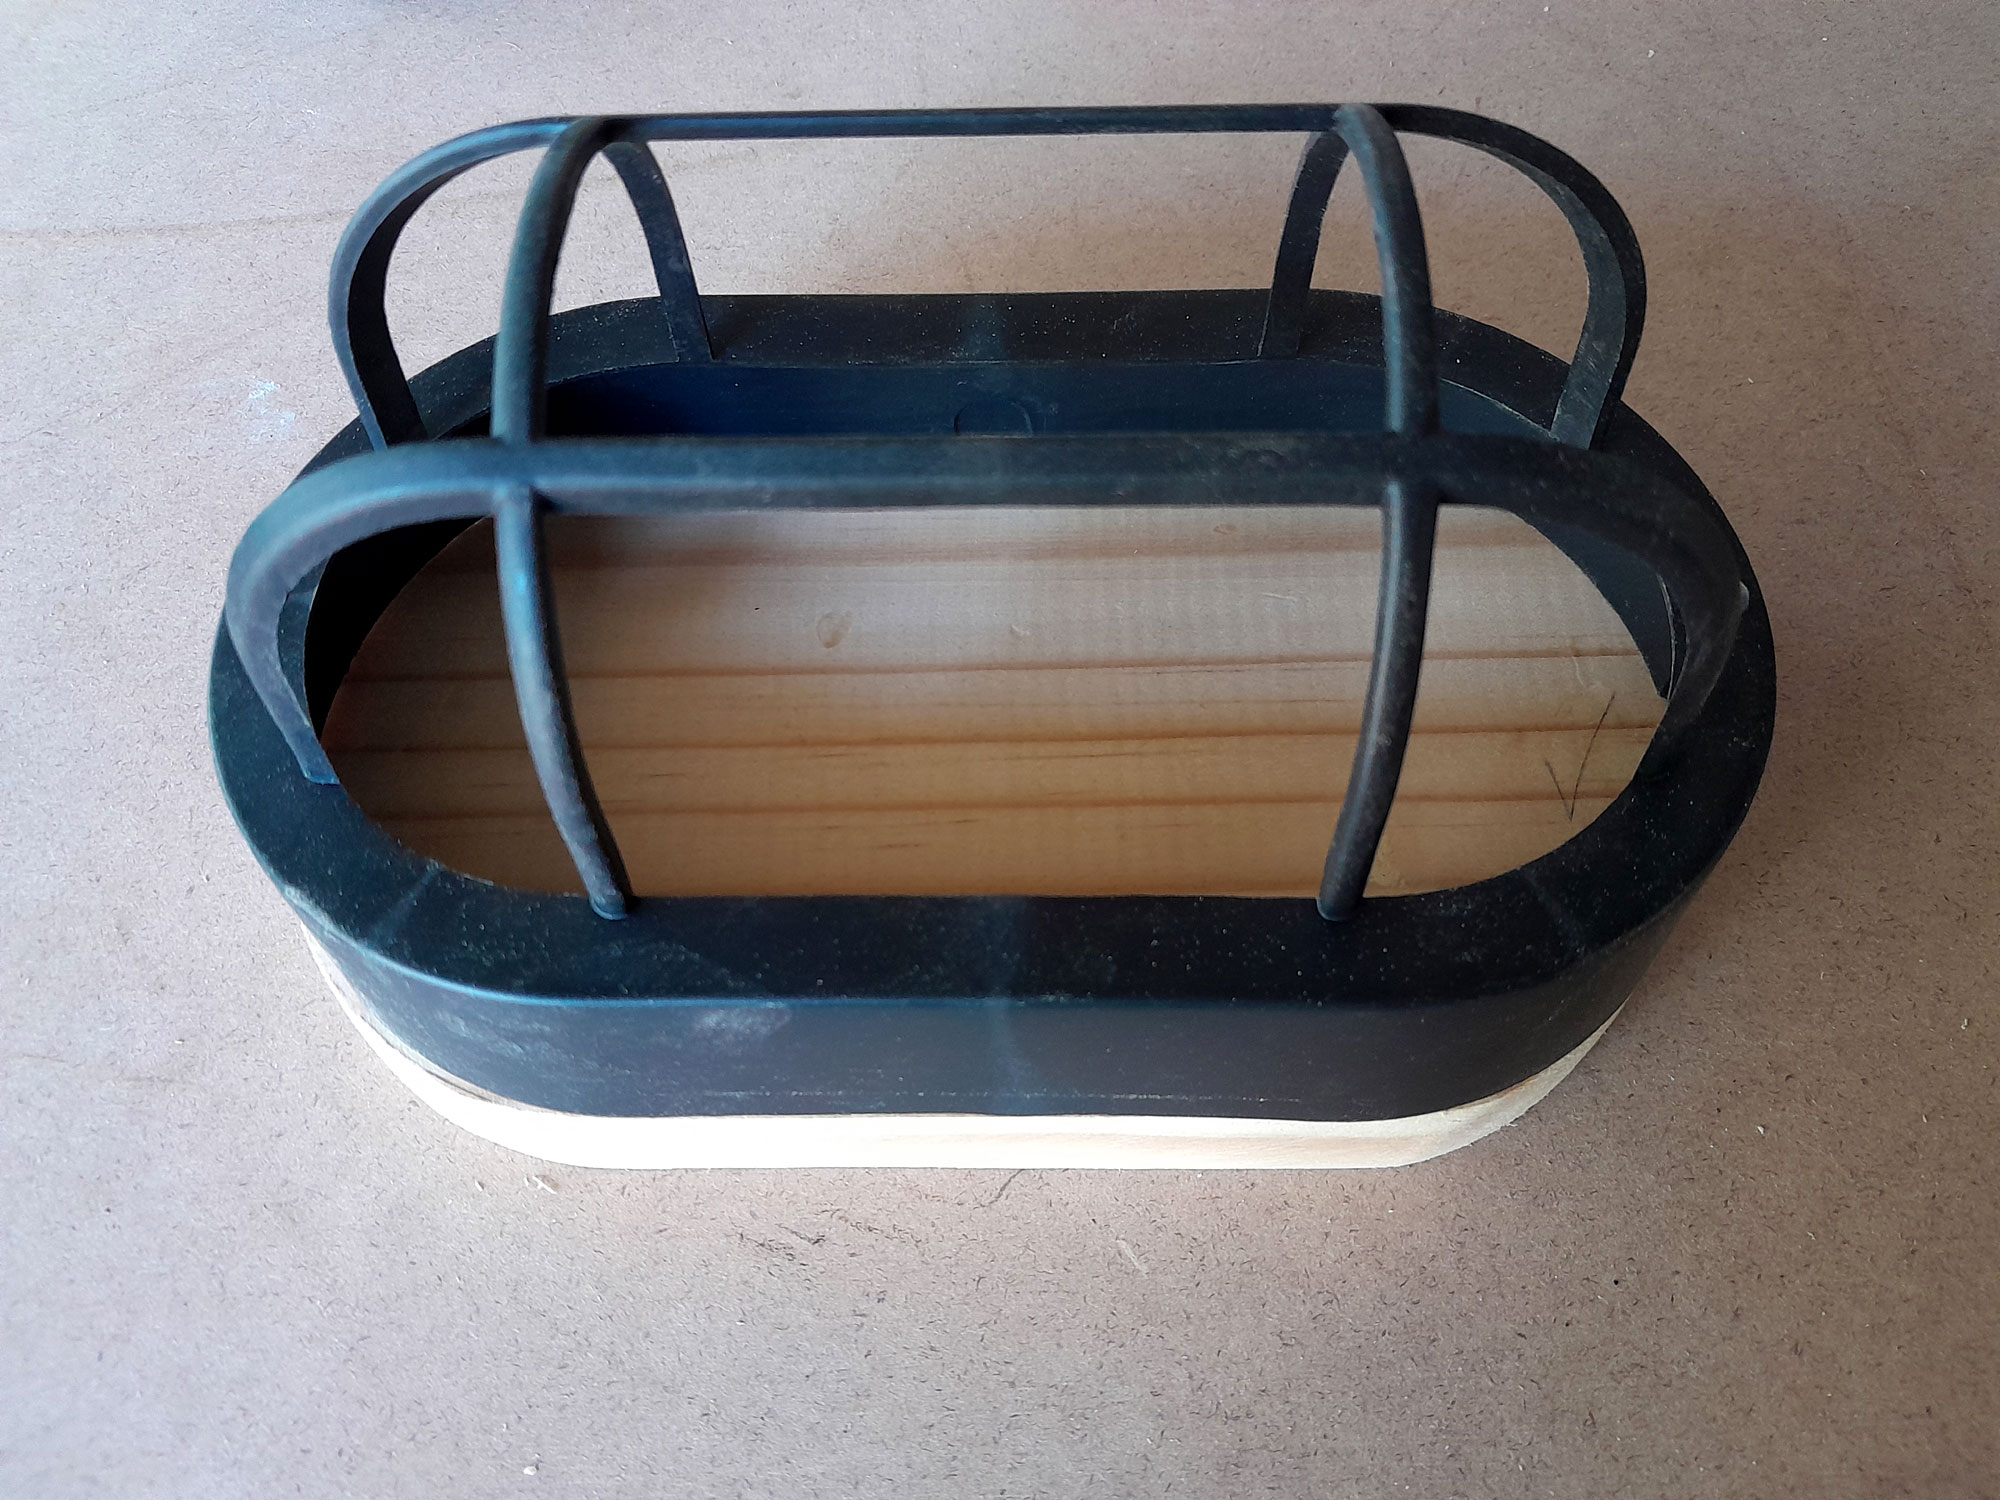
- Some cutting and sanding later, and I had a pretty close match.
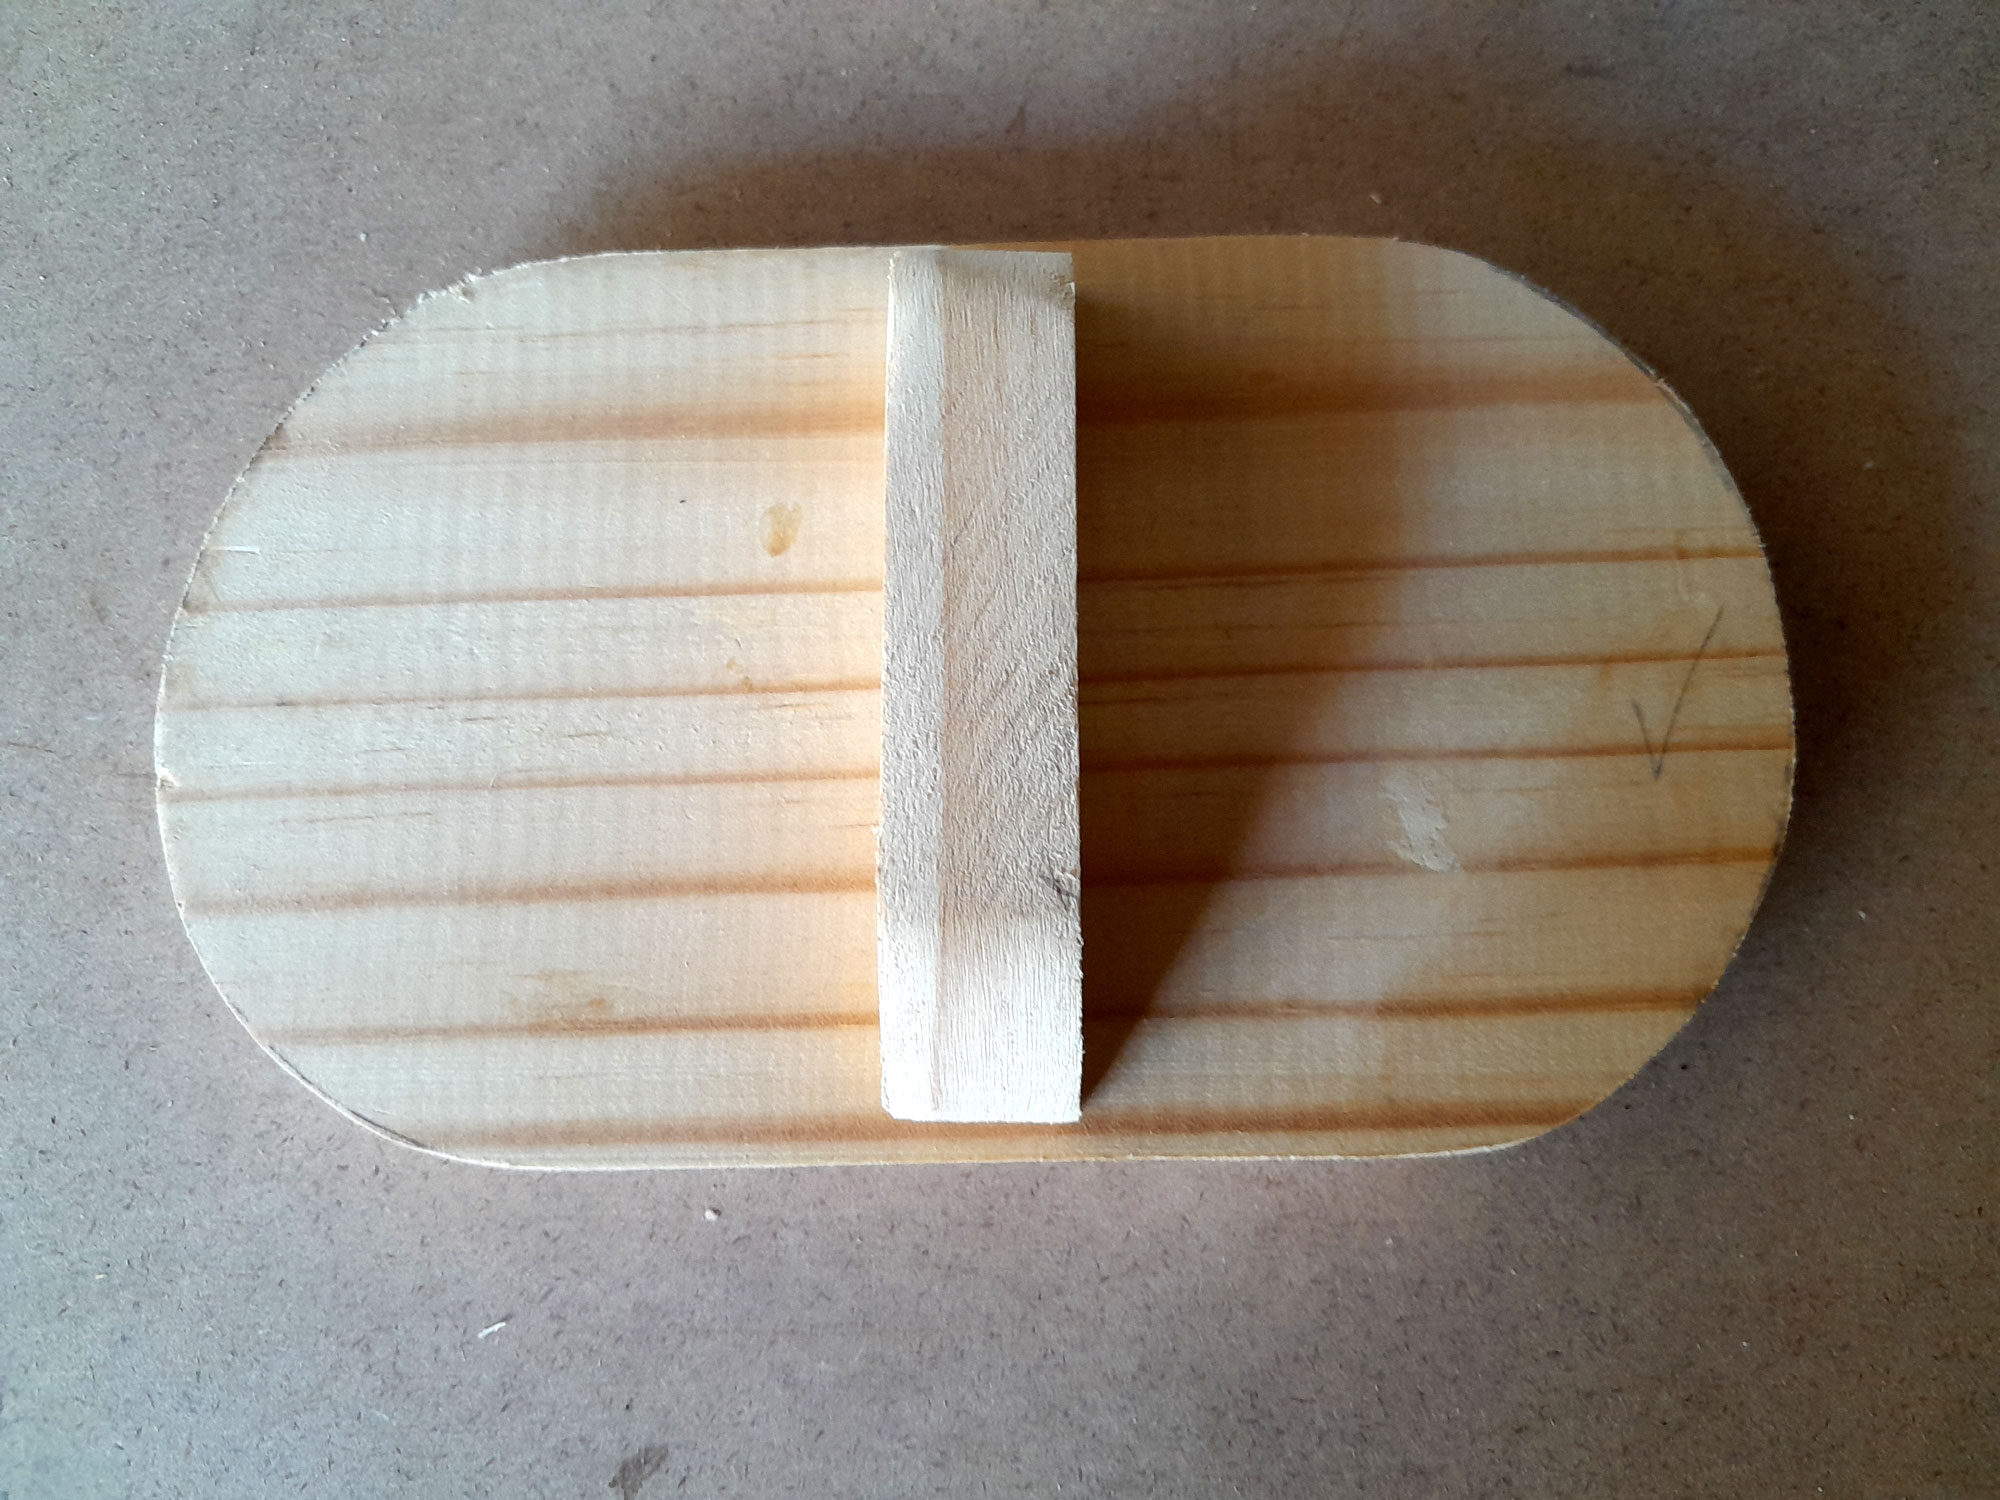
- As you can see again here; I was quite chuffed with the result.
- Here’s the base with the piece I was going to use as the attachment point for the arms going to the top of the dowel. I half-rounded off the ends for aesthetic reasons – I just think it looks better than cut square.
- At first I was going to put the light on its side, but then decided positioning it vertically would be better.
- First the arms…I cut two lengths of 22x22mm SA pine to I80mm, marked the centreline and drilled the 6mm set screw holes about 15mm in from one end.
- I used three 25mm fender washers, loosely bolted into position on the set screw, as my guides to round off the ends of the arms… if the washers are relatively free to rotate as the sanding disk spins, they won’t wear down, but will allow you to round off the ends very neatly and symmetrically.
- I half-rounded off the other ends, and there are the two arms, ready for attachment to the base.
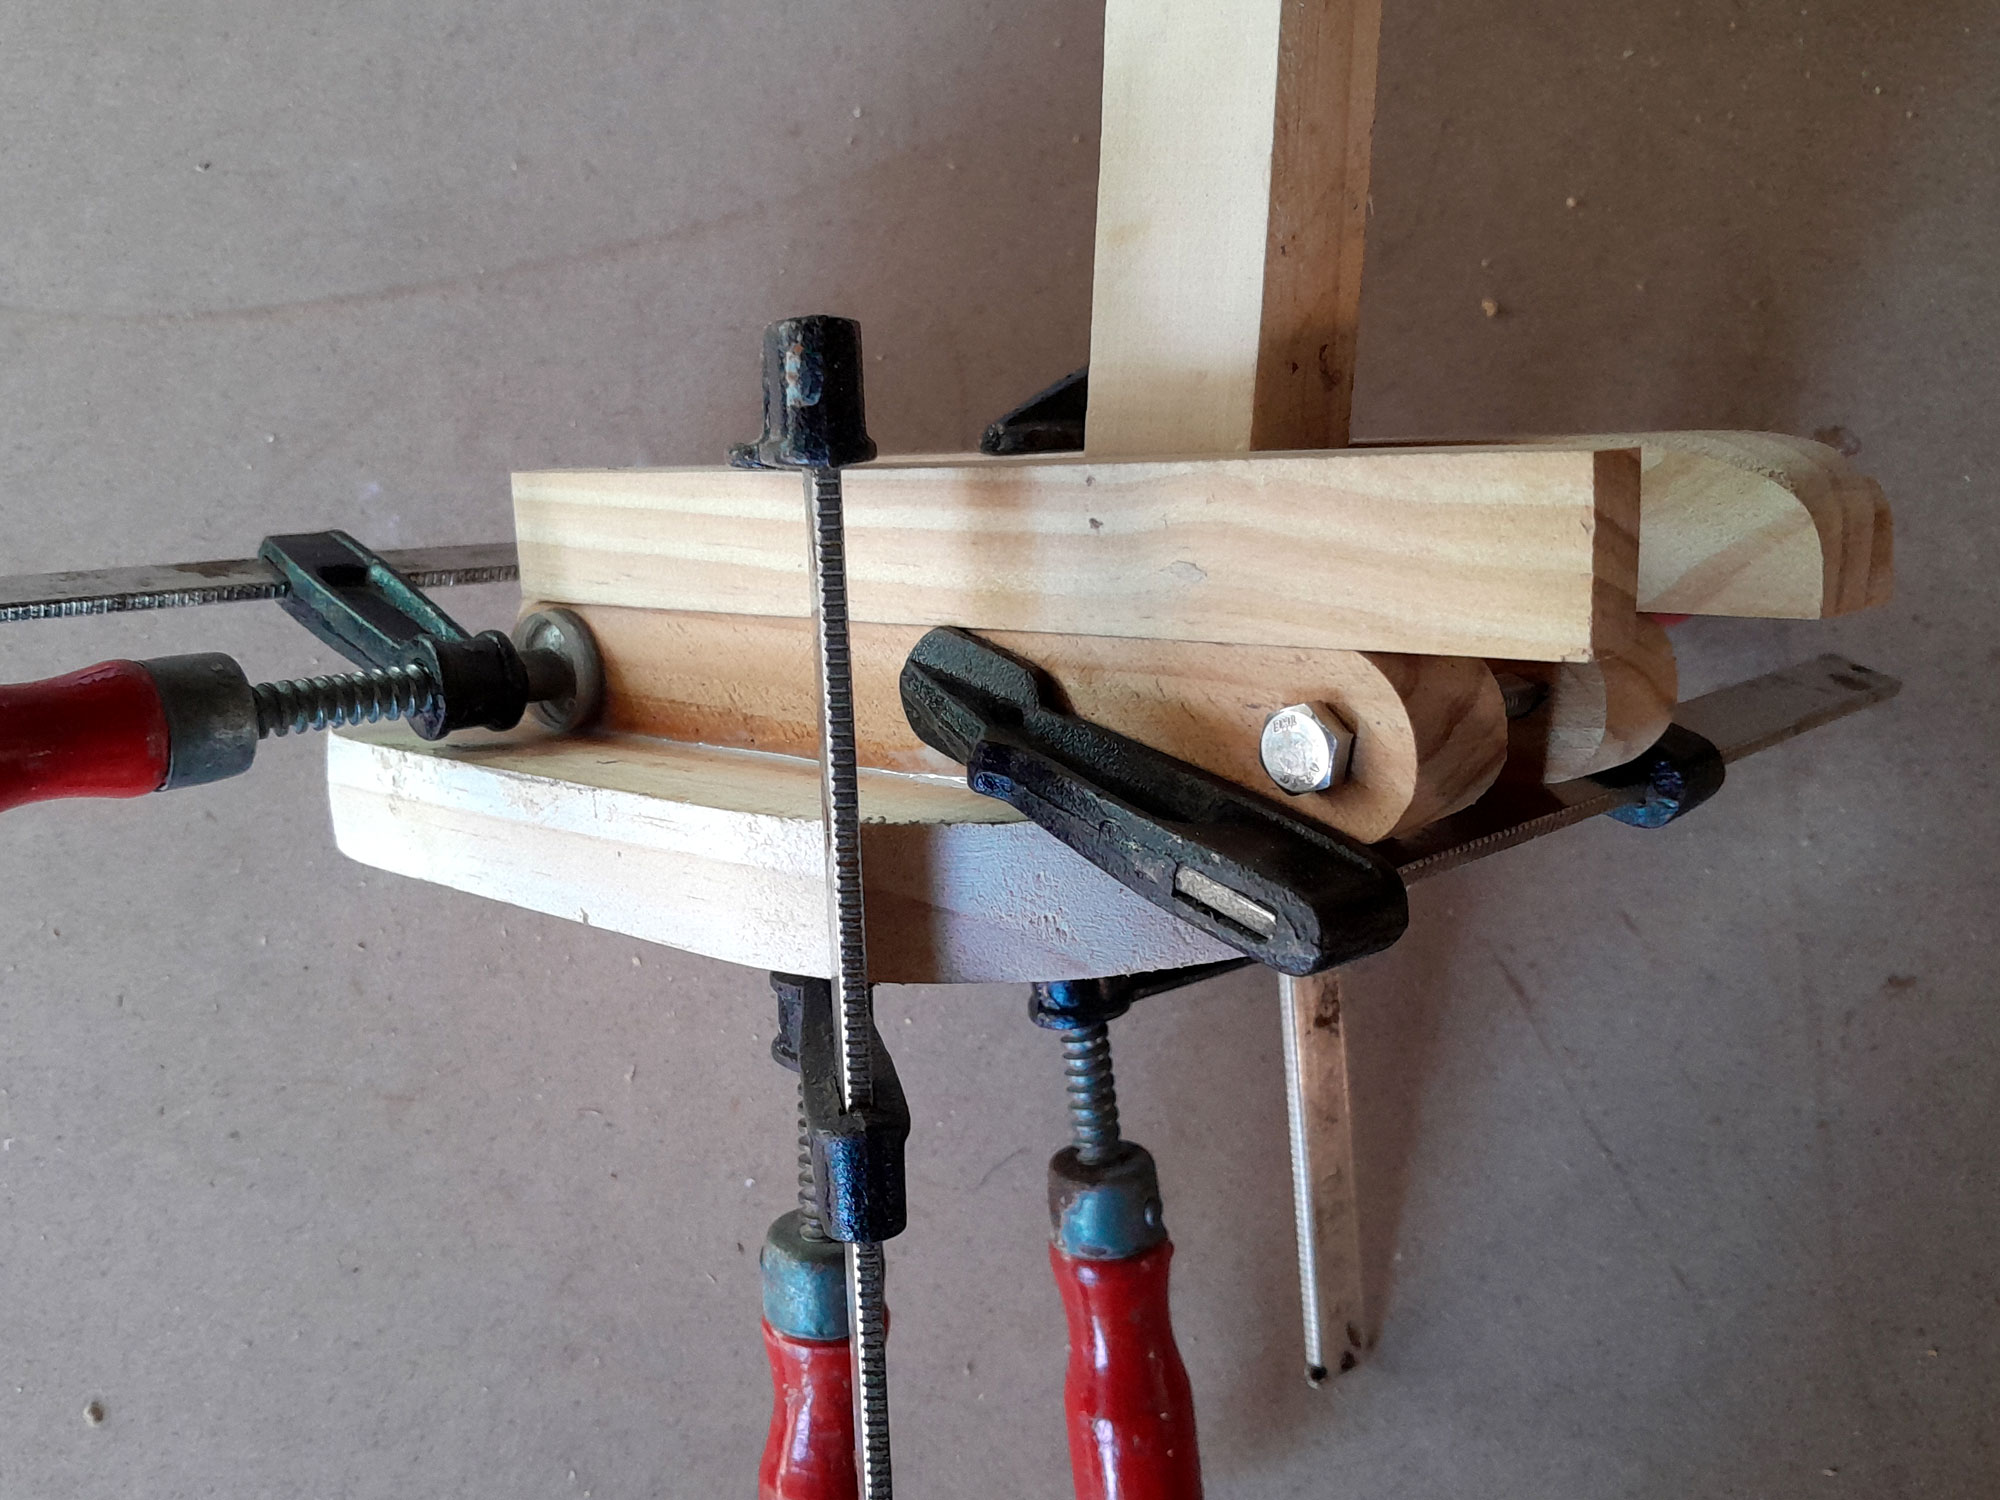
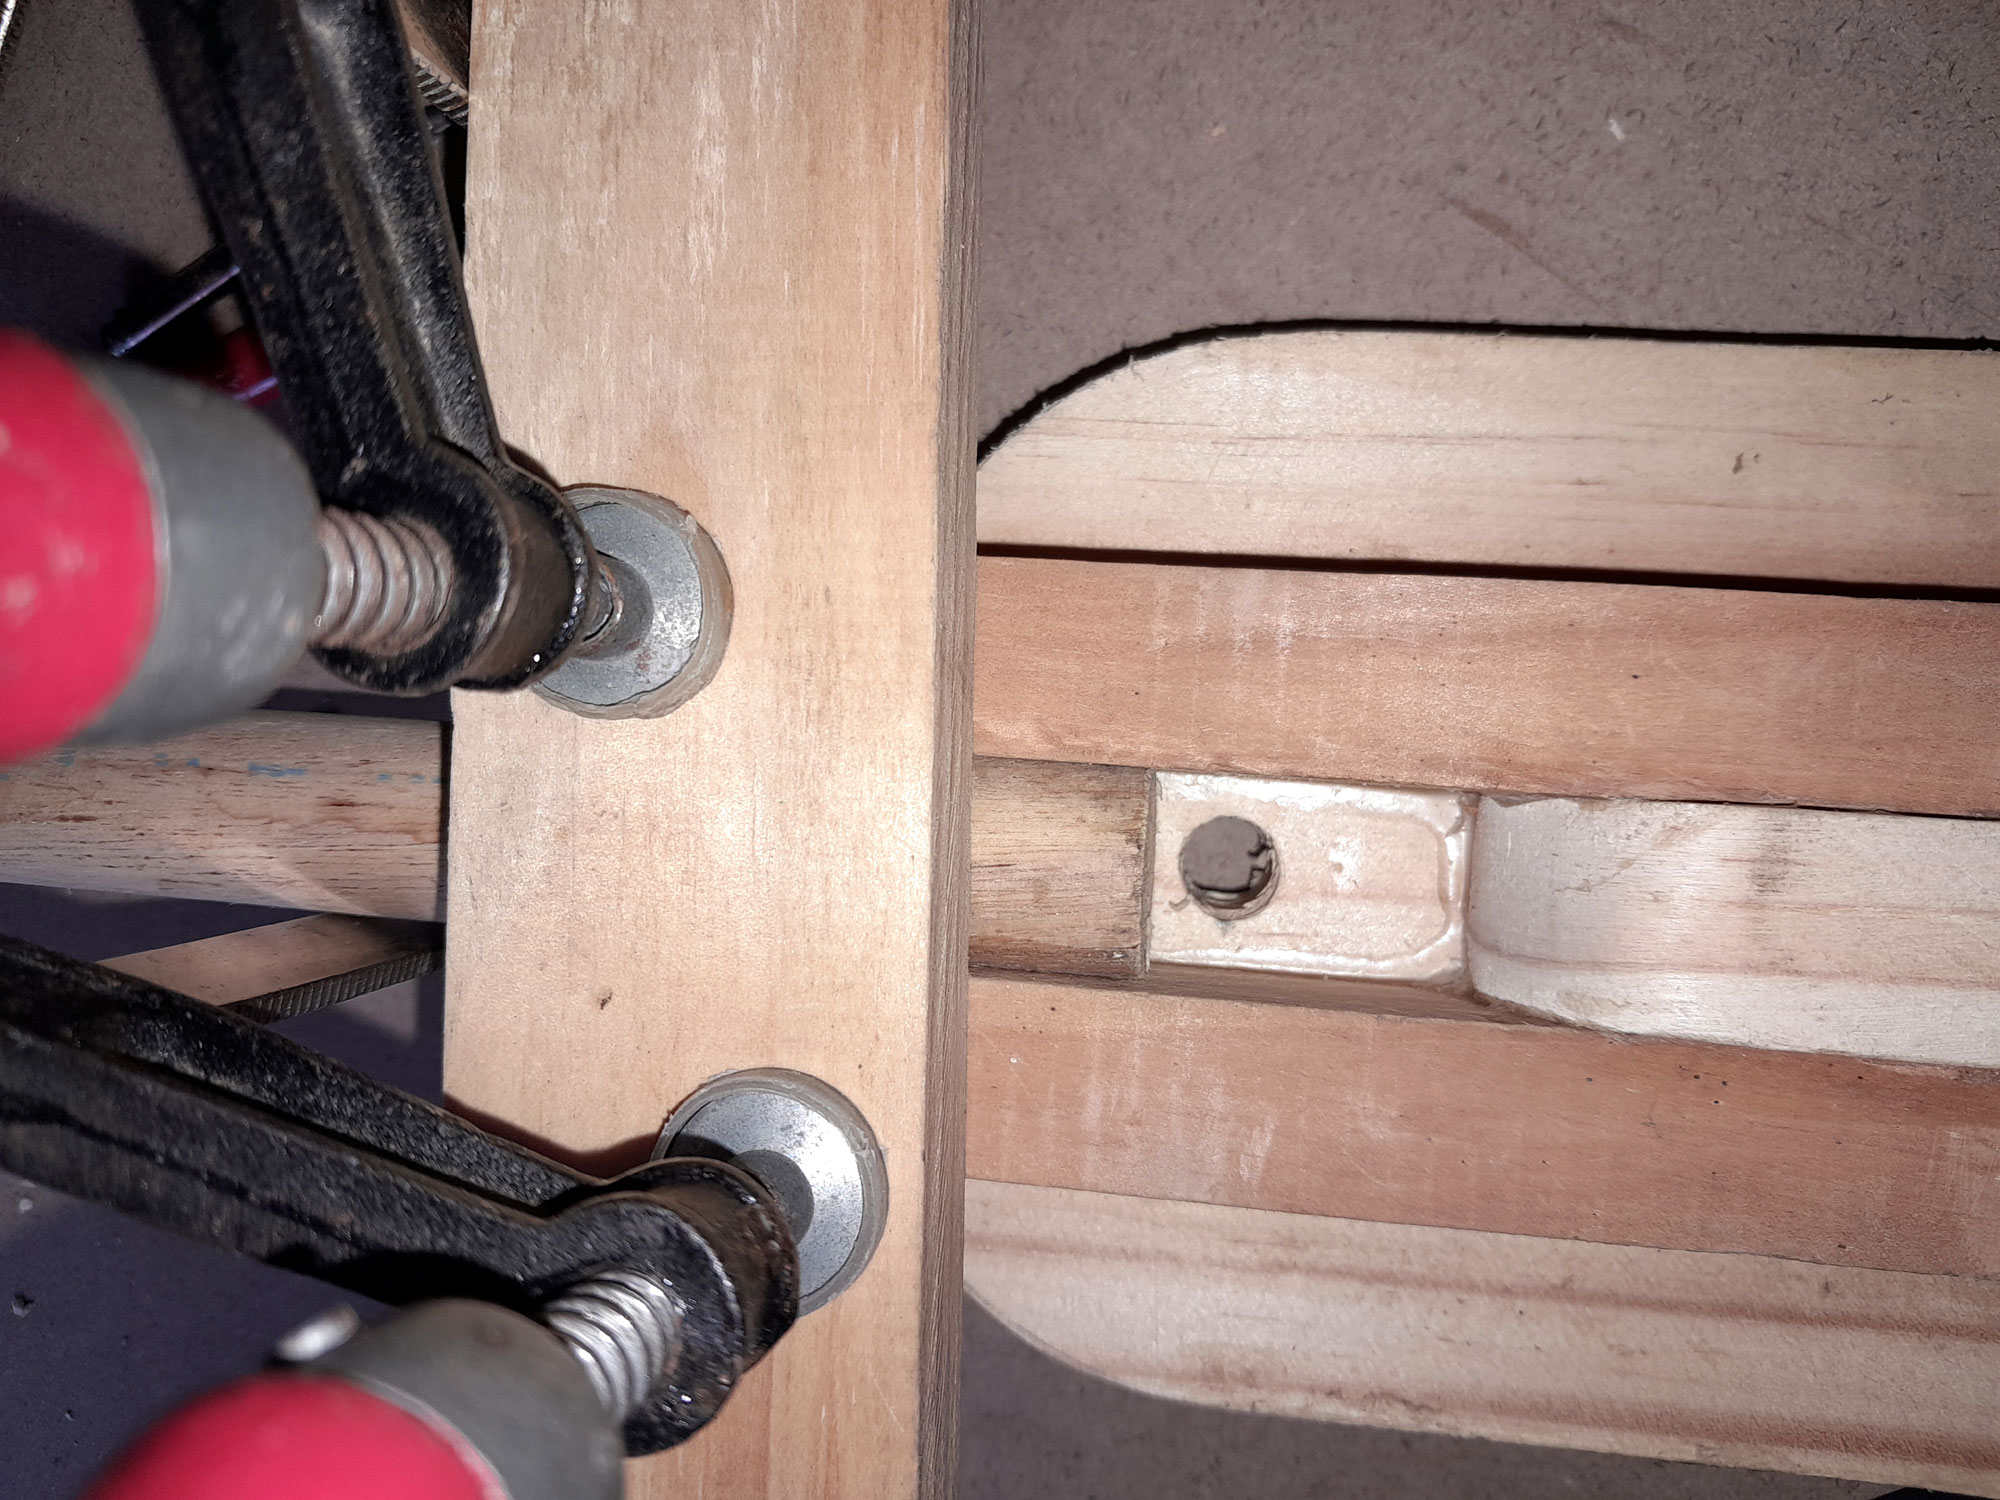
- I applied glue, centred the attachment on the base and the arms on either side of it and clamped them into position. Note: I used the set screw axle to ensure the holes in the arms would be perfectly aligned.
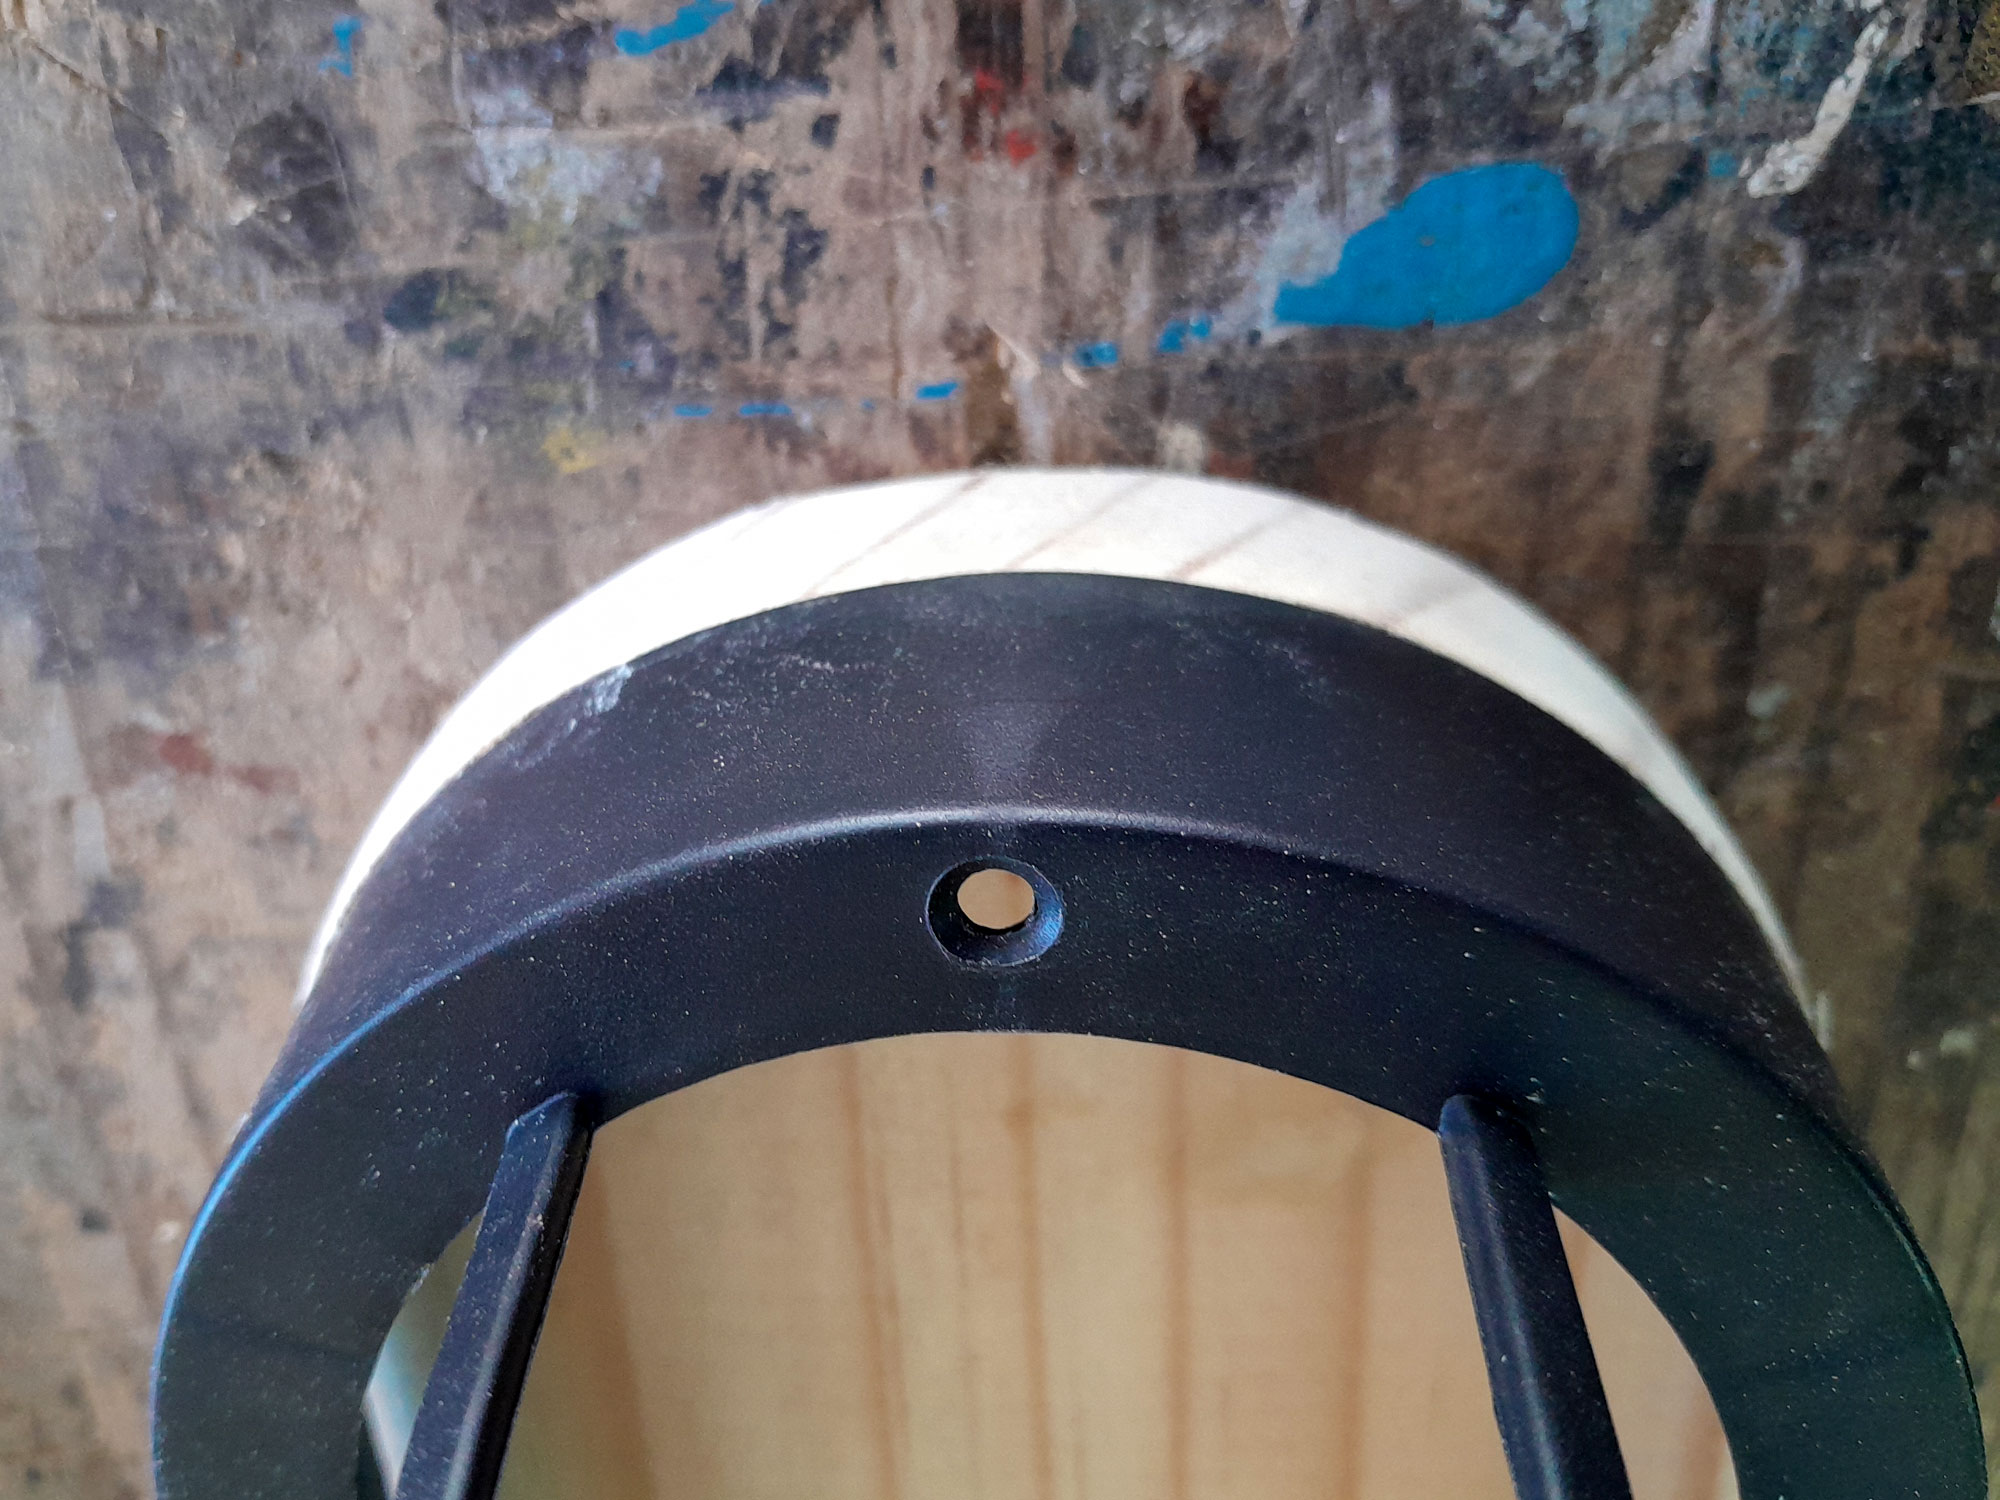
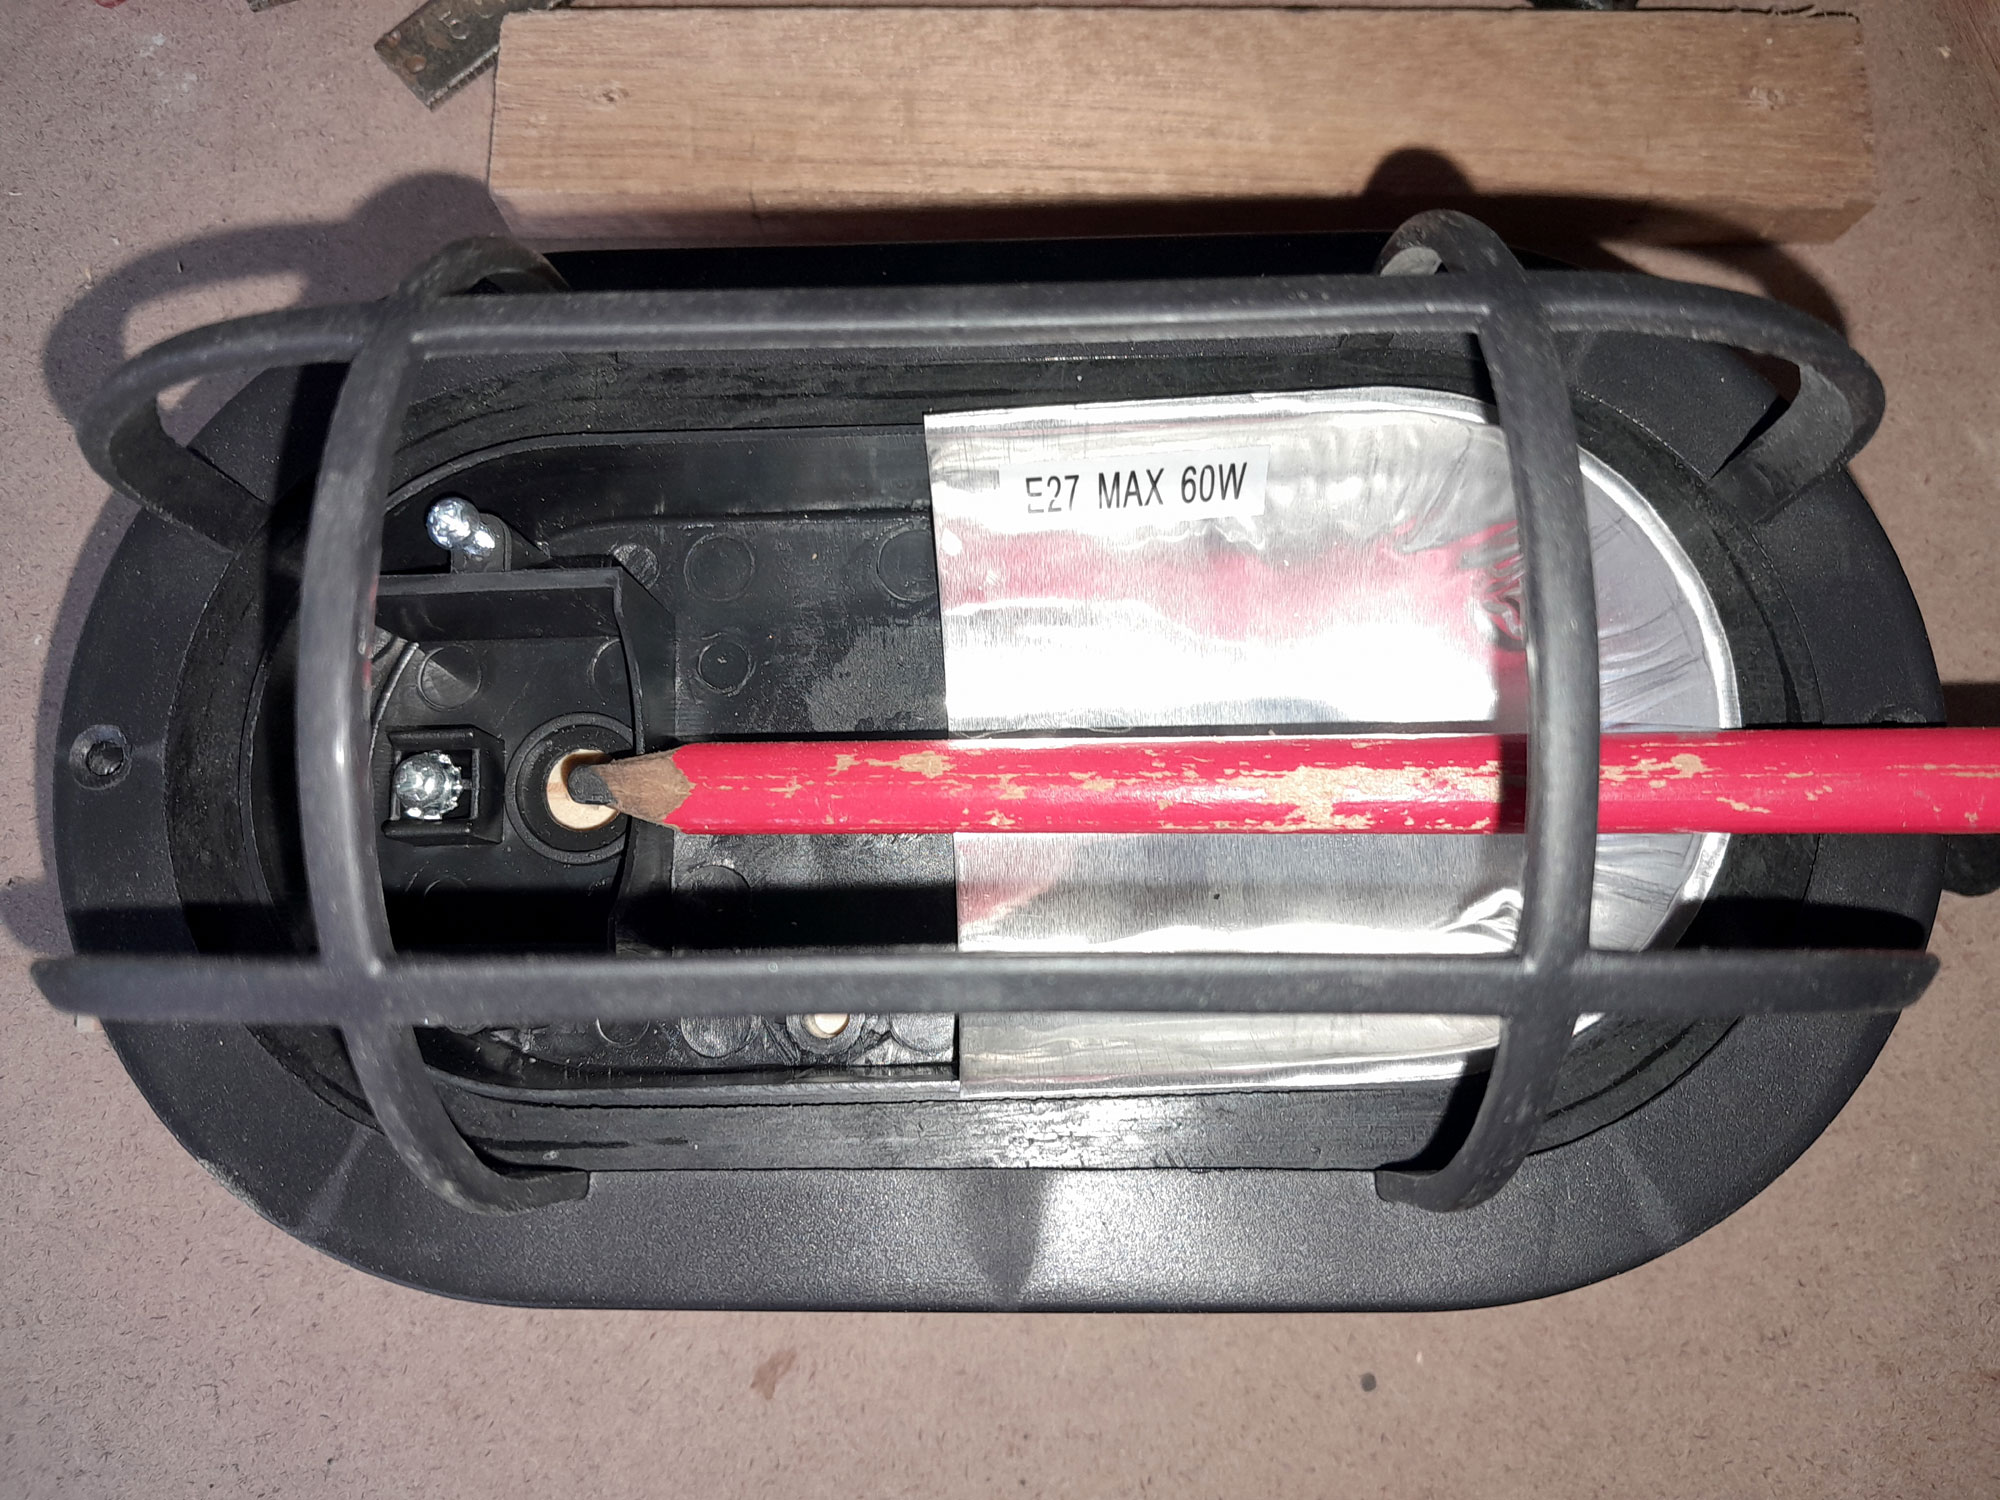
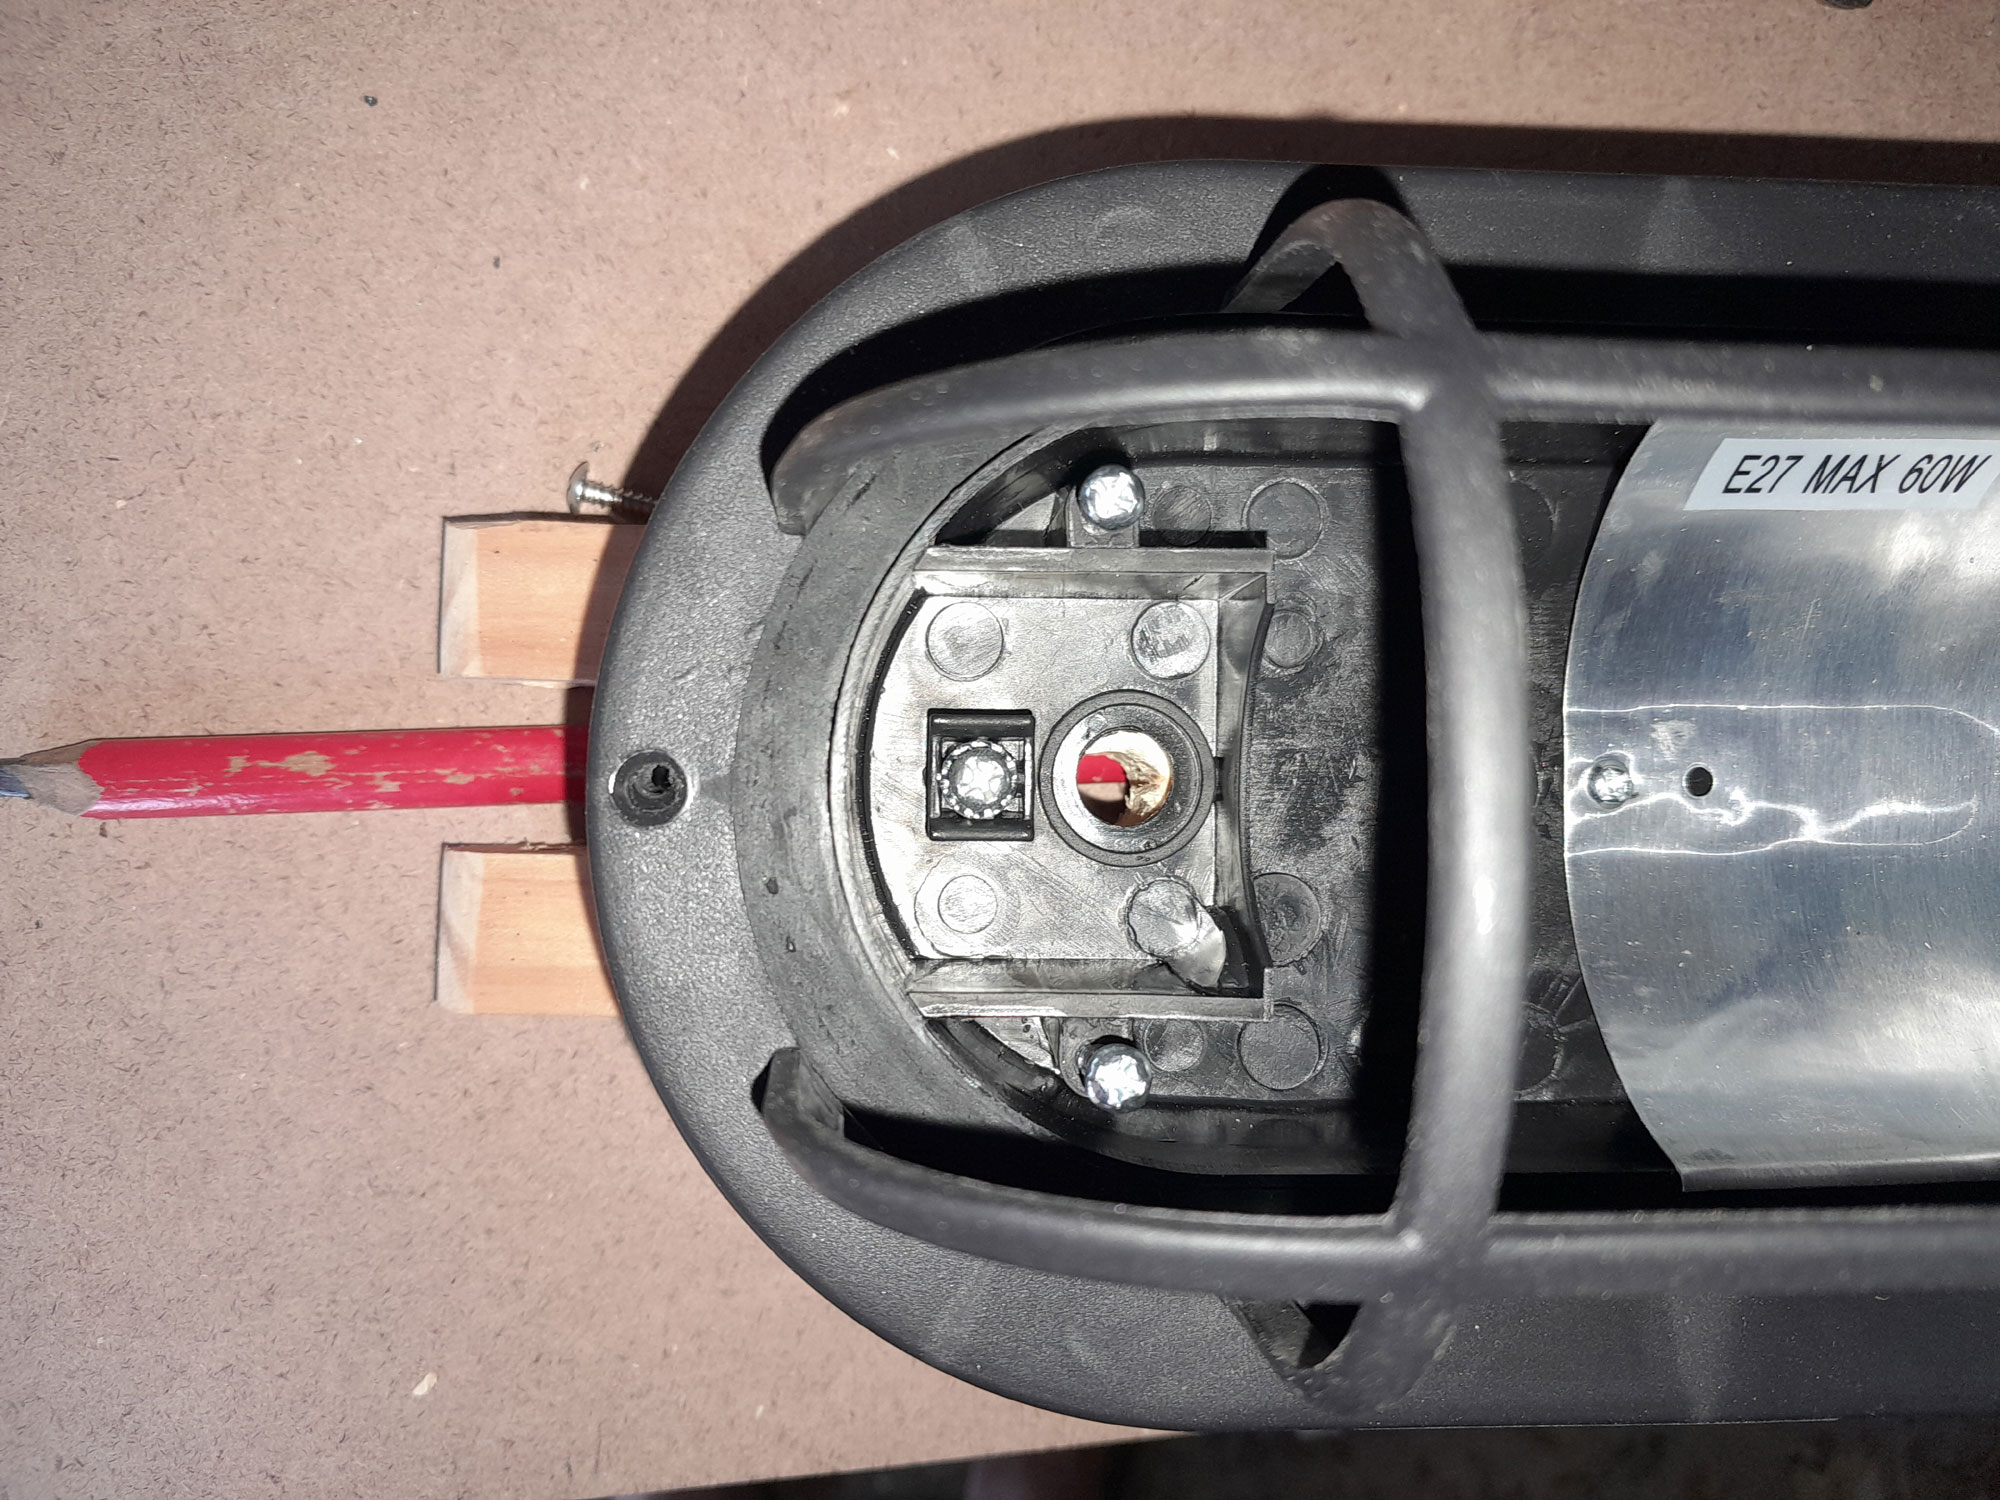
- With its glass cover removed, I positioned the fitting on the base and marked the position of the hole for the extension cord.
- Then I drilled a 10mmØ hole for it, and checked everything lined up – it does, as you can see.
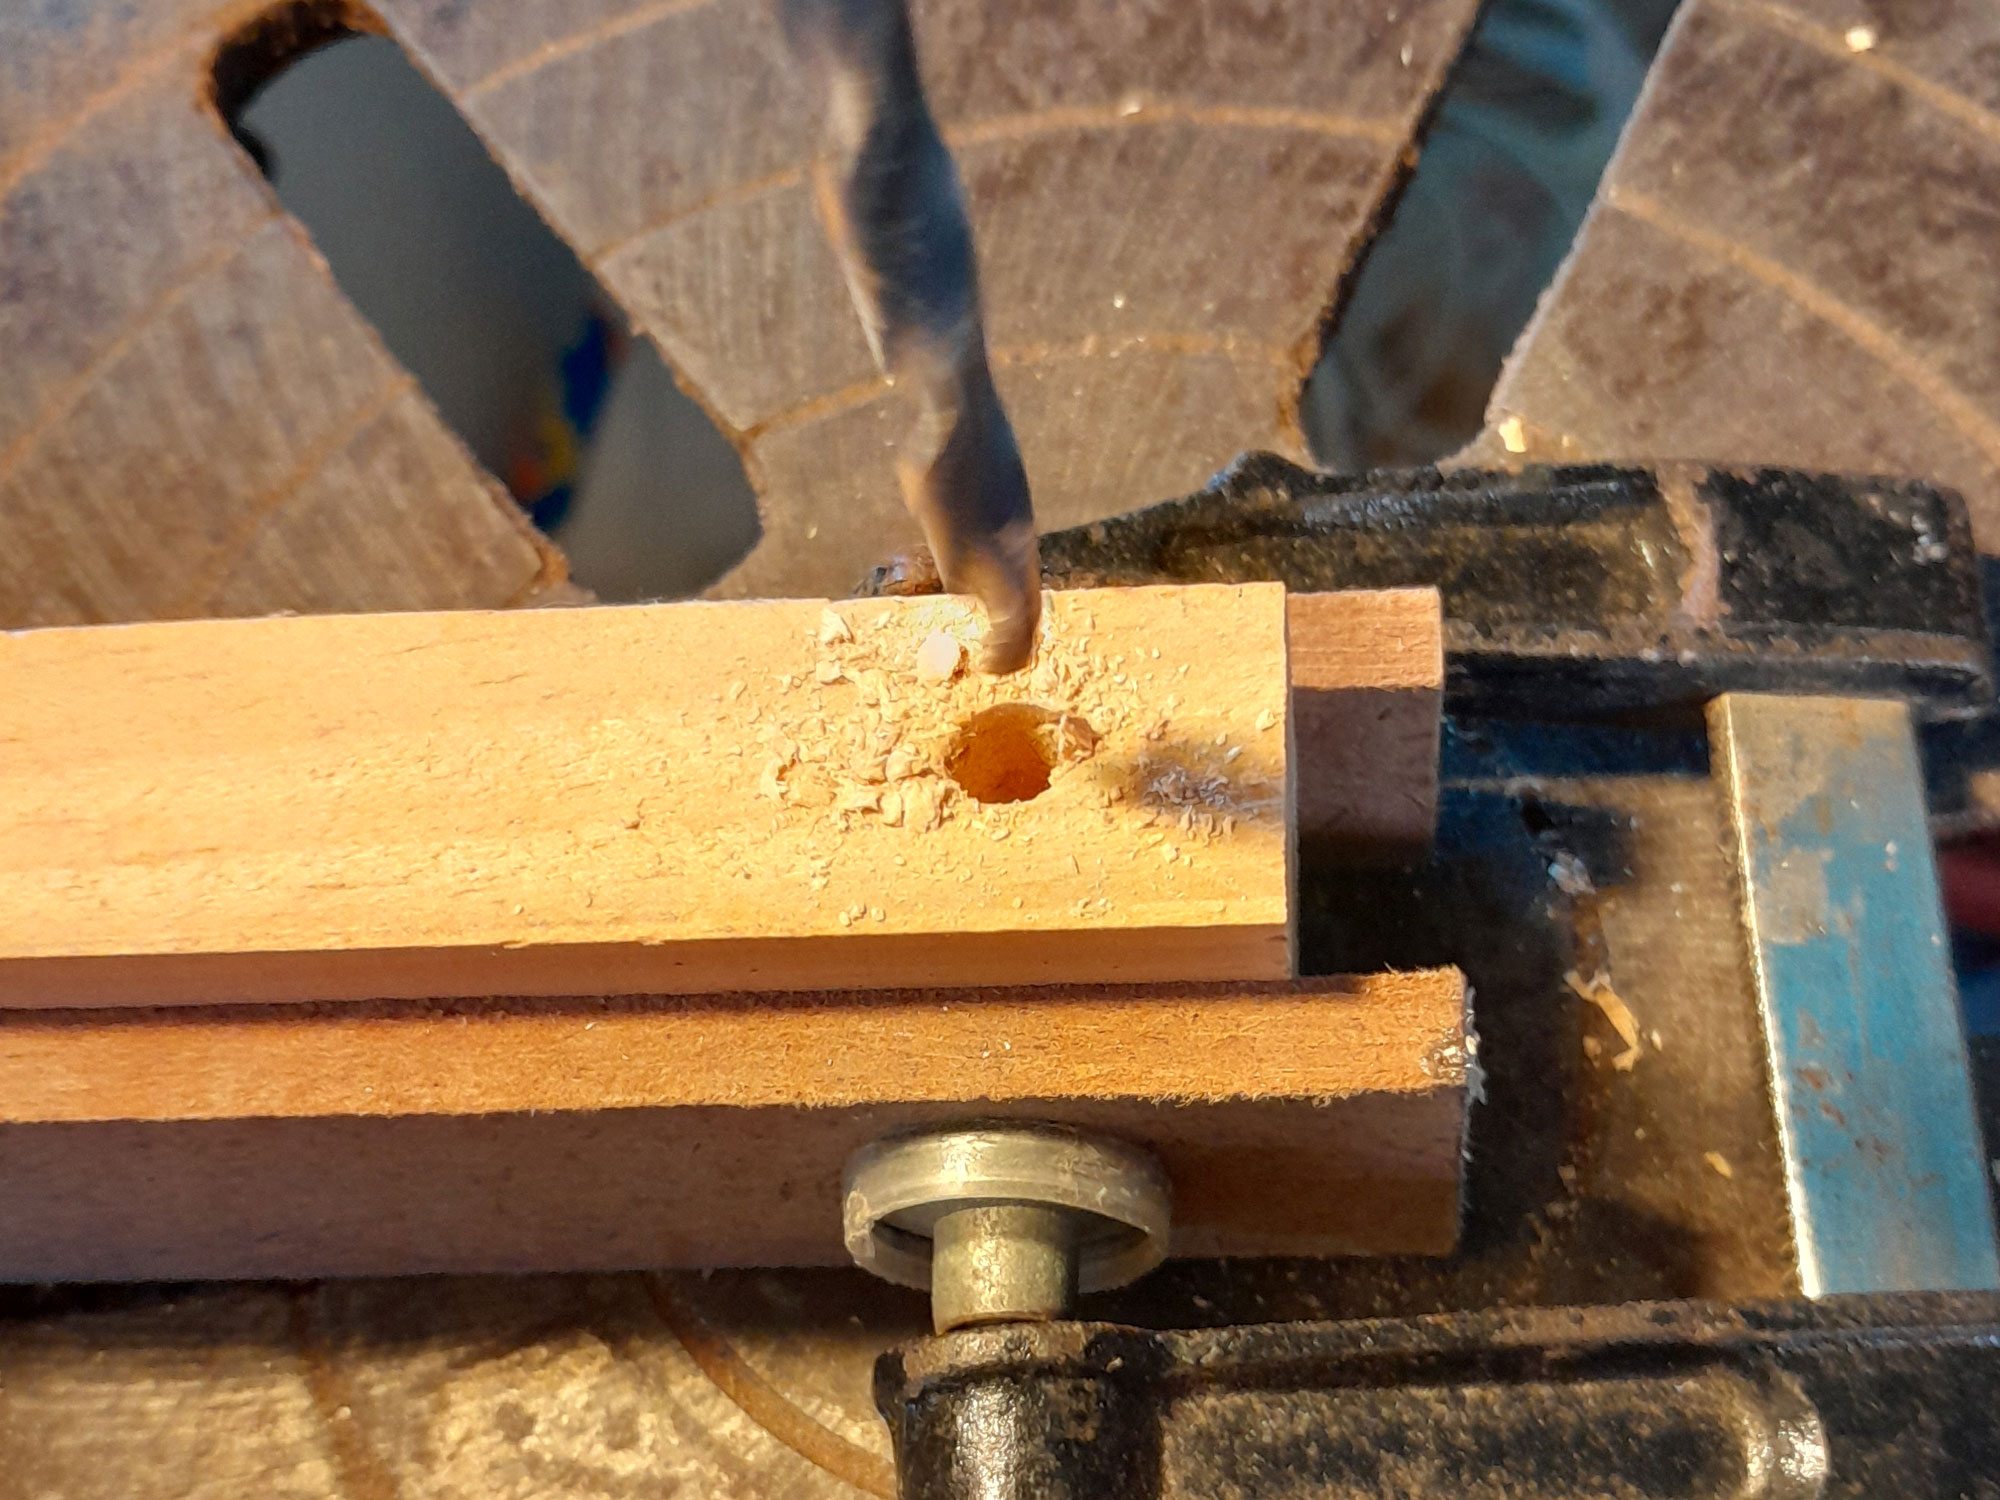
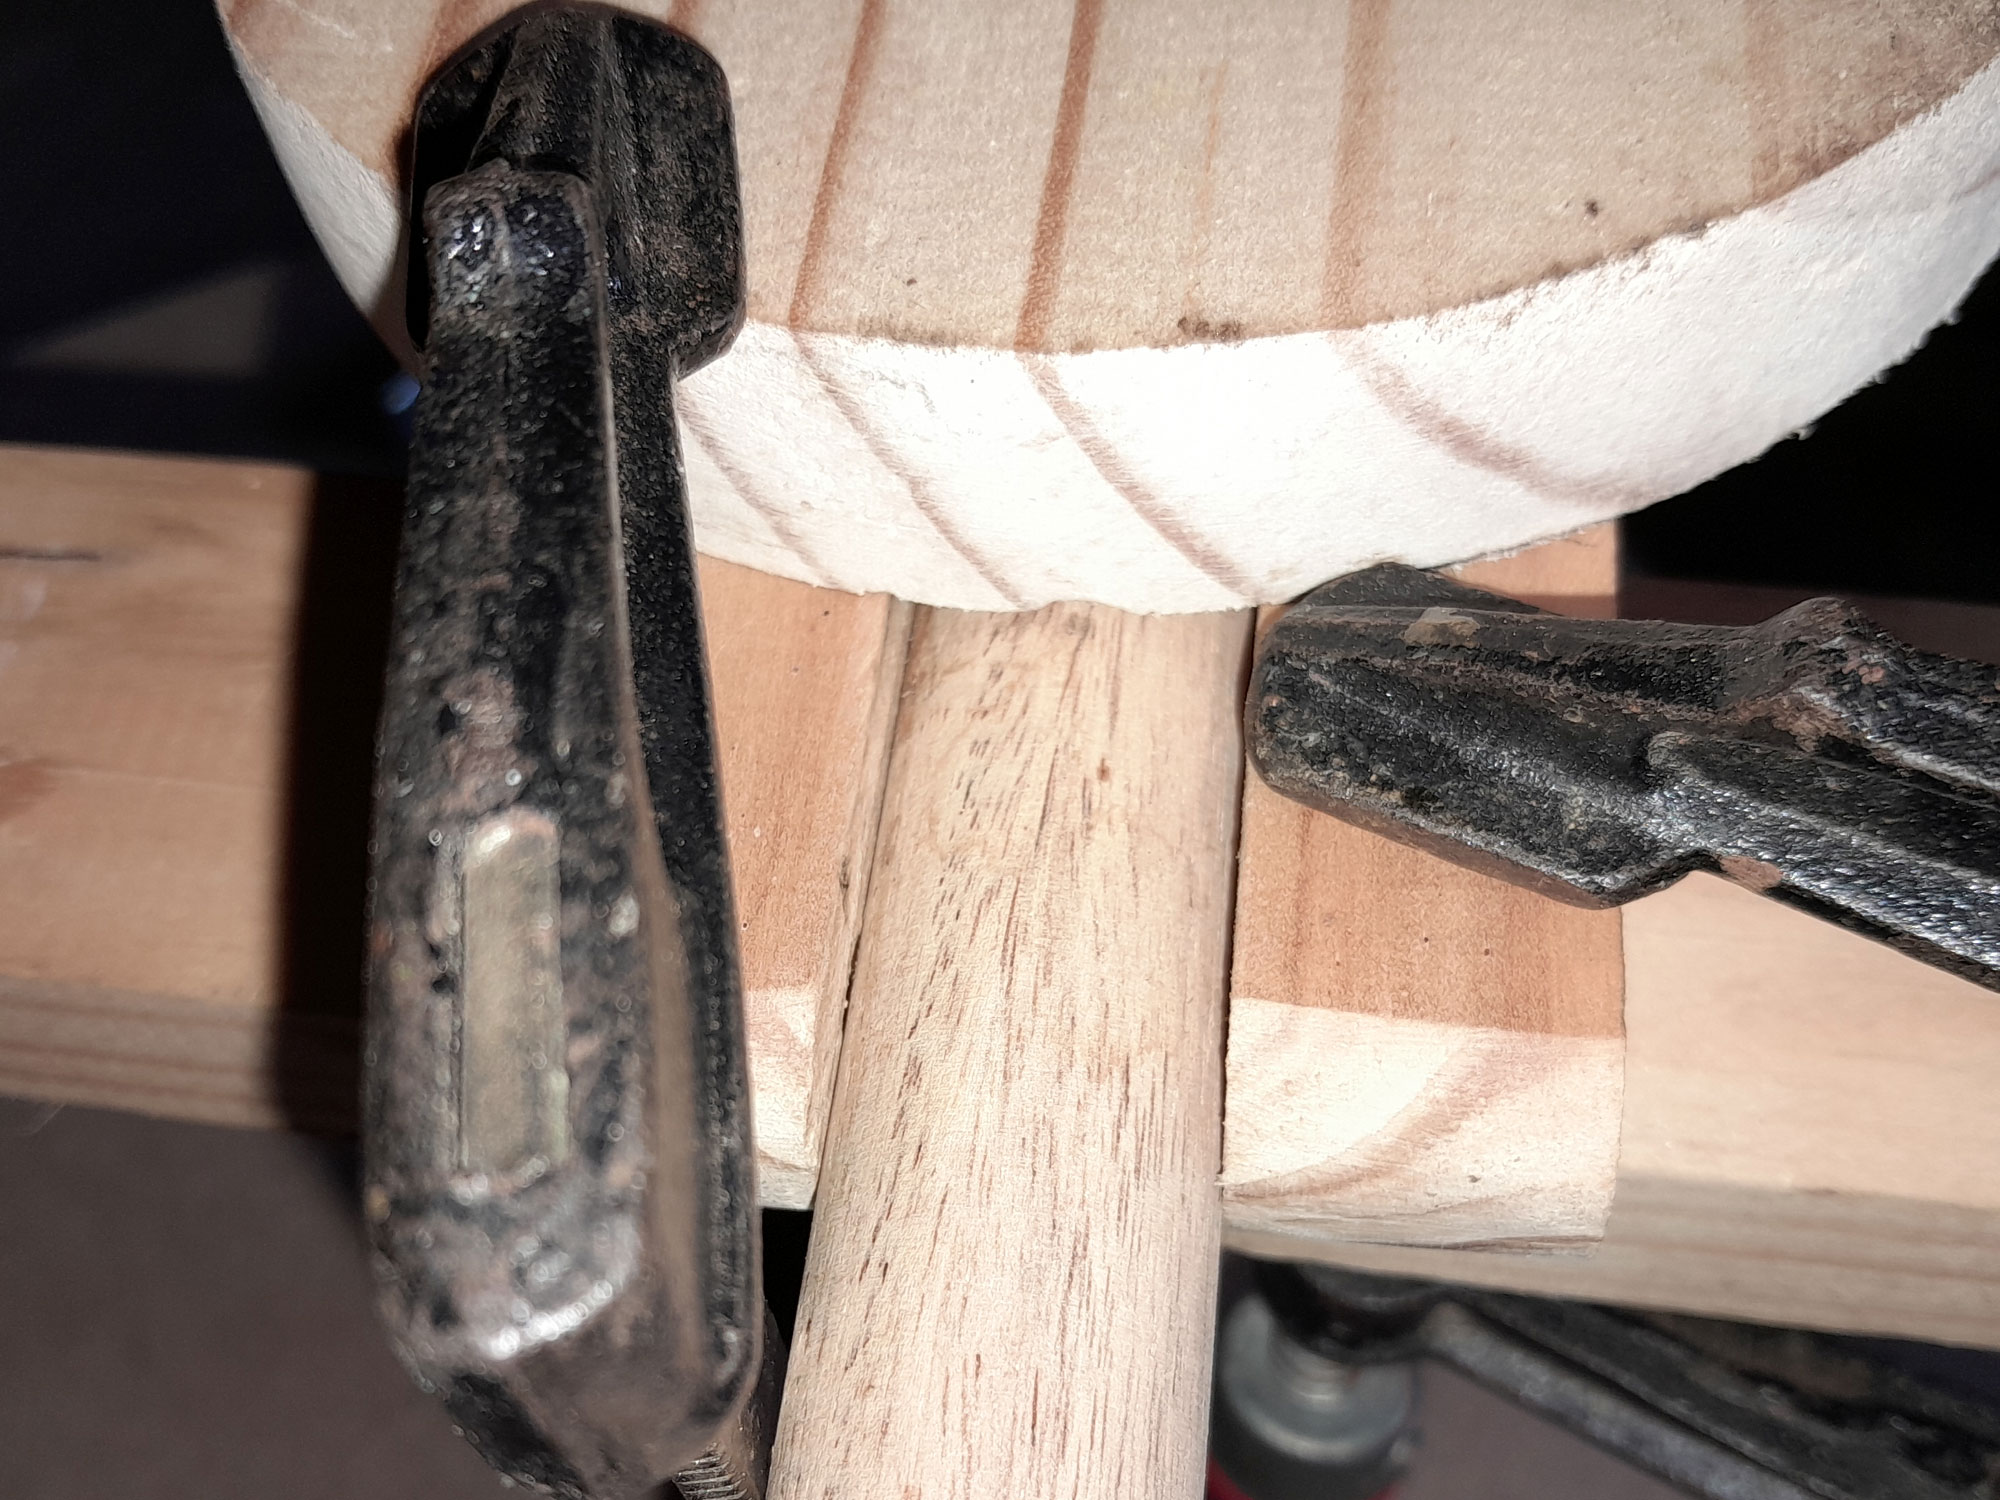
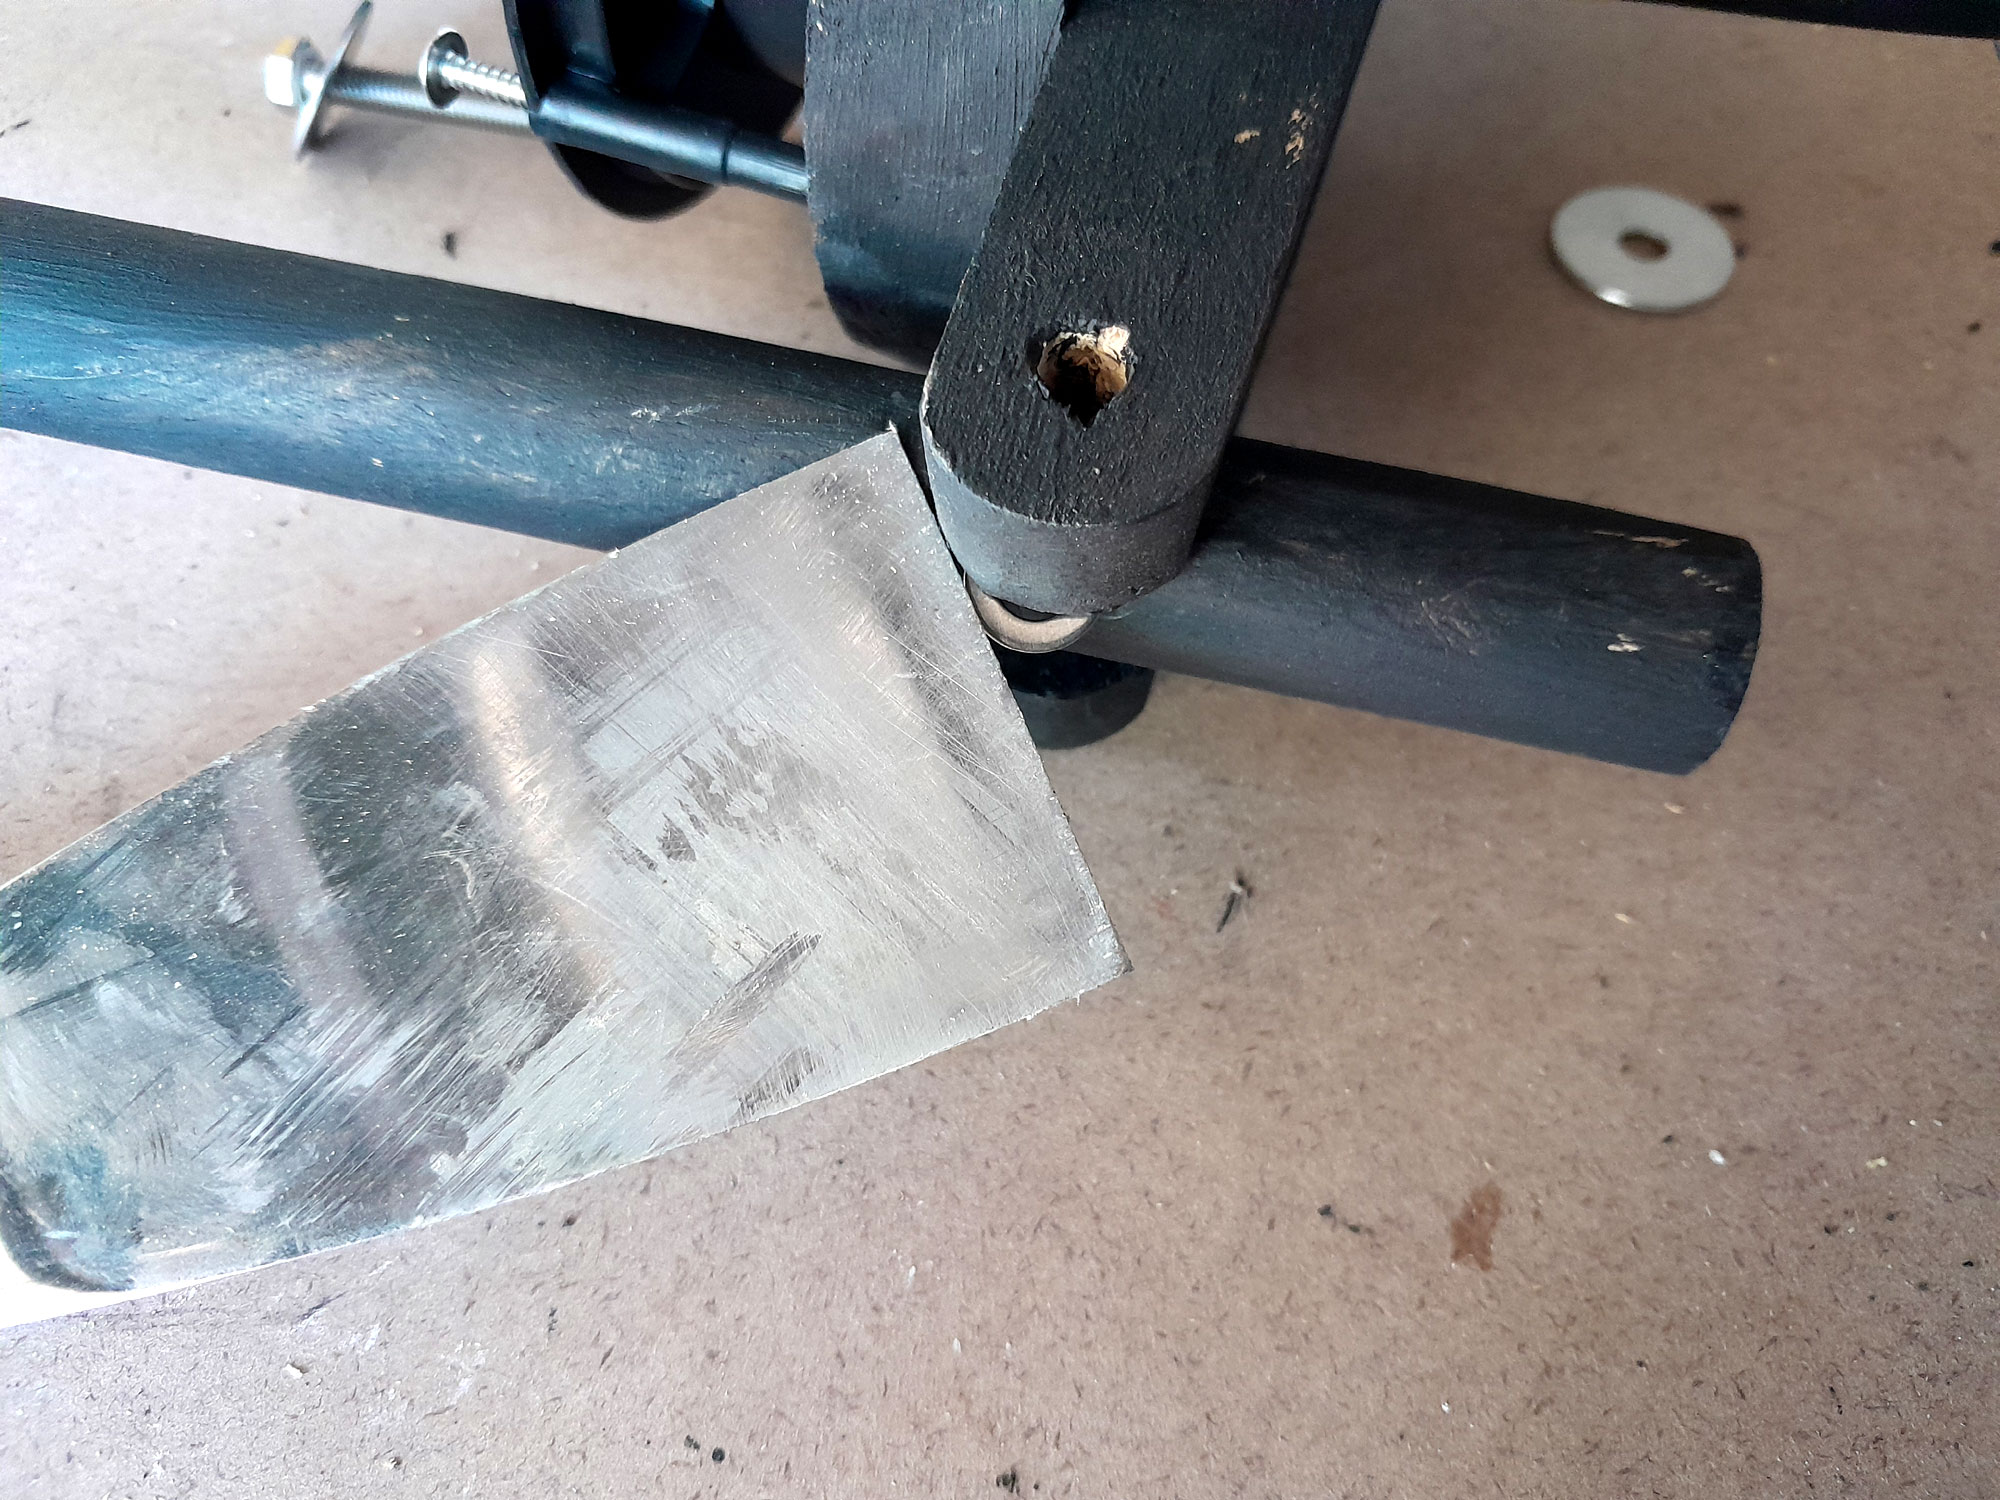
- Then I positioned what would be the top end of the dowel between the arms, clamping it into position, and ensuring that the end was well clear of the hole for the extensions cord.
- Make sure it is clamped in very firmly.
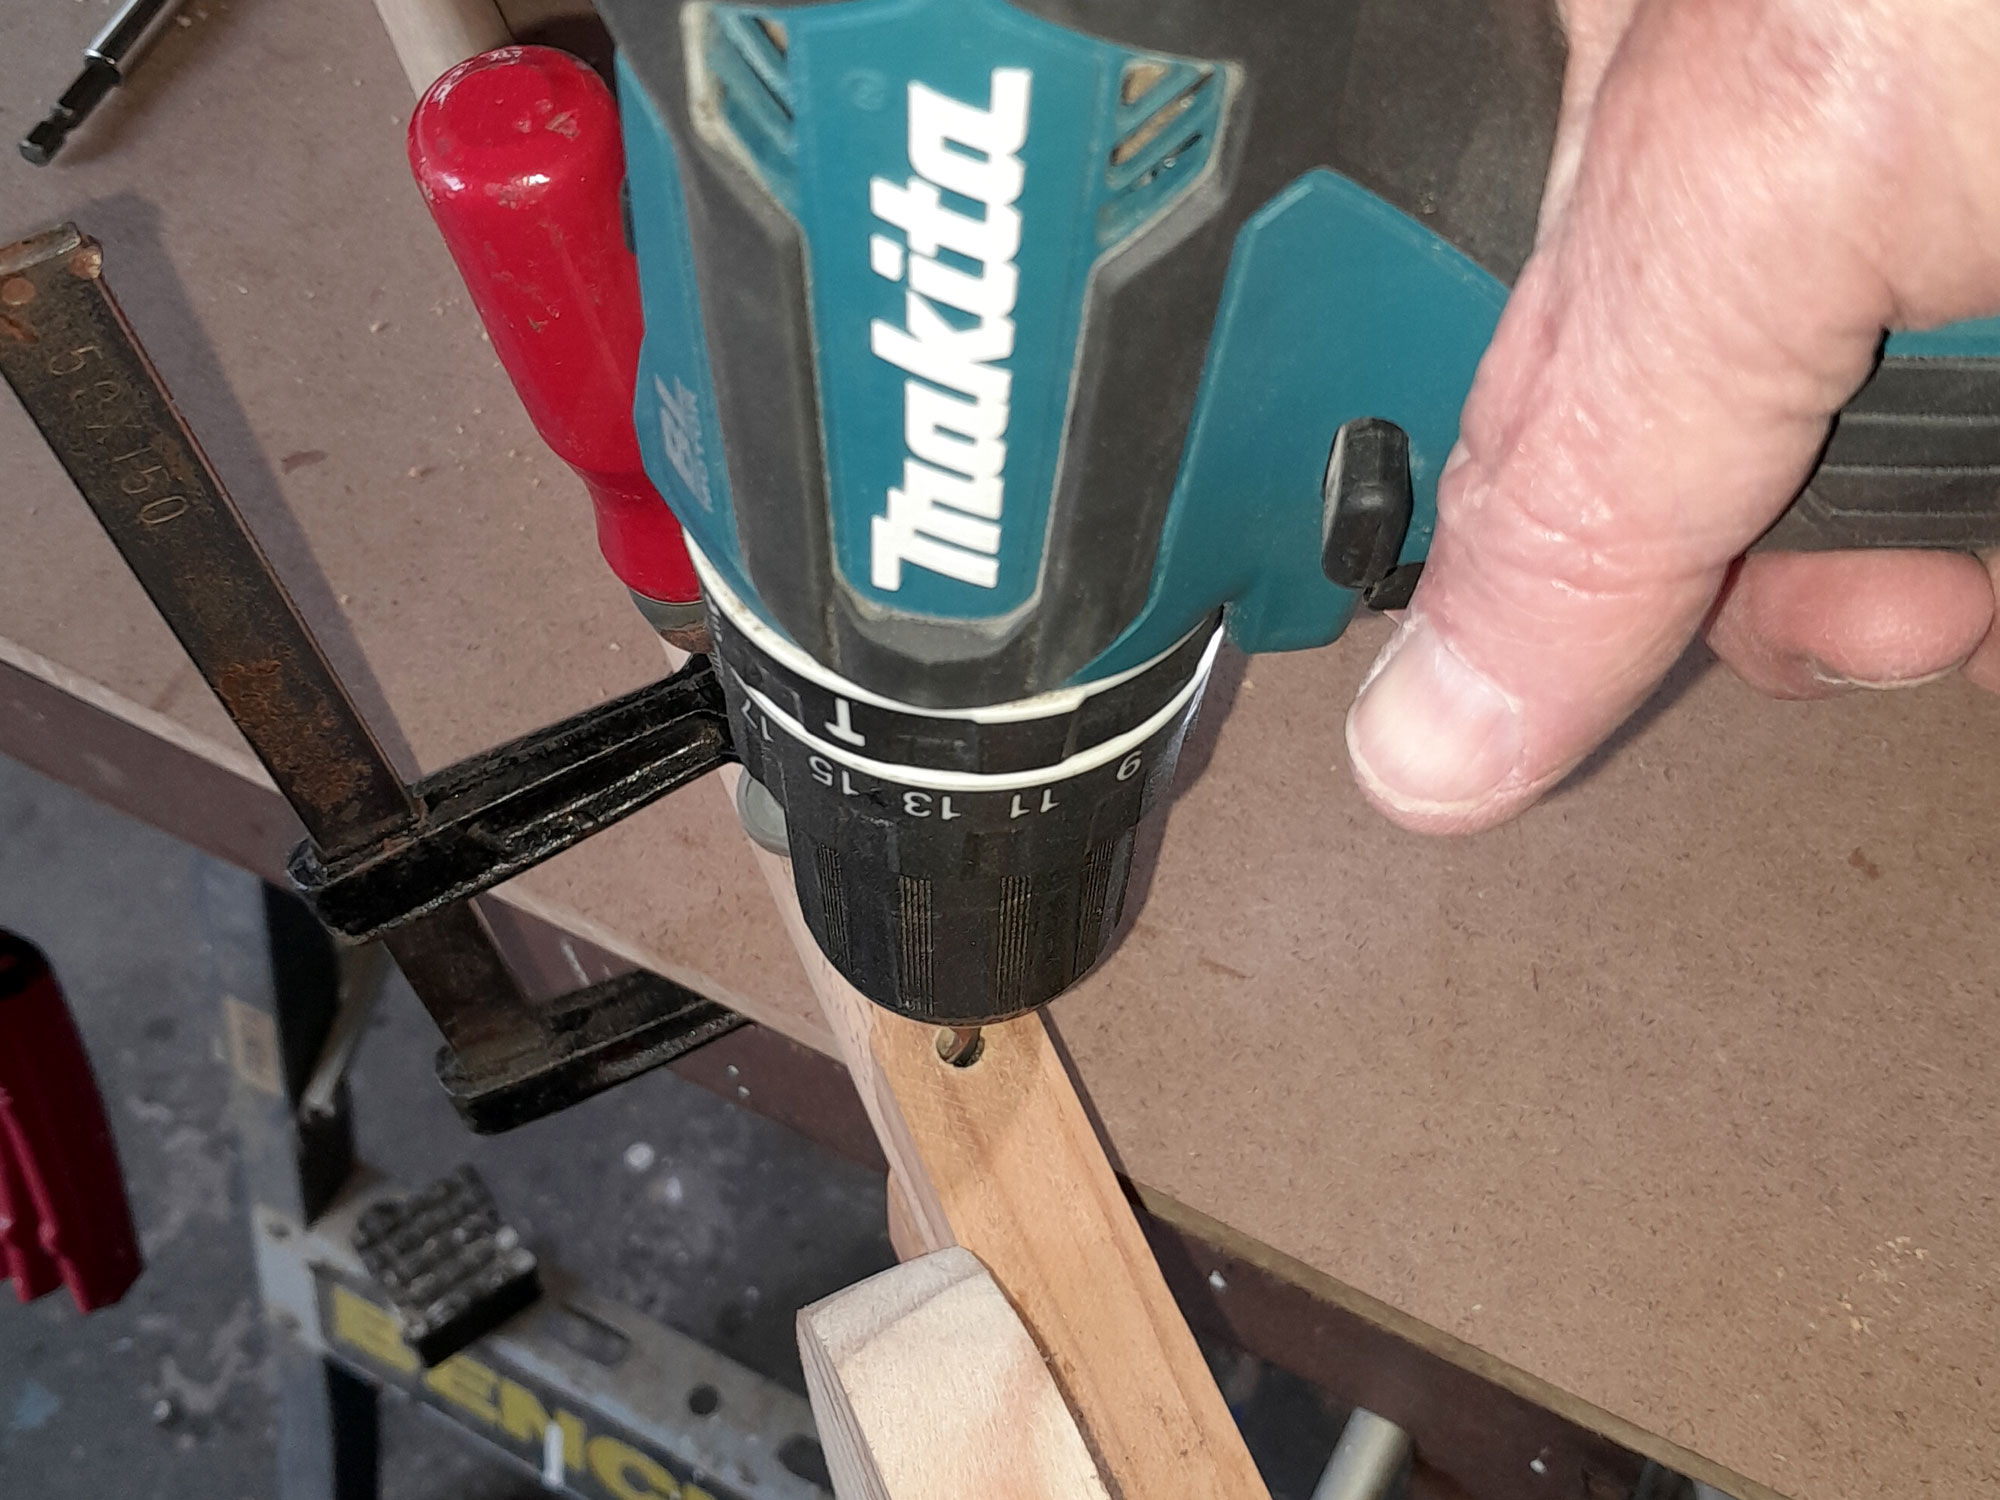
- Now remove the set screw, if you haven’t already, and drill through the dowel by using the arms as your guide.
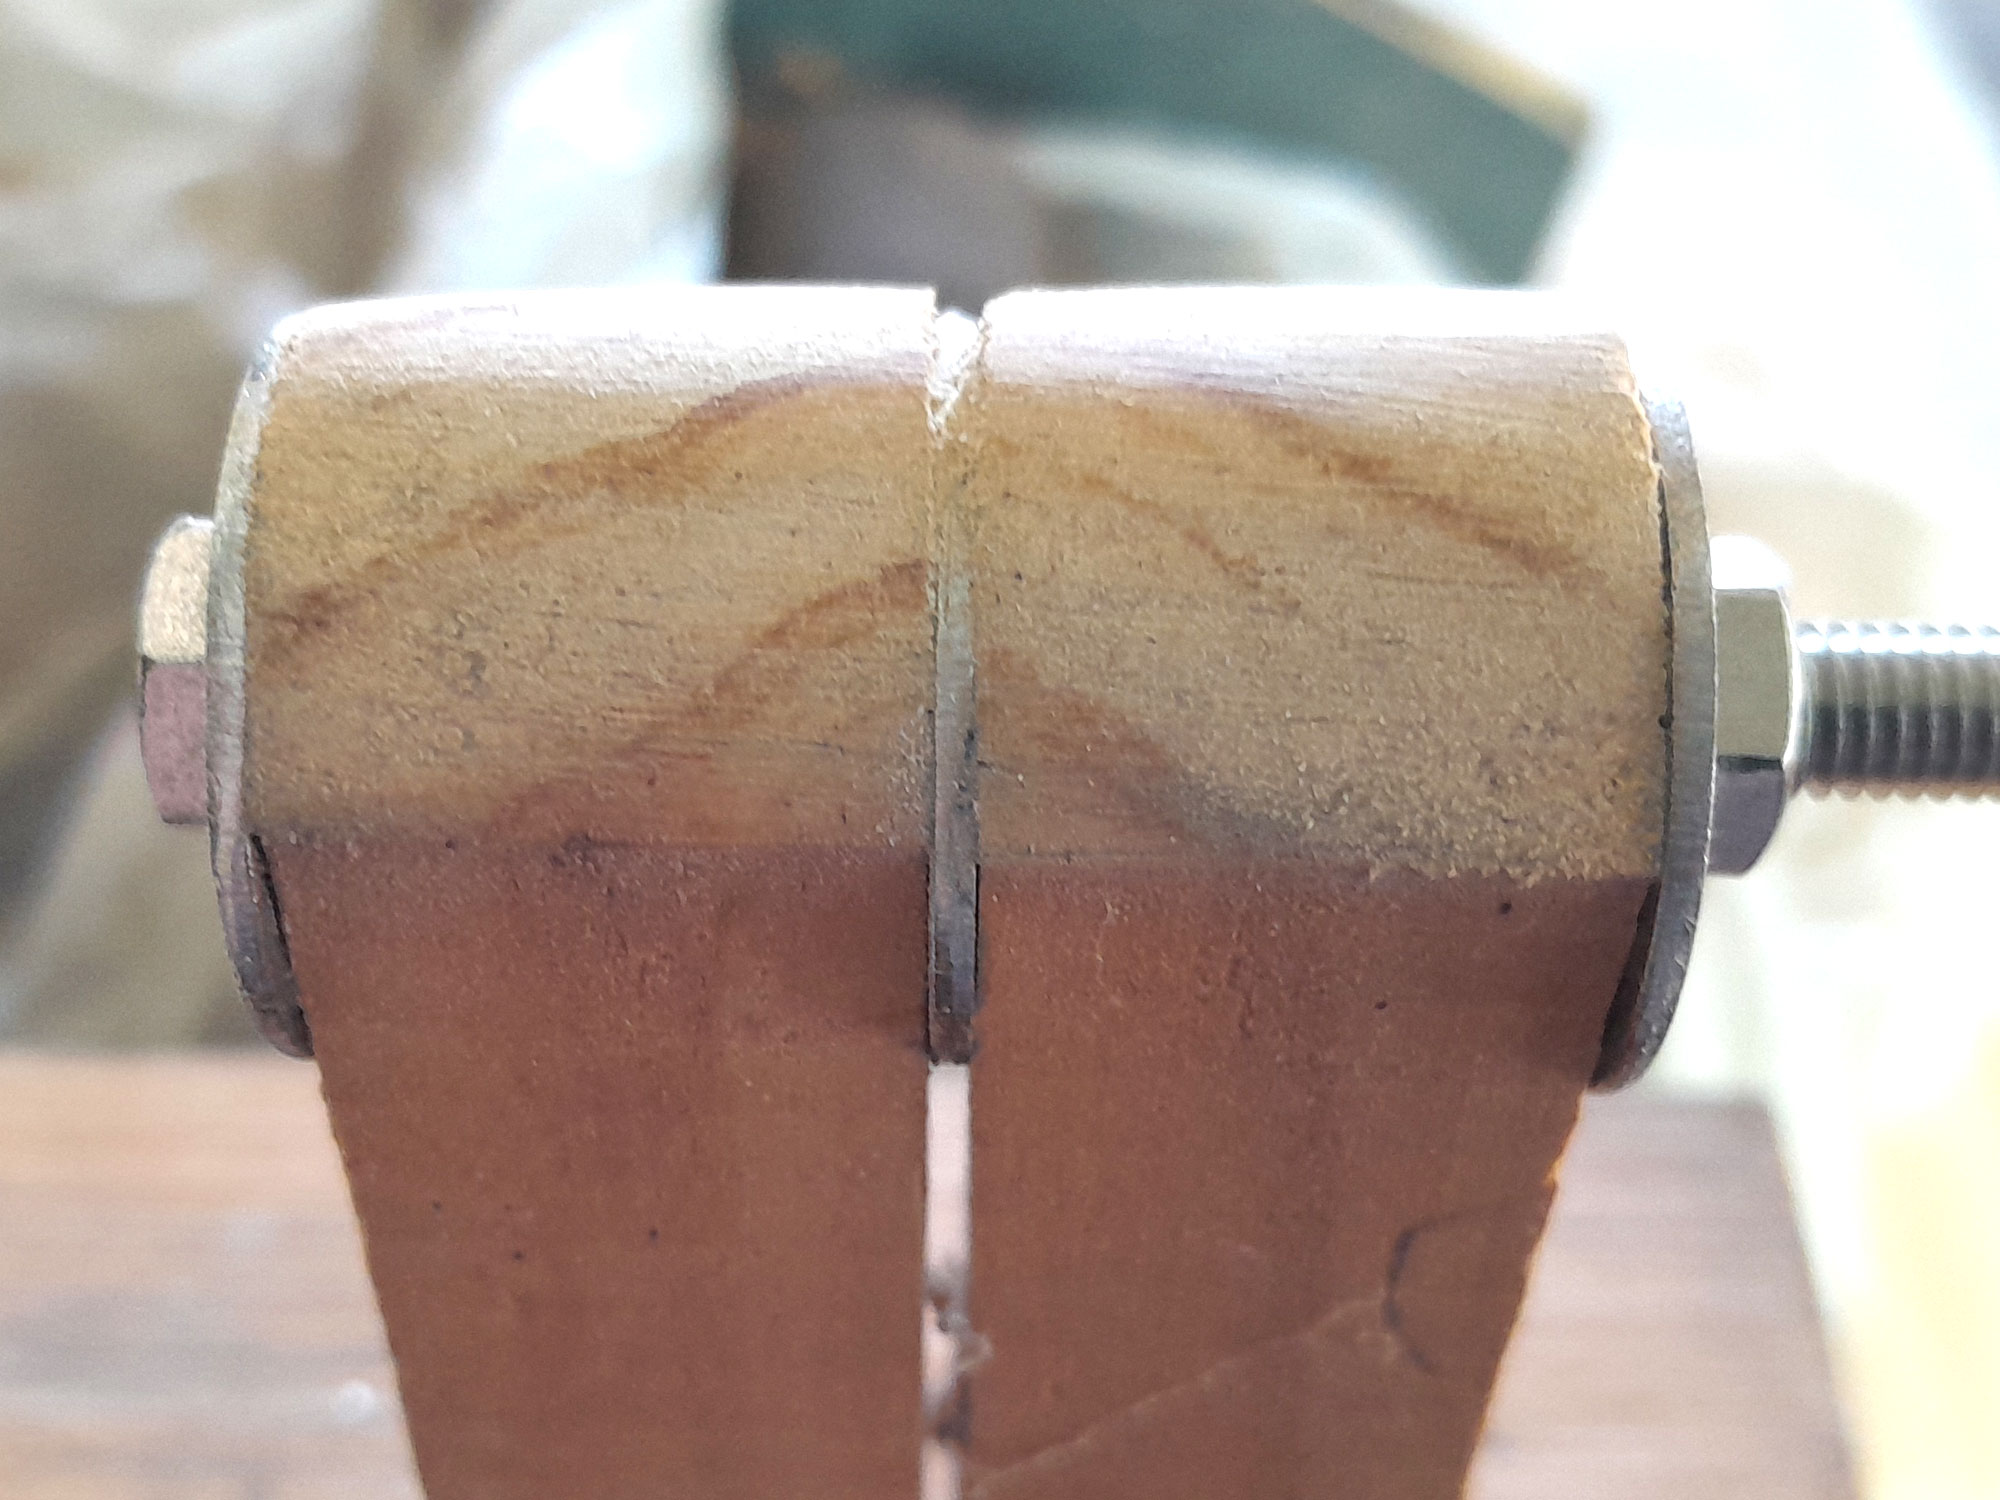
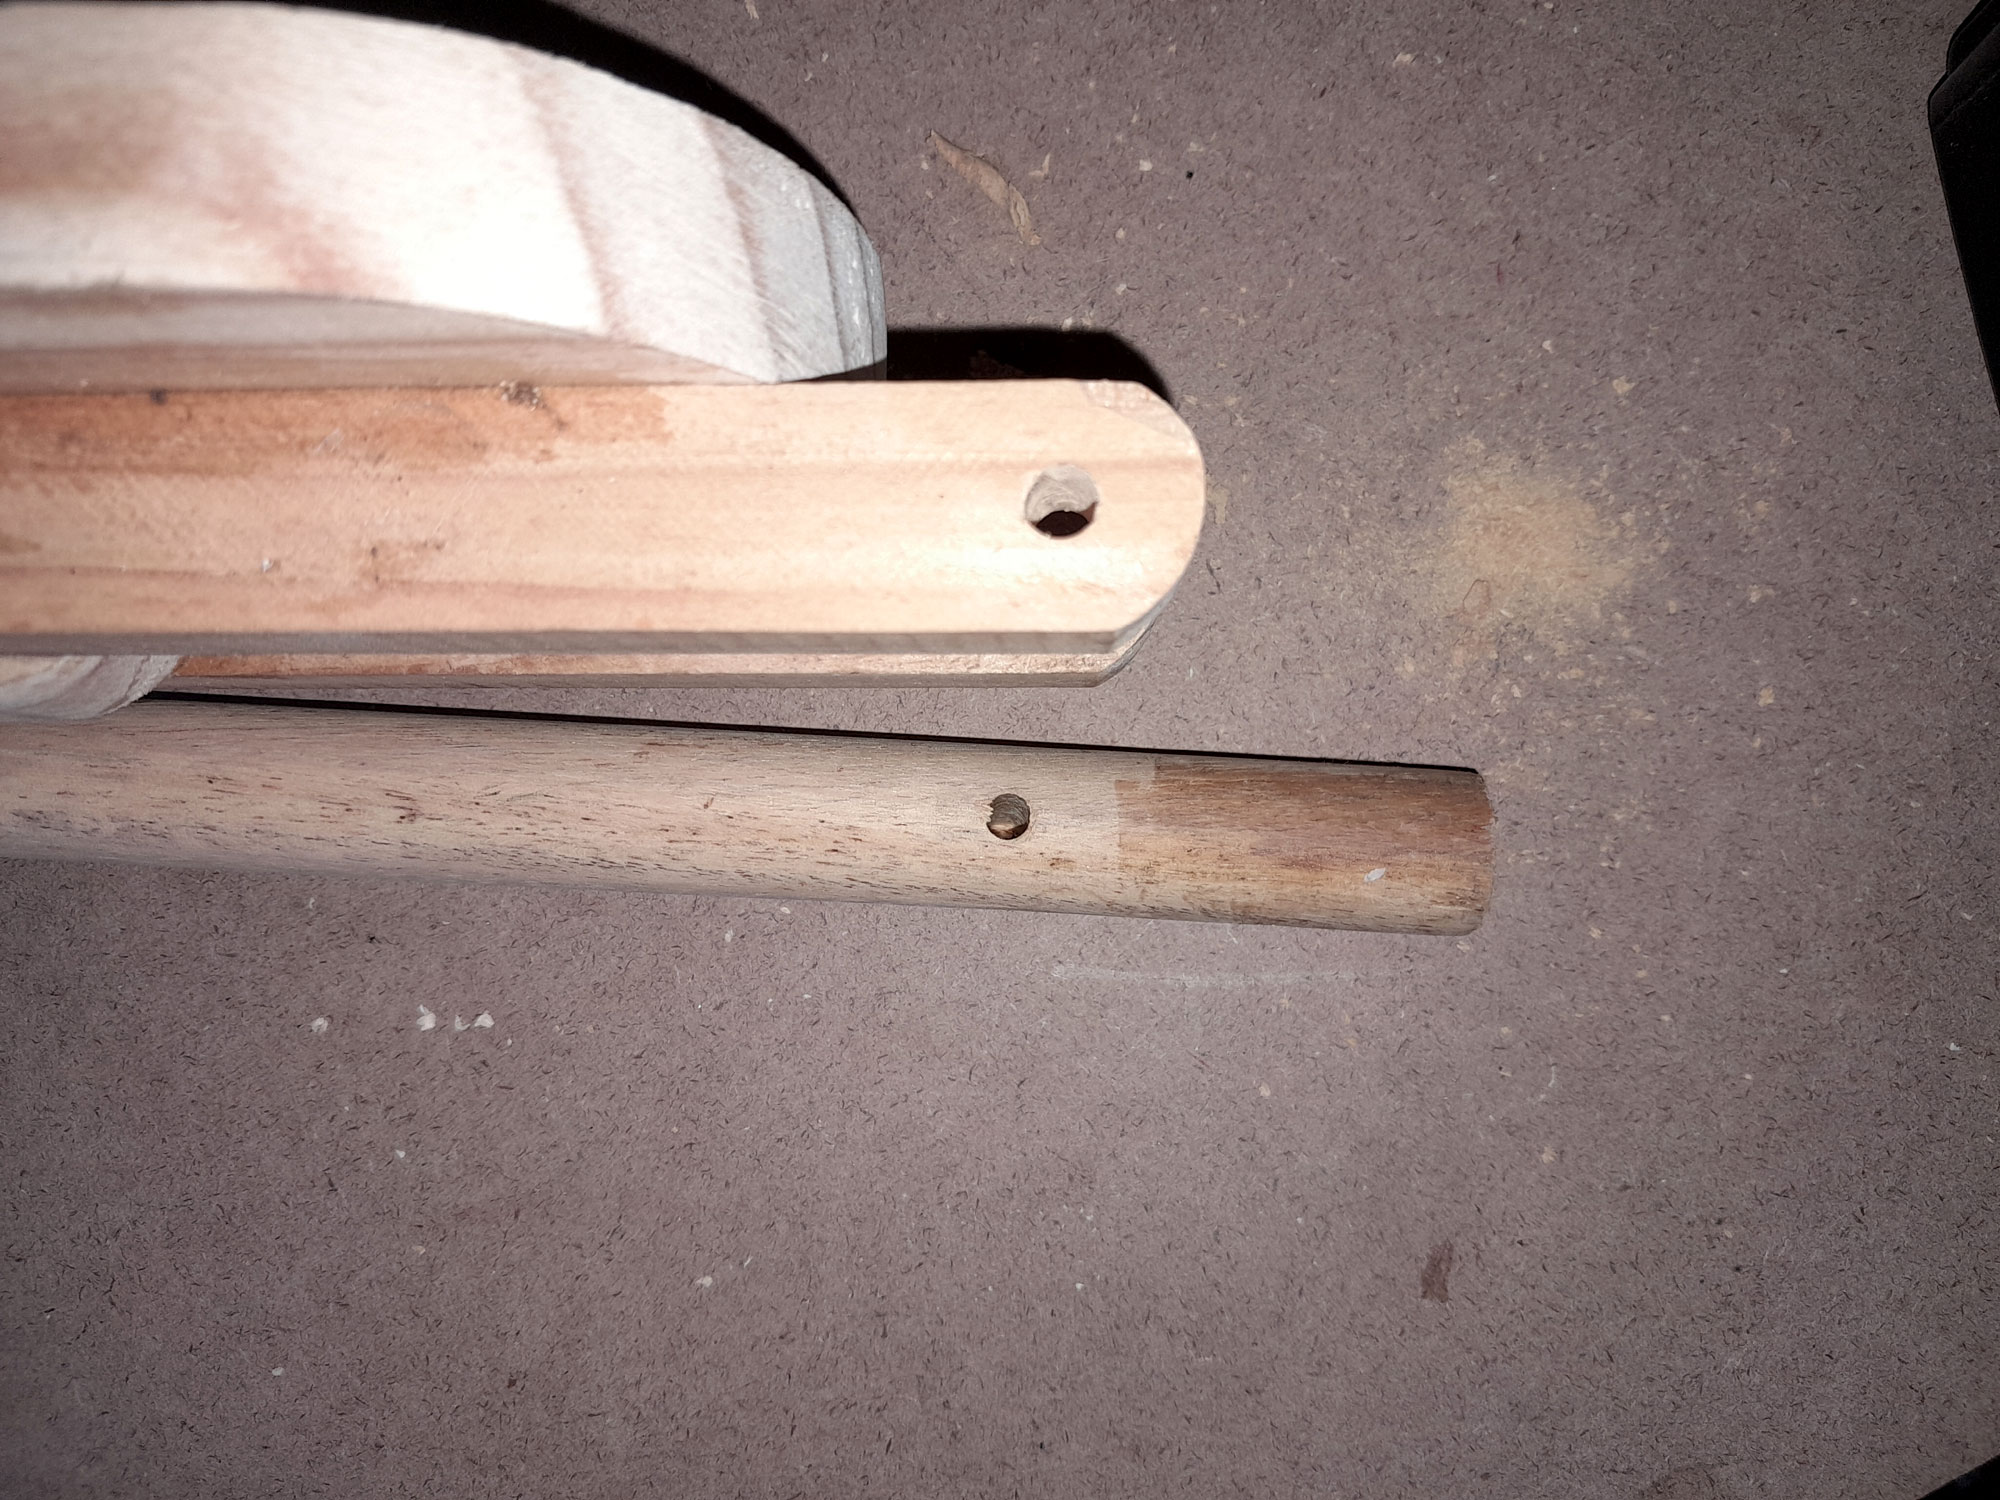
- And here’s the result – in the dead centre, Mr Venter! It was at this stage as well that I painted the base and arms, and the dowel. Blackboard paint dries very quickly, but I left everything to dry fully overnight, just to be sure.
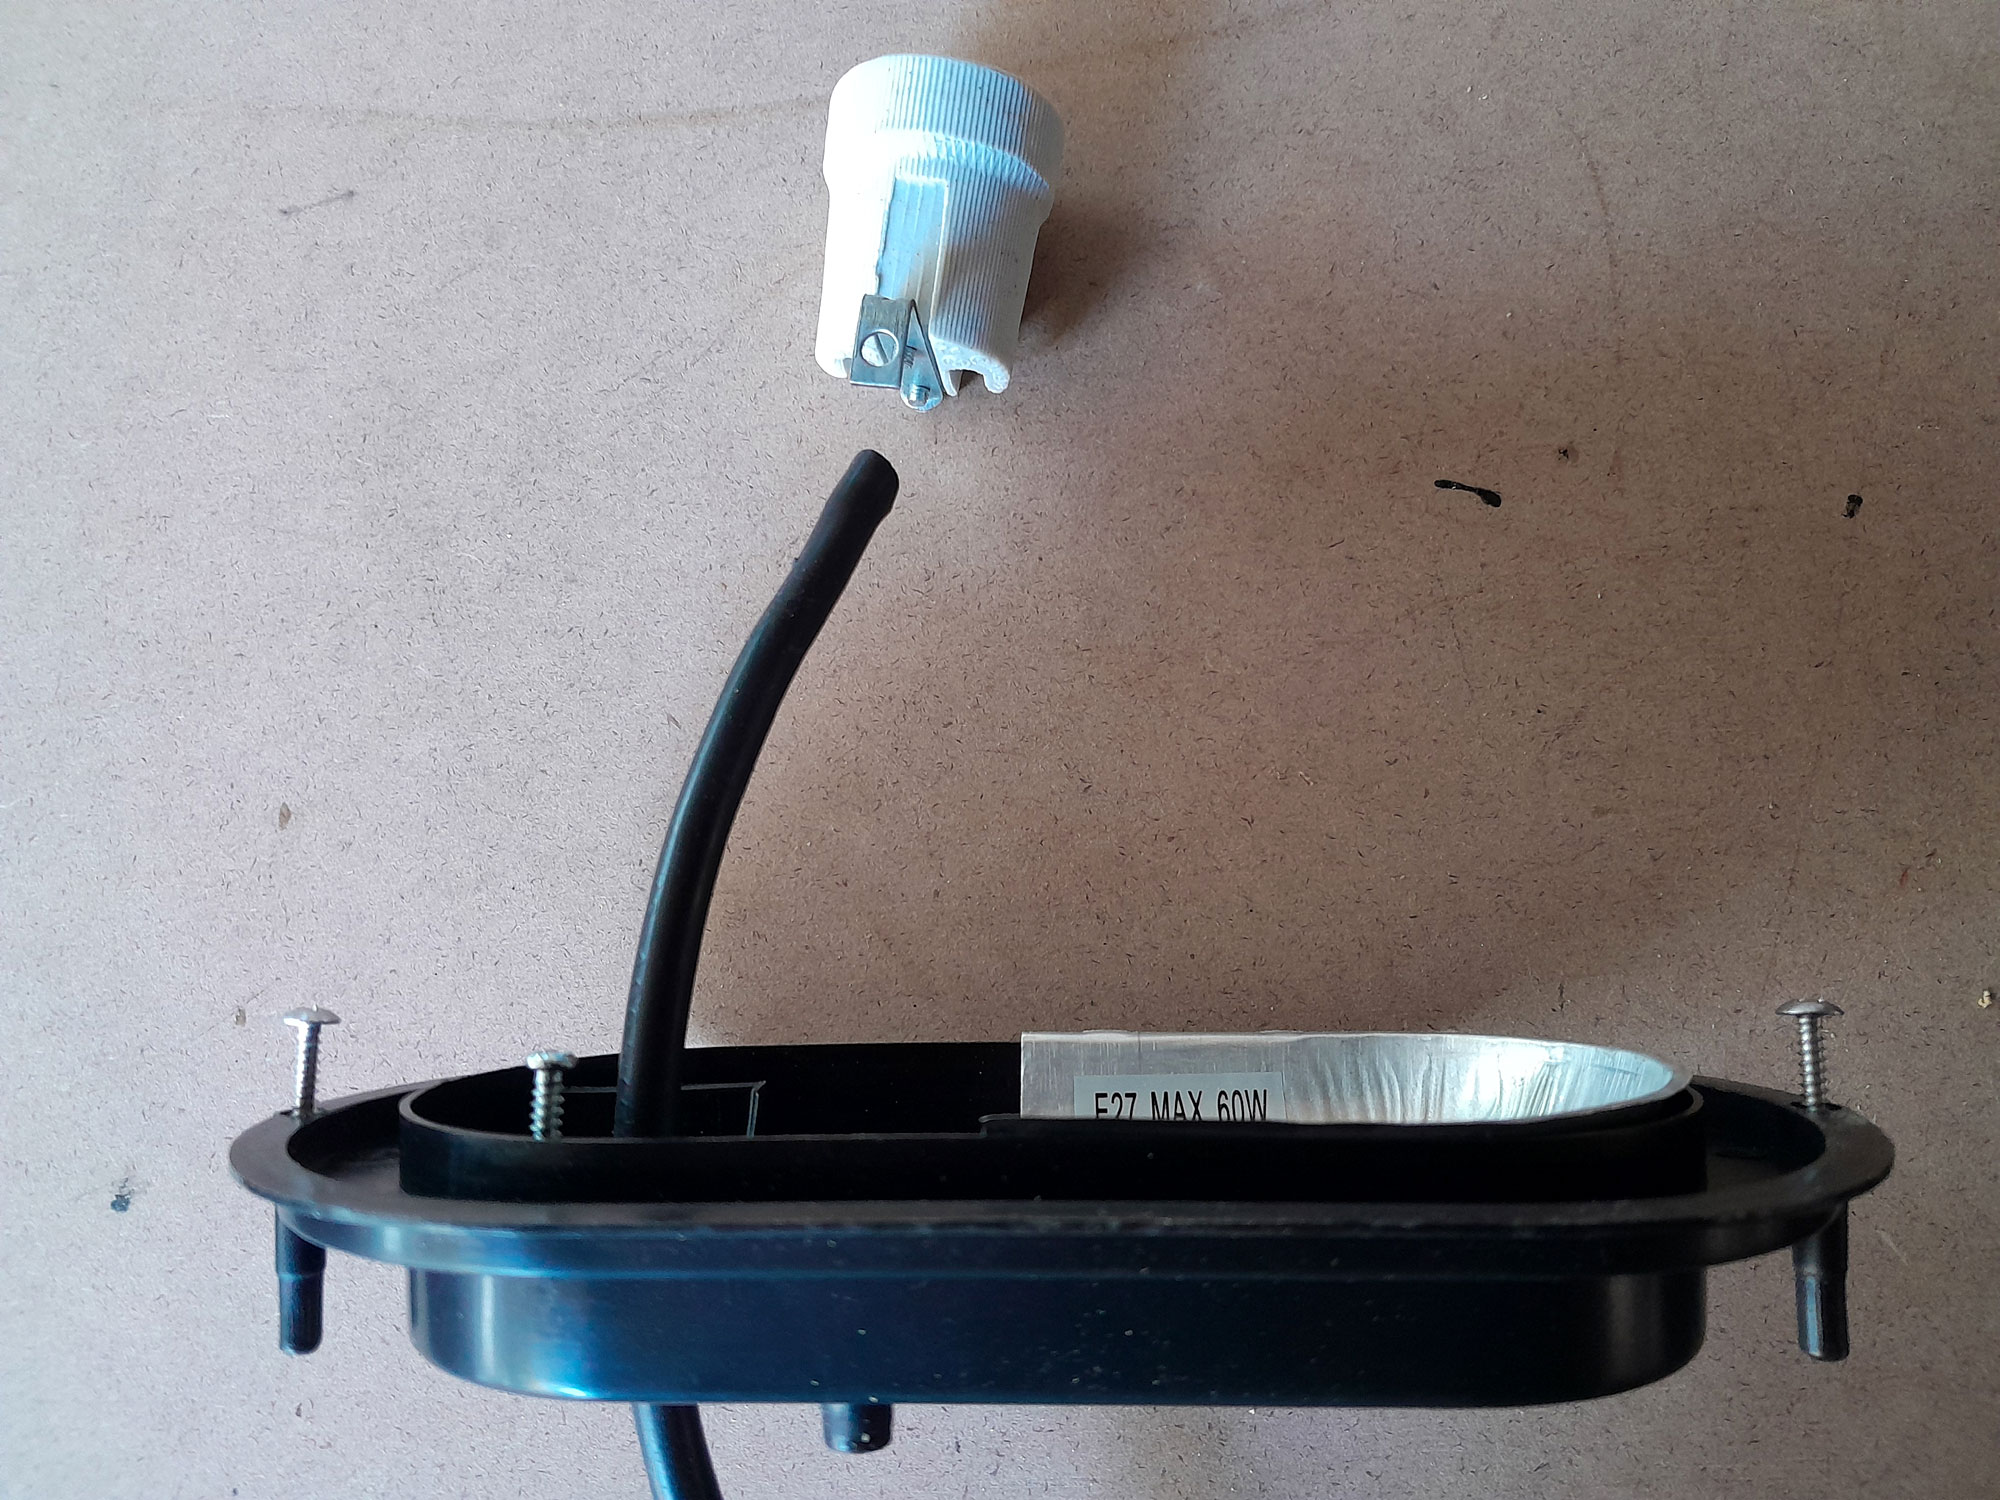
- Now I pulled the cord through the grommet sealing the hole and making the housing watertight.
- I pulled through enough to give myself plenty of freedom. You will see I also detached the actual bulb fitting
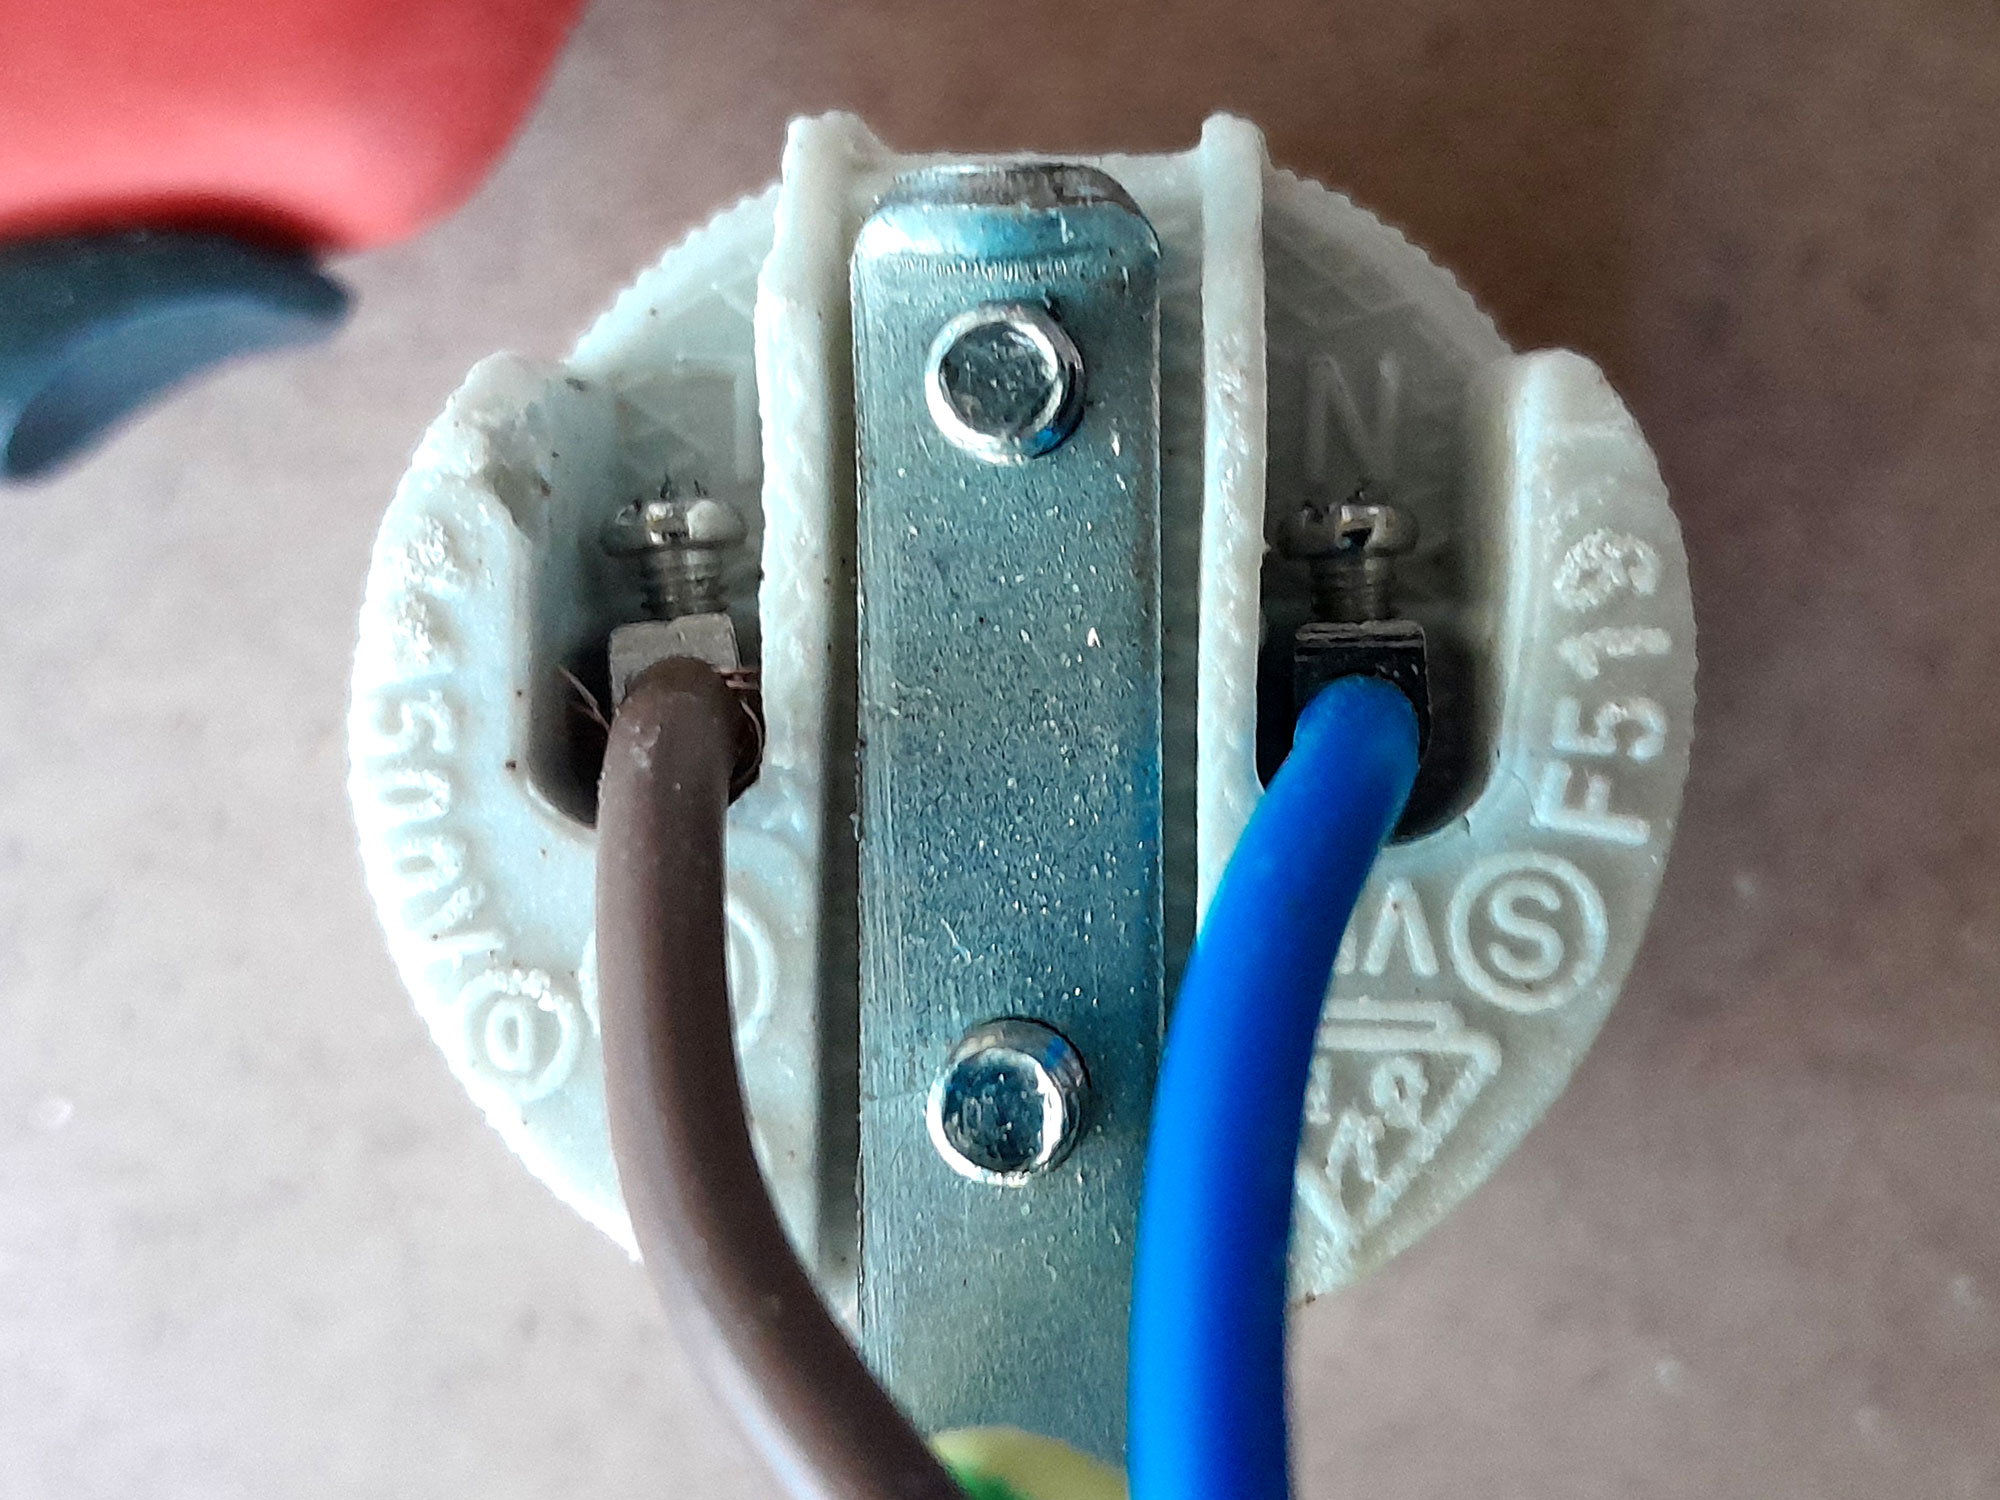
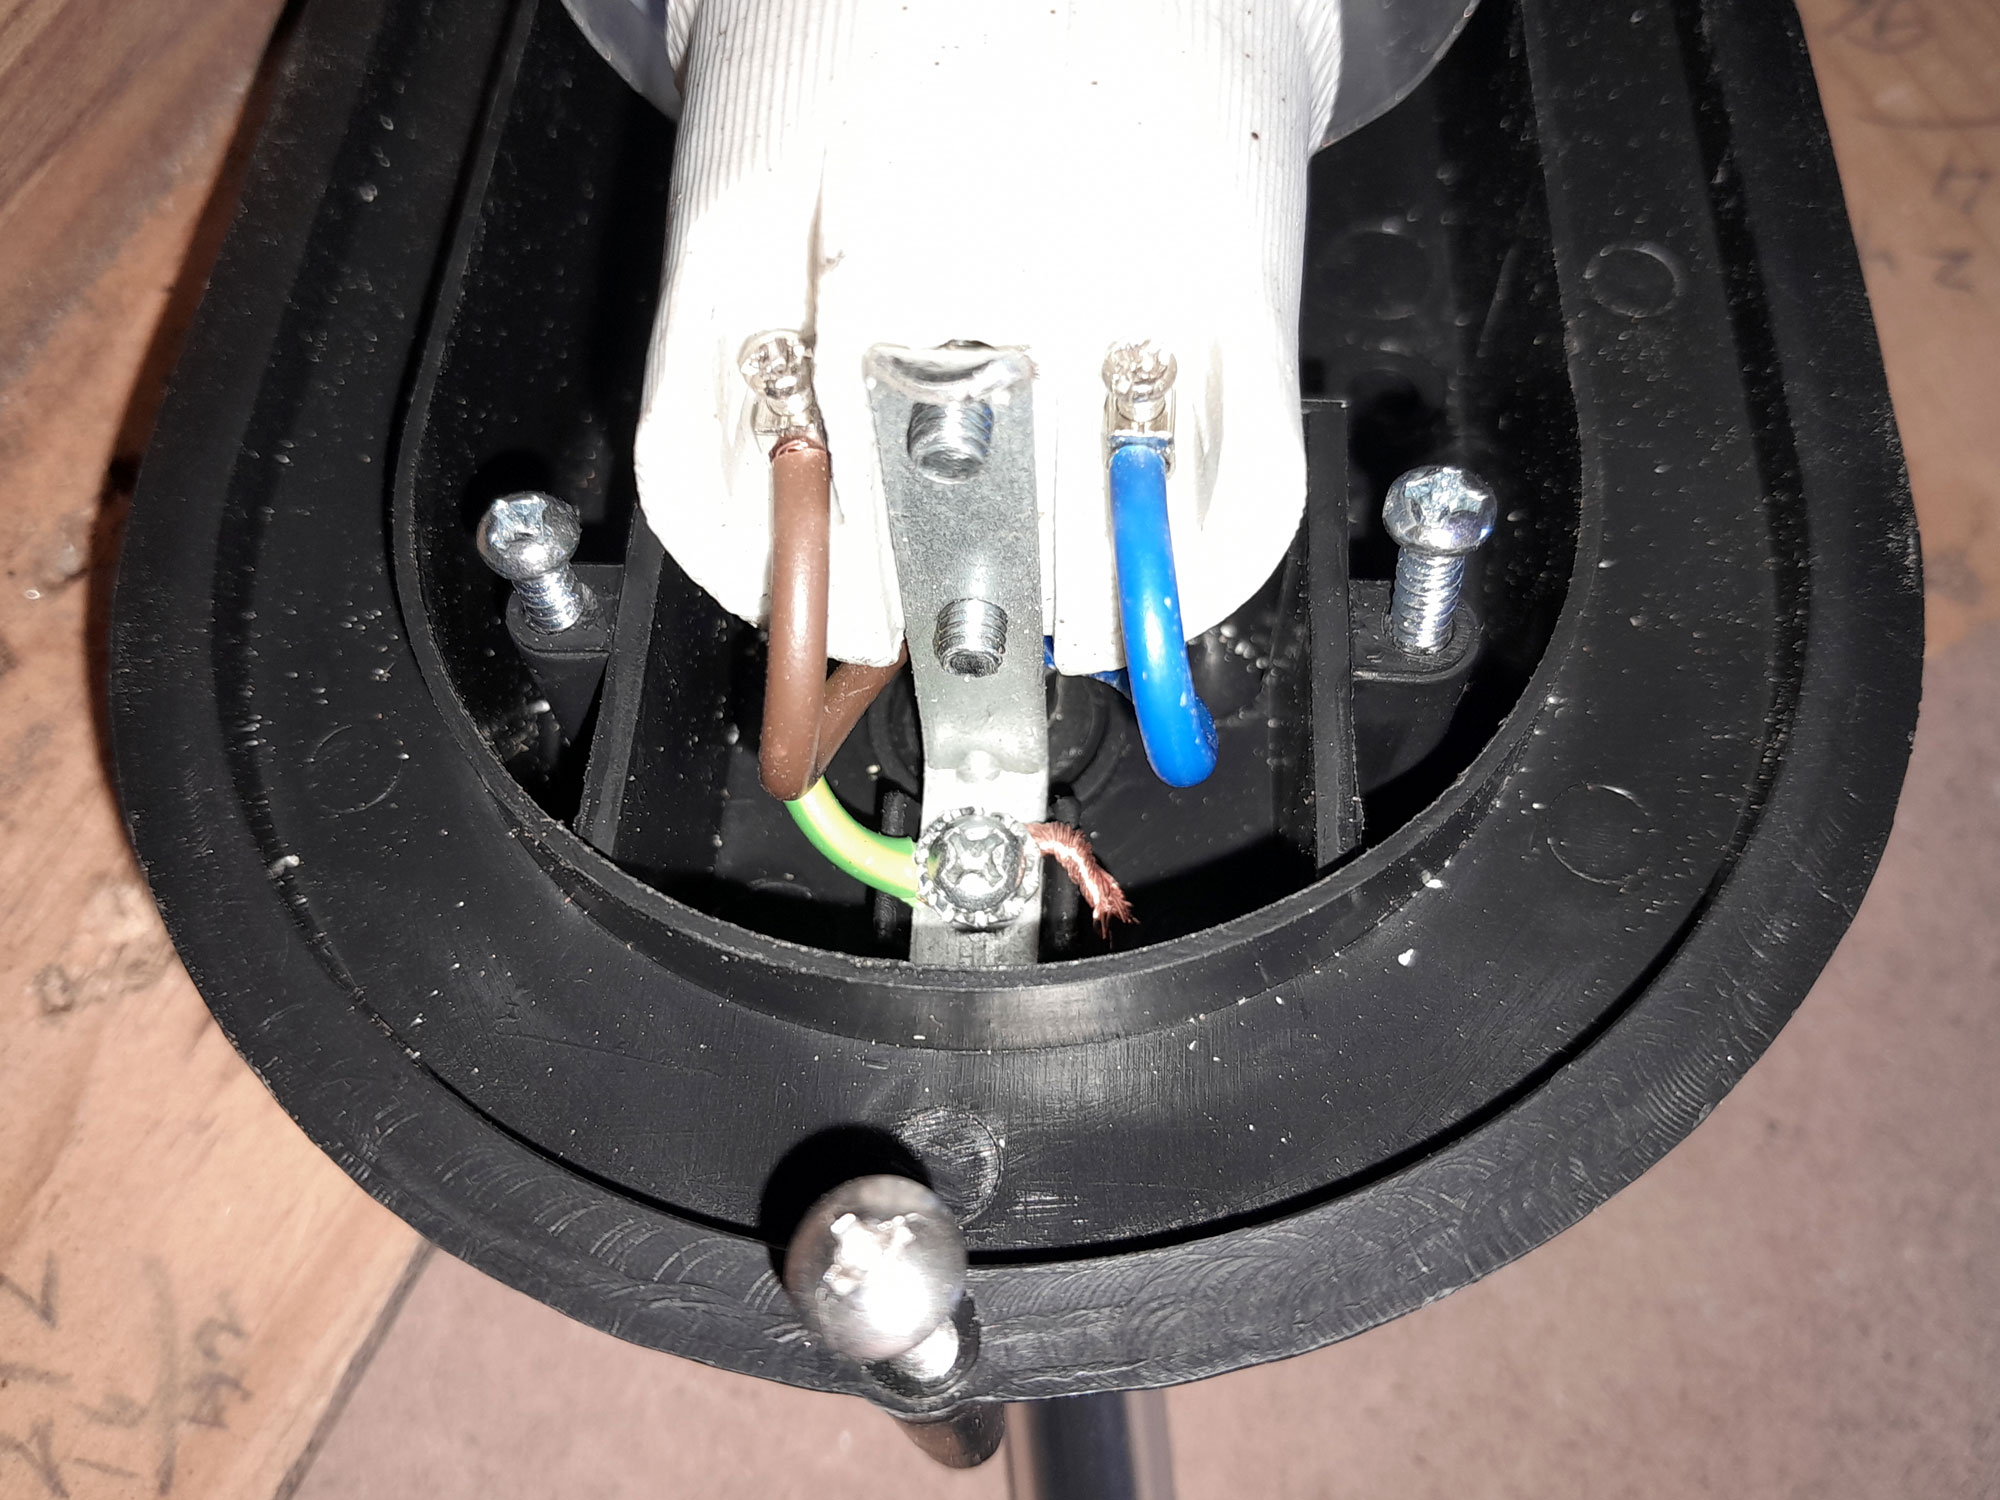
- I stripped off about 50mm of the outer sheath, and then the 8mm or so of the insulation off each wire and connected Brown (Live) to the L terminal, and Blue (Neutral) to the N terminal.
- I split the earth copper strands into two roughly equal numbers and wrapped them around the earth terminal/bracket attachment screw and secured the bulb fitting securely in place.

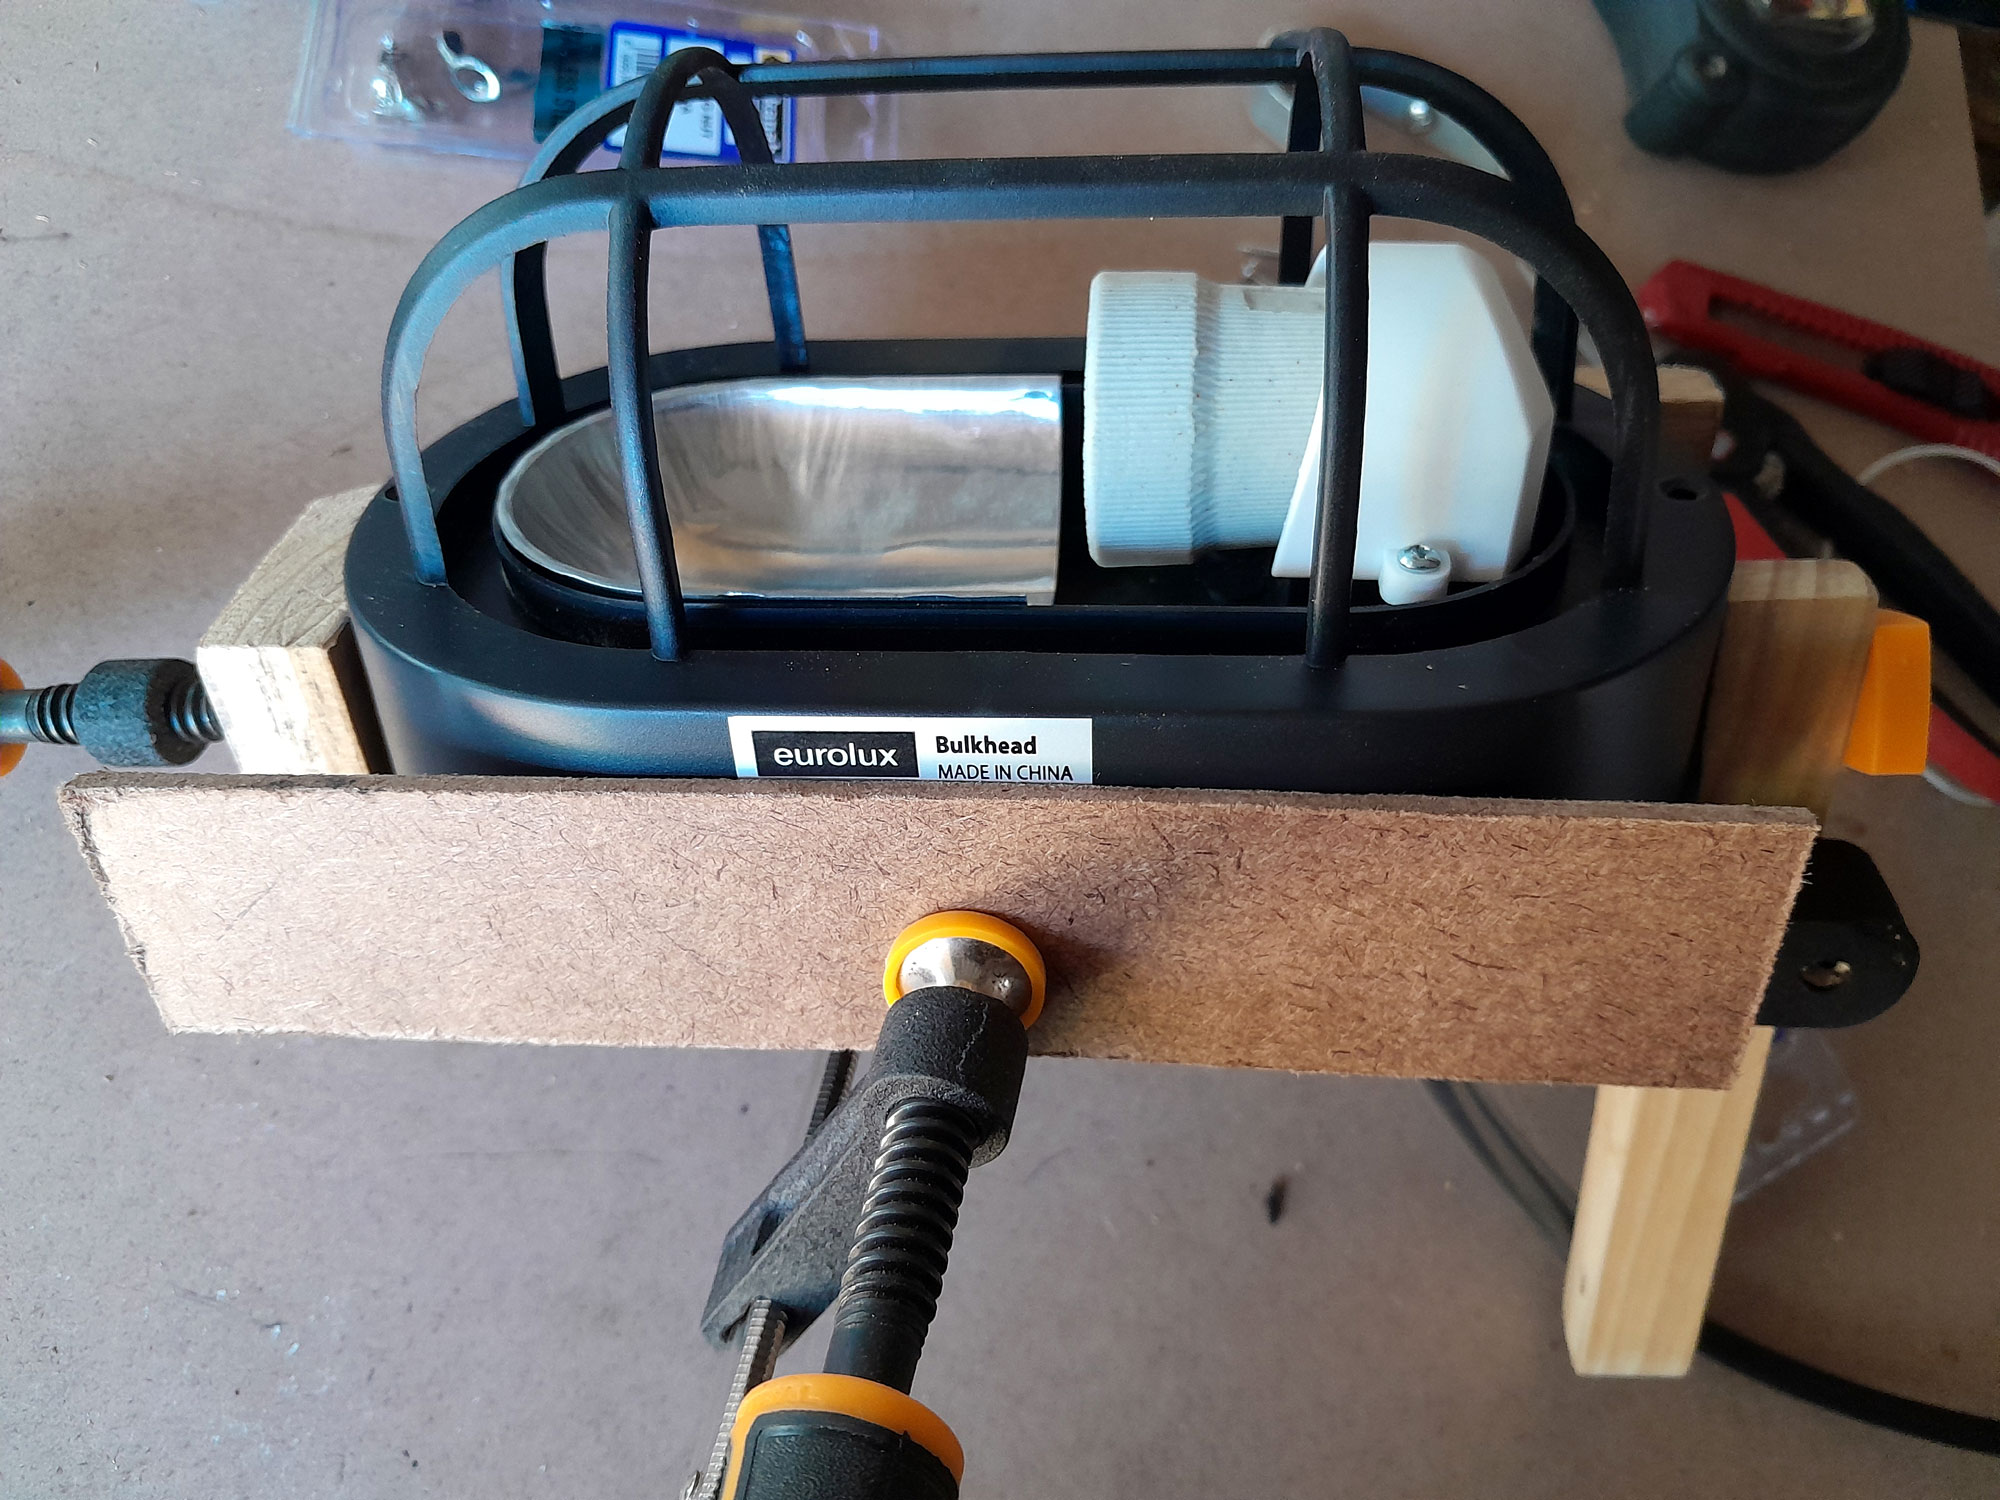
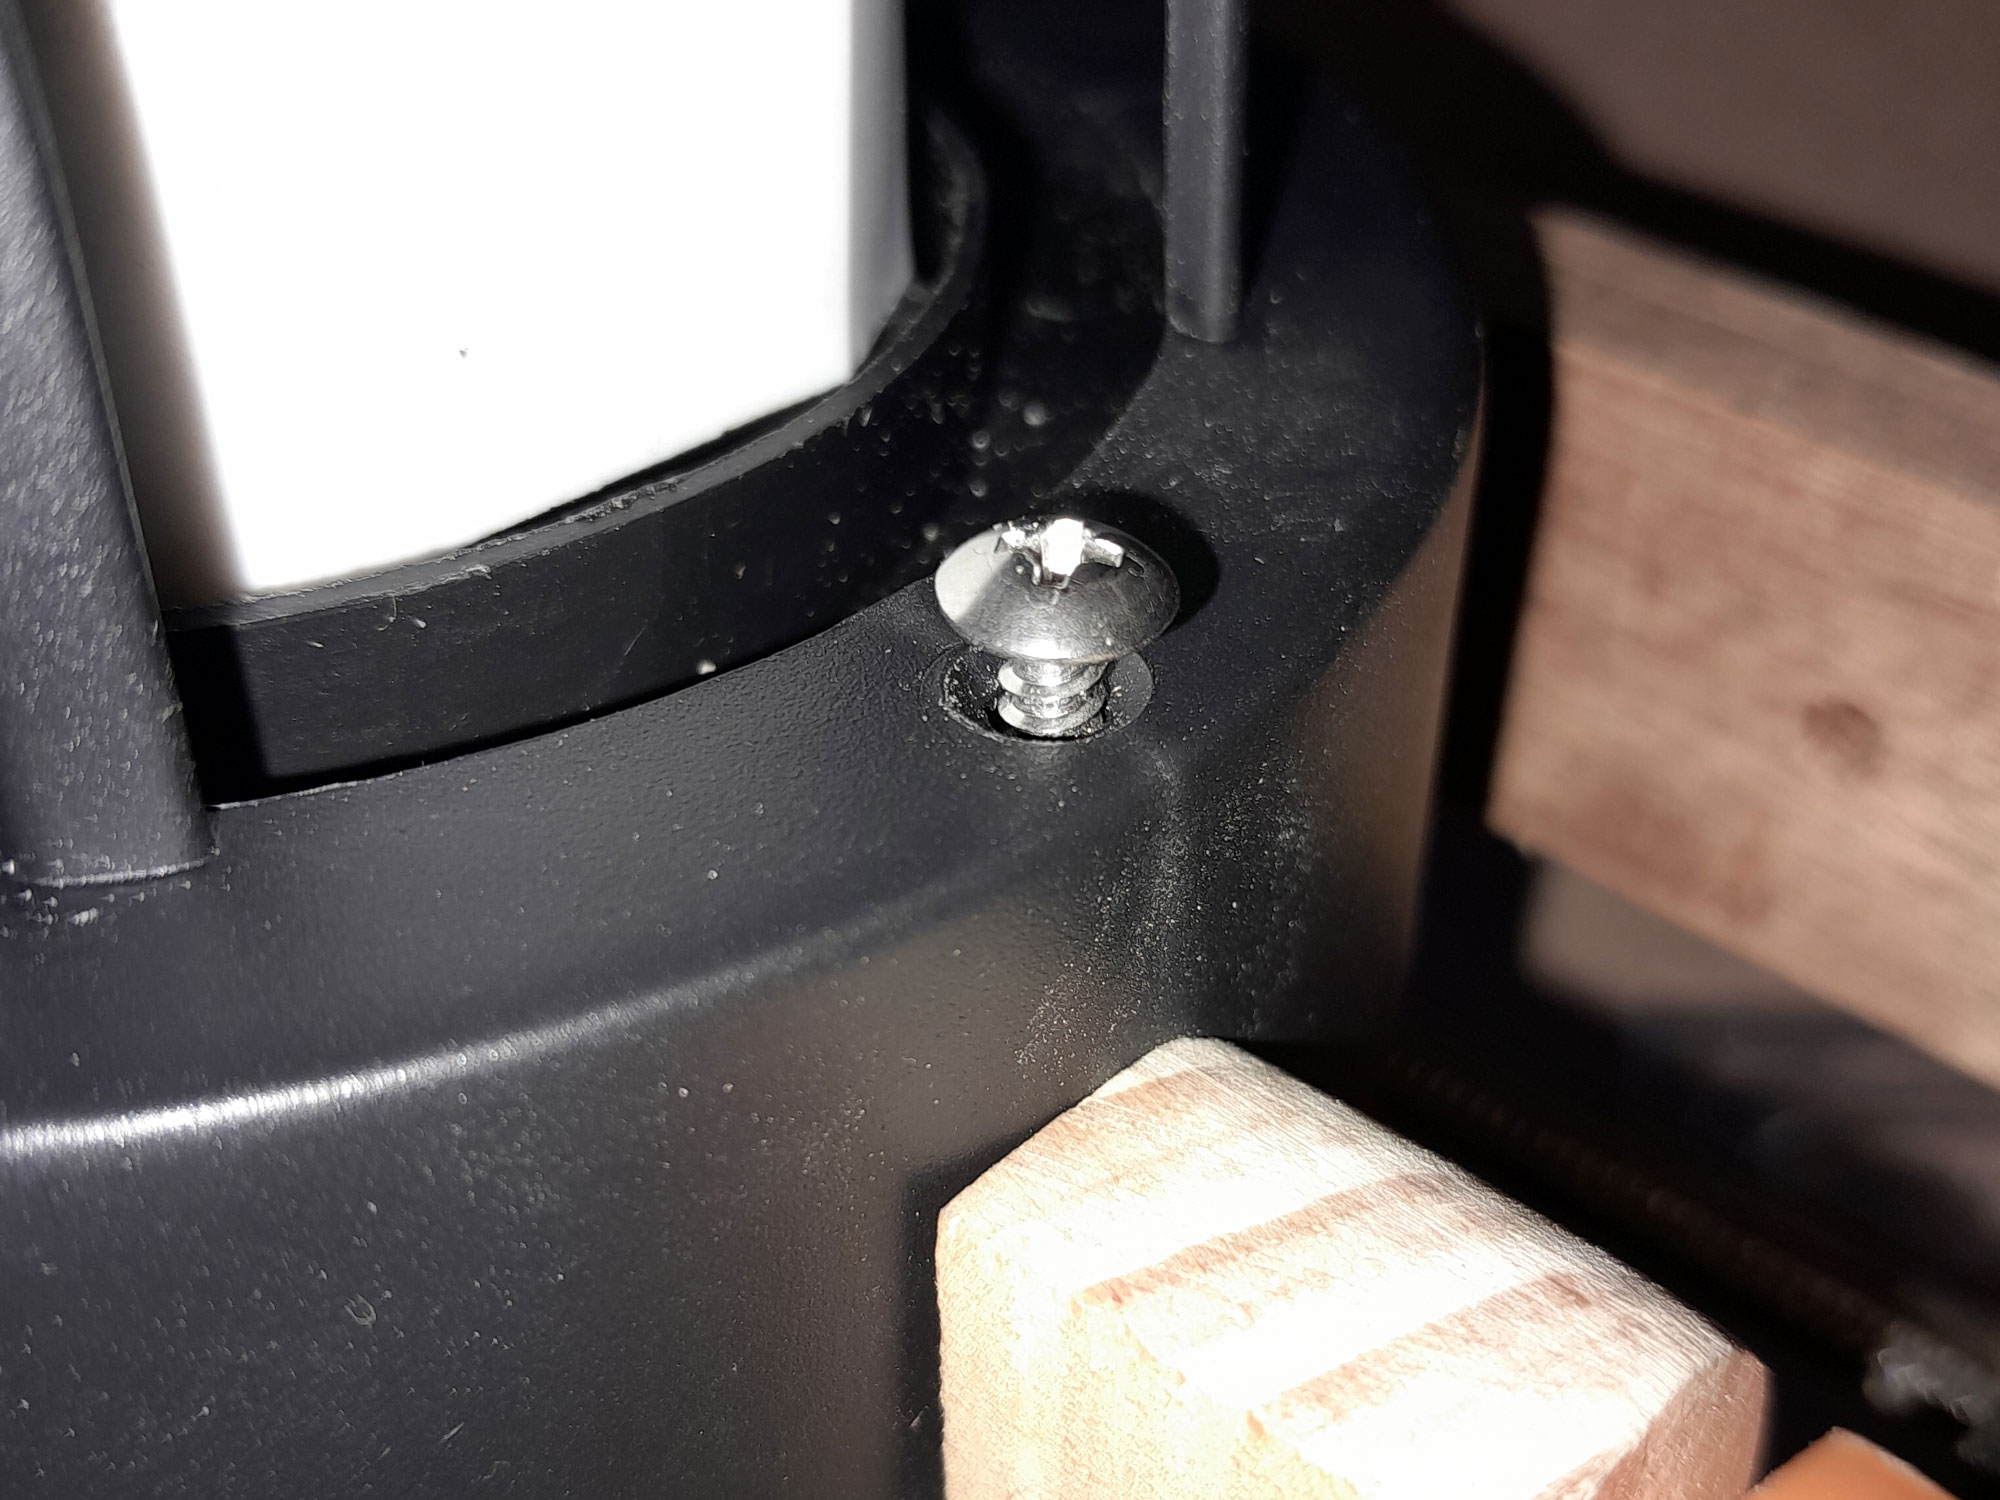
- Then I clamped four pieces of wood on each side and end of the base, and pushed the fitting, complete with its outer covering into position. At this stage I hadn’t yet removed the reflector, but you have to with this model as one of the securing screw positions is right under it. Then I used the two securing screws, as supplied with the fitting, to secure it to its base.
- Note that I secured the outer cover lightly to ensure everything – fitting’s base and its top outer cover – lined up properly.
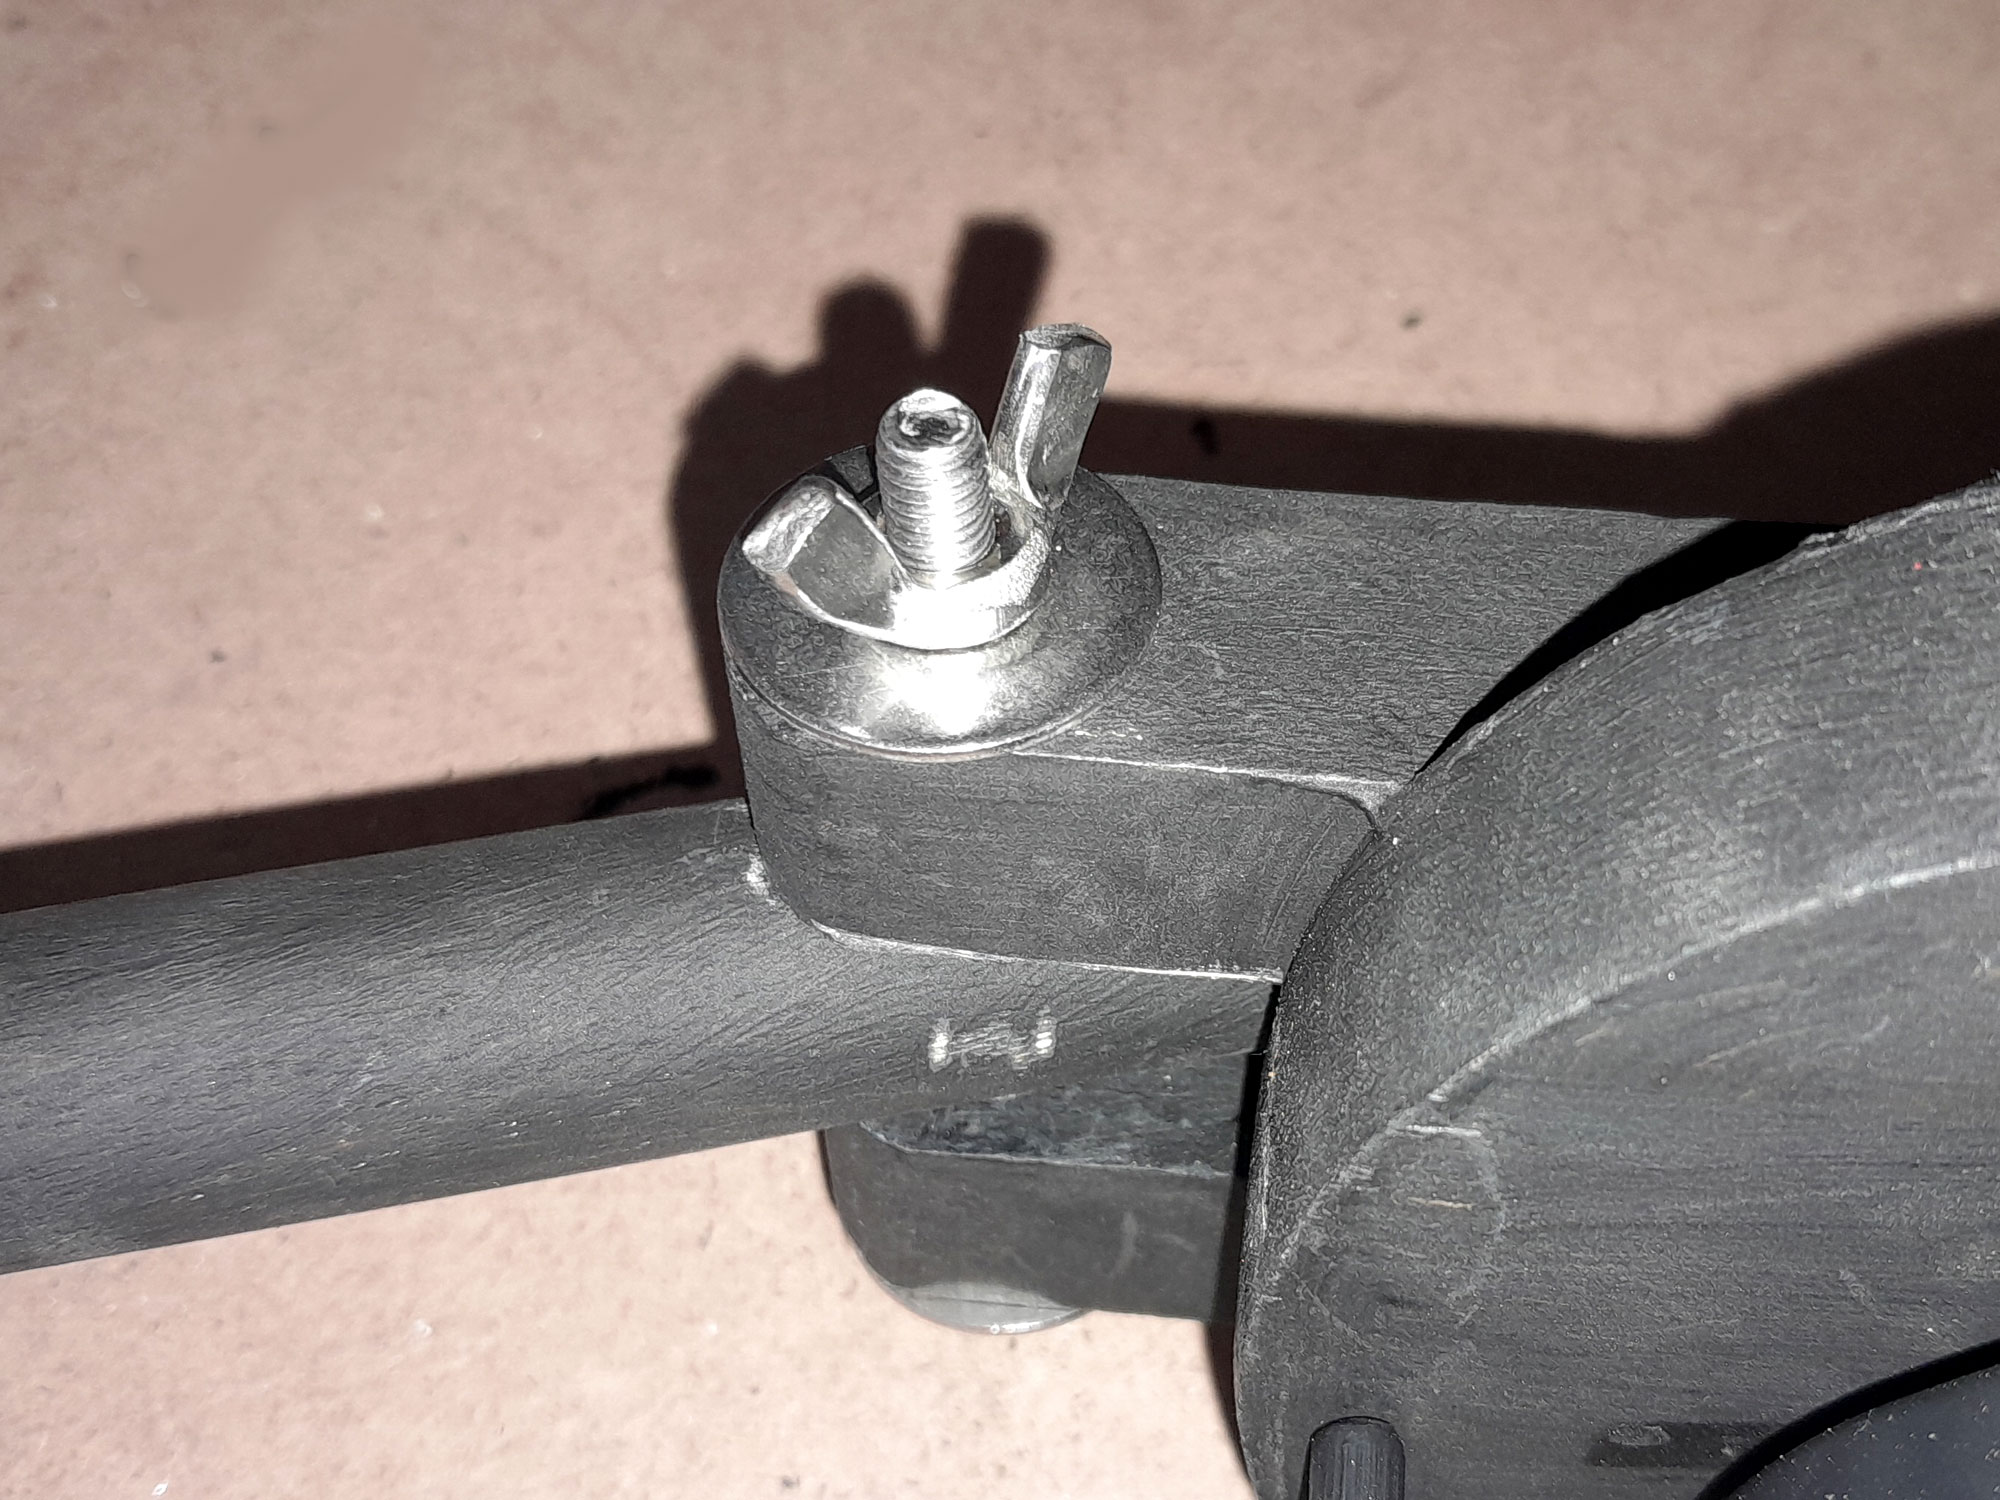
- It’s a very tight fit, and in fact you might need to sand – flat, note – the meeting surface of the dowel so that you can slip a 6mm flat washer in between the dowel and the arms, on either side of the dowel.
- Then I inserted the set screw axle, complete with 25mm 6mm fender washers on the outside and secured it with a wing nut.
- I put the reflector back on the fitting and fitted the bulb.
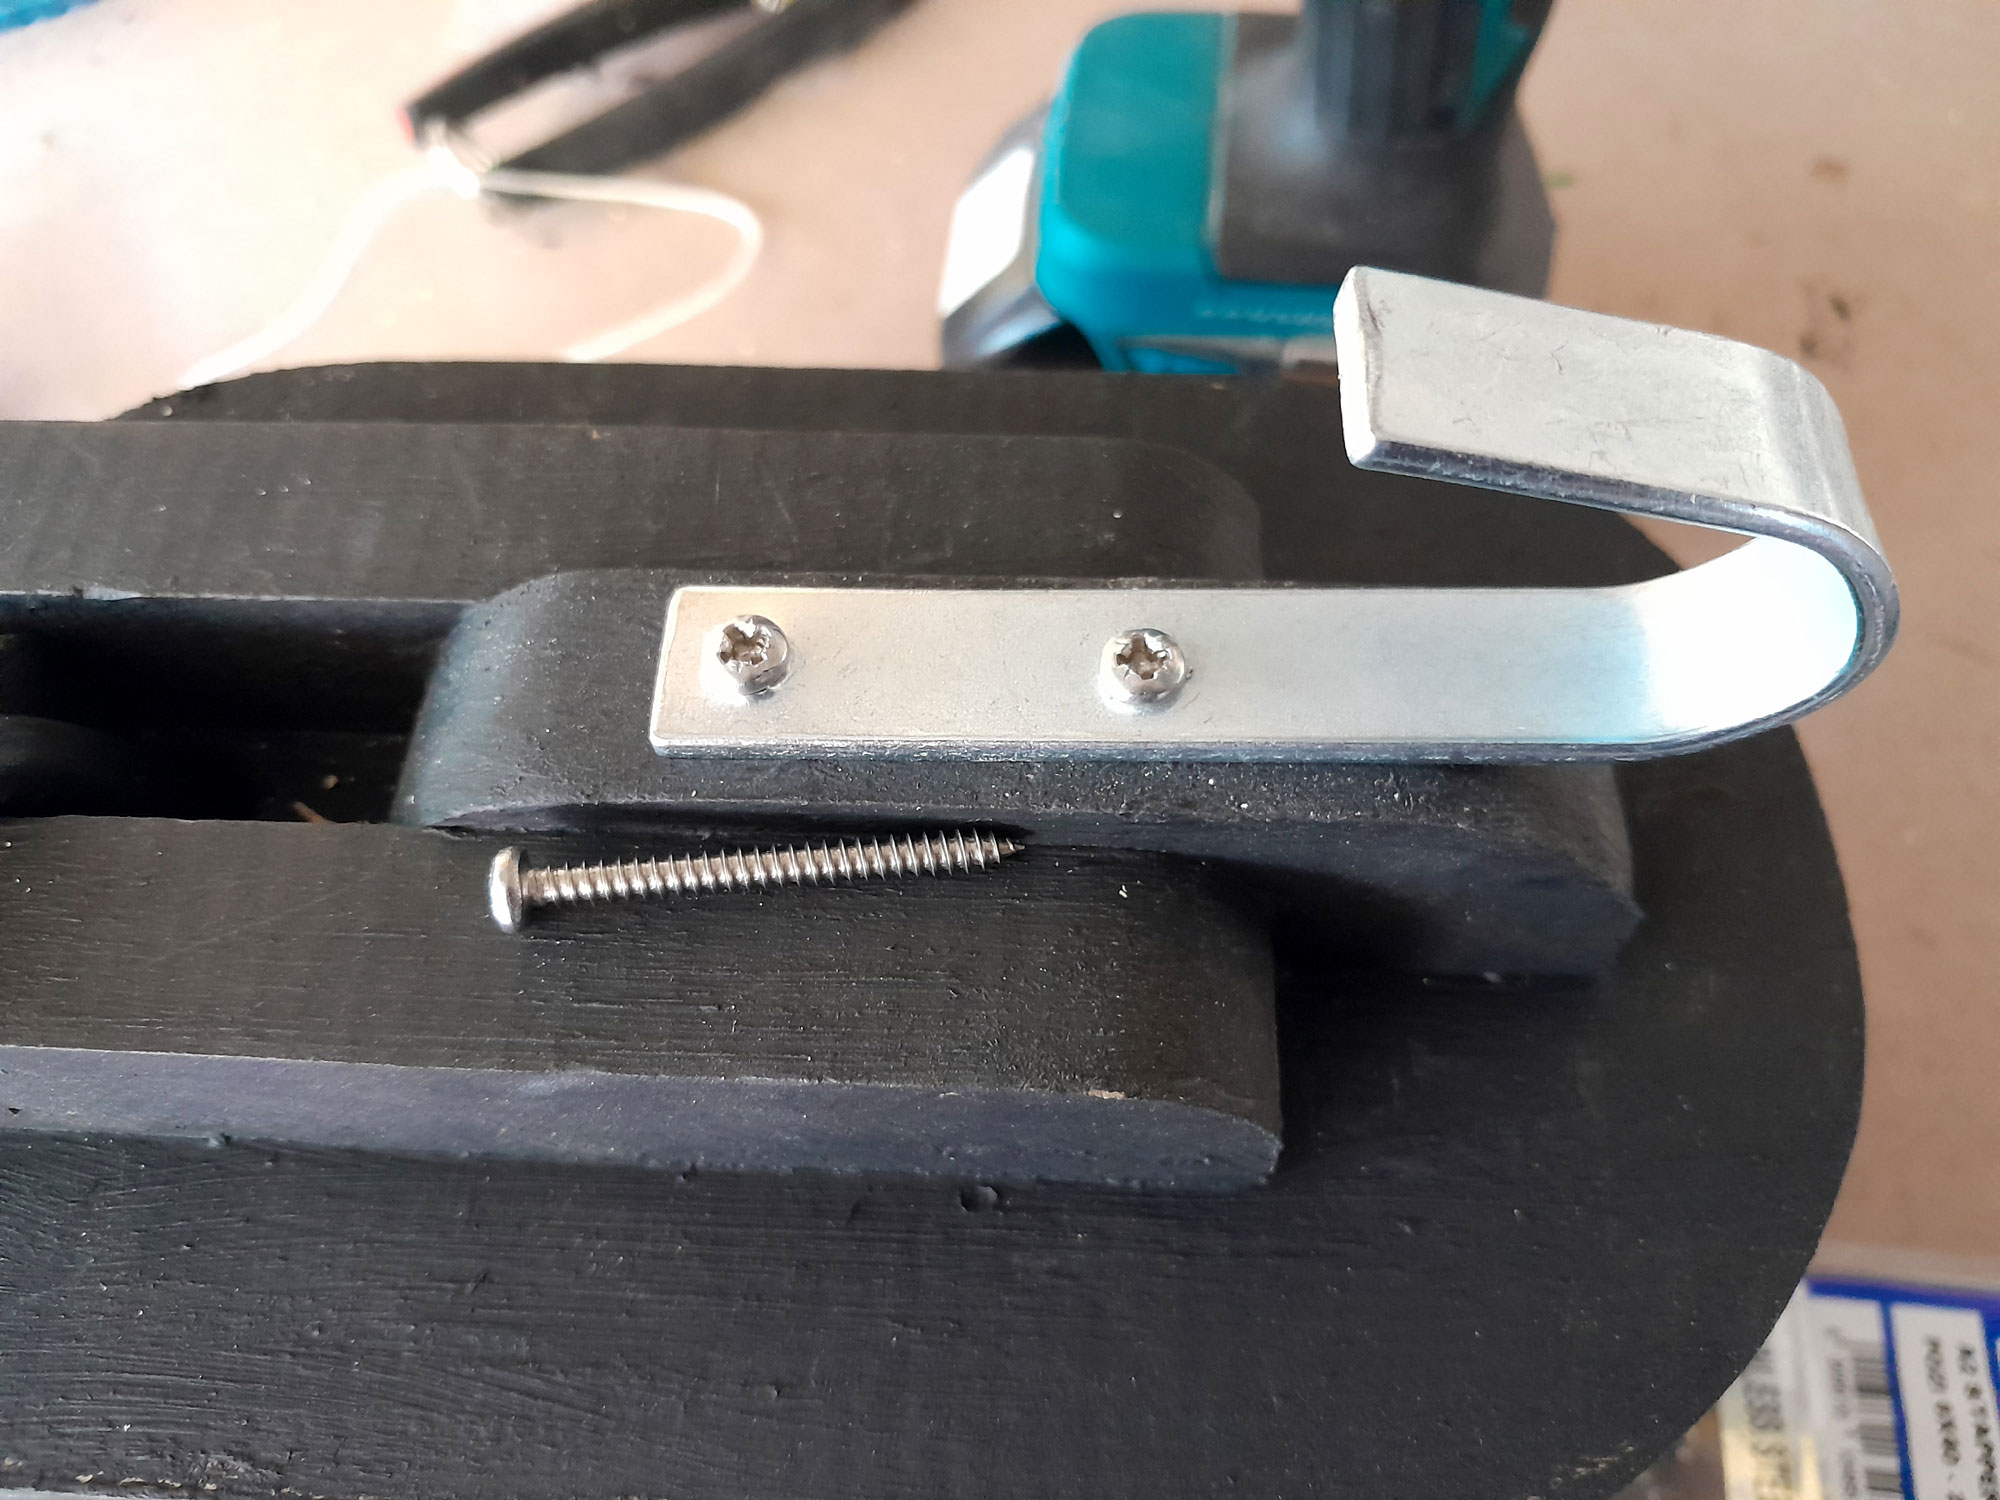
- Almost there… I fitted a hook on the arms mounting using 40mm screws that secure the hook and also reinforce the join between the base and the arm mount.
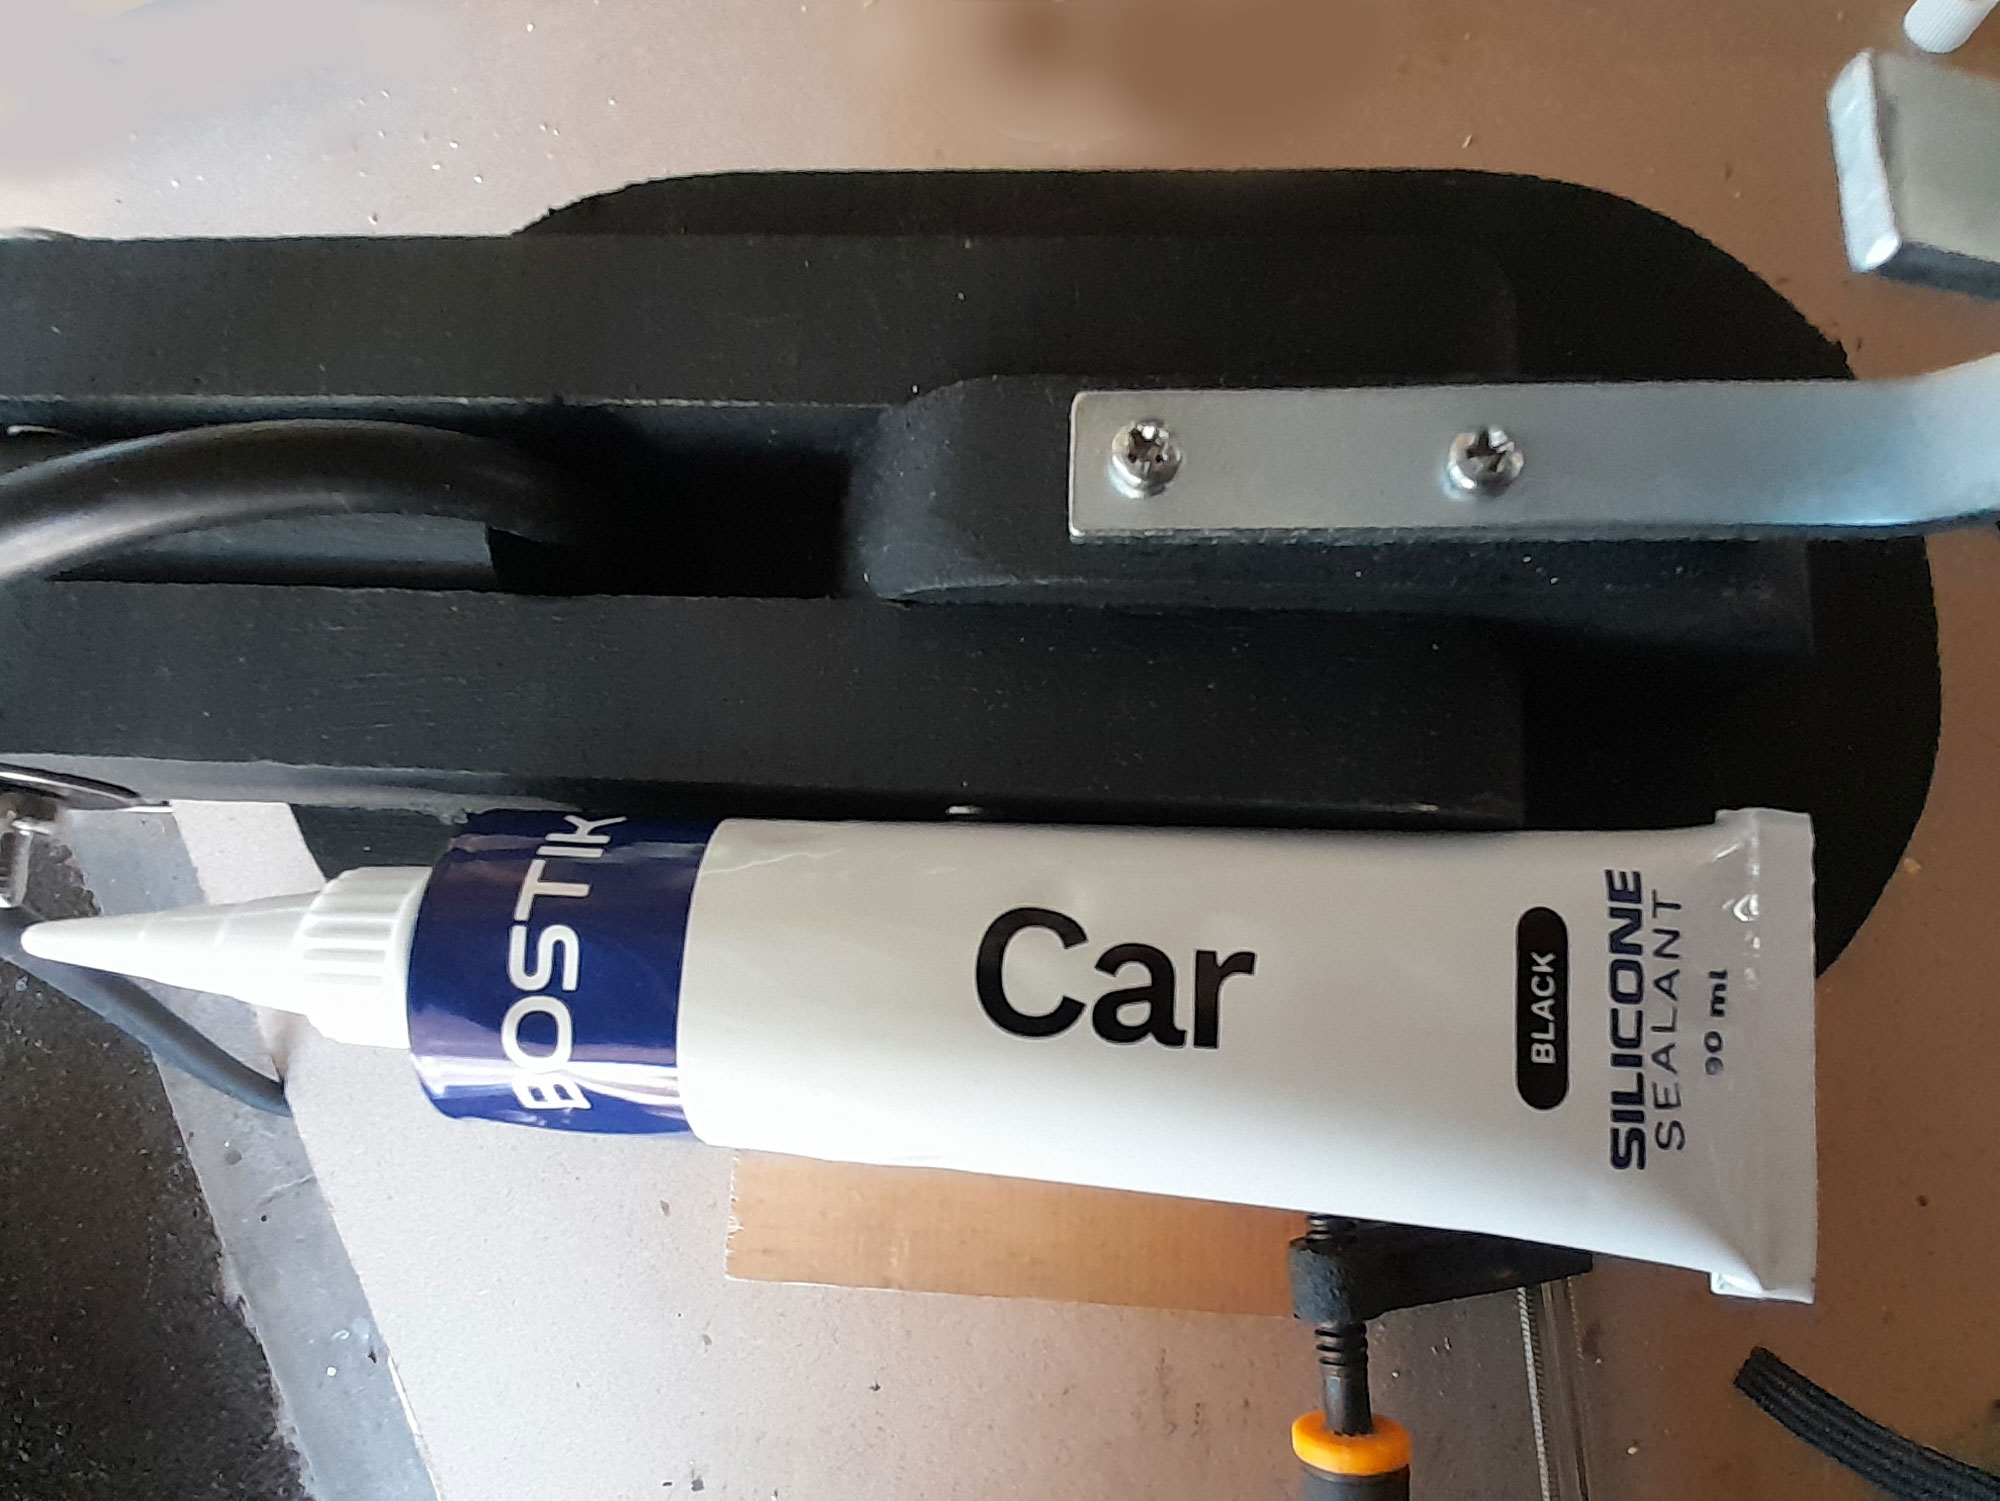
- To really seal the unit, I used some black car sealer to secure a length of 10mmØ clear plastic tube over the extension cord. I pushed the end right in and hard up against the grommet on the fitting, making a good seal. I also wanted to give the extension cord a little extra protection again any wear-and-tear on the wood base.
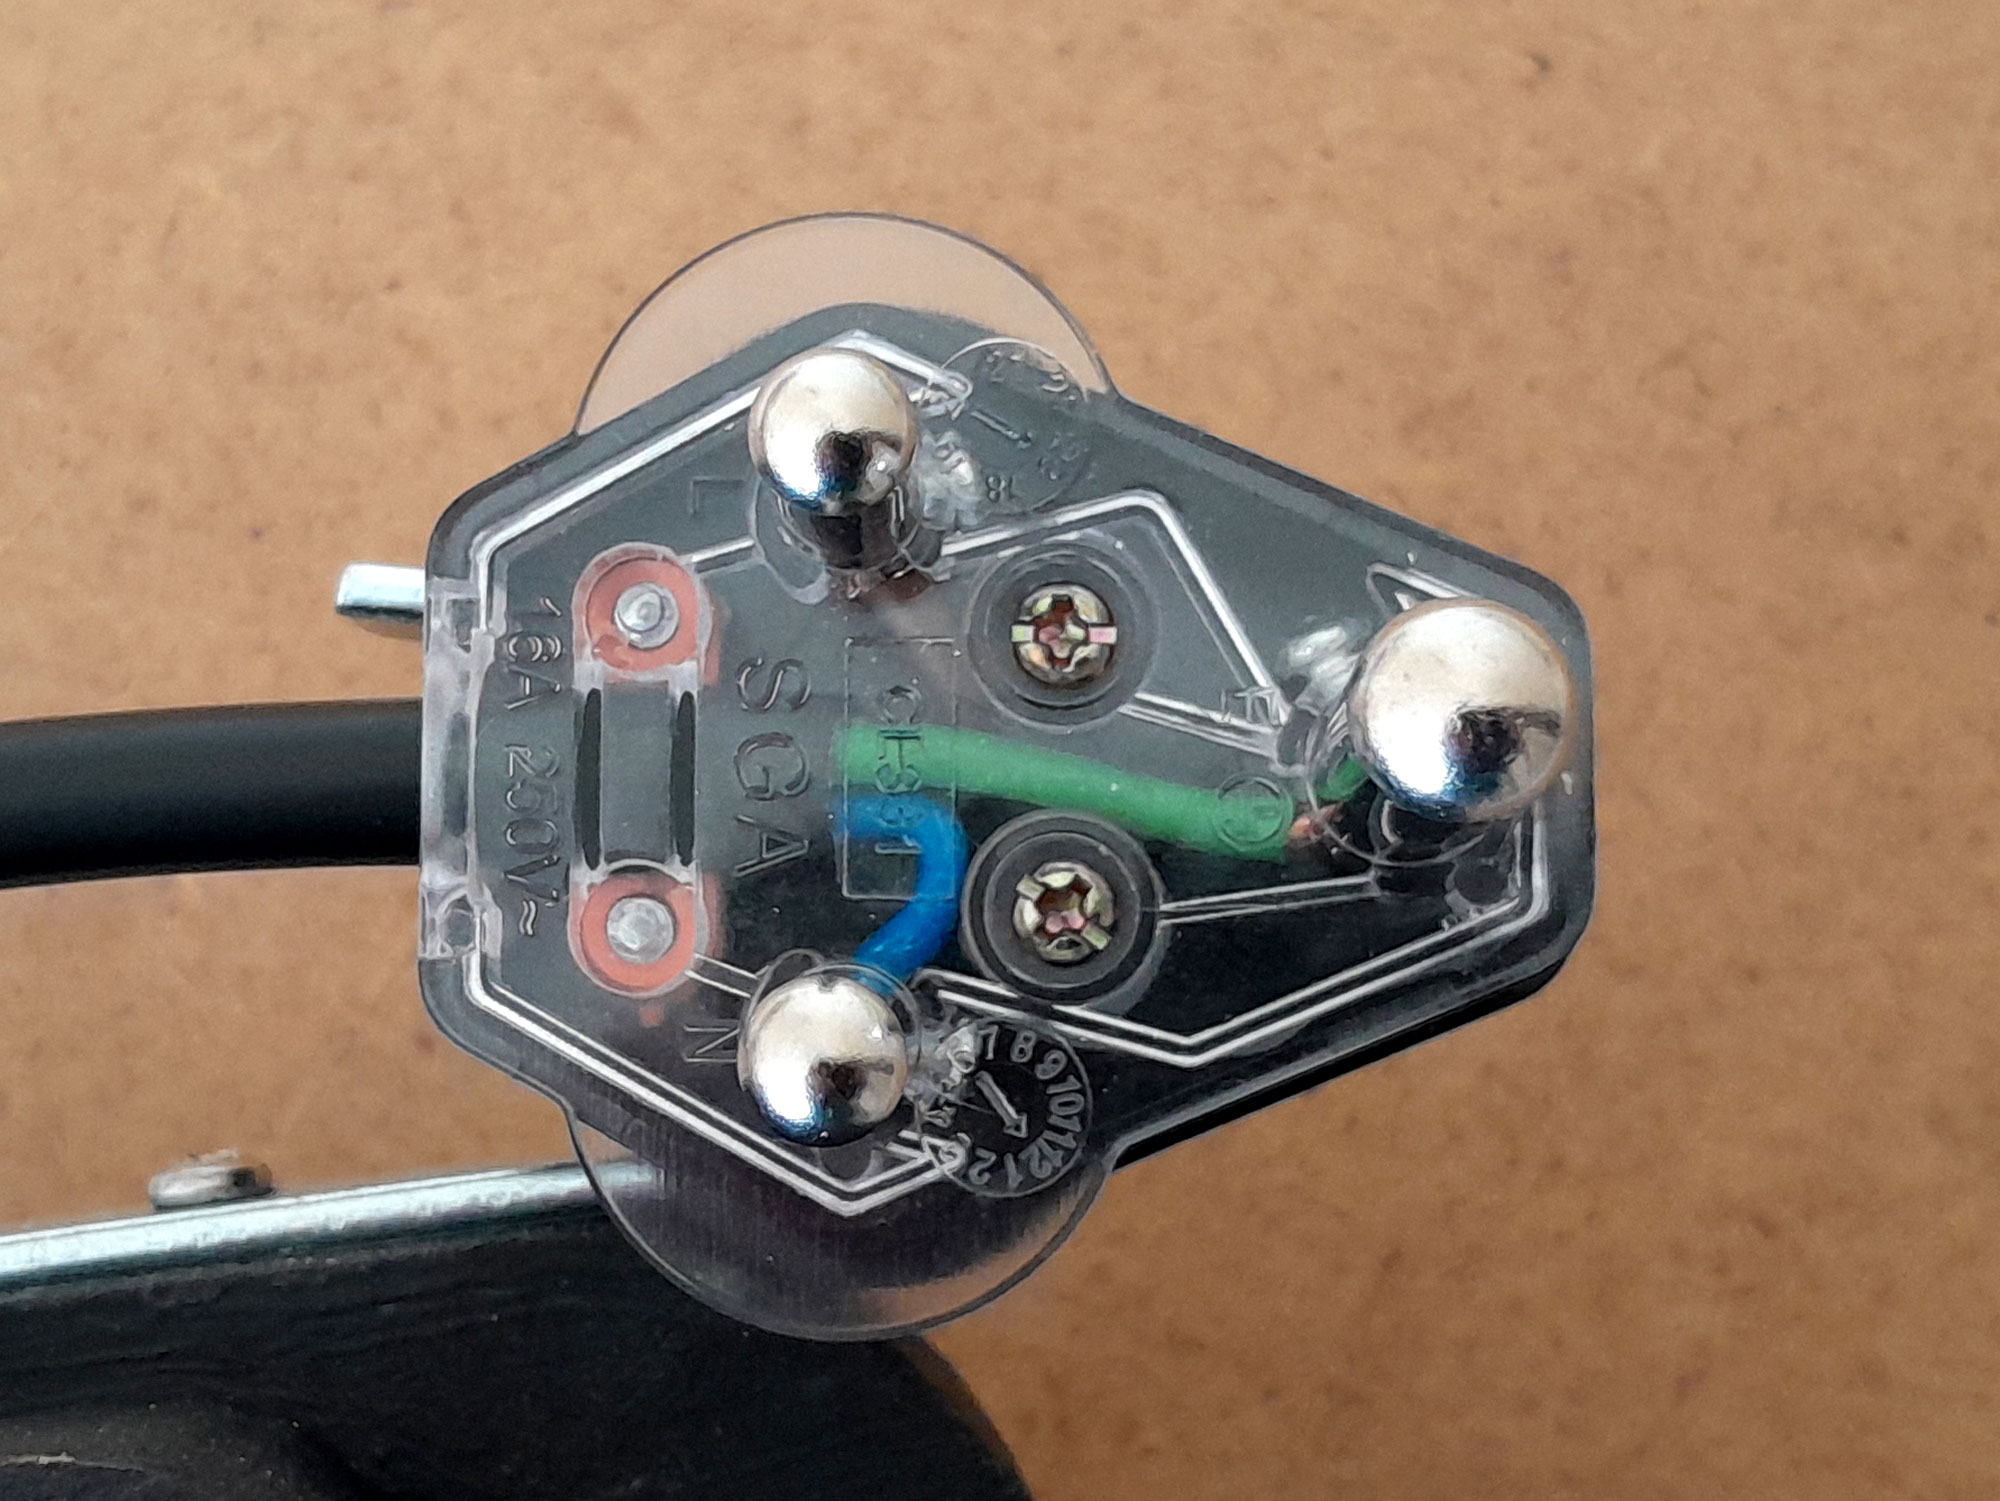
- I connected the other end of the extension cord to its plug. Note: Brown to Live, Blue to Neutral, Green/Yellow to Earth.
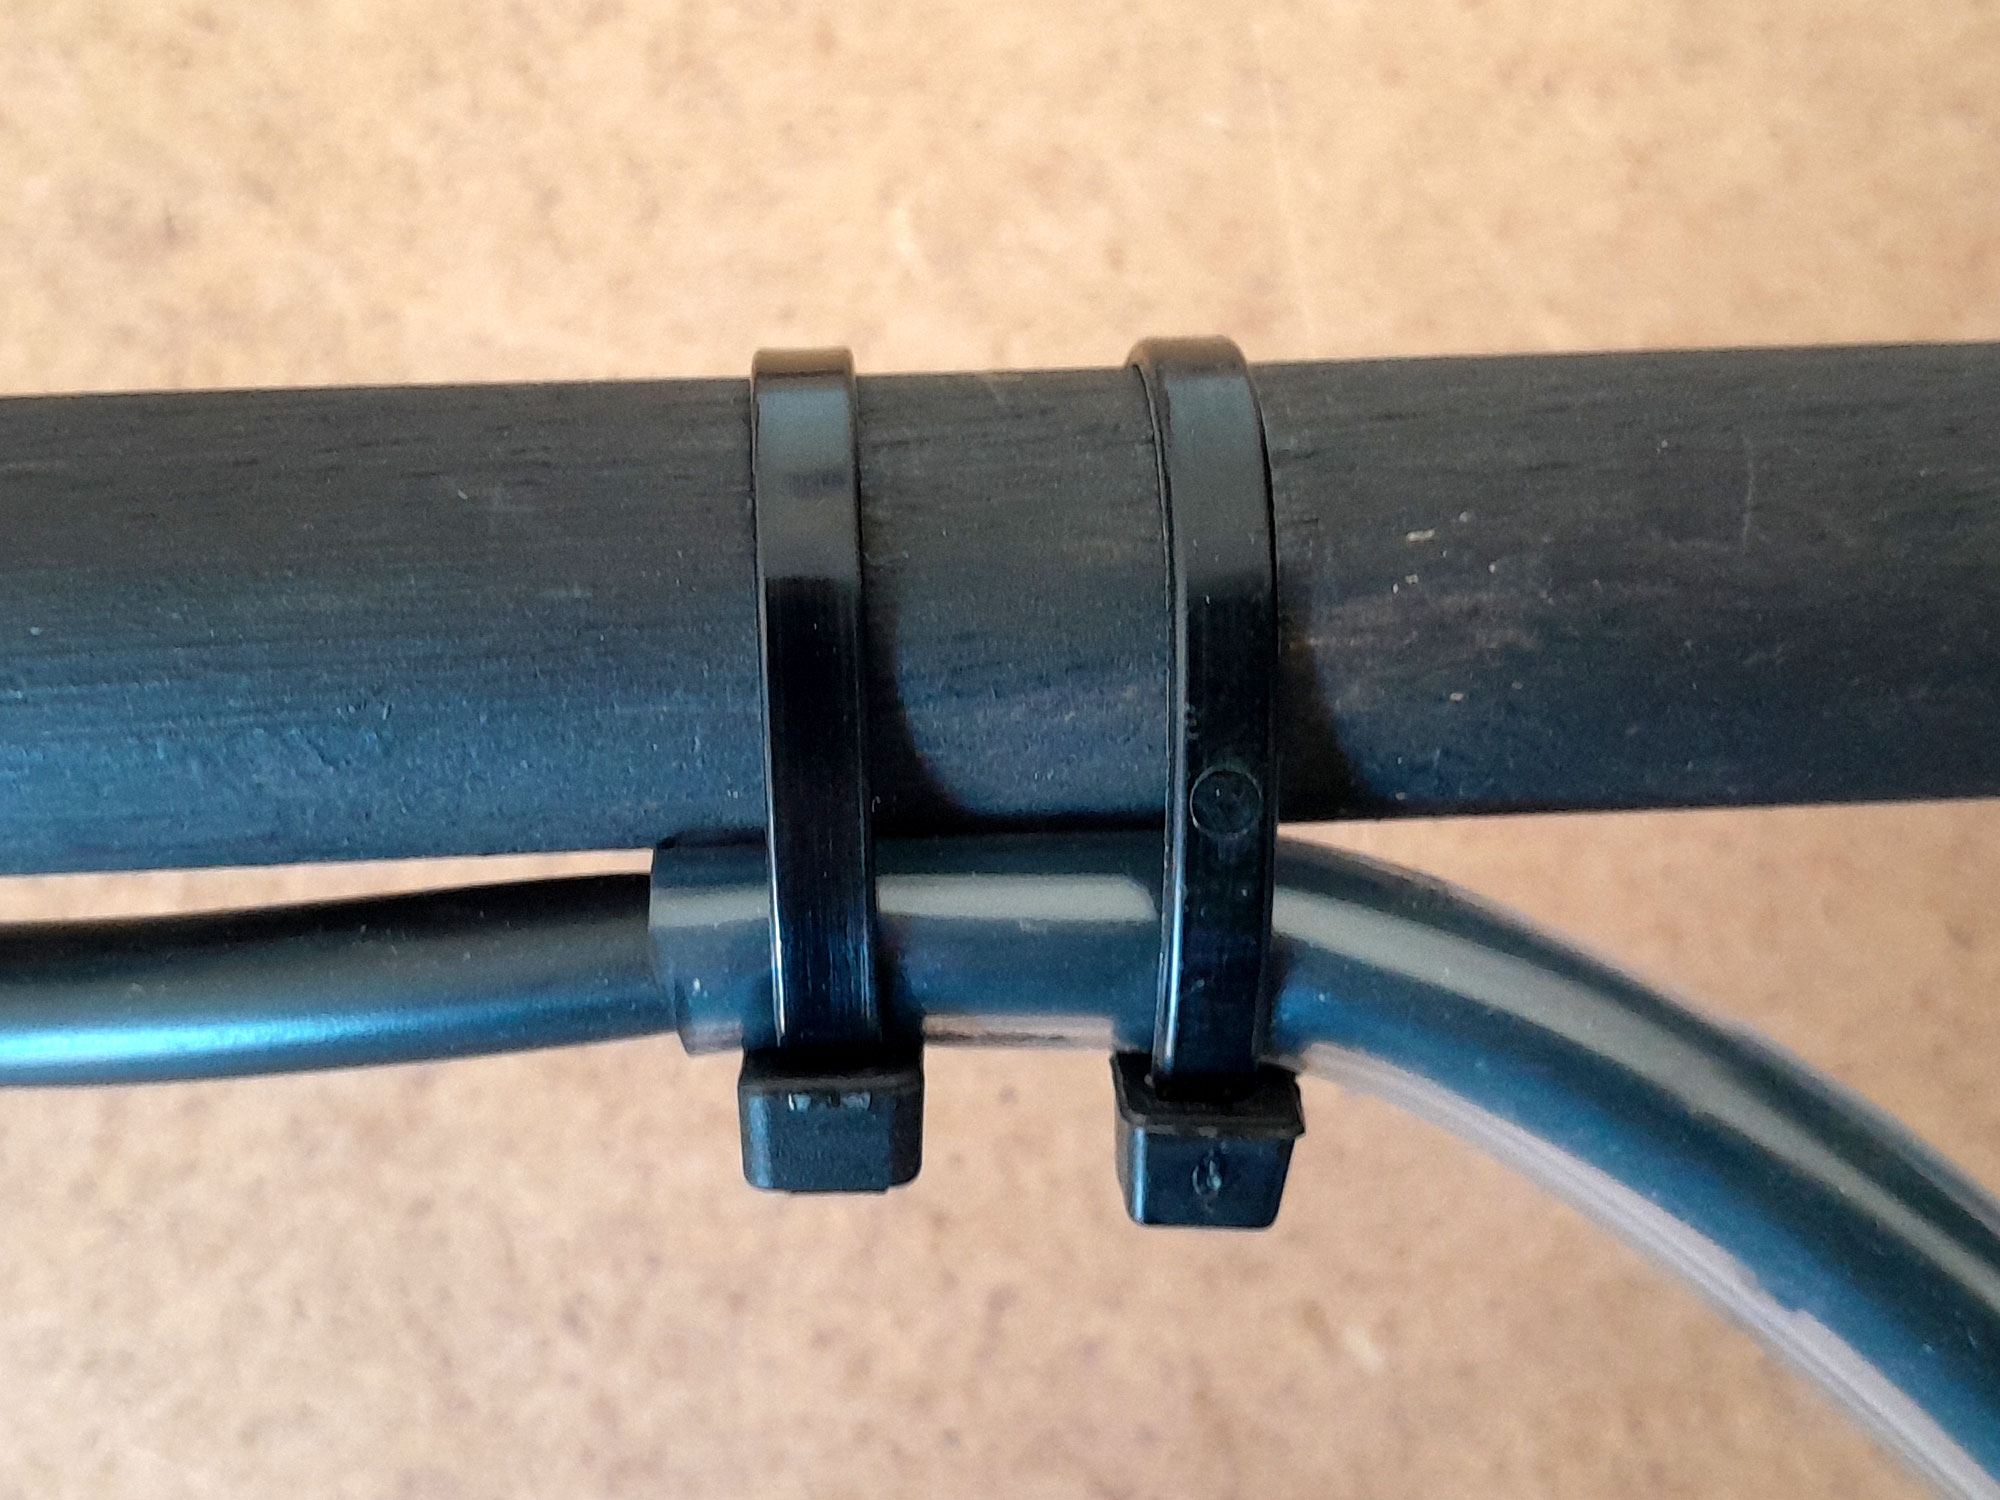
- I secured the end of the clear plastic tube and extension cord to the dowel at a position at which there is plenty of room for both to flex without being pulled tight over the top of the dowel.
- Two cable ties should be sufficient to secure it.
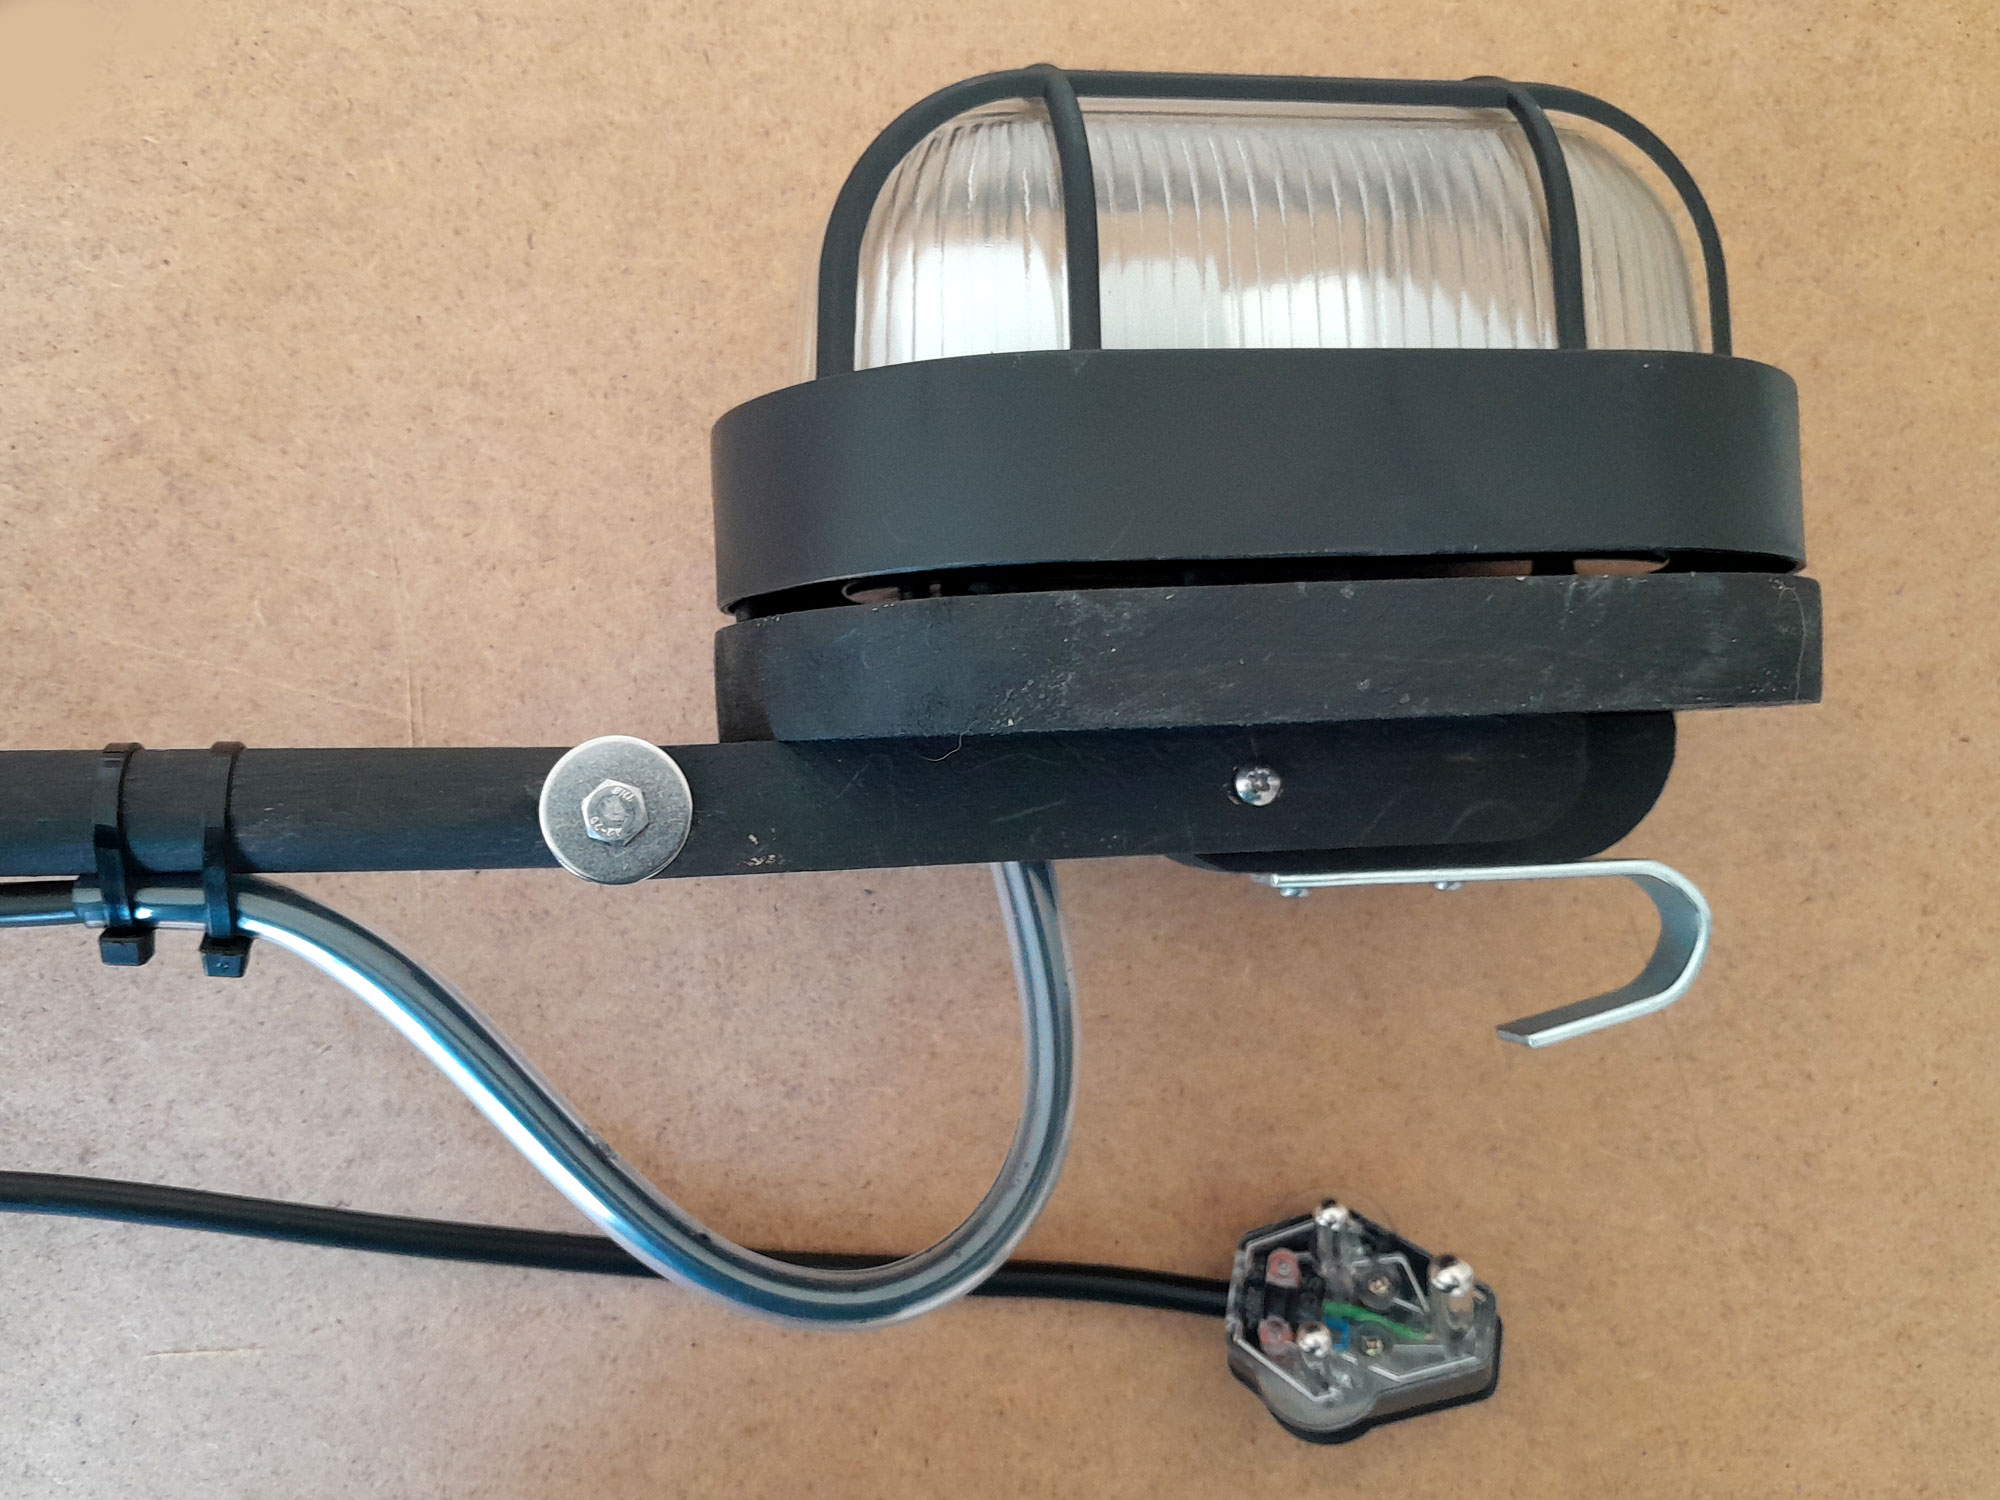
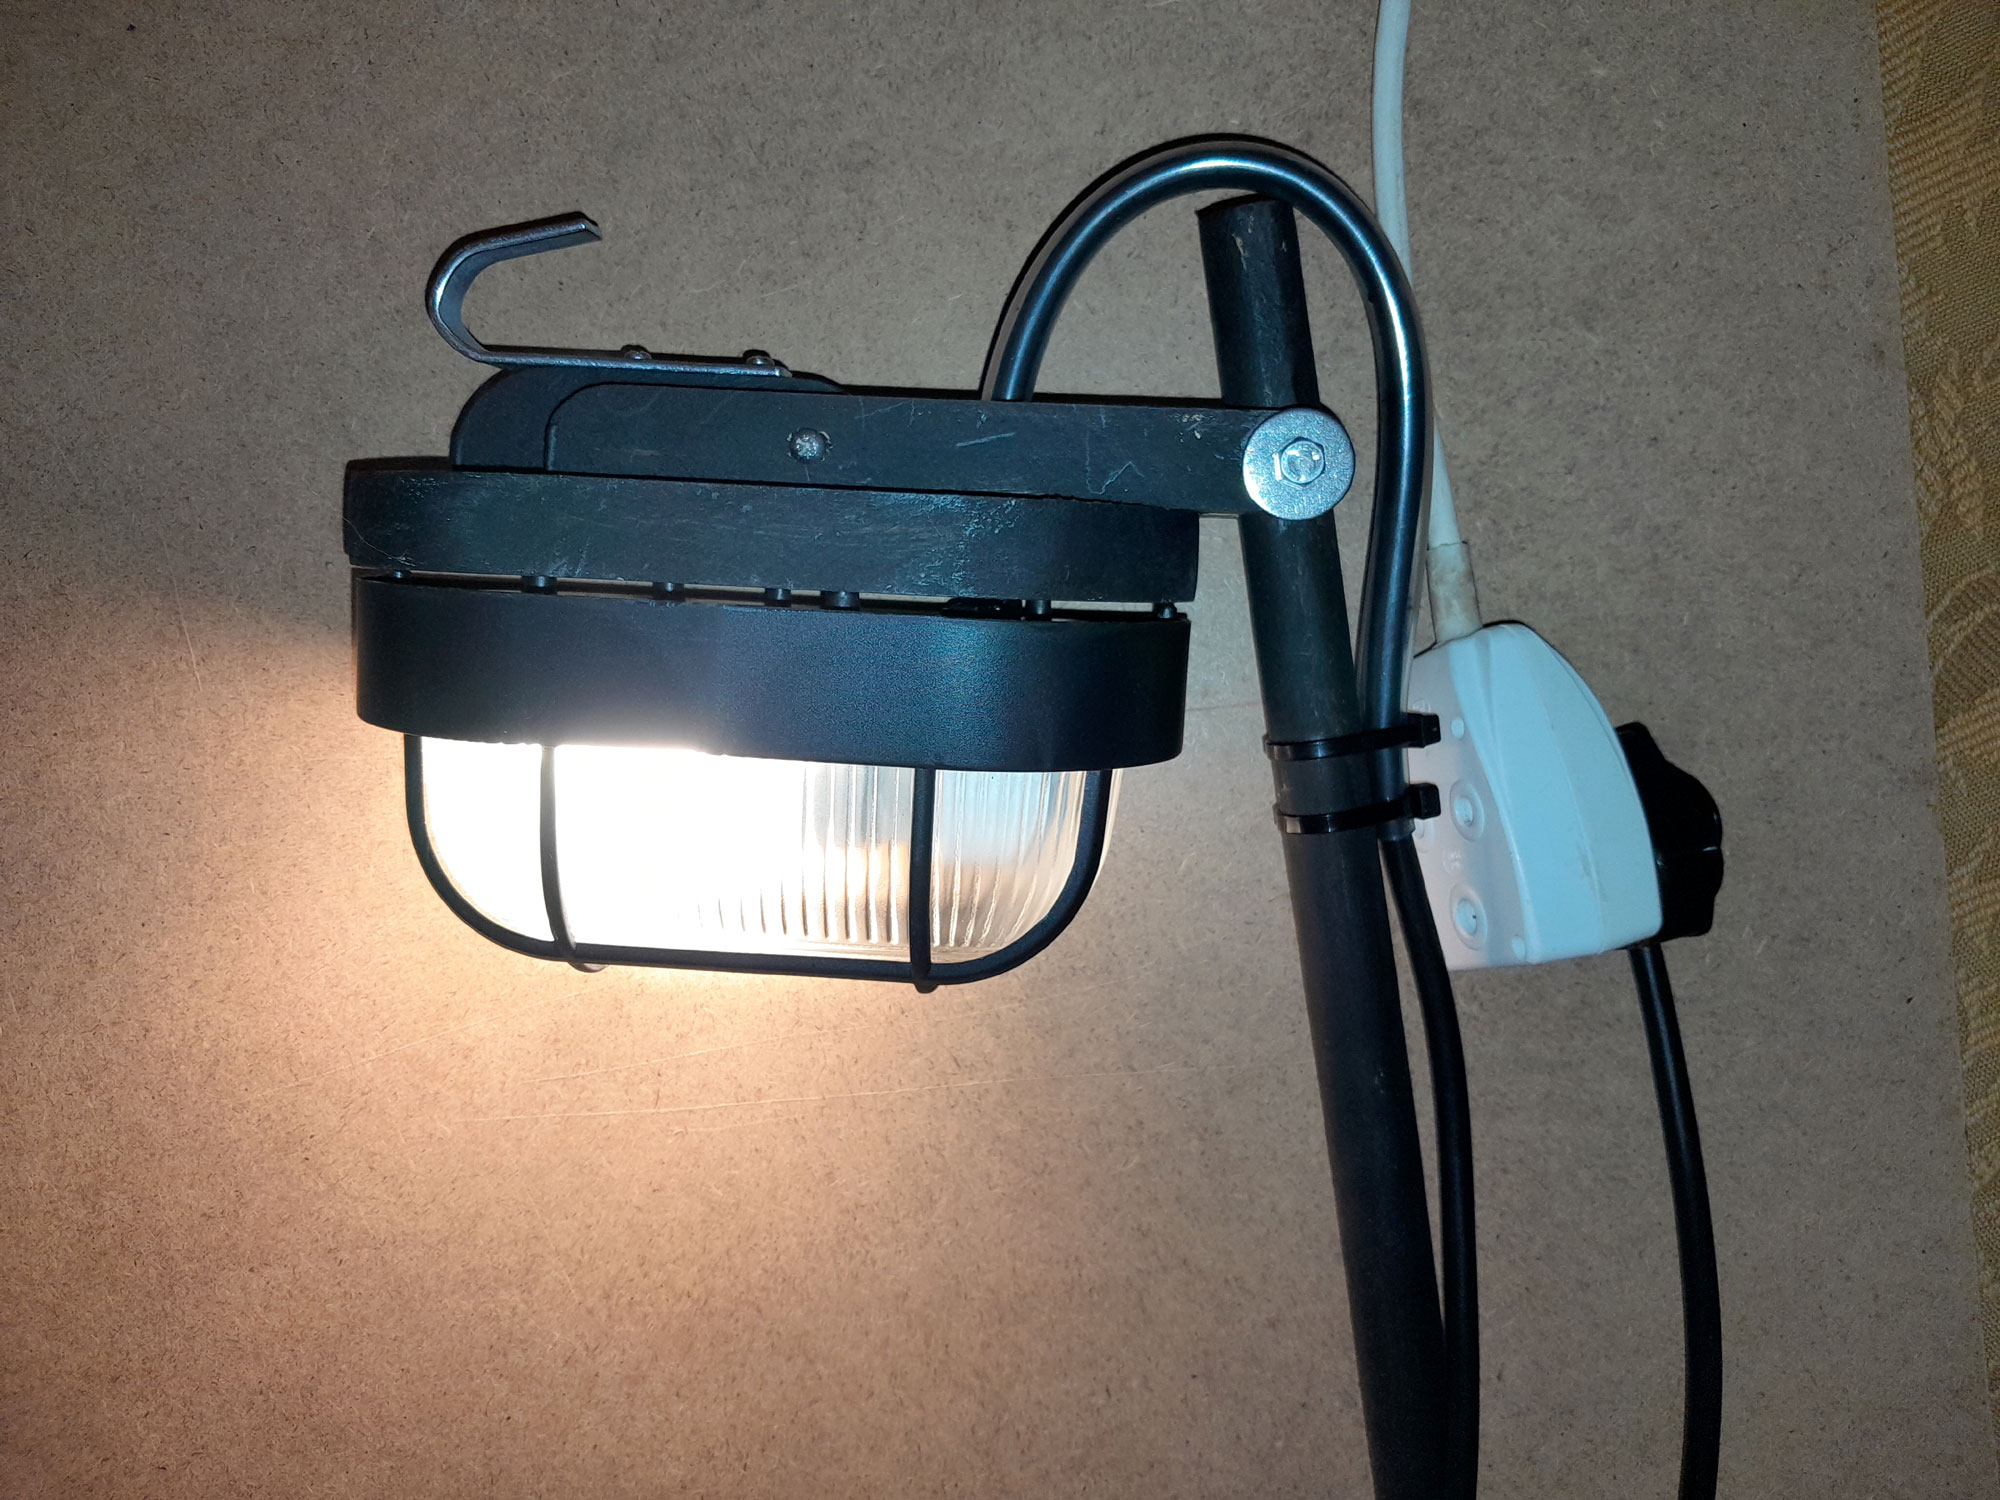
- Then a quick test and flex to confirm everything is as it should be.
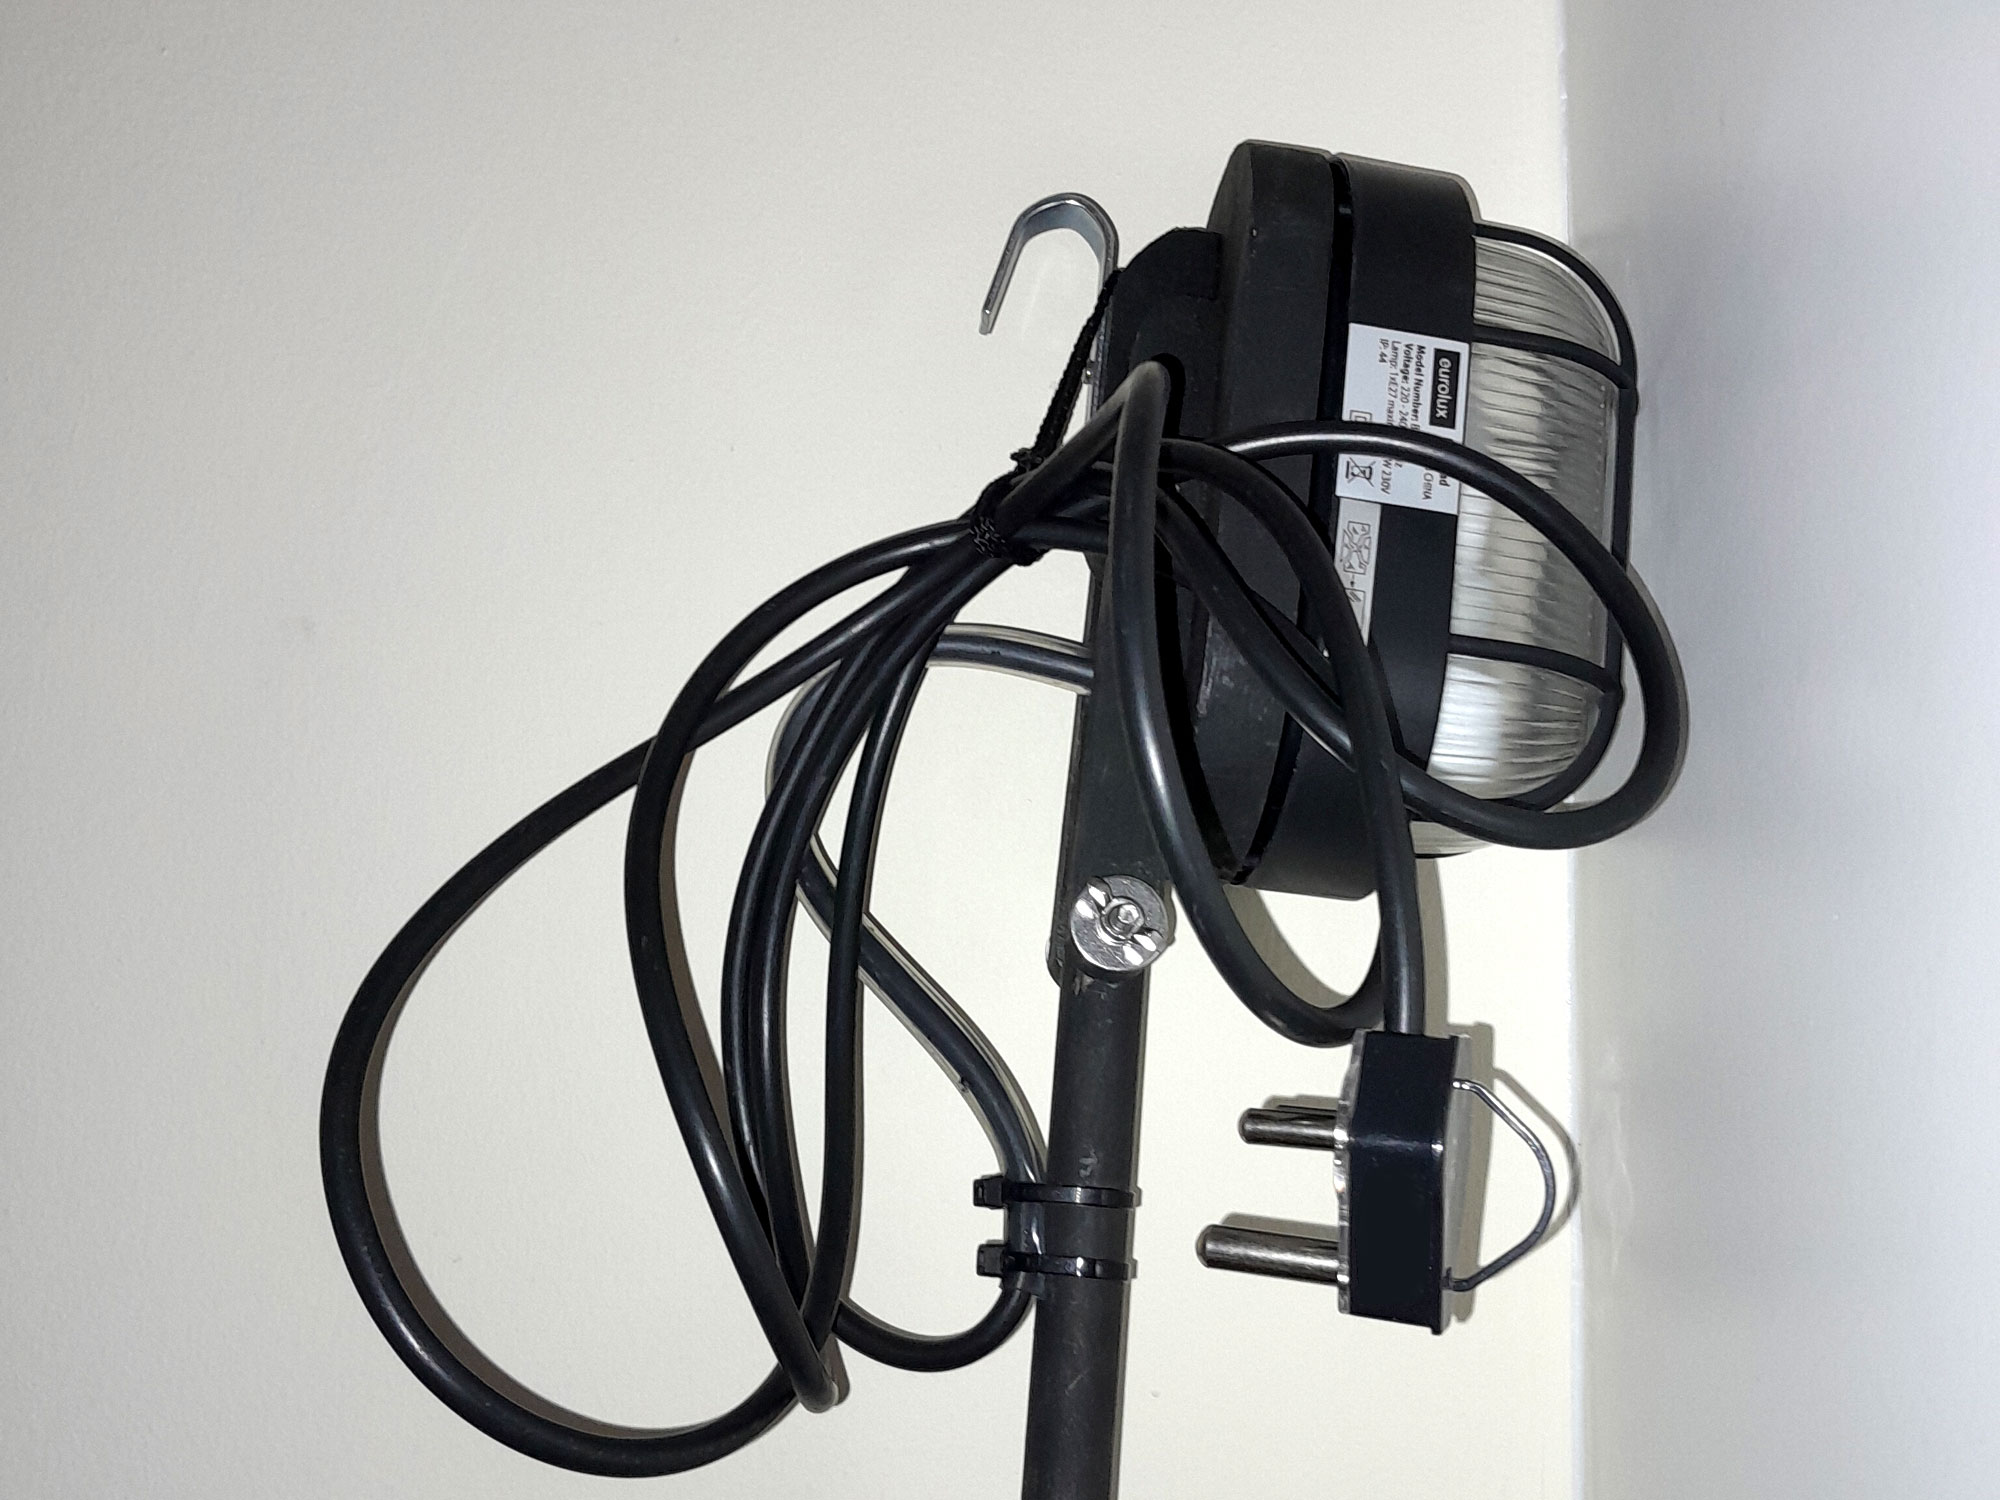
- When not in use, it can be stored behind a door in the home or in the garage or shed.
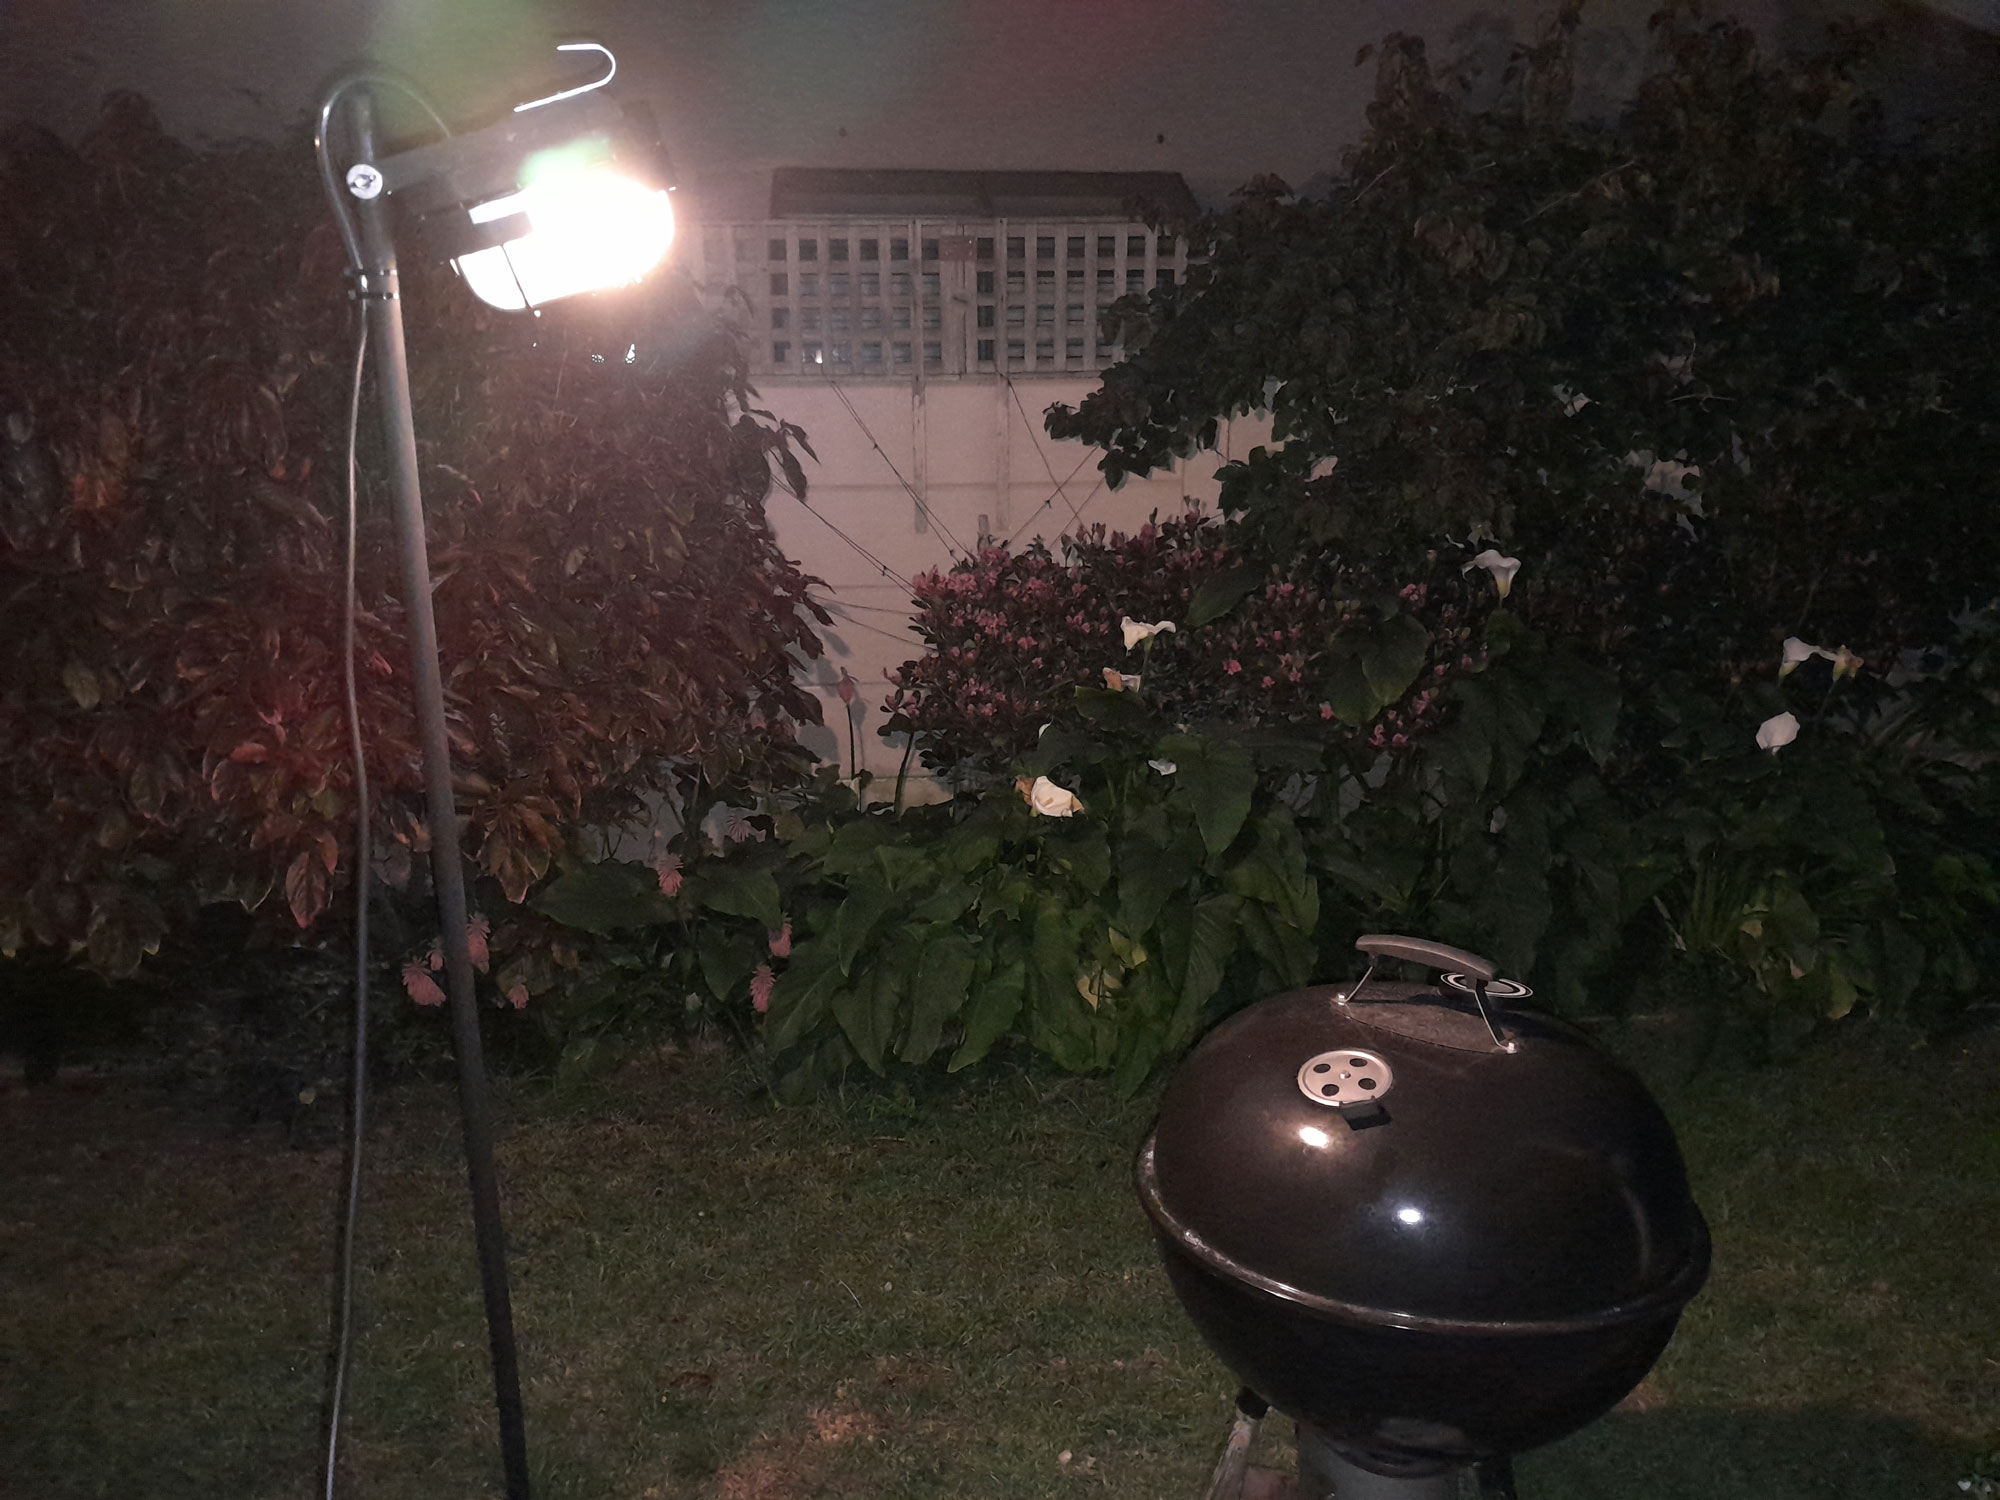
- Here it is lighting up the braai – not, not too close to it.
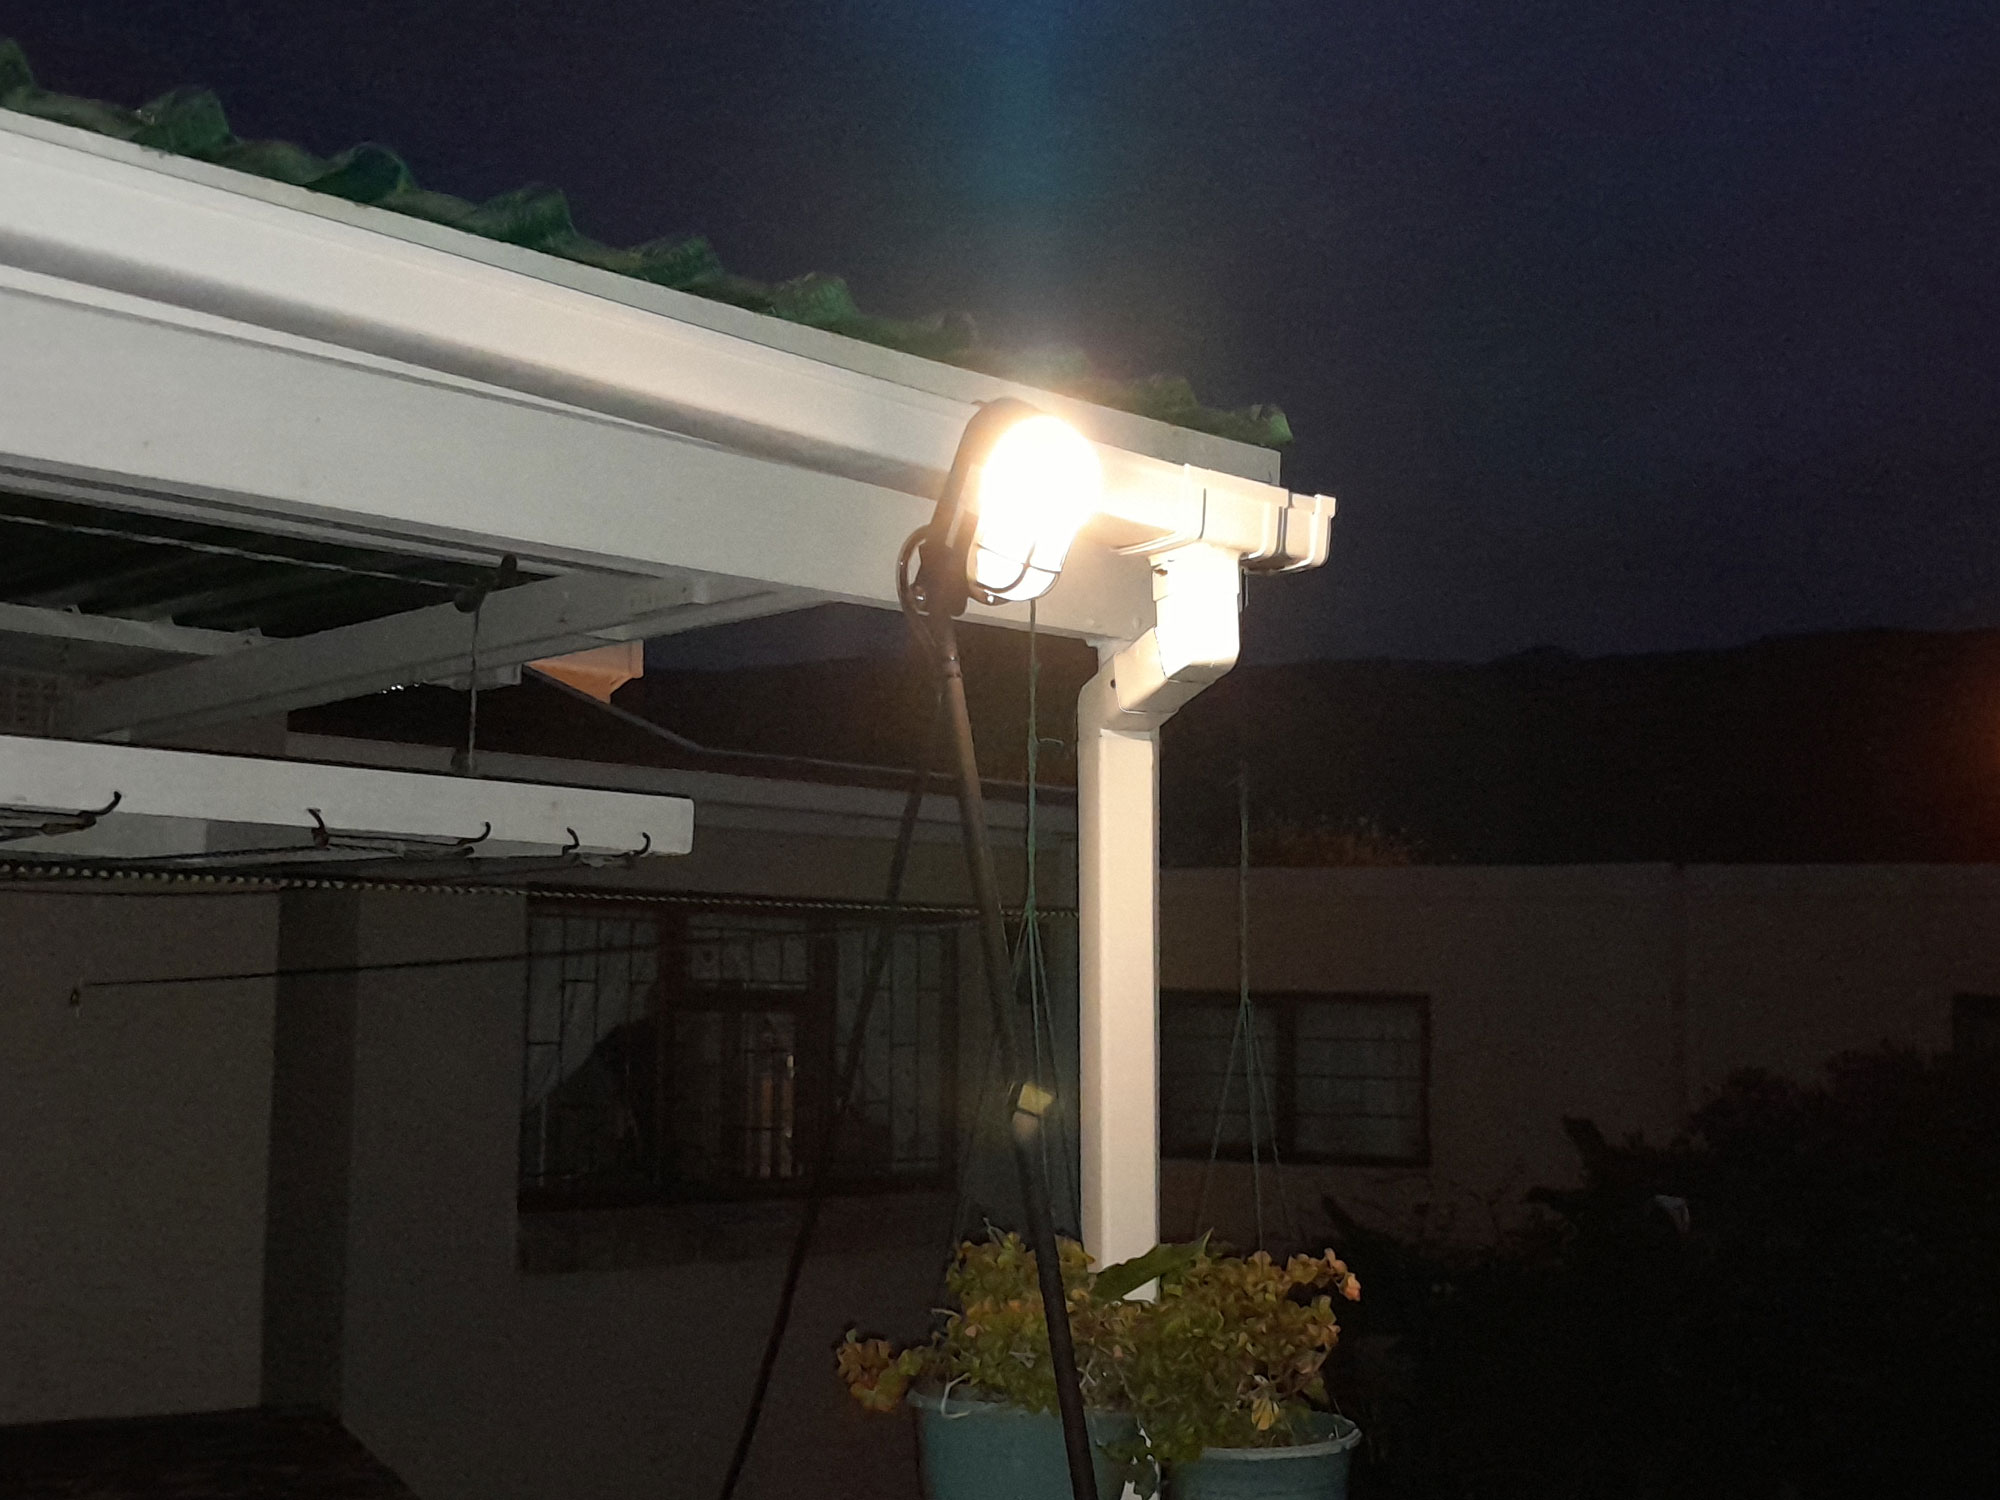
- Its hook allows you to hang it on a gutter or line, if necessary.
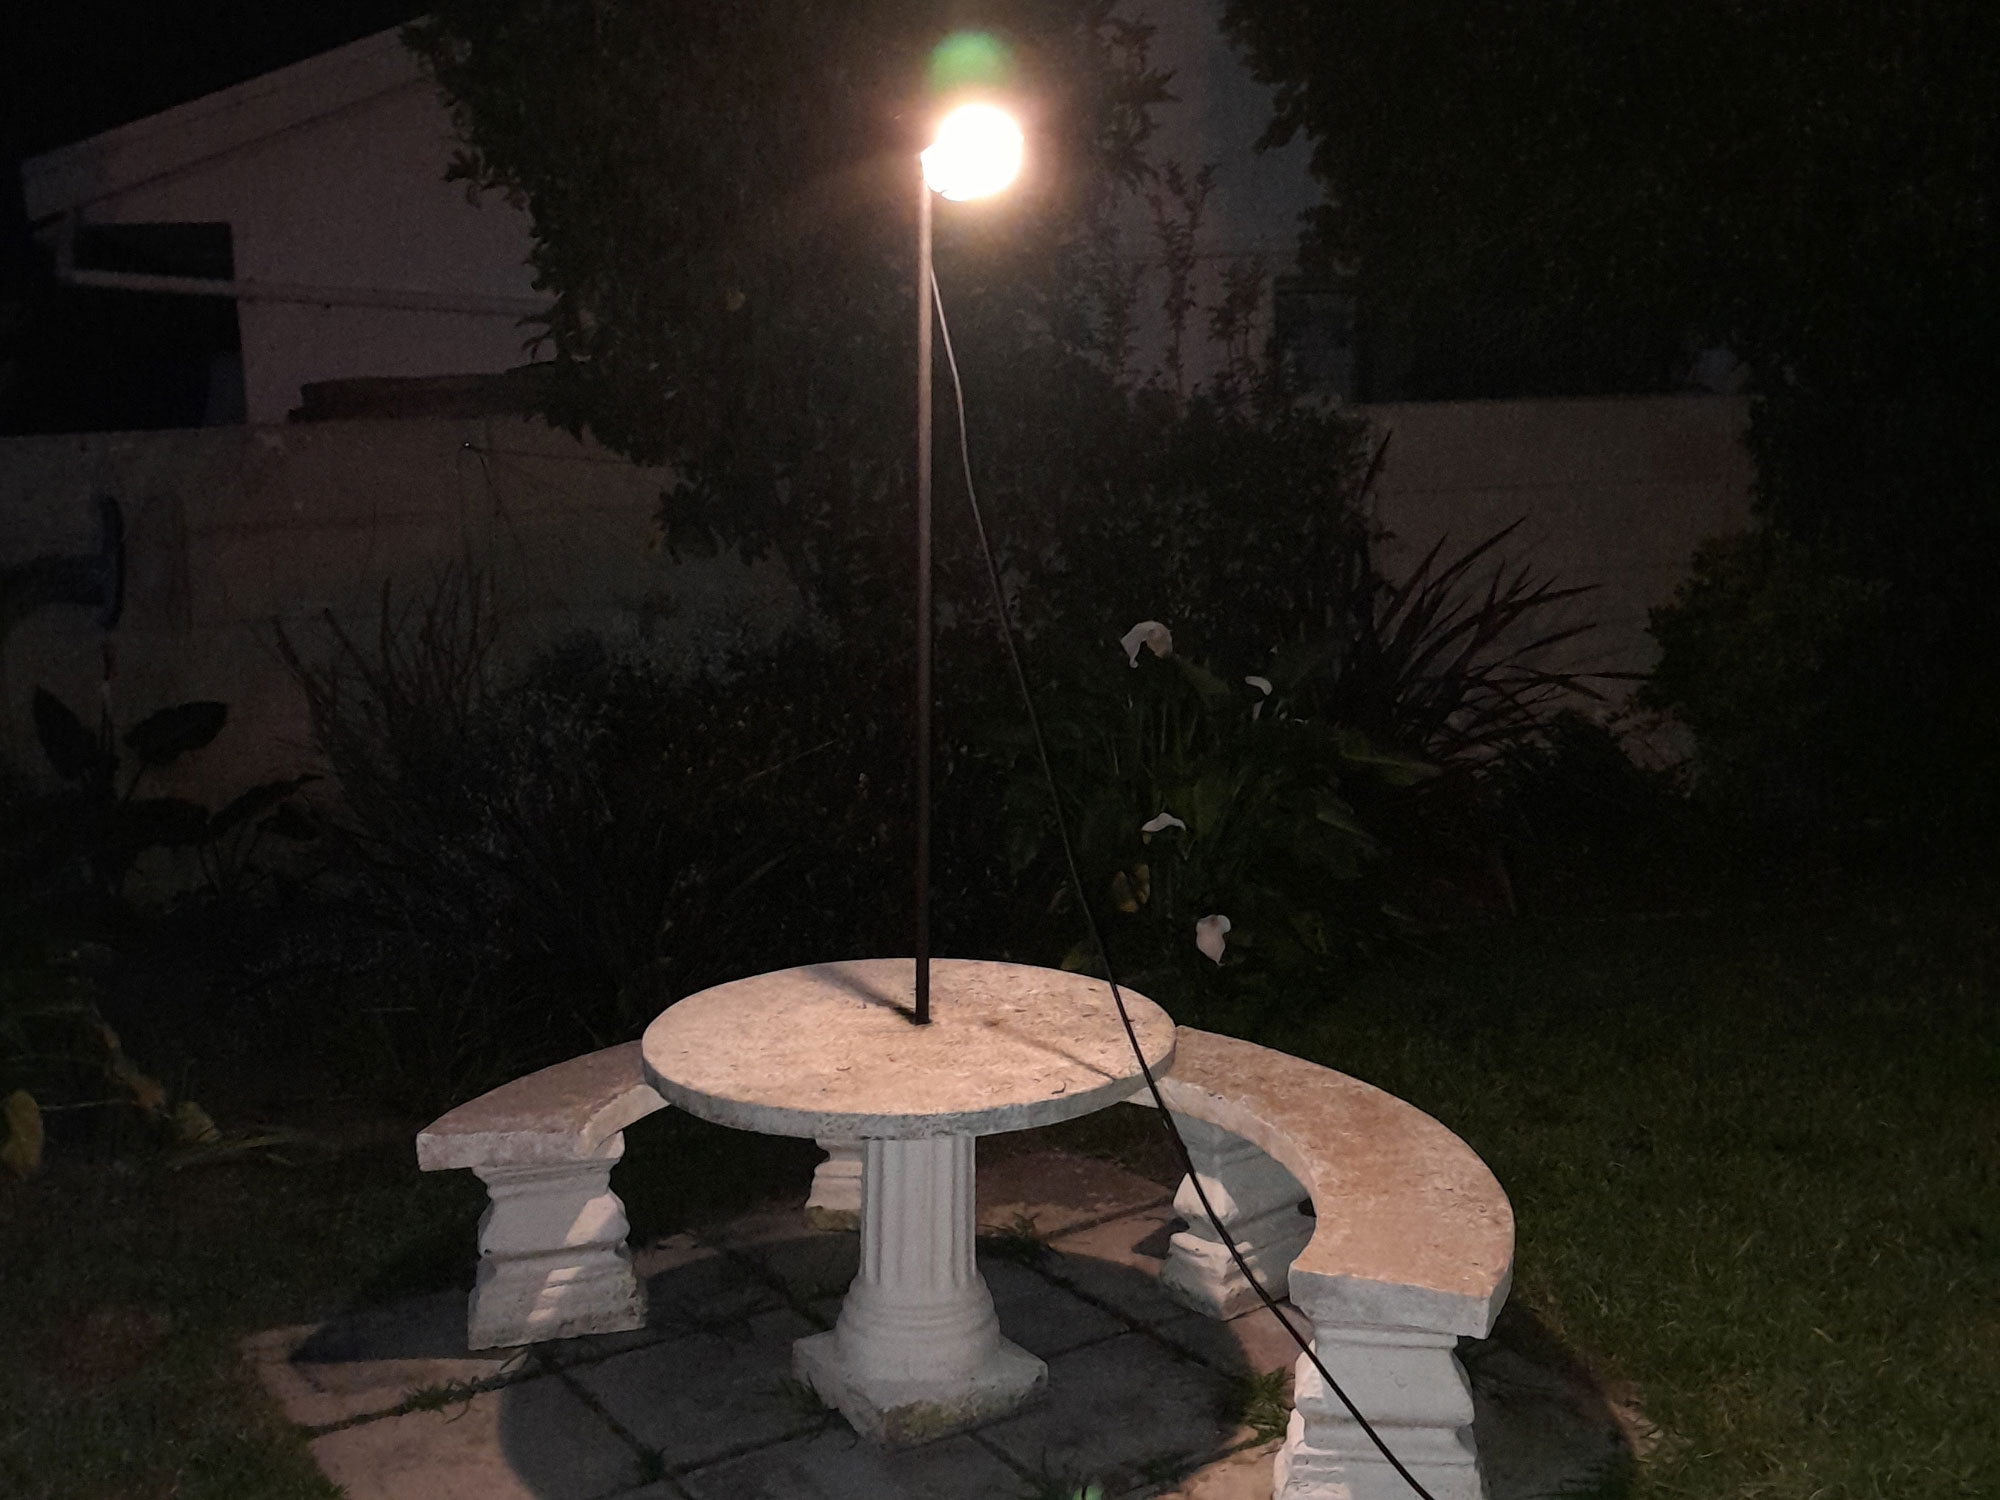
- Welcome to Nights of the Round Table – just be careful you don’t trip over the cord. As you can see, even the low-energy bulb used here provides ample light over a wide area.
Tools:
Drill/driver (mains or cordless), jigsaw, sander
Project guide
Difficulty: Experienced
Estimated time: 1-2 days
Cost: R250
Mica Stores stock the timber, dowels and so on that you need. To find your closest Mica and whether or not they stock the items required, please go to www.mica.co.za, find your store and call them. If your local Mica does not stock exactly what you need they will be able to order it for you or suggest an alternative product or a reputable source.