Ebony is a very popular choice of wood for furniture but due to its popularity is extremely expensive.
(According to the IUCN Red List of Threatened Species, “Due to the high value of this wood, many species of ebony are now extinct, on the verge of extinction, endangered or vulnerable“. Some black ebony species have been placed on the endangered species list published by IUCN.)
But all is not lost… you can achieve a reasonably realistic ‘ebony’ finish using blackboard paint overcoated with French polish (ideally) or failing that, a good wax-based wood polish.
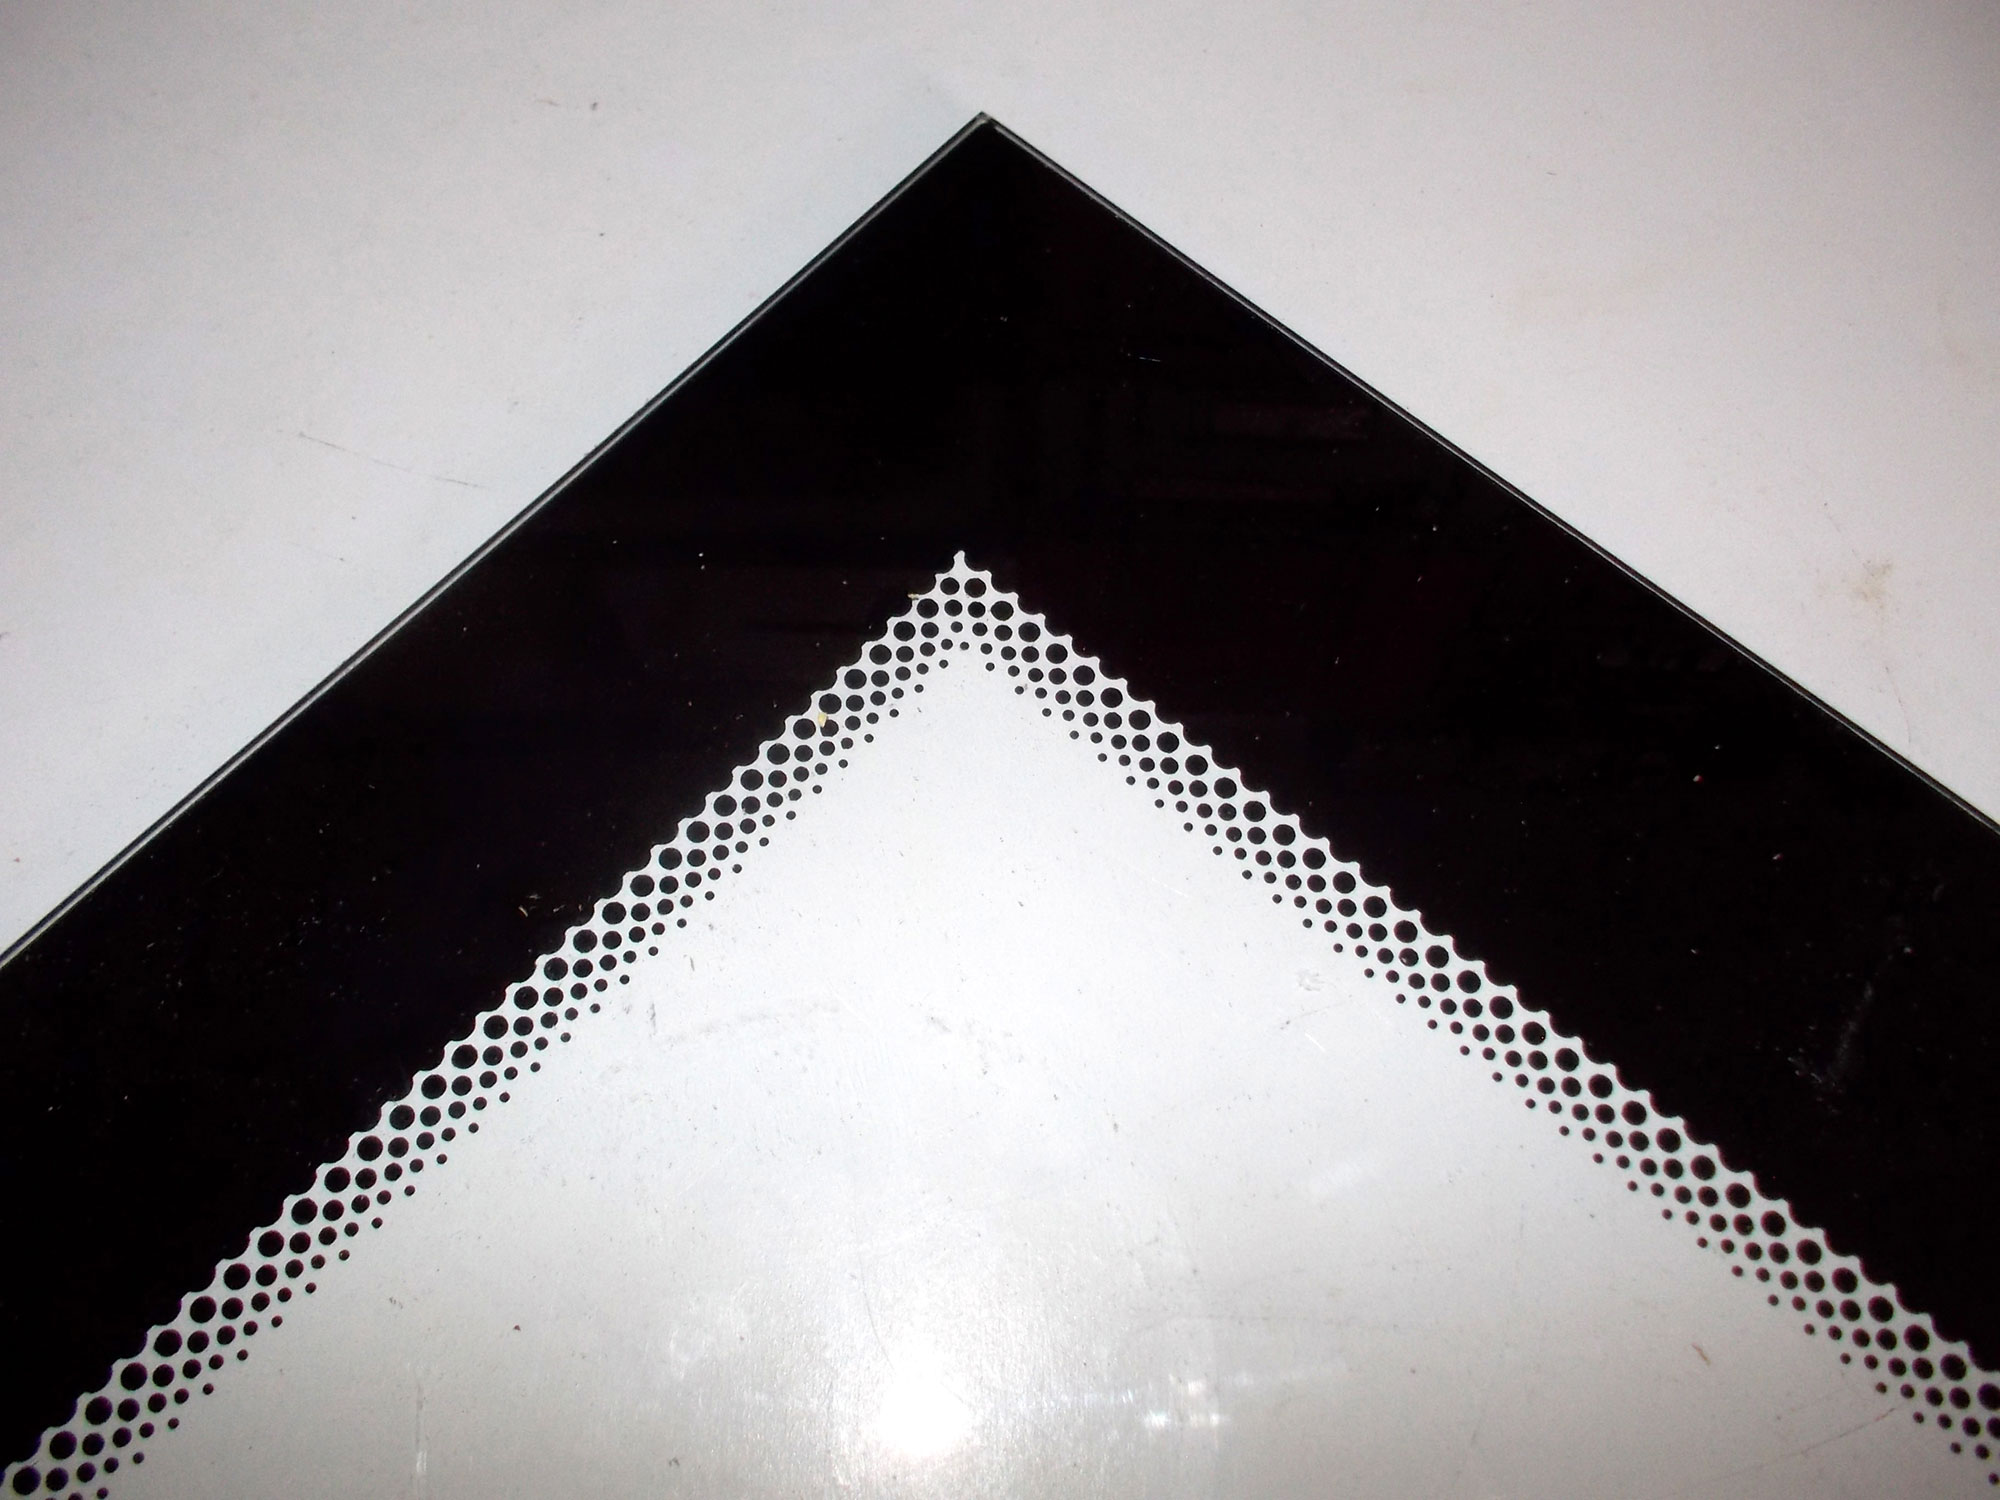
And that is the look I decided to go for in this case as the microwave front glass I used has a black surround with an attractive edging of dots.
The result is a small side table with the following dimensions: 350mm high x 400mm long x 280mm wide.
Aluminium angle equal edge dimensions
Extruded aluminium equal edge with an angle profile is available in a range of sizes, but all commonly of the same length – namely 2.5m.
Think of the capital letter L, with the vertical and horizontal arms being of the same length and the vertical arm being labelled ‘A’ and the horizontal arms being labelled ‘B‘.
The larger the profile (i.e. the wider each arm, generally the thicker the aluminium. So…
A [vertical arm]
B [horizontal arm]
T [thickness of the metal] (all dimensions in mm)
15
15
1.2
19
19
1.5
25
25
1.6
25
25
3*
32
32
1.6
38
38
2
50
50
2
*Note that the 25x25mm profile is available in a choice of two thicknesses – 1.6mm and 3mm, depending on the material’s proposed use.
Please note, however, that aluminium profiles are available in a wide range of … well… profiles and specifications and range might vary from manufacturer to manufacturer.
Also note that from an aesthetic point of view, the smaller the glass, the smaller the profile of the surround – but this is of course a very subjective choice; you may wish to use a large profile on even a small table.
Materials*
SA pine:
22x69mm x 1.8m – two lengths cut eight lengths of 350mm (for the legs)
12x96mm x 1.8m – one length cut to four lengths to fit (for the sides)
Extruded aluminium angle:
15x15x1.2mm – two lengths of 2.5m, cut to fit (for the surround for glass, and sides’ underside trim)
Wood glue
Blackboard paint
French polish (or wood polish)**
*Note that naturally the dimensions of your table may well differ from the above and hence your materials need will change.
**One can achieve a reasonably good imitation of an ebony effect by applying a coat of blackboard paint and then overcoating with French polish (ideally), but if that is not available, then a good wax polish for wood can be used as a substitute for the French polish.
Hint: I applied the blackboard paint prior to fitting the aluminium trim, but applied the polish after fitting it as it is easily wiped off the aluminium, whereas the paint is not so easily removed and so is applied before fitting the trim.
Caution: When attaching the sides to the legs, check and double-check that you have all four fitted so that the smaller recess for the glass surround will be at the top on each side, and the longer recess for the underside trim will be on the bottom edge of each side. Mix them up and you will be disappointed – to say the least.
Method:
A view of the materials, in this case just lone length of the 22x69mm SA pine legs timber, the single length of 12x96mm SA pine for the sides, and one length of the aluminium equal angle.
This shows the patterning along the edge of the glass – and I reckon it could be quite attractive. Not of course that the pattern is there necessarily for aesthetic reasons, it could be required as one of the measures to prevent microwaves from being emitted from the oven.
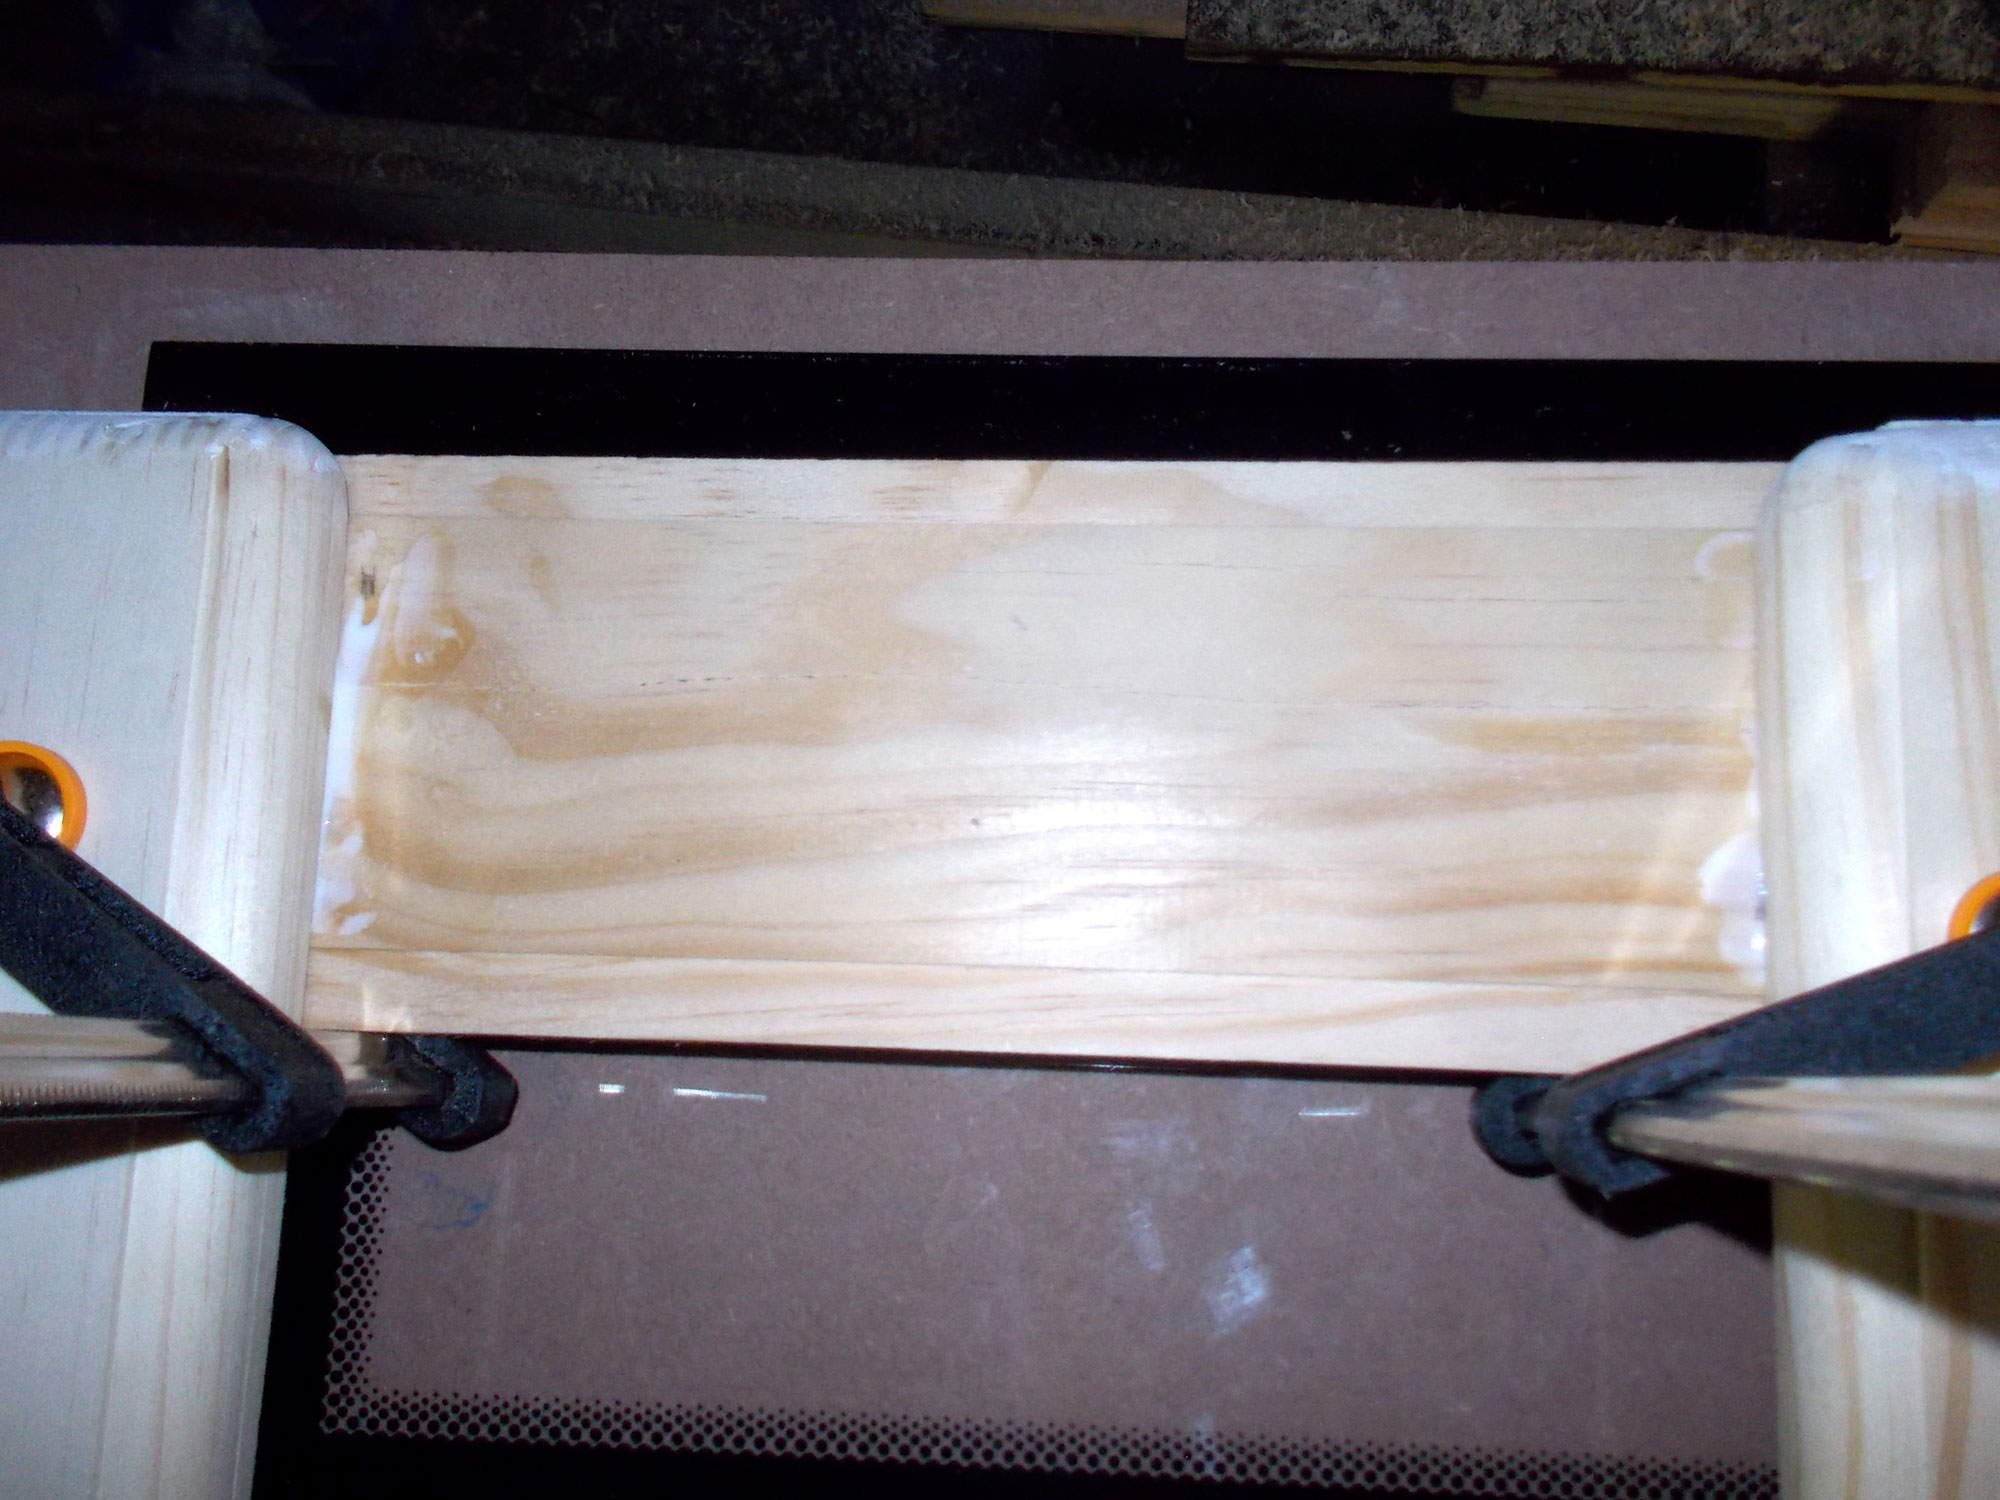
I cut each 1.8m length of the 22x69mm SA pine in half to 900mm to make it more manageable.
Then I glued them as shown and left the glue to cure.
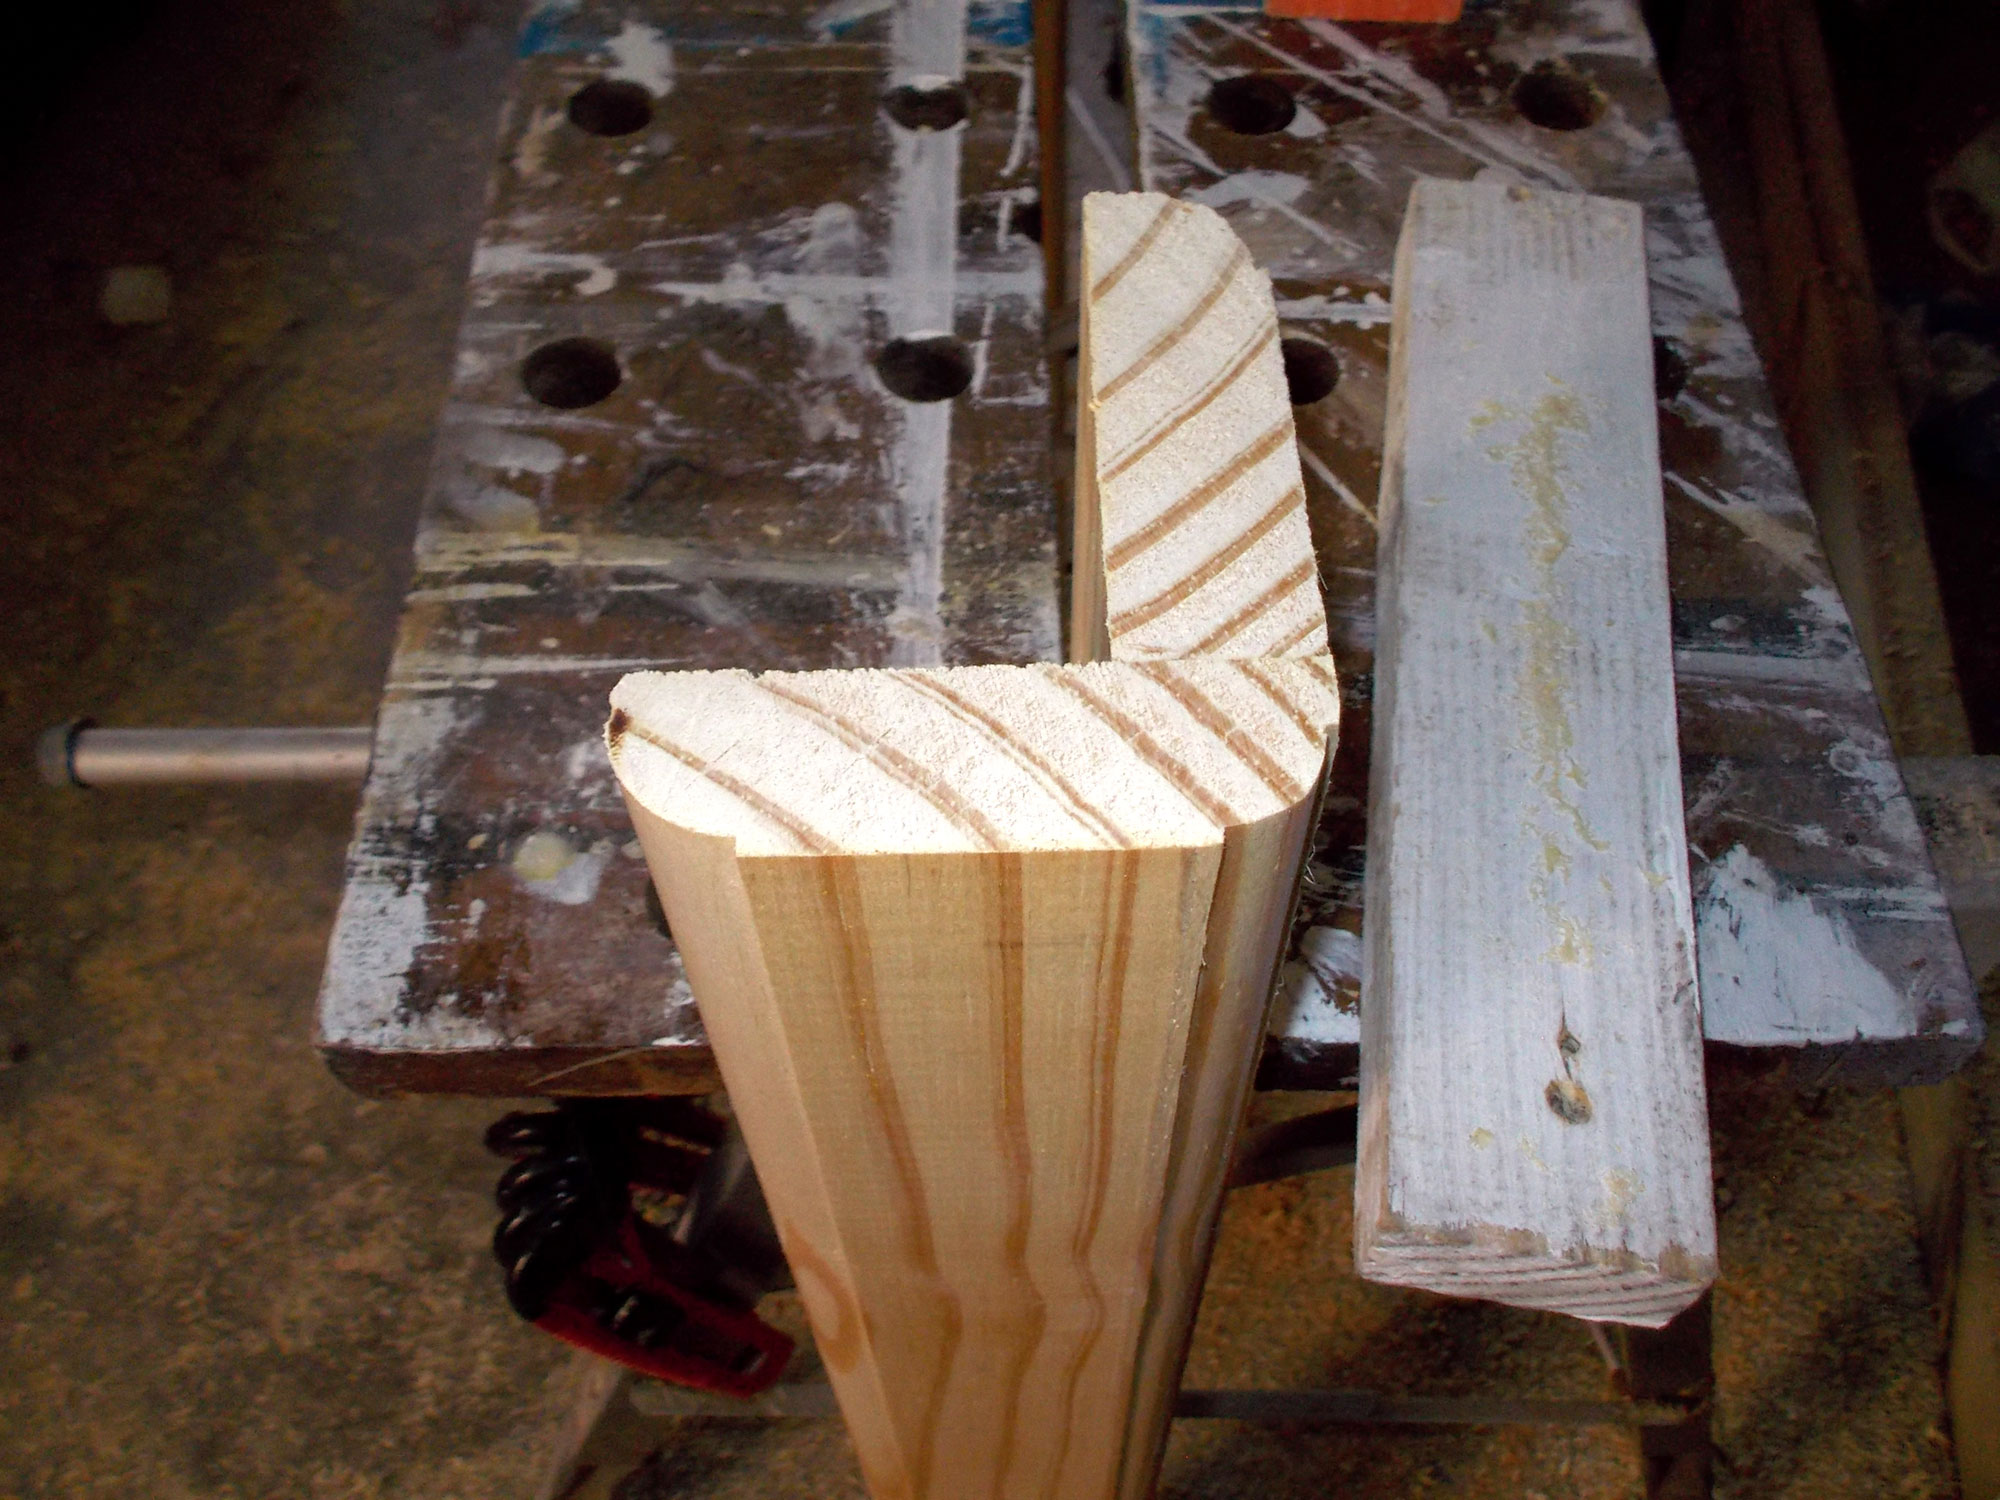
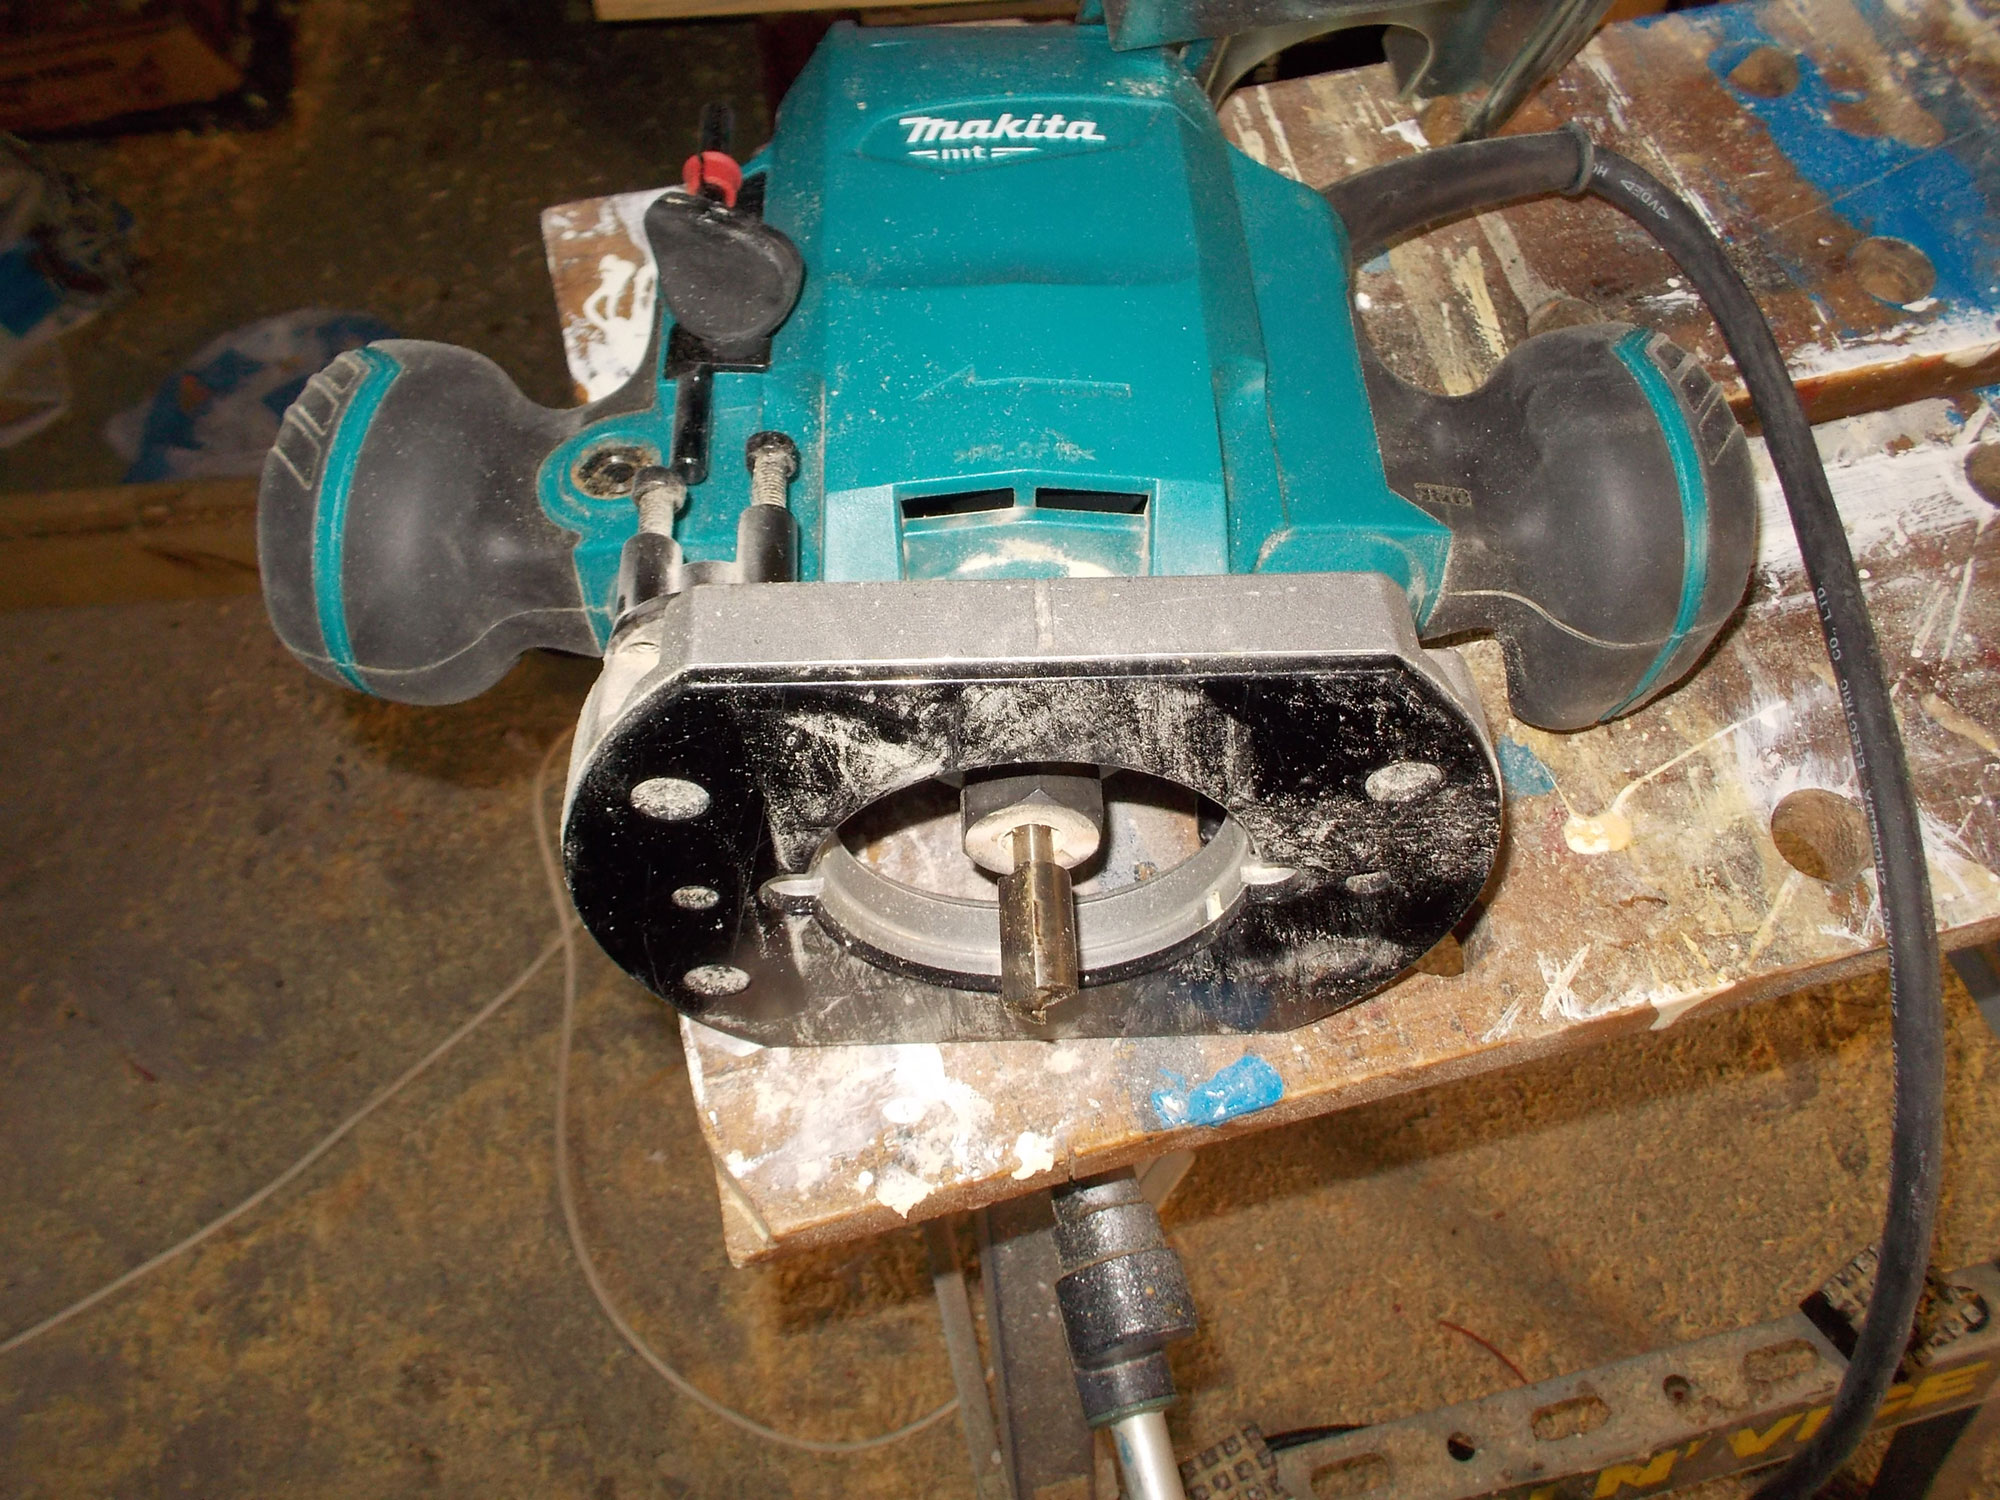
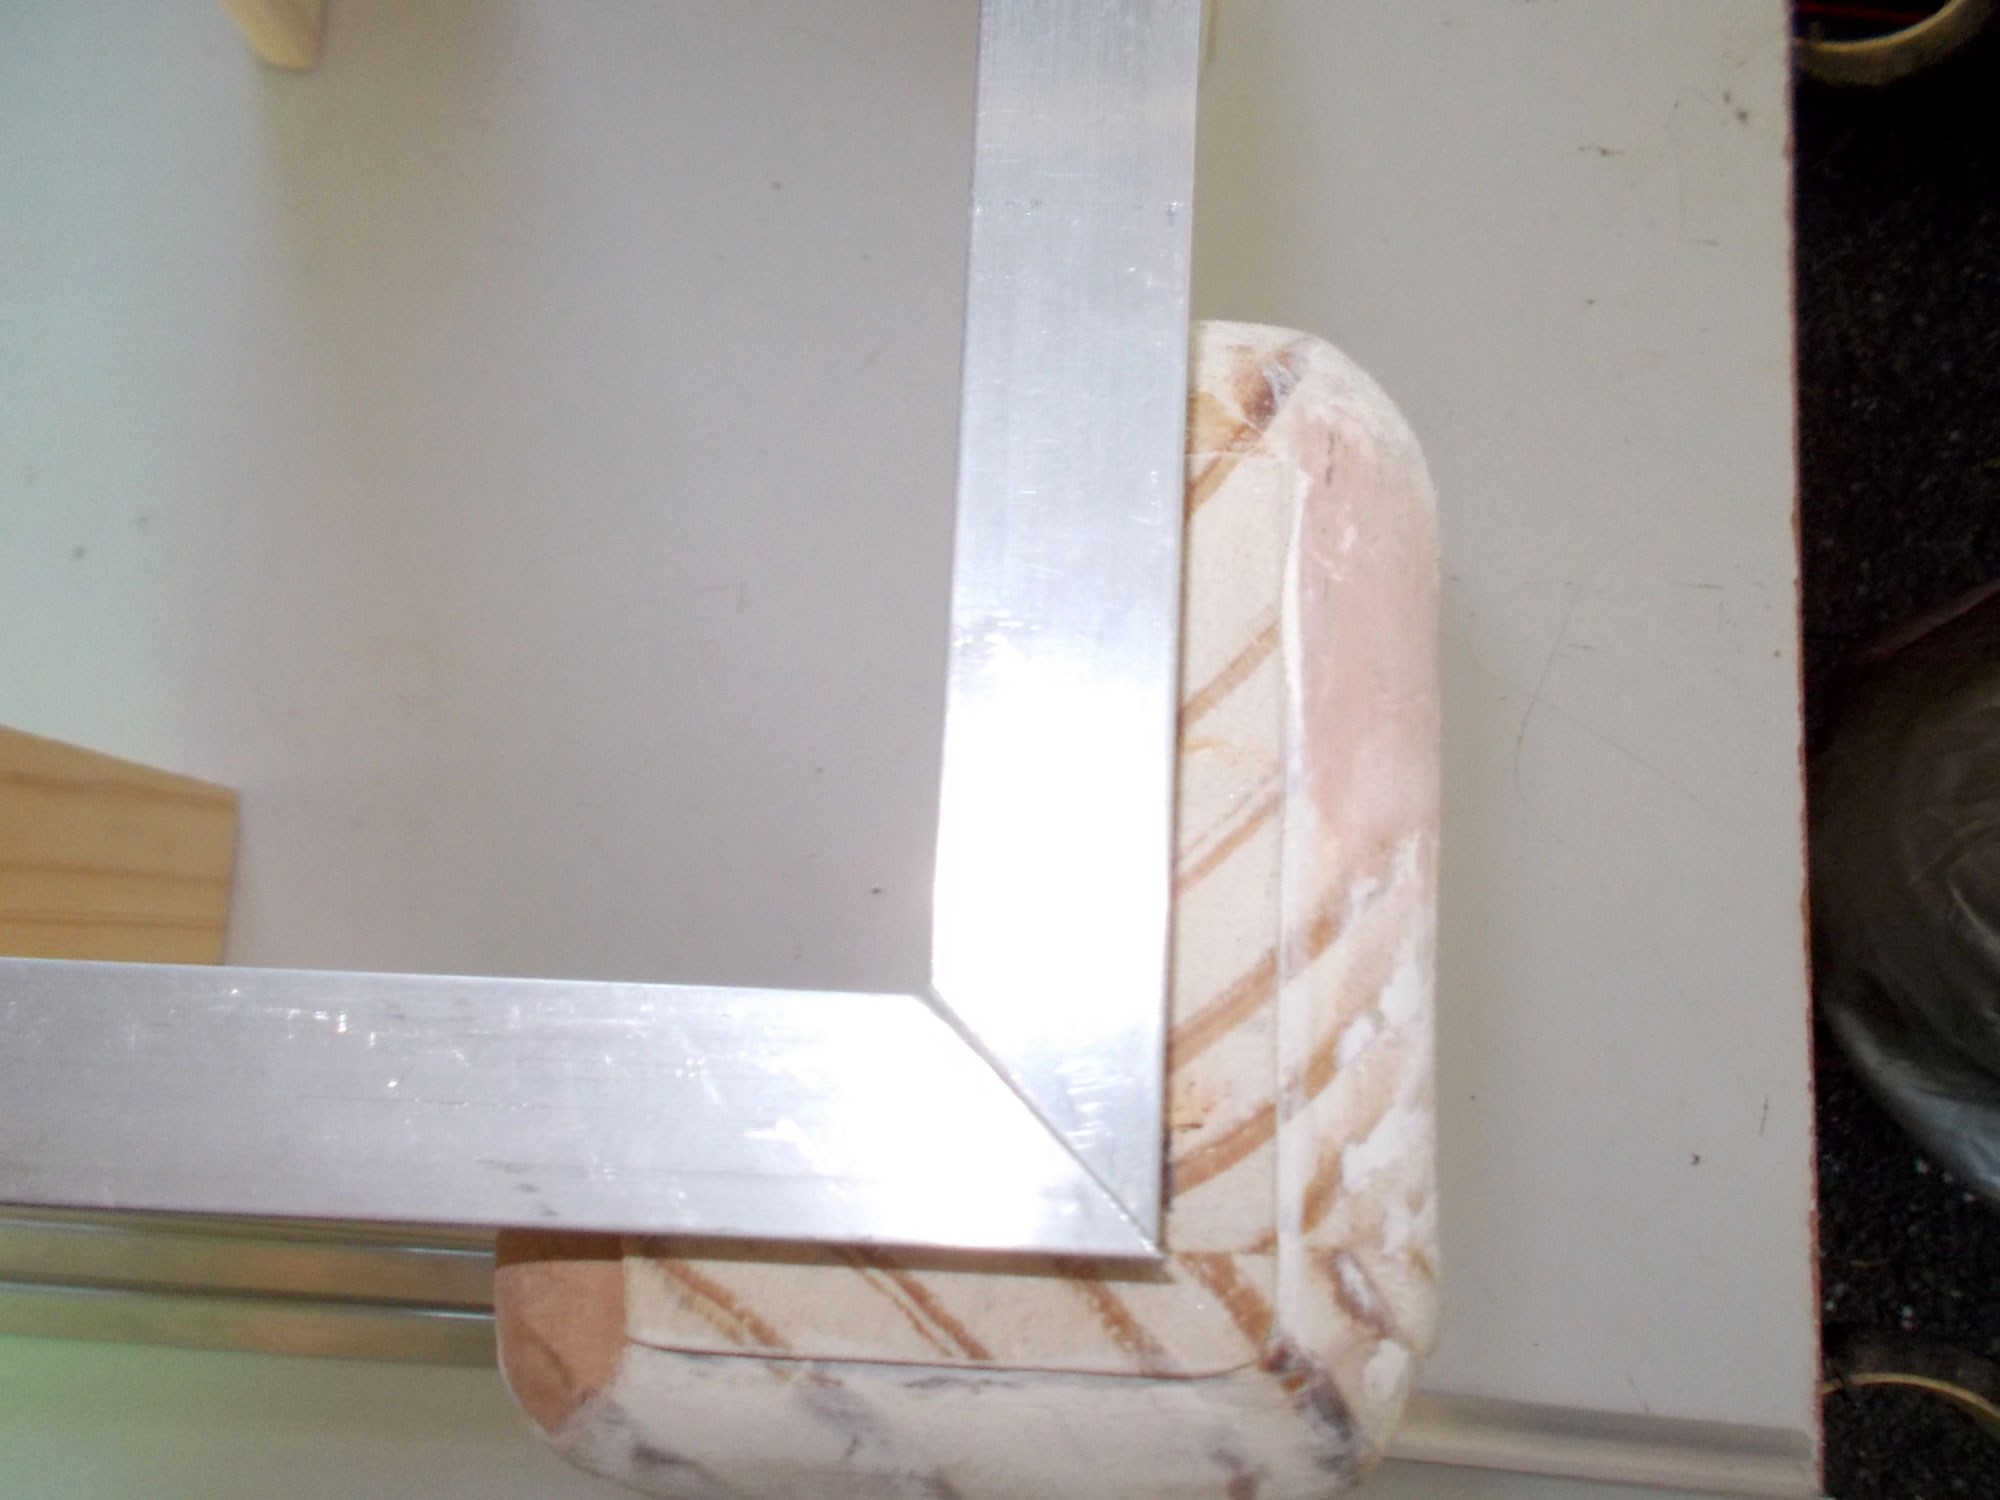
I used a rounding-off bit on the router to round off each side of the legs.
But first I did a test run on some scrap timber to set the bit depth.
Then I routed along one side.
And here is the result. Hint: It is easier to keep the length of the timber as long as possible when routing in this manner and then cut the legs to length afterwards – otherwise you are handling far shorter lengths of wood, and that not only makes securing them for routing more difficult, but also increases your chances of over-routing at the ends.
Satisfied, I completed routing each length and here you can see the effect quite clearly in this top view.
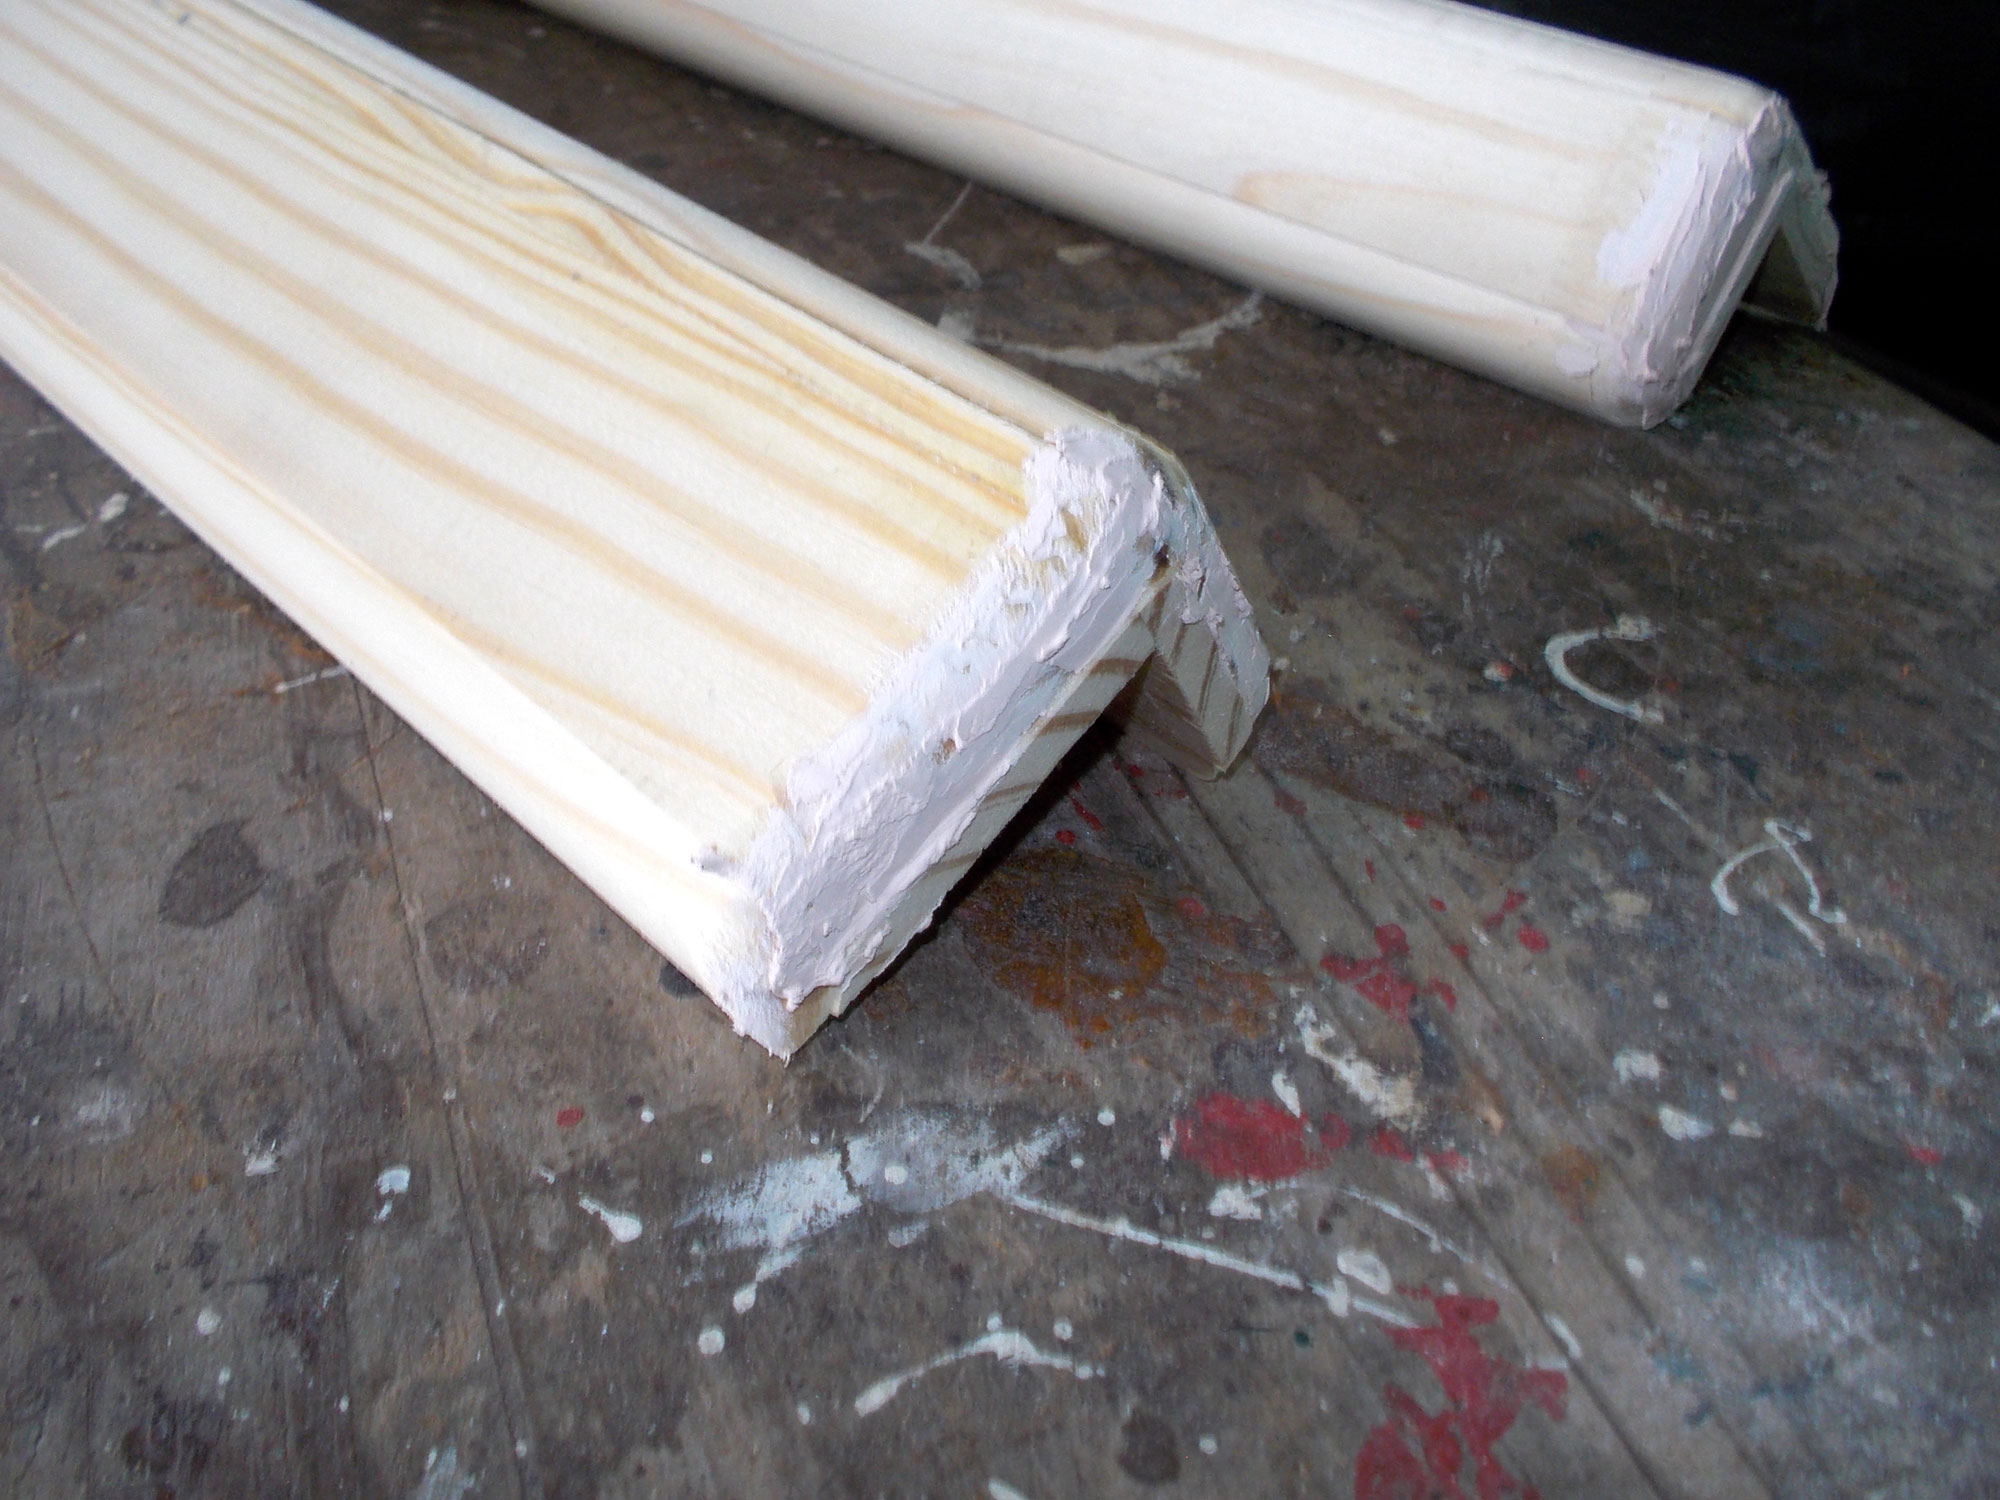
Then I very carefully routed each end of the 900mm lengths and applied wood filler liberally to fill any chipped areas – quite common when routing across the grain as in this case. Once the filler had fully dried, I sanded it down to match the routed contour. Hint: The deeper the chipping, the better it is to apply two or more layers of filler, allowing each successive layer to fully cure, as a single thicker layer can shrink a little as it dries. The idea is to always have the filled area standing a little proud of the surrounding surface and then sand it down level with the surrounding wood – be that surface flat or curved, as in this case.
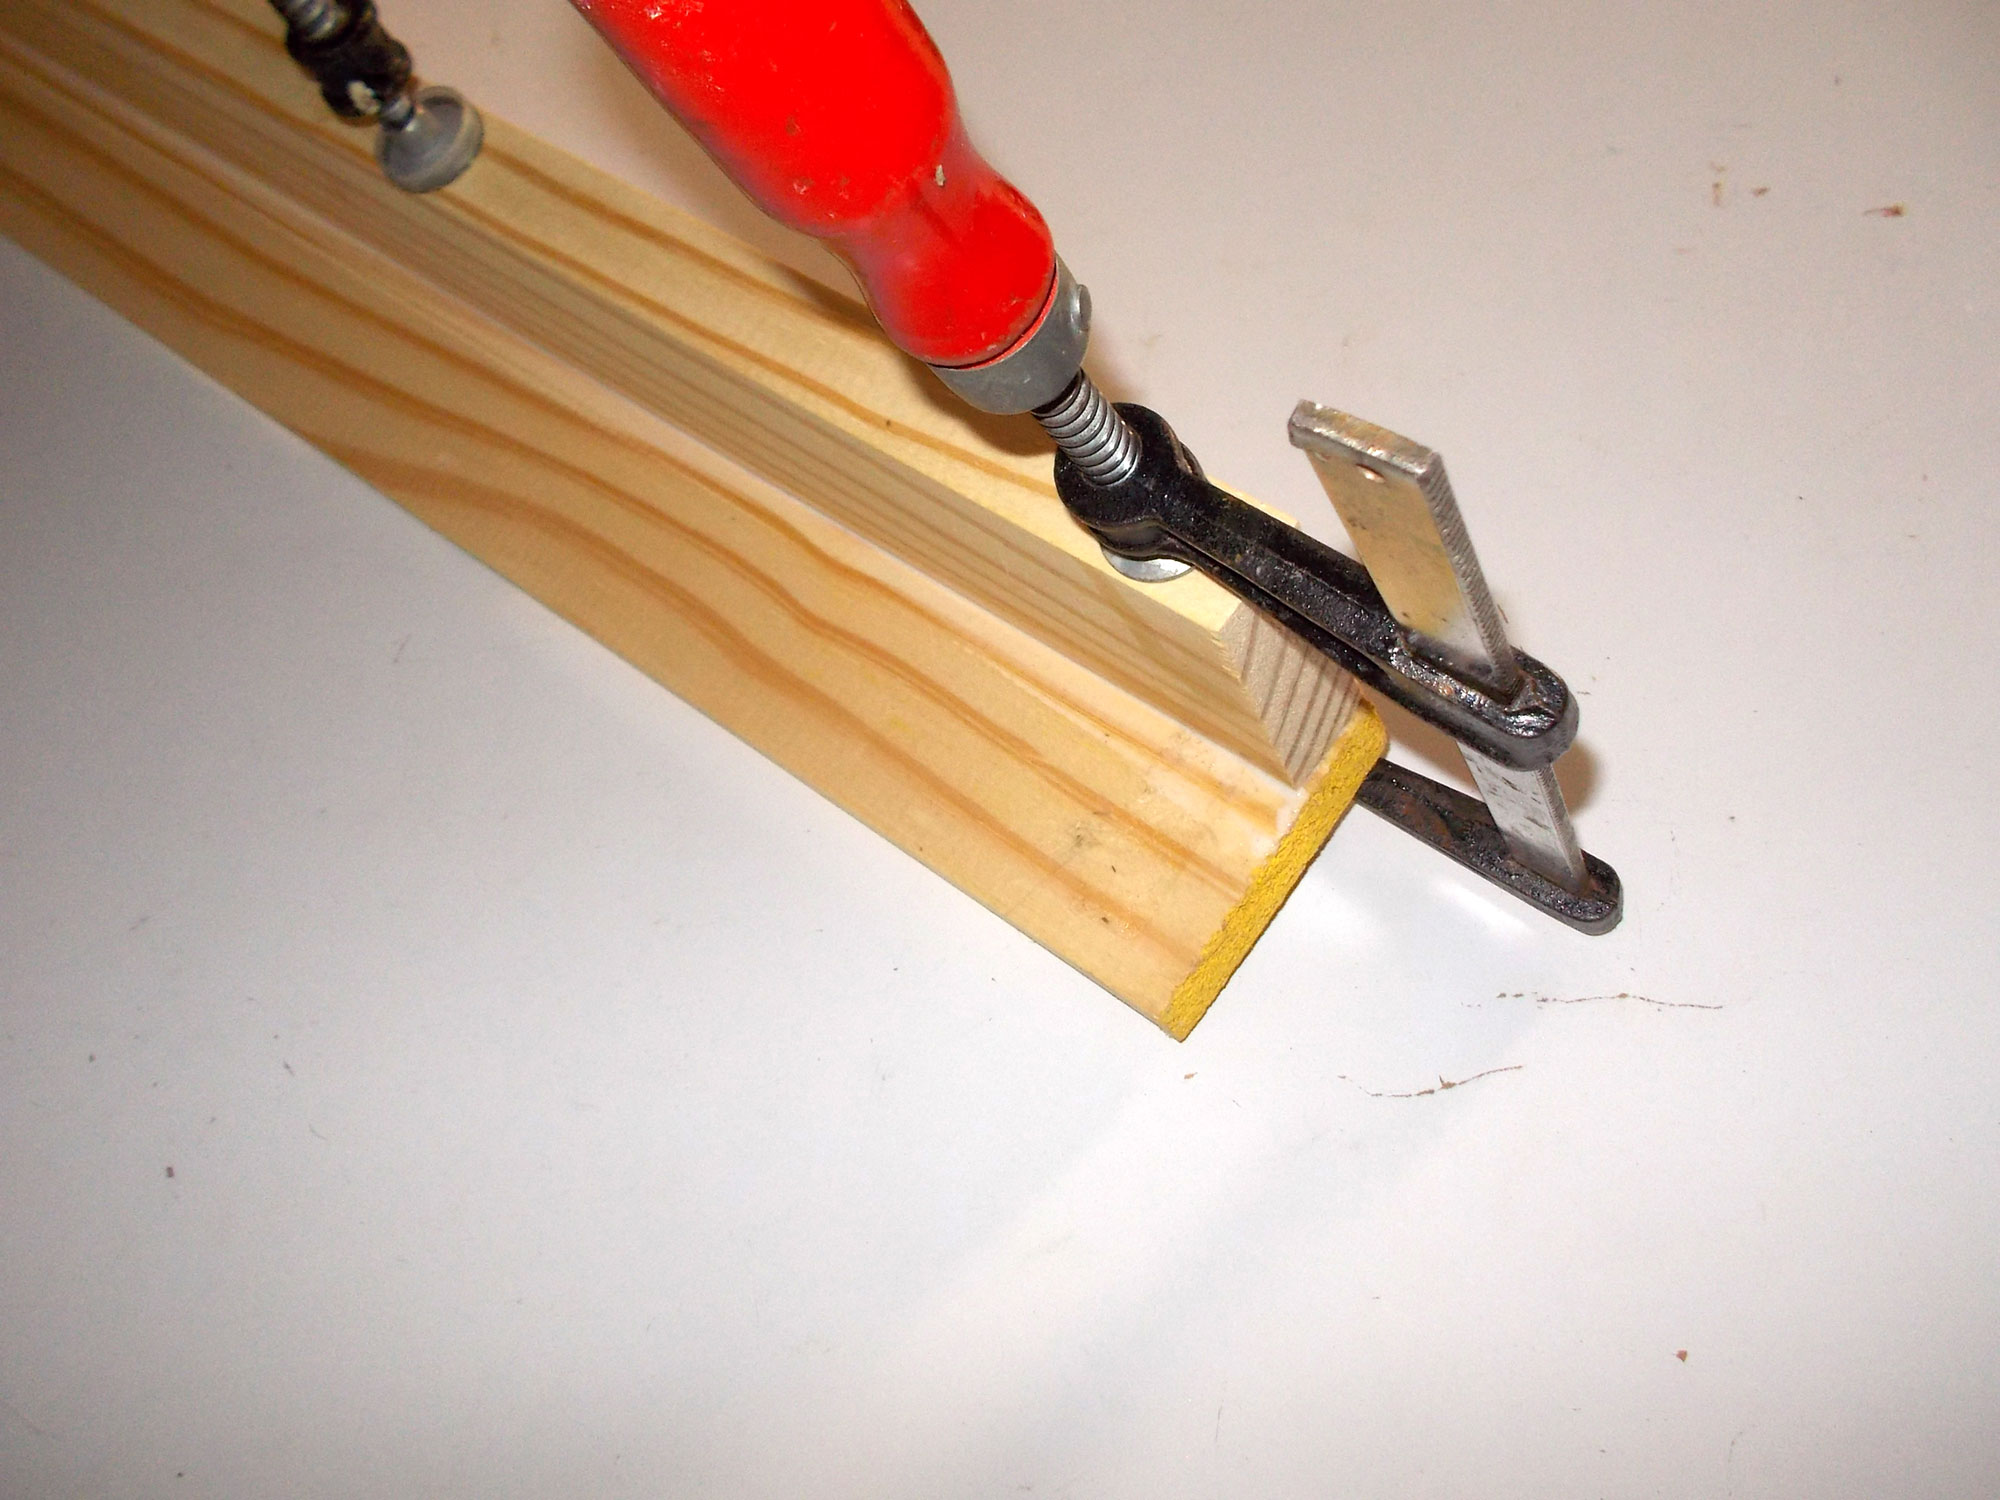
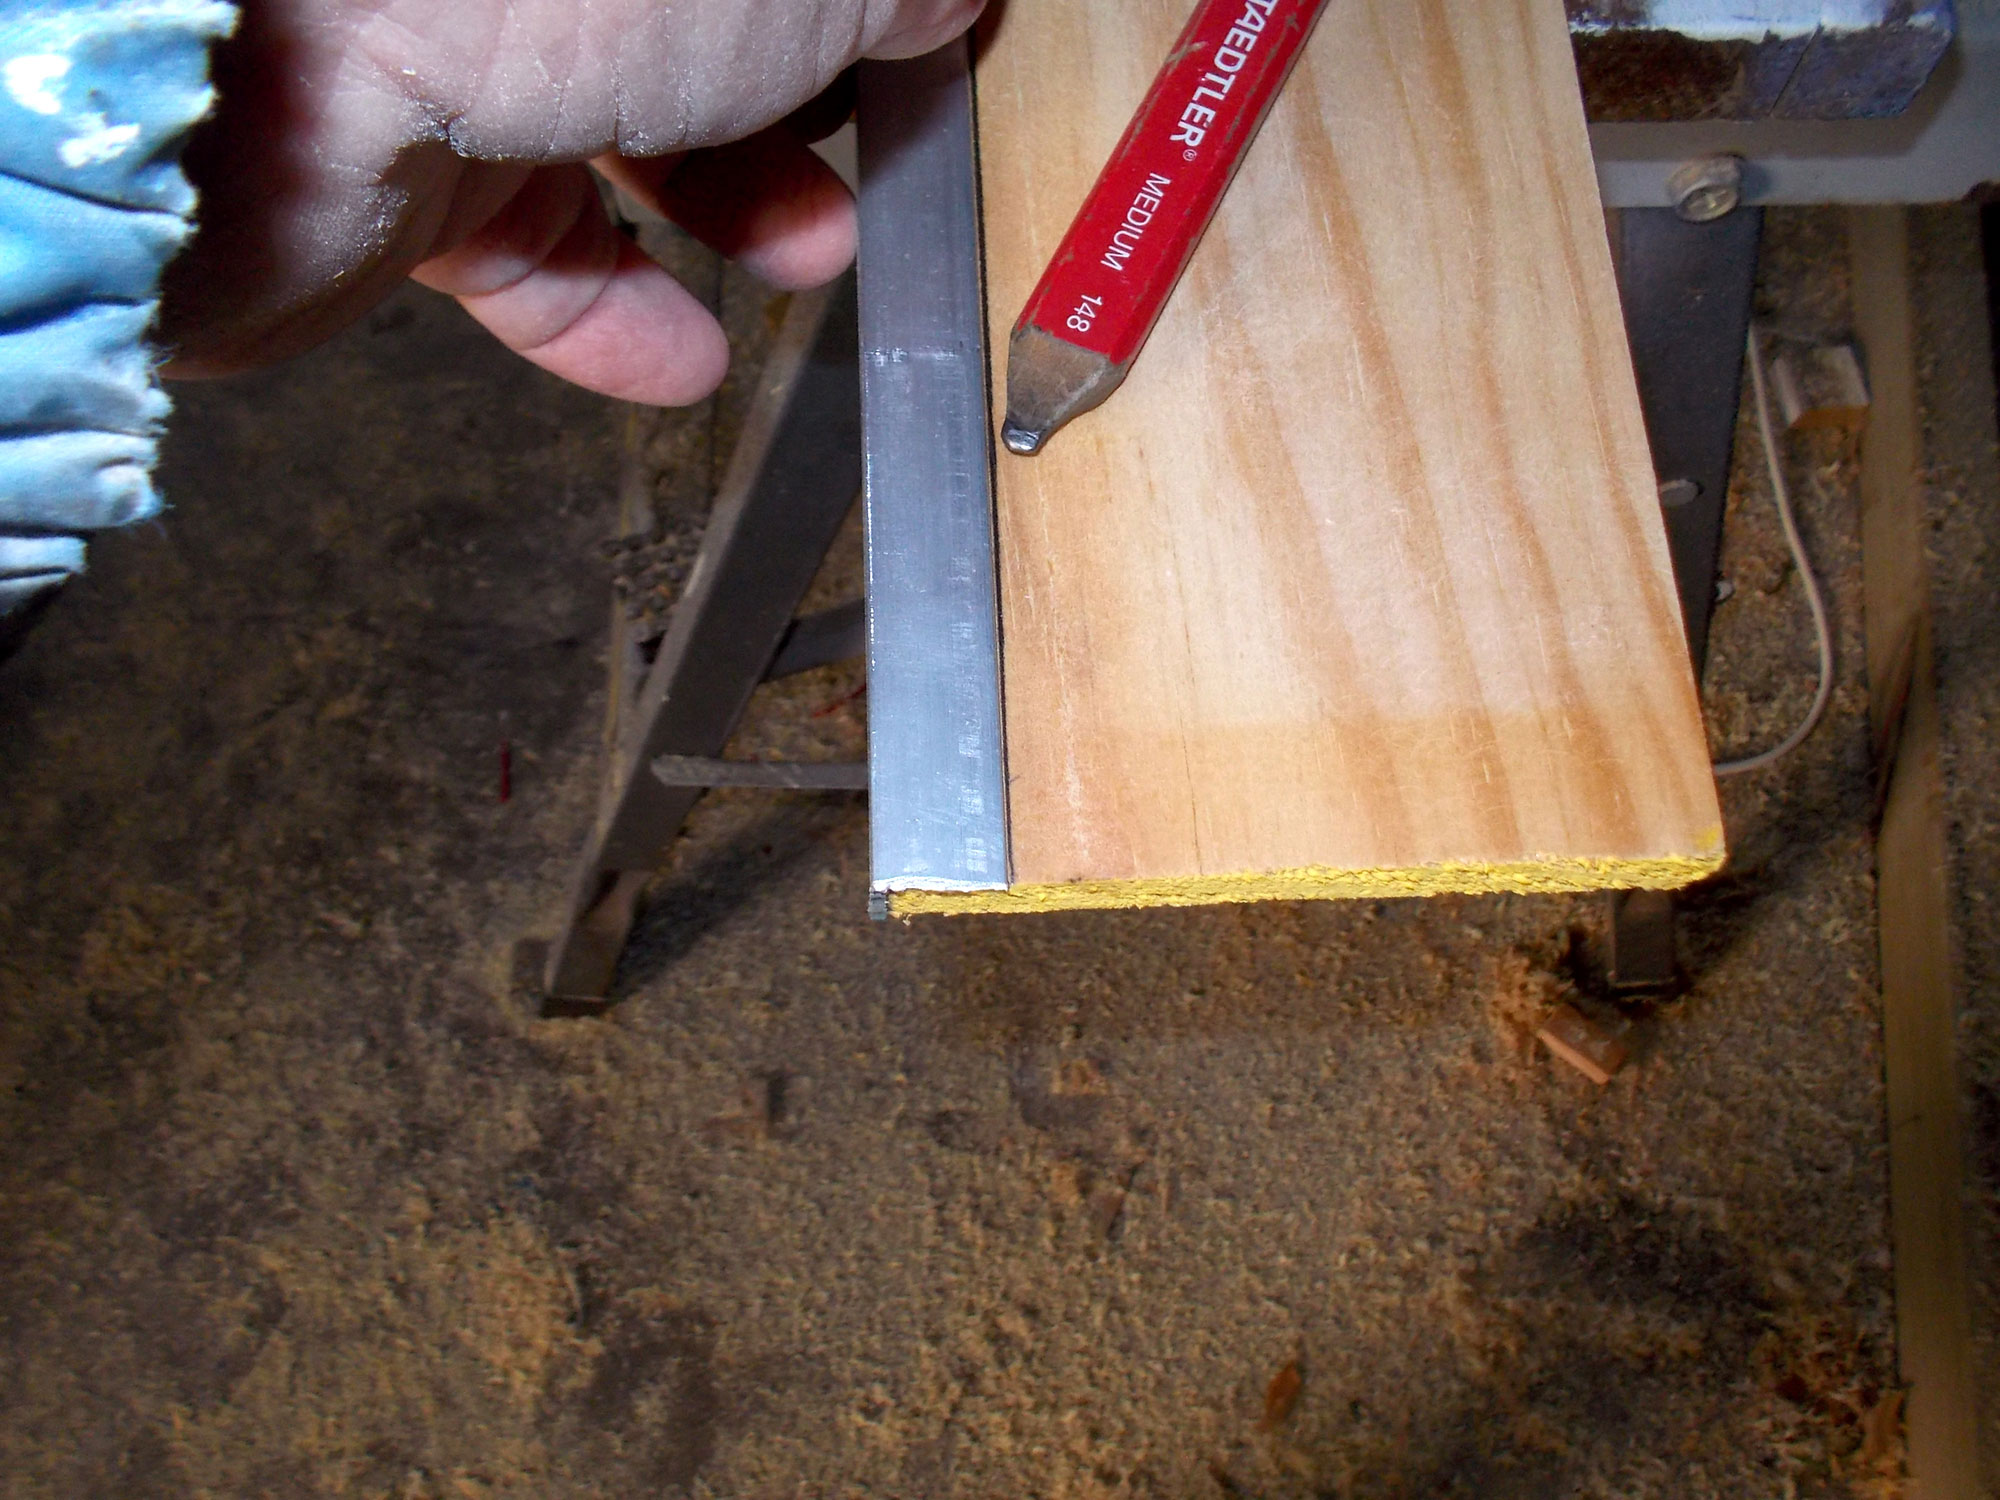
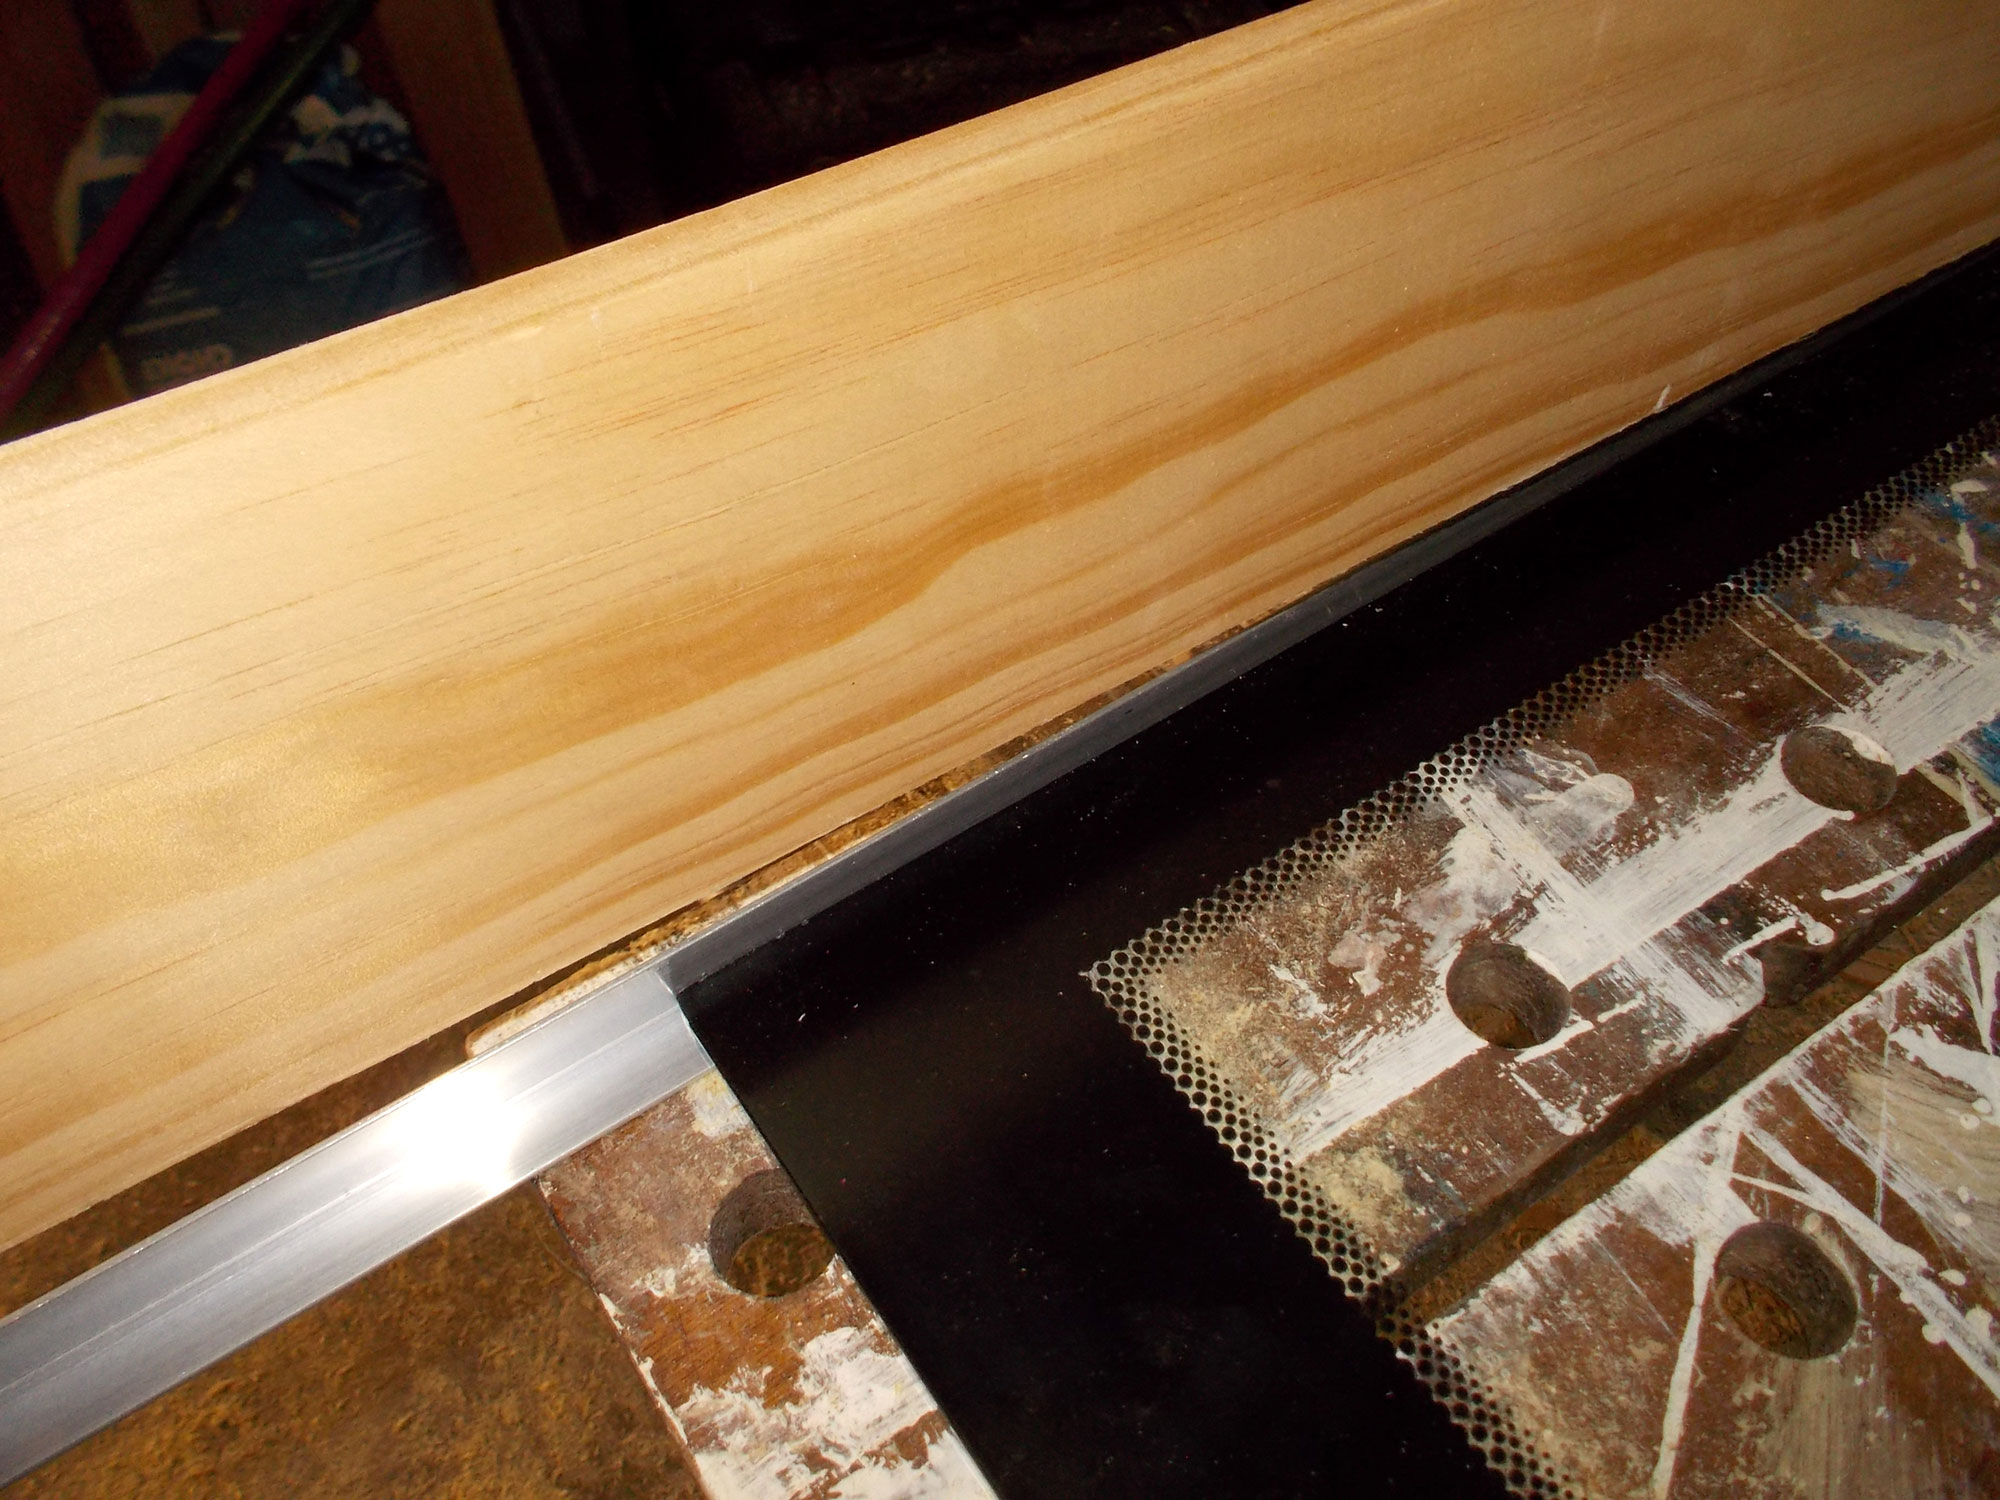
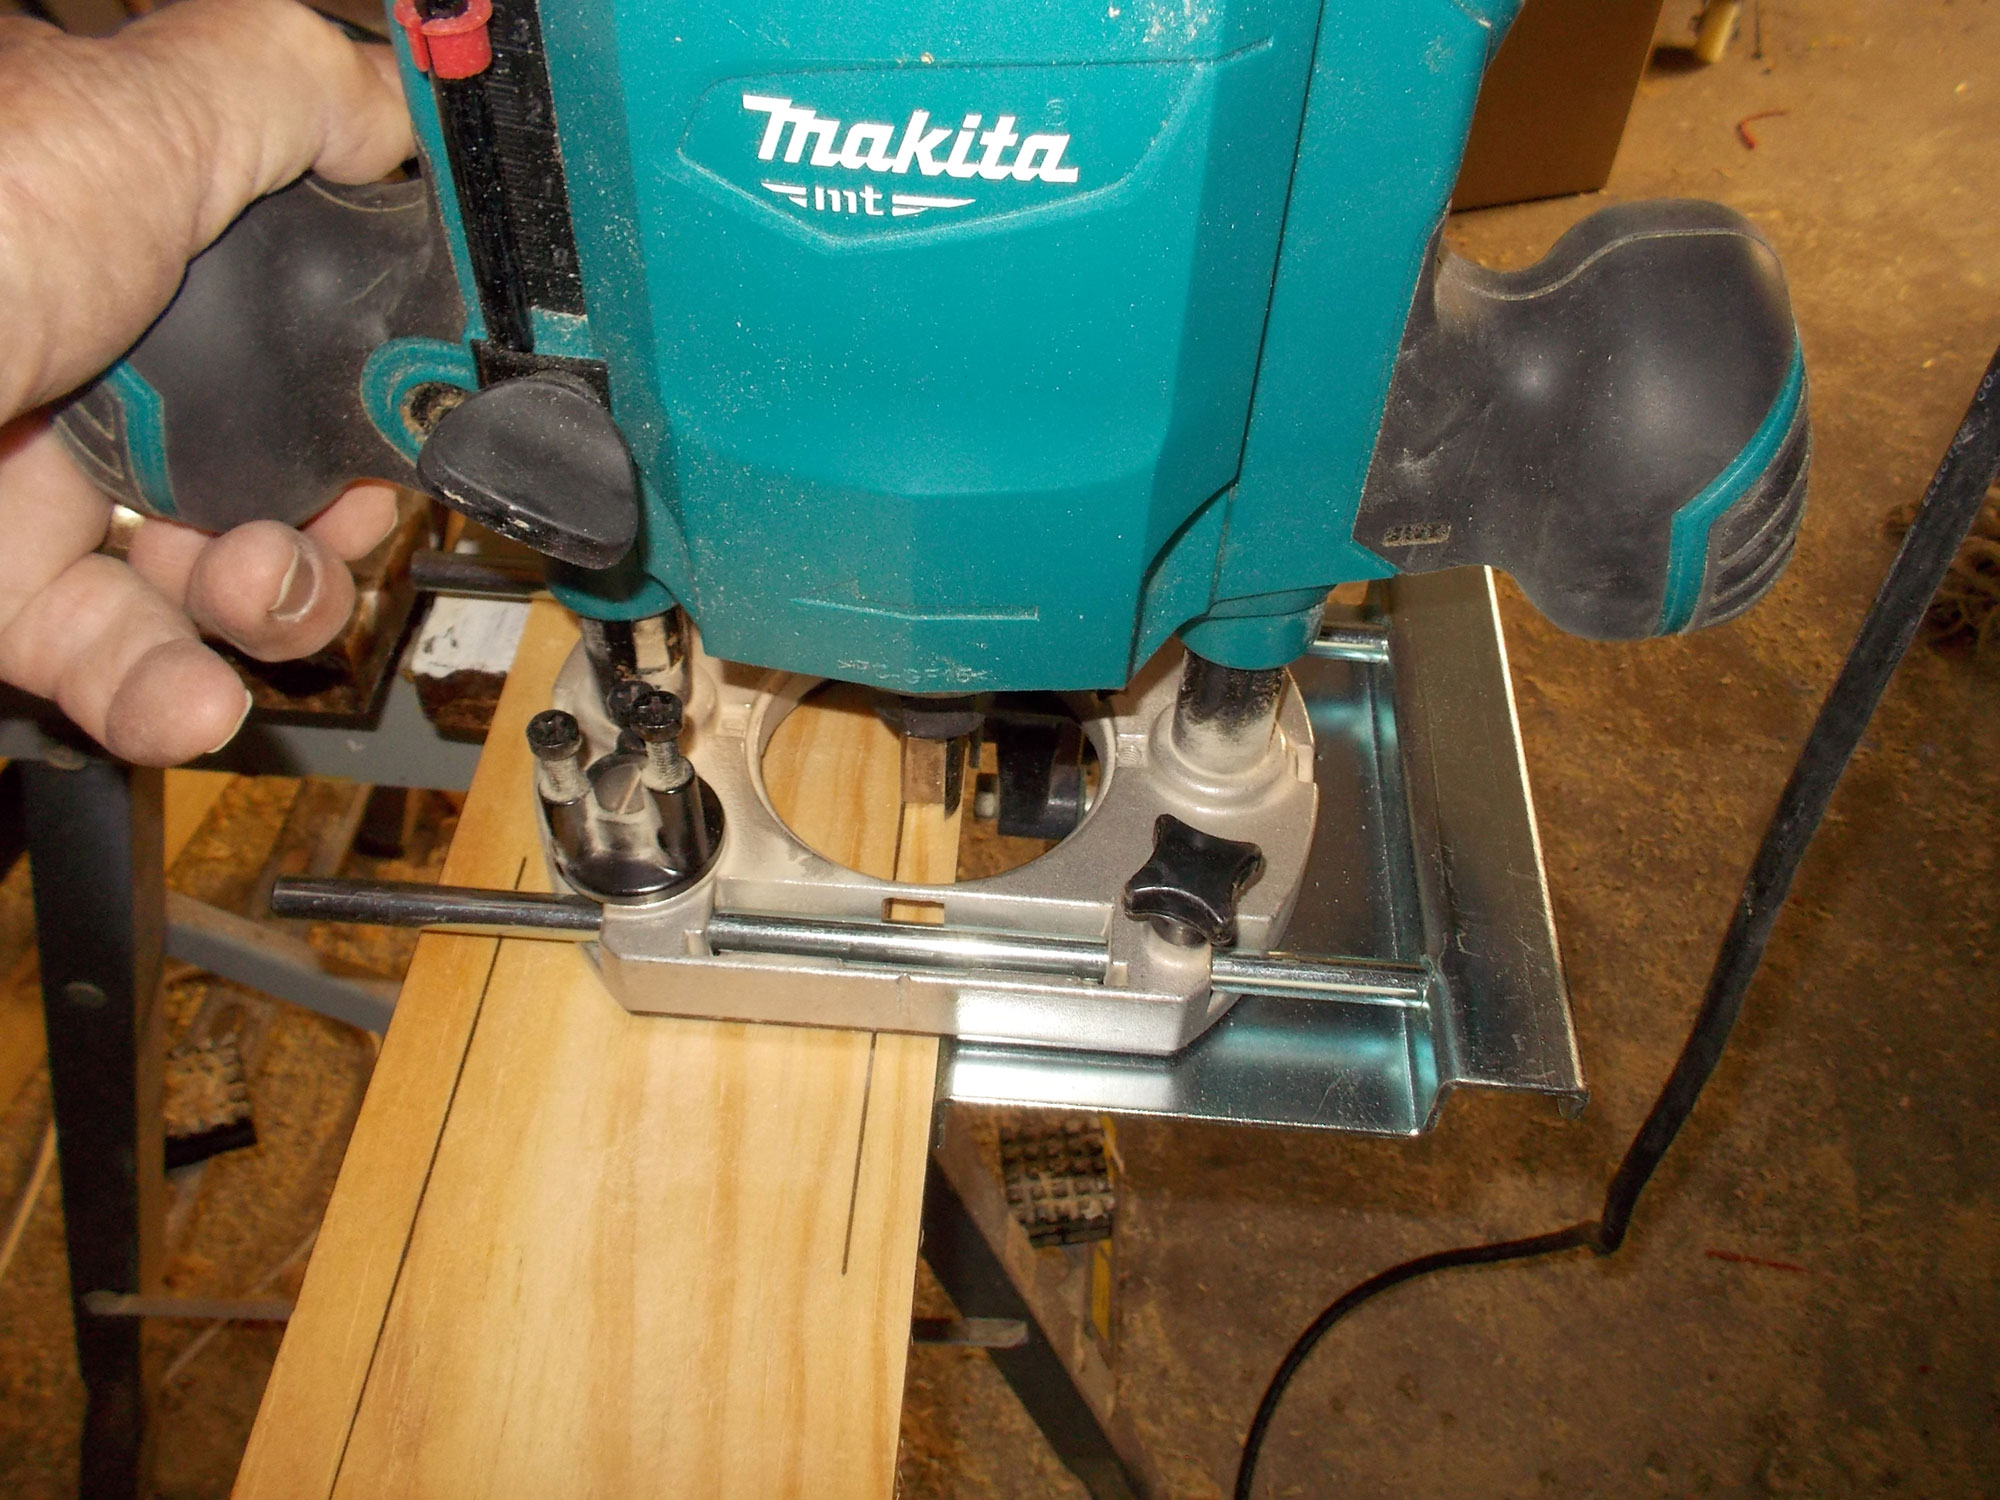
Now for the crafty part… routing the recesses in the side pieces for the aluminium angle. You need to do this because if you do not, when the sides are glued to the legs, there will be no gap for the aluminium angle to slide into. So, first of all, holding the angle hard against the edge, mark off the routing line. This being the full depth of the extrusion’s arm will be for the bottom ledge of the sides.
For the top edge, where the aluminium will serve as the glass surround, you need to make allowance for the thickness of the glass, so place the aluminium on the bench, slide the glass over it, and then hold the side vertical as shown here… now you can mark the routing line.
Now you can see the difference between the two… on the left the recess is the full width of the angle – and that will be the lower edge of the side, i.e. its trim – and on the right the narrower routing recess for the aluminium, taking into account the thickness of the glass.
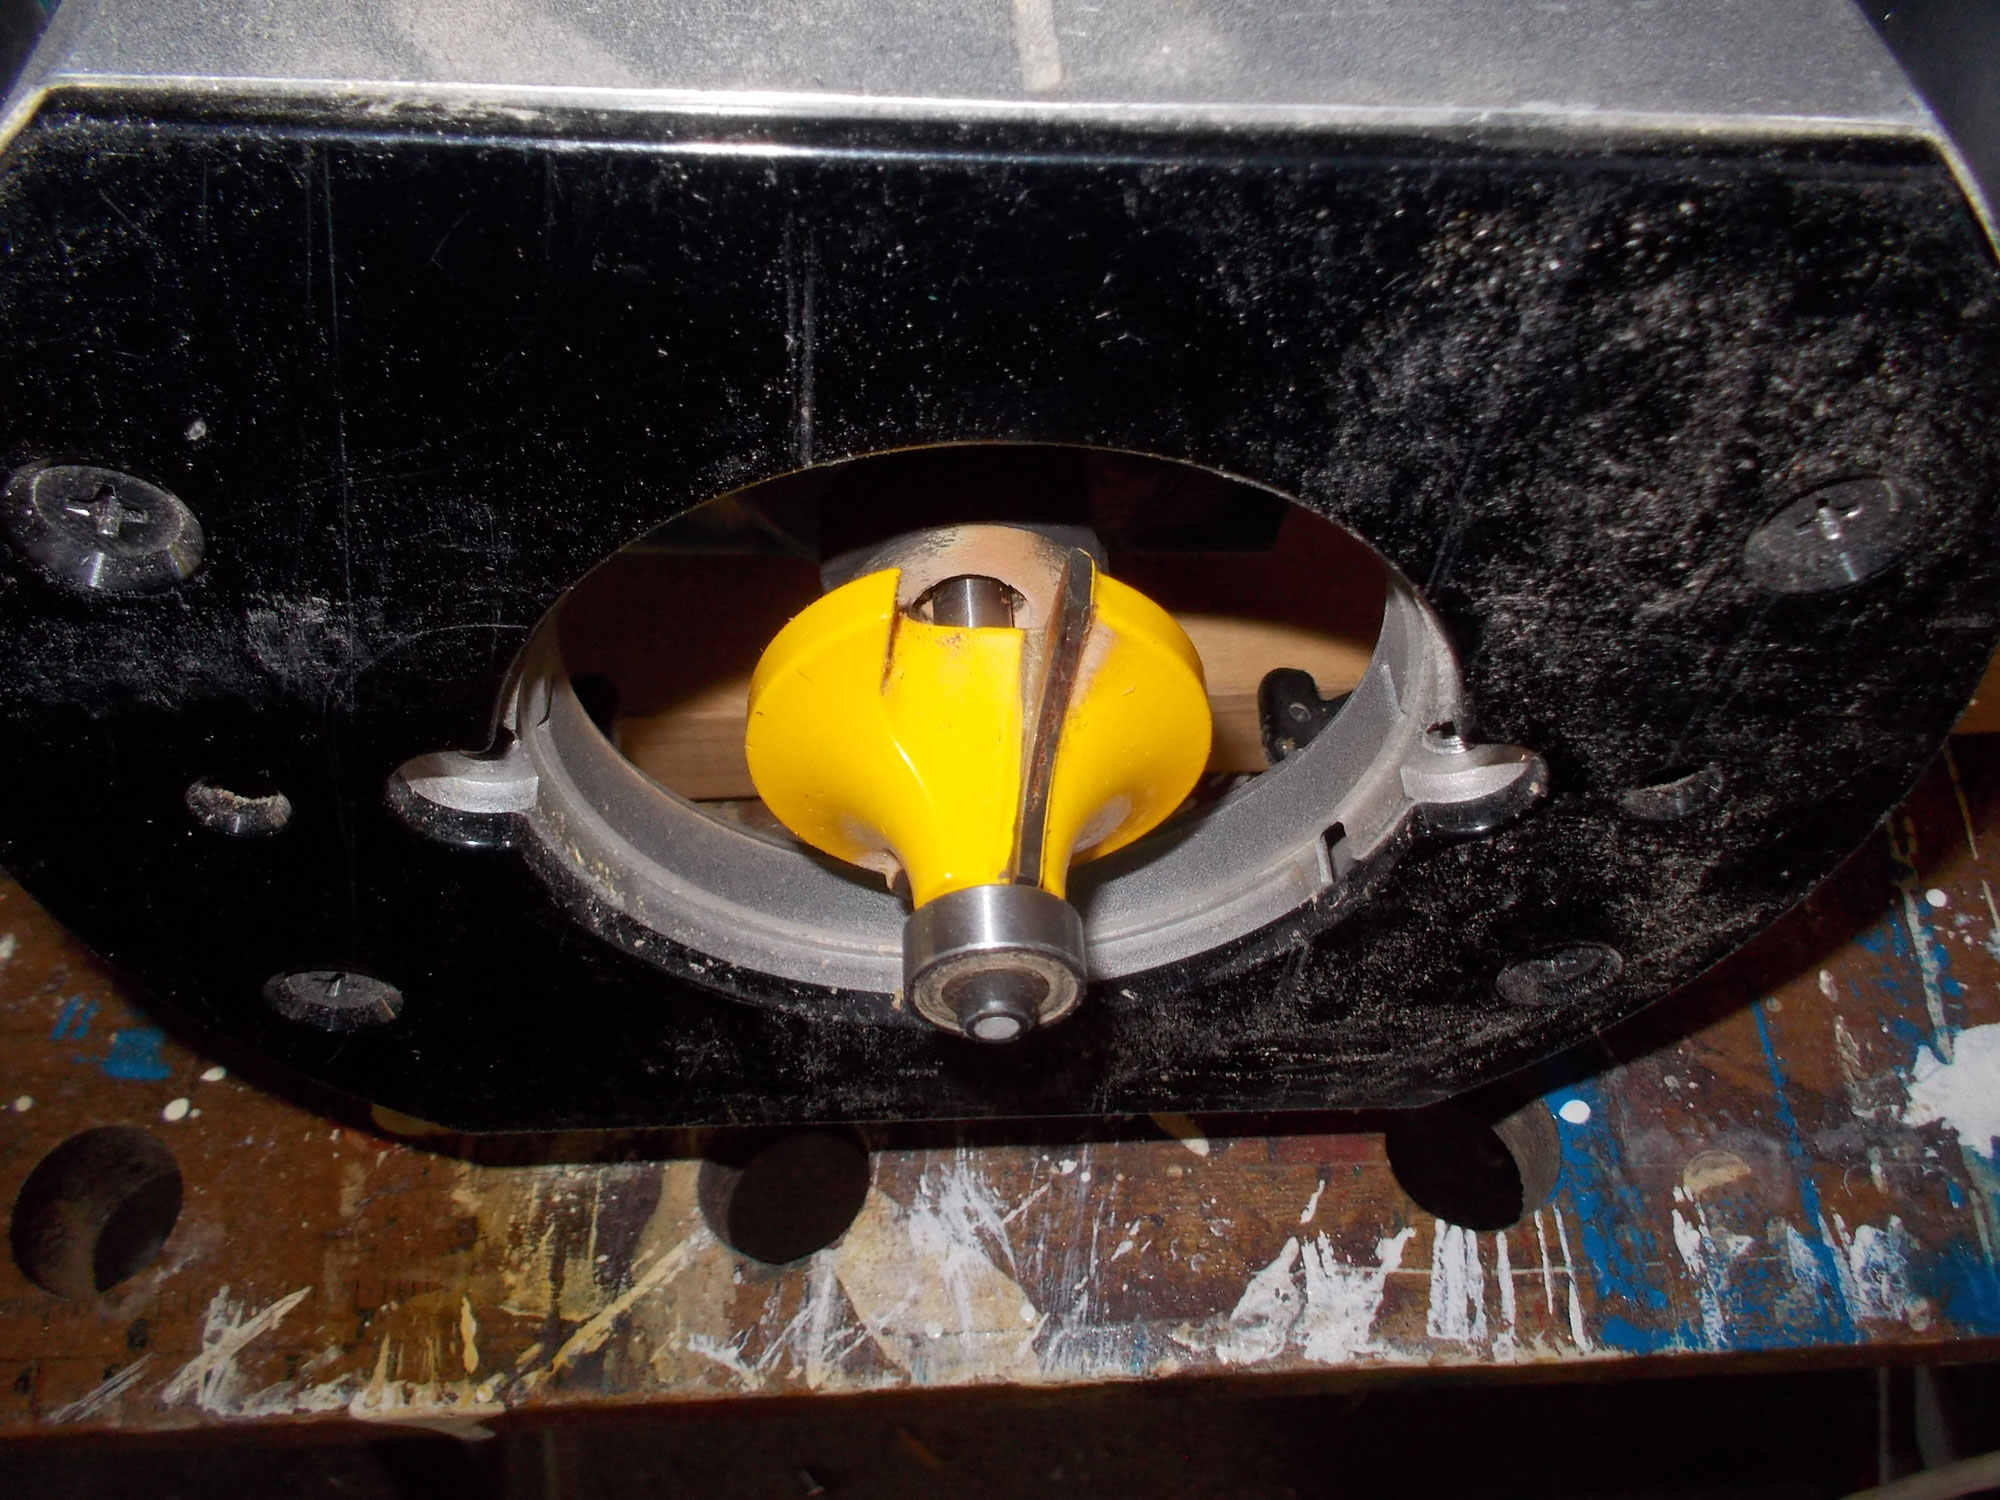
Now change the rounding bit for a straight bit.
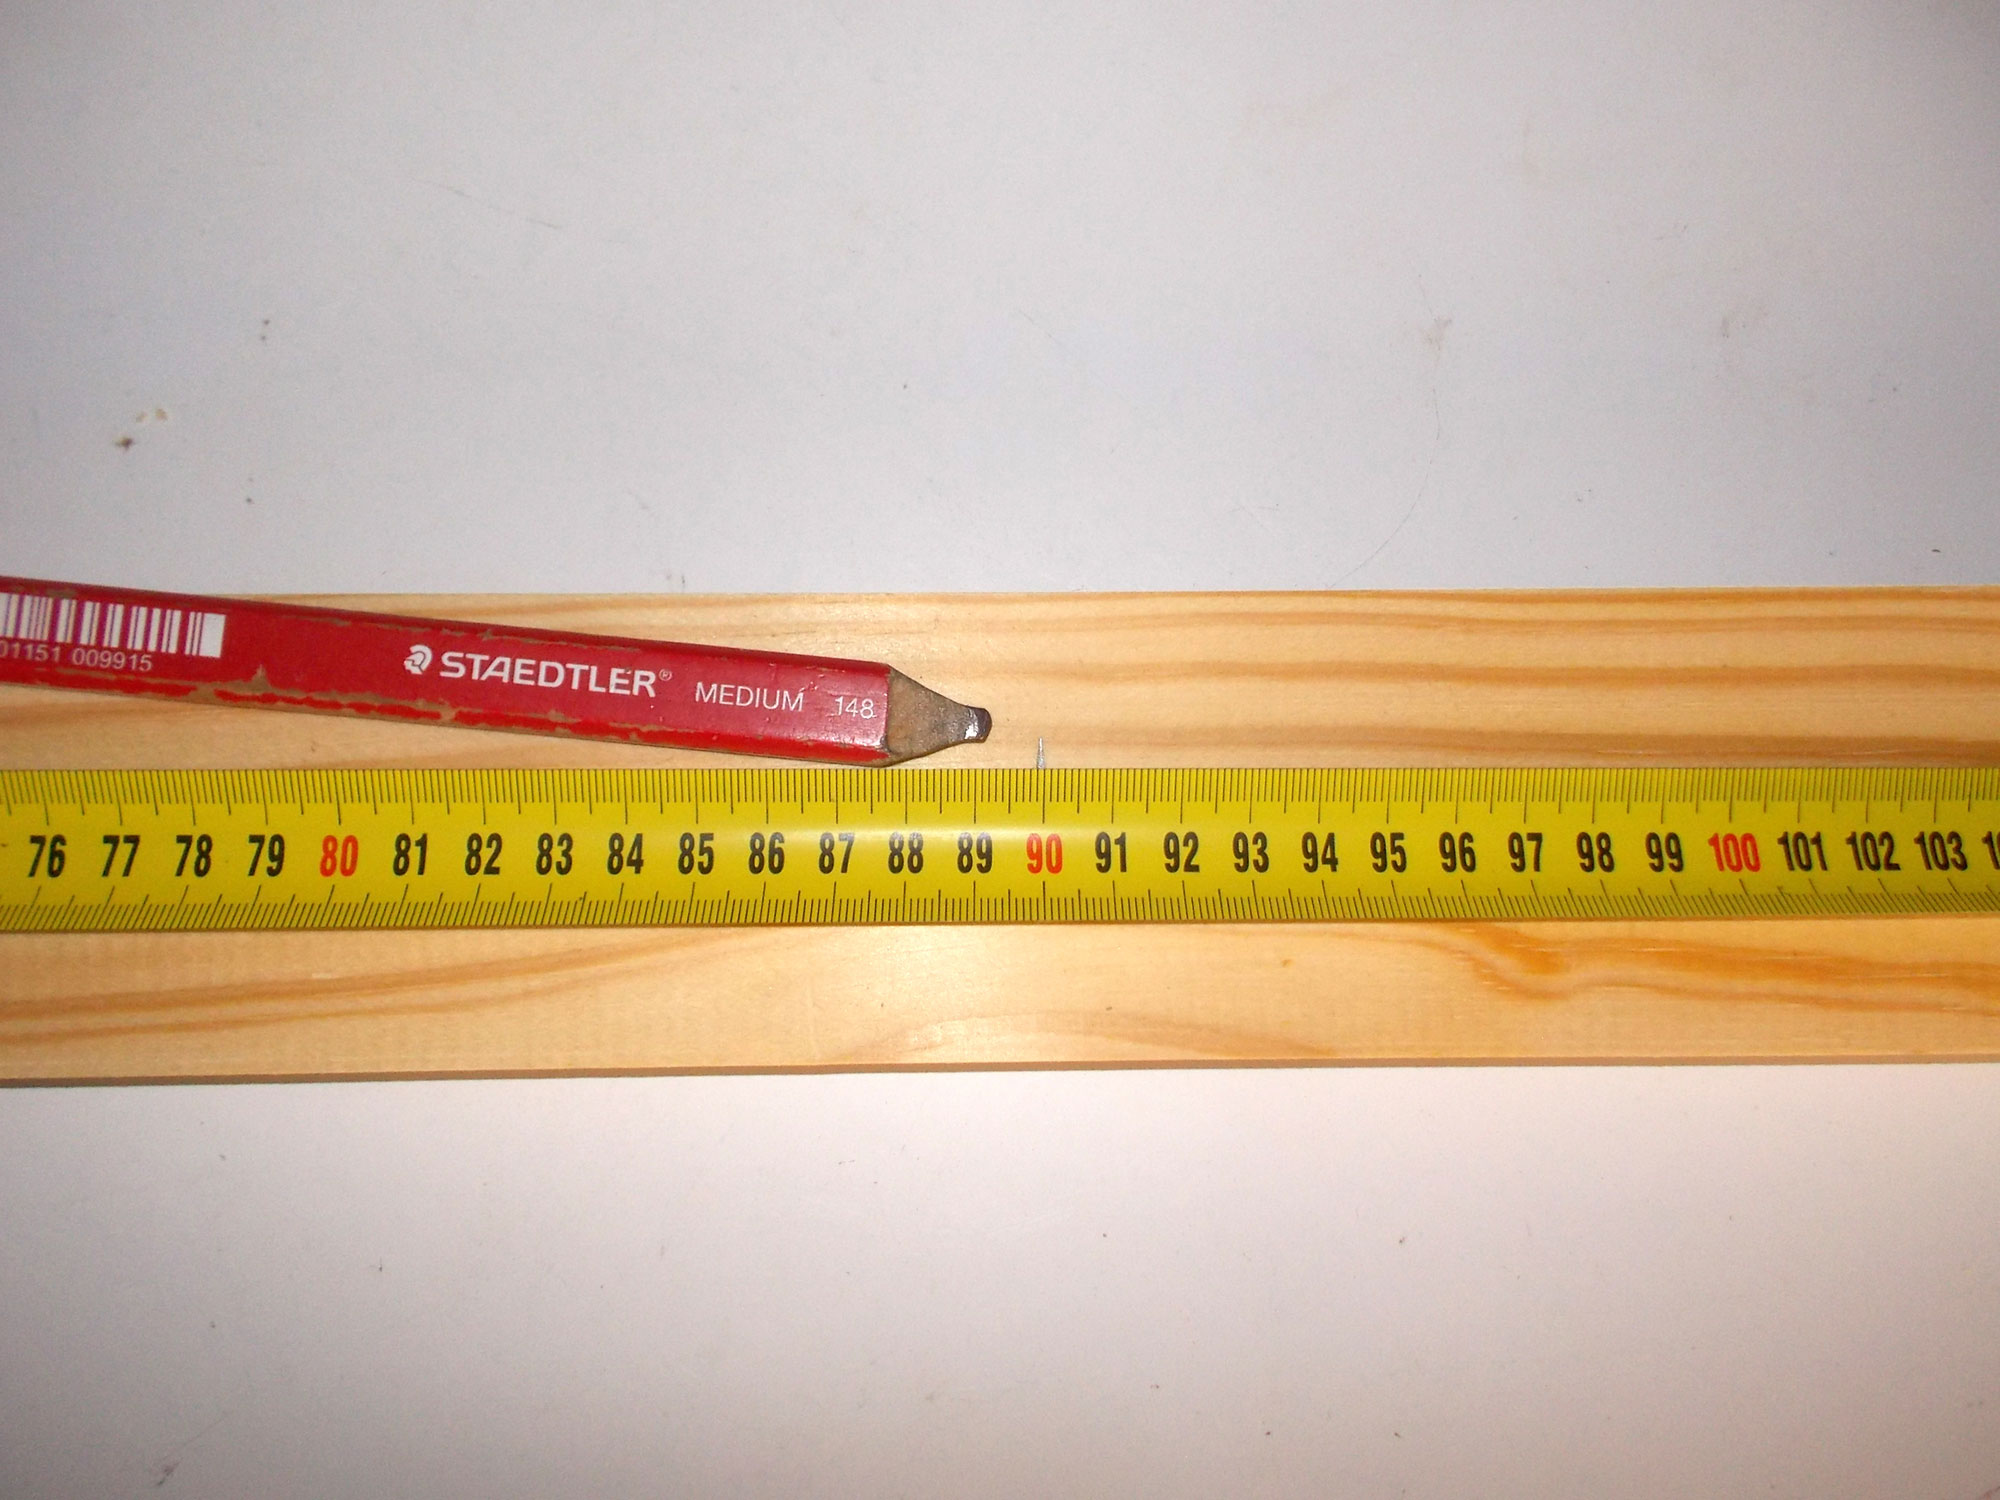
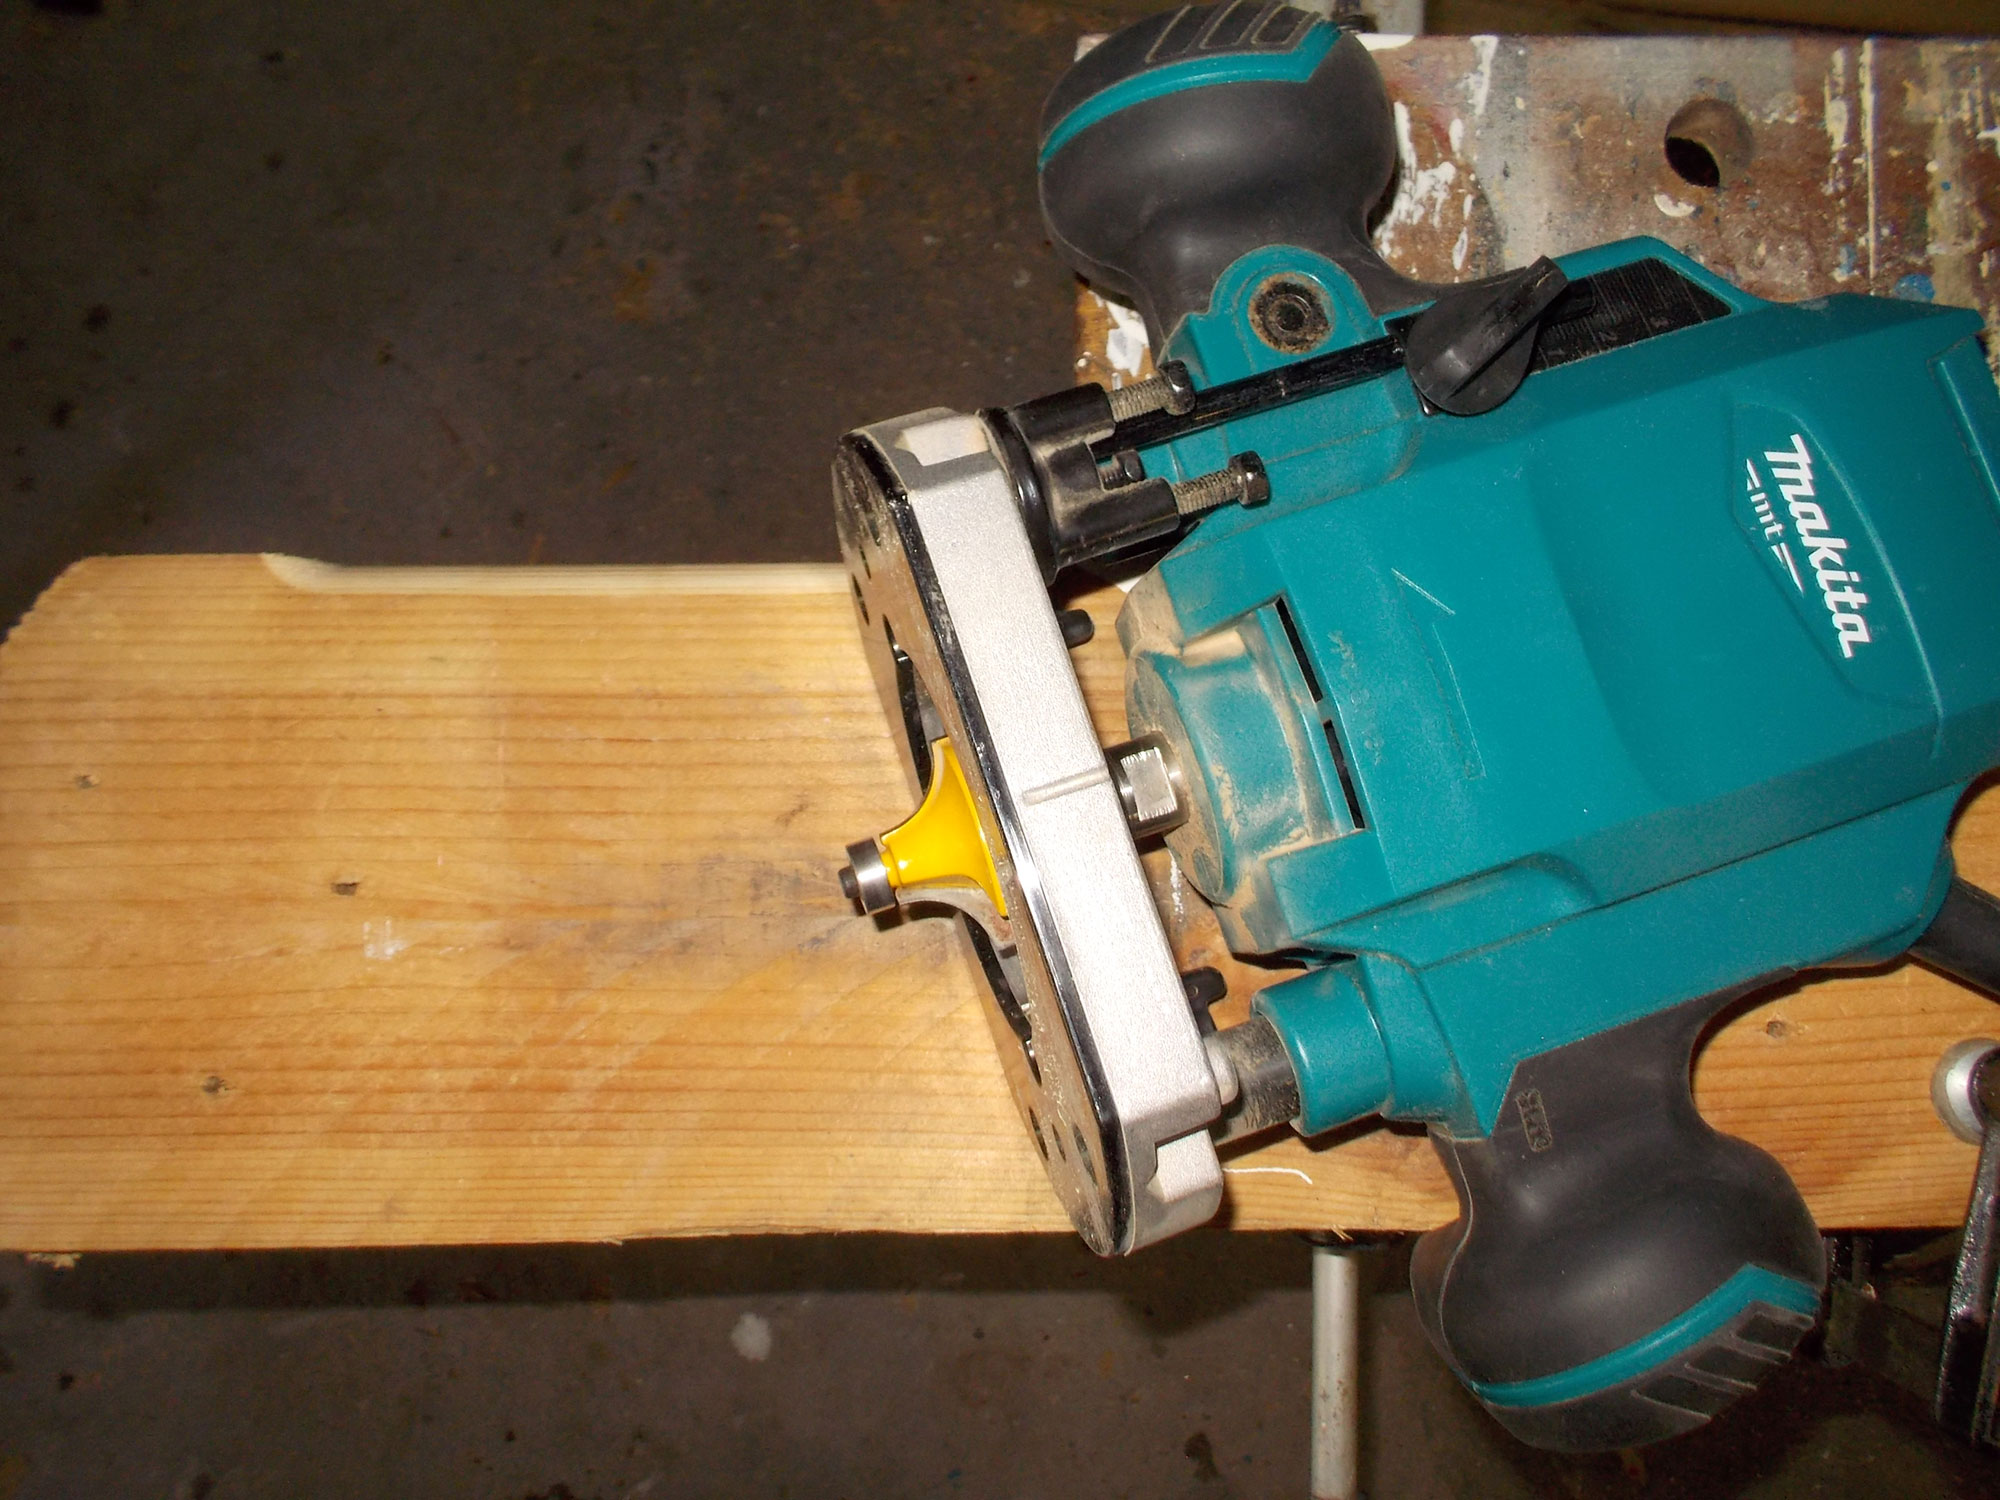
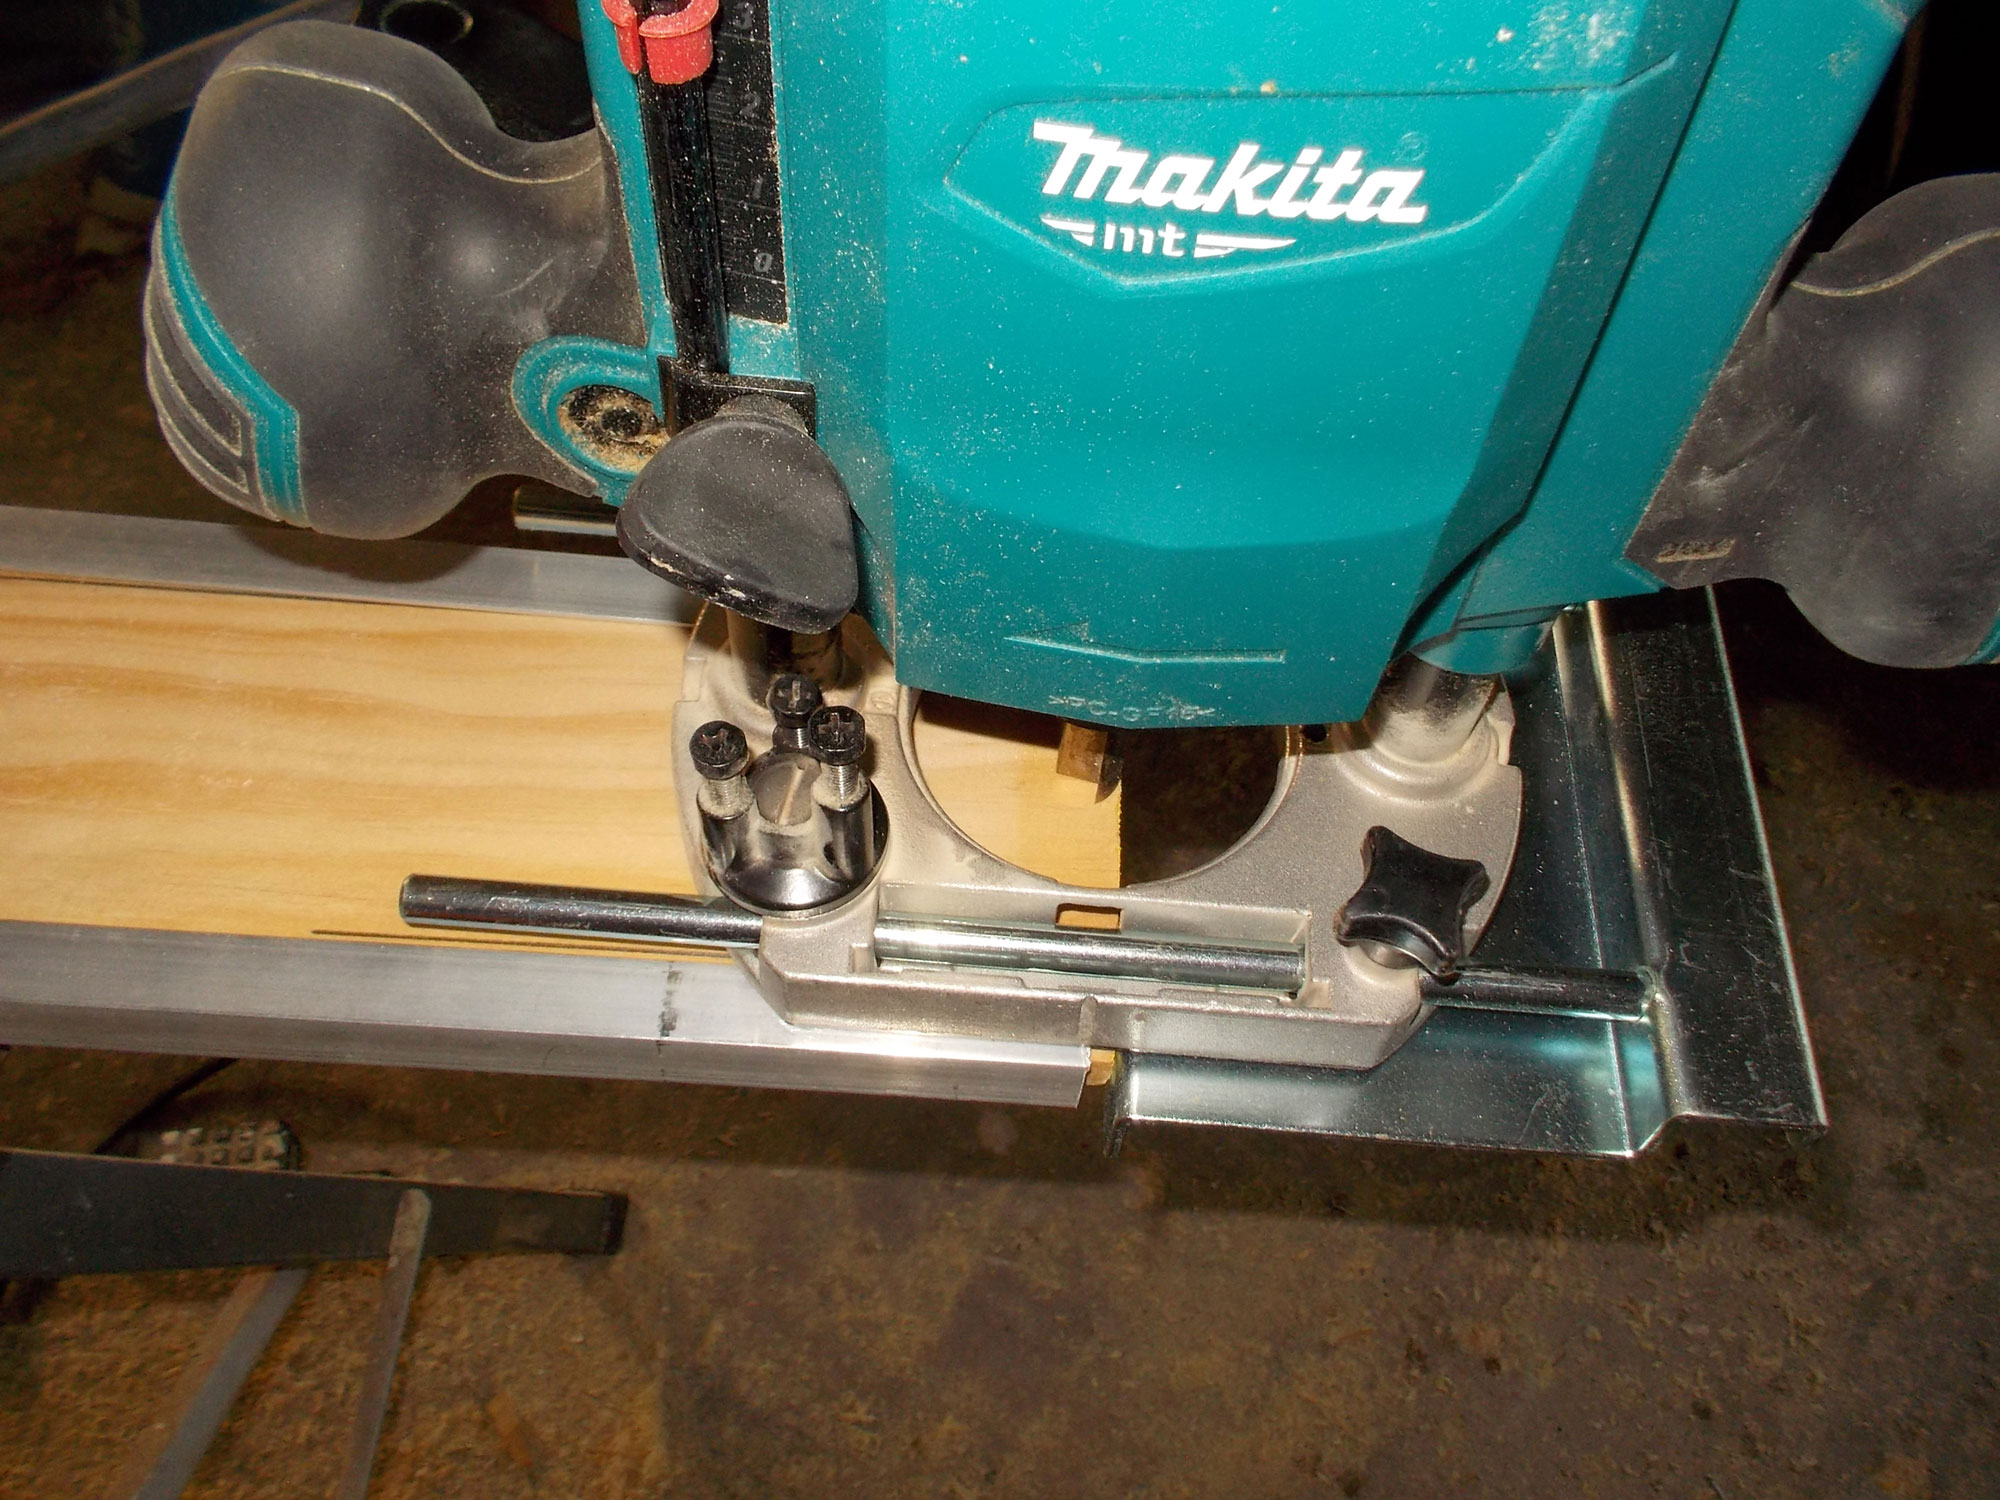
With a length of aluminium on each side, set the routing depth – in this case 1.2mm. This method is far quicker and easier to use than trying to set the routing depth using a rule.
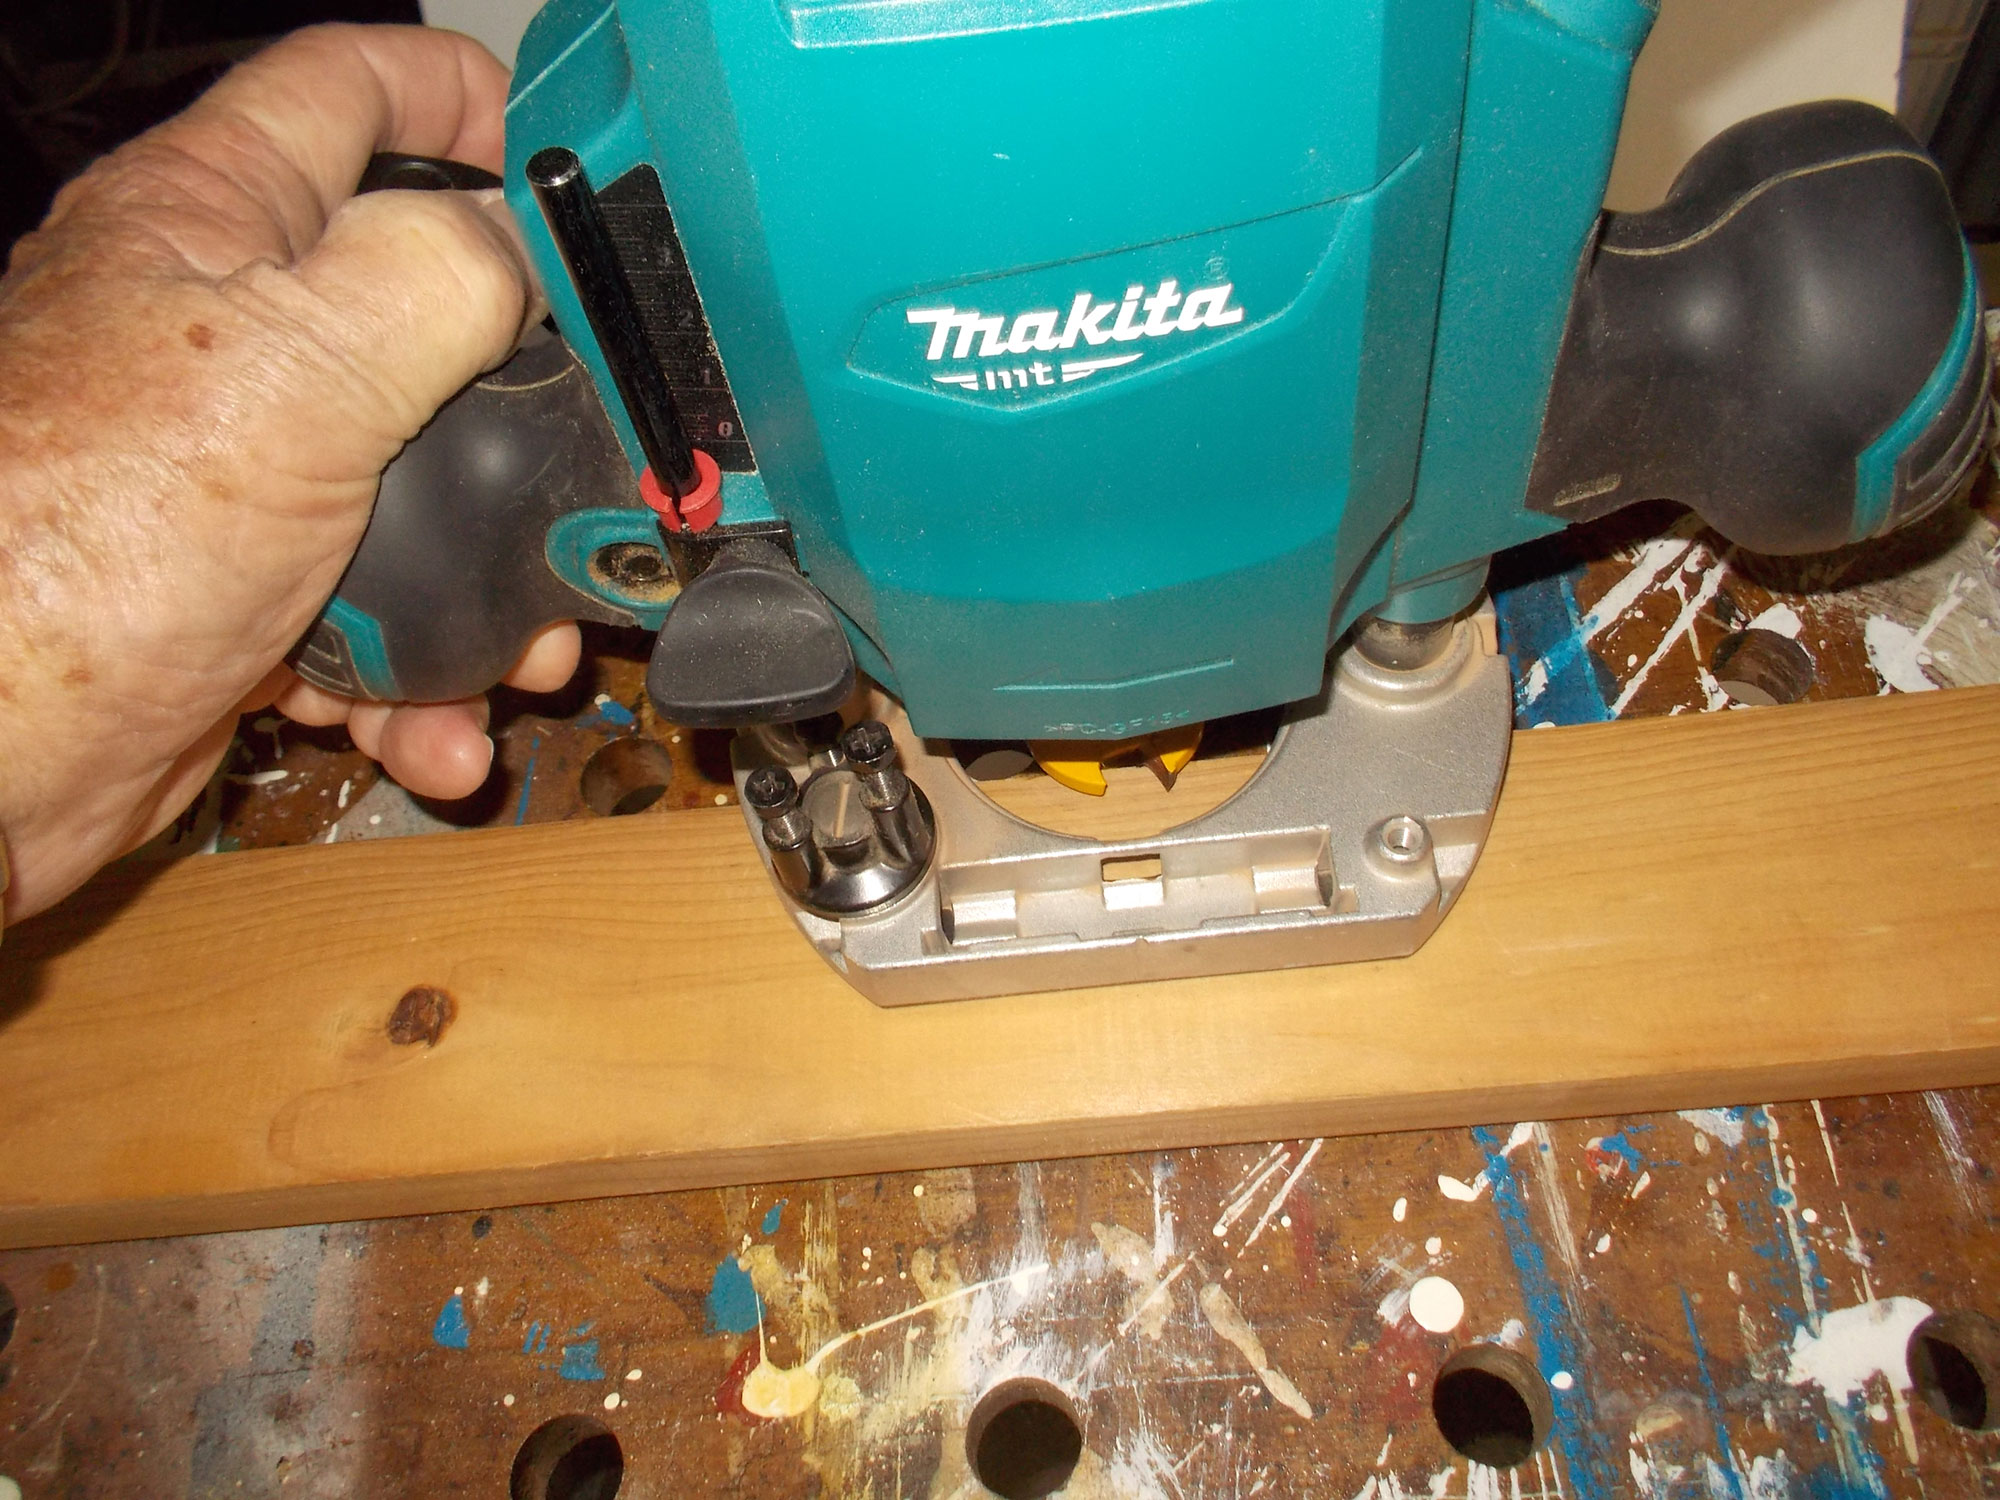
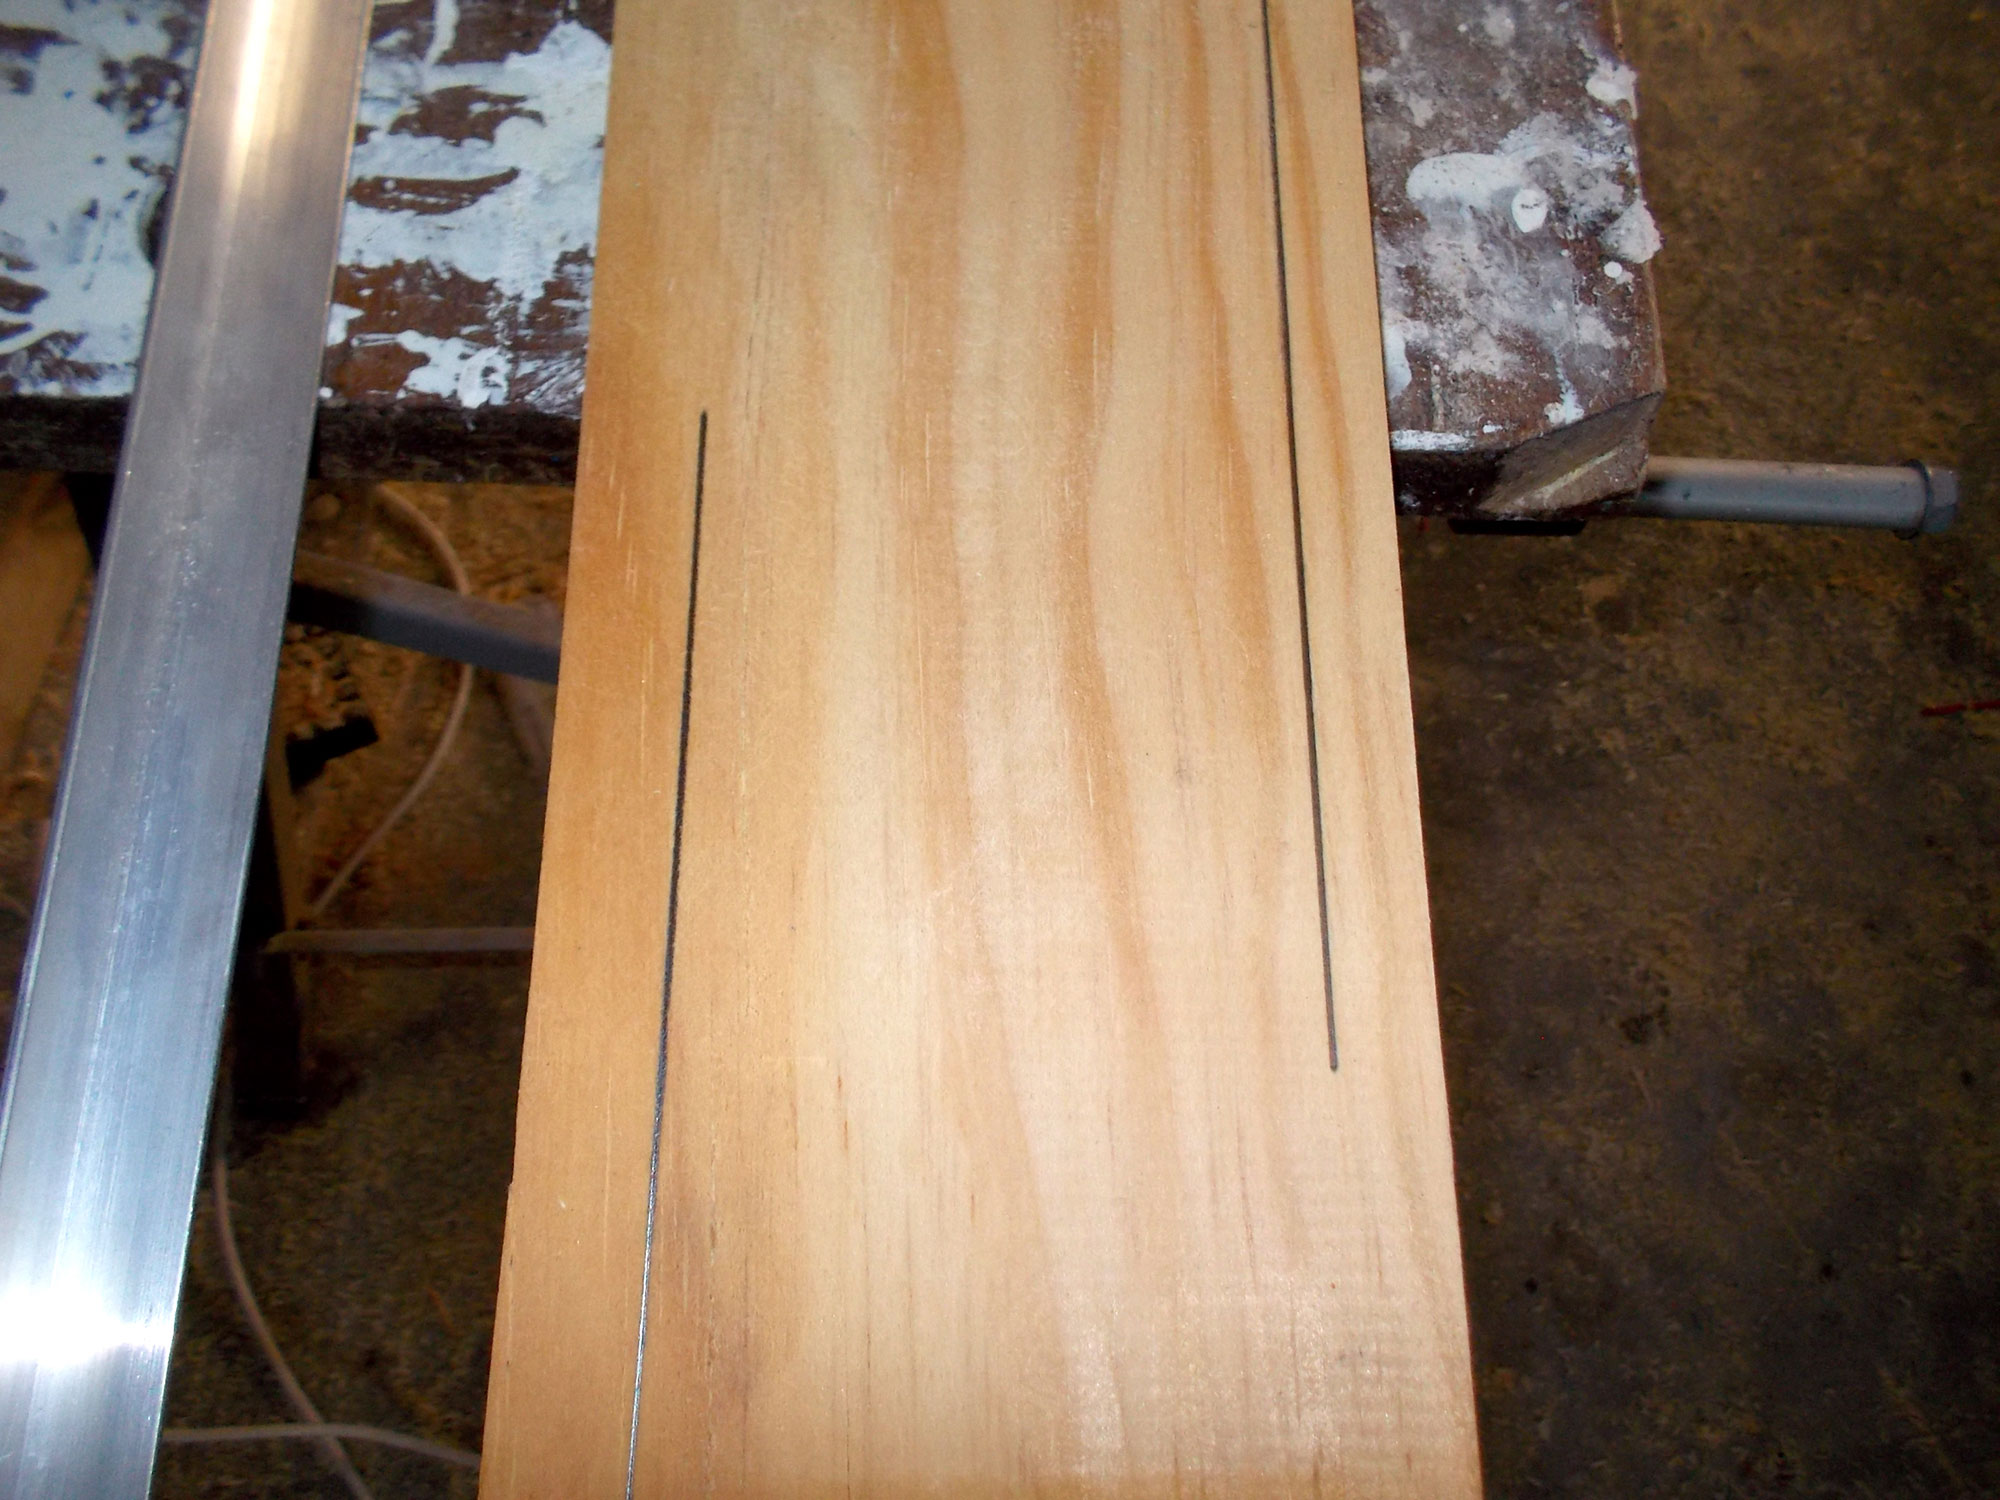
Now, with the router’s fence fitted, set the routing width.
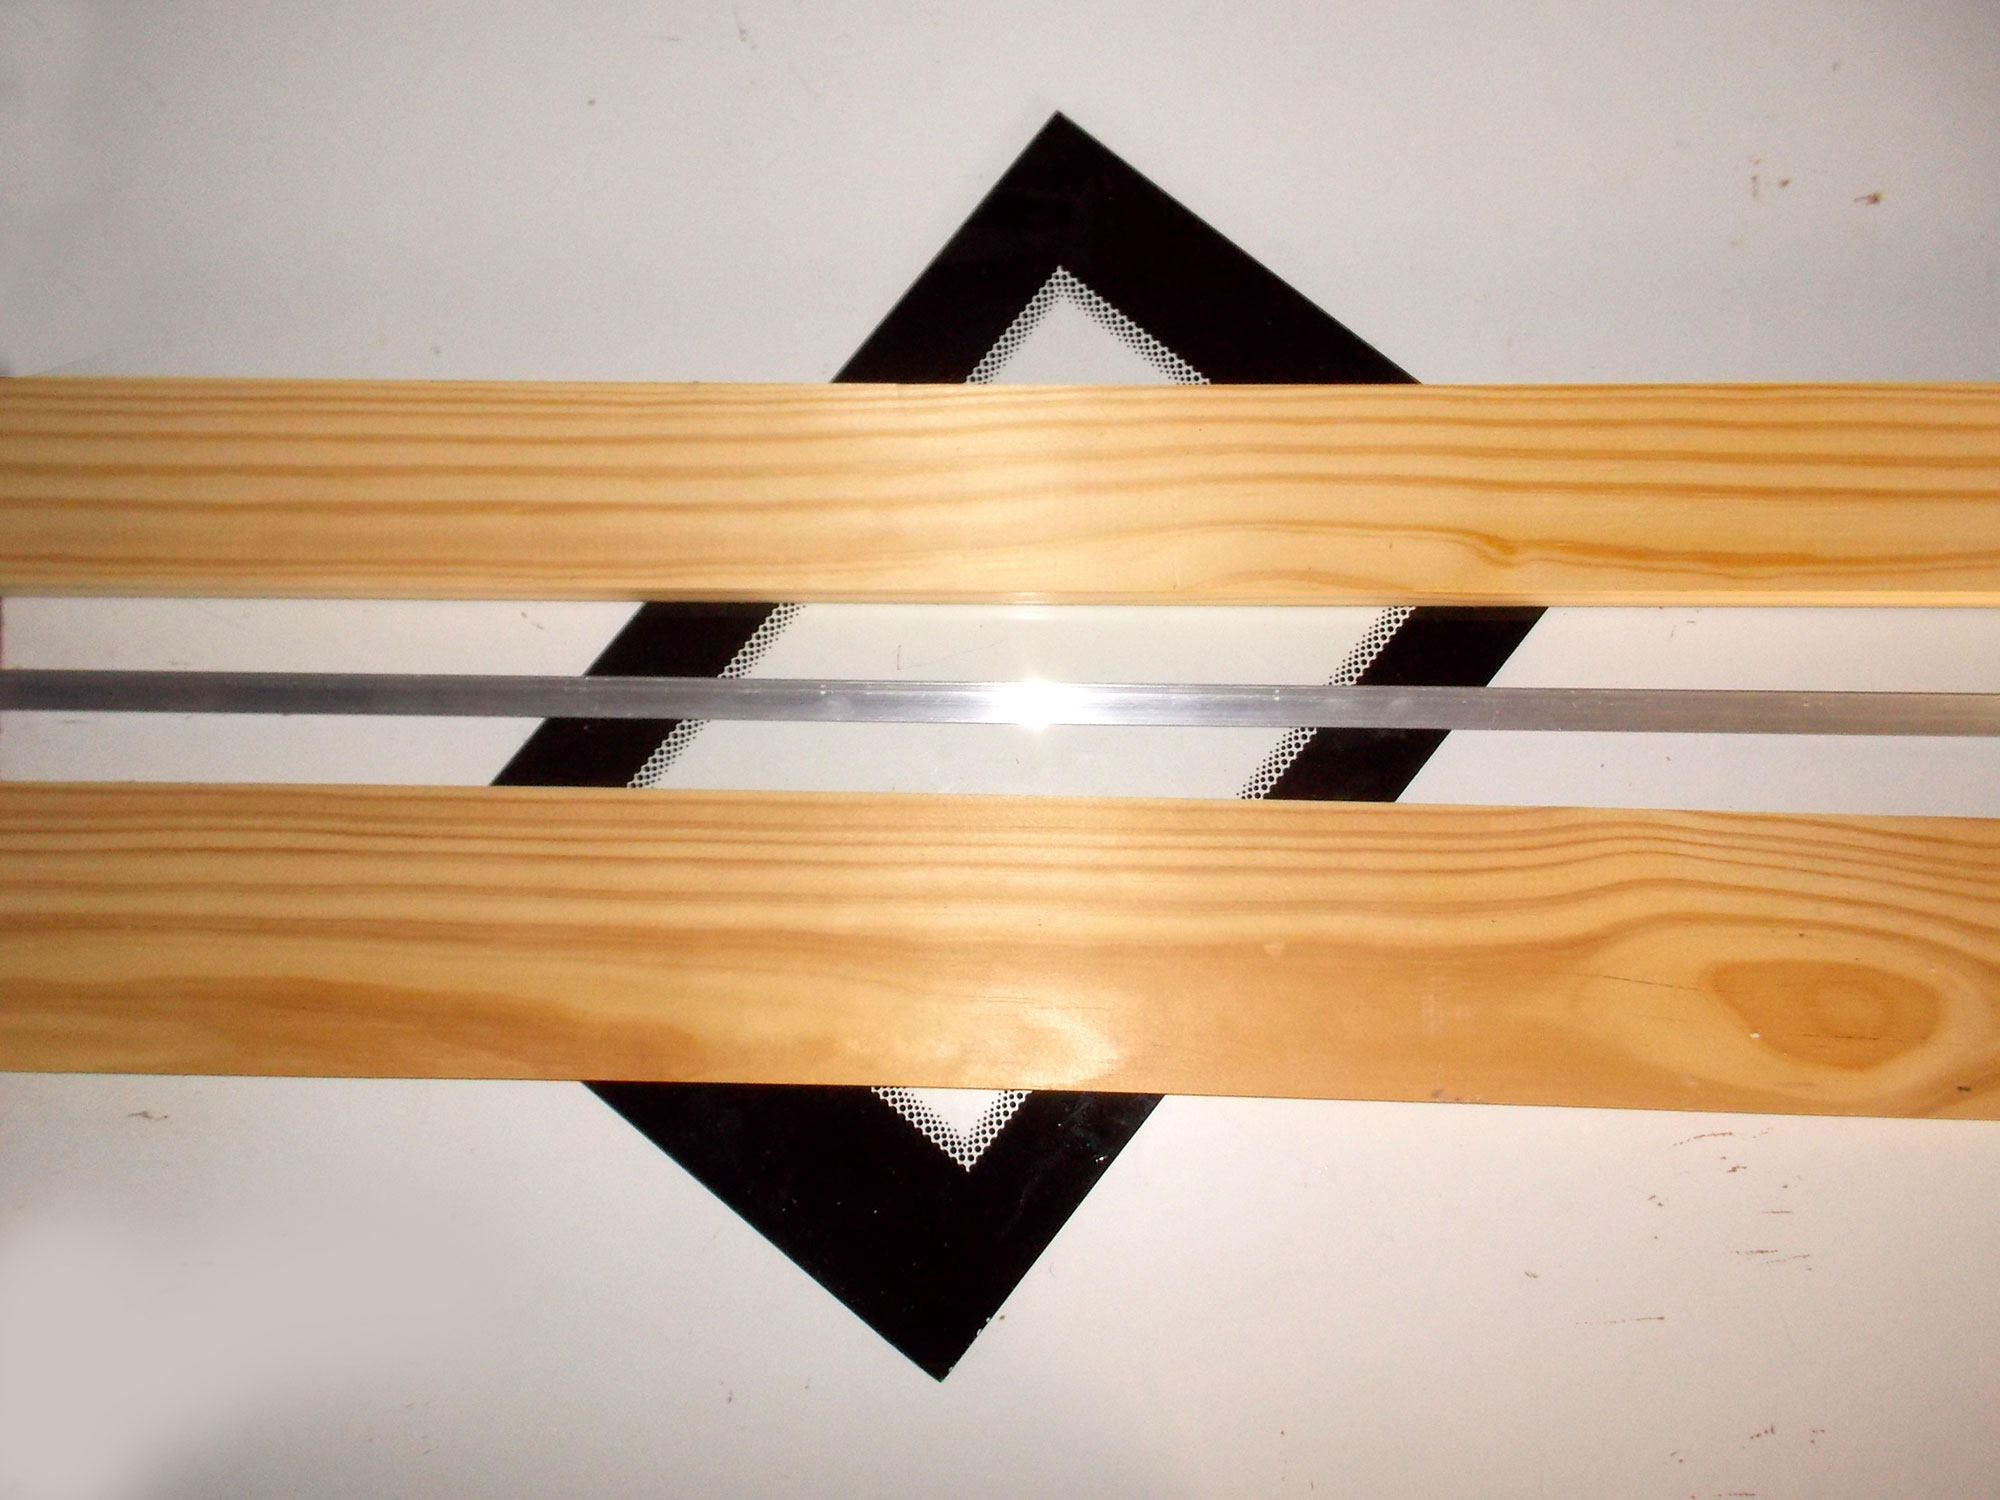
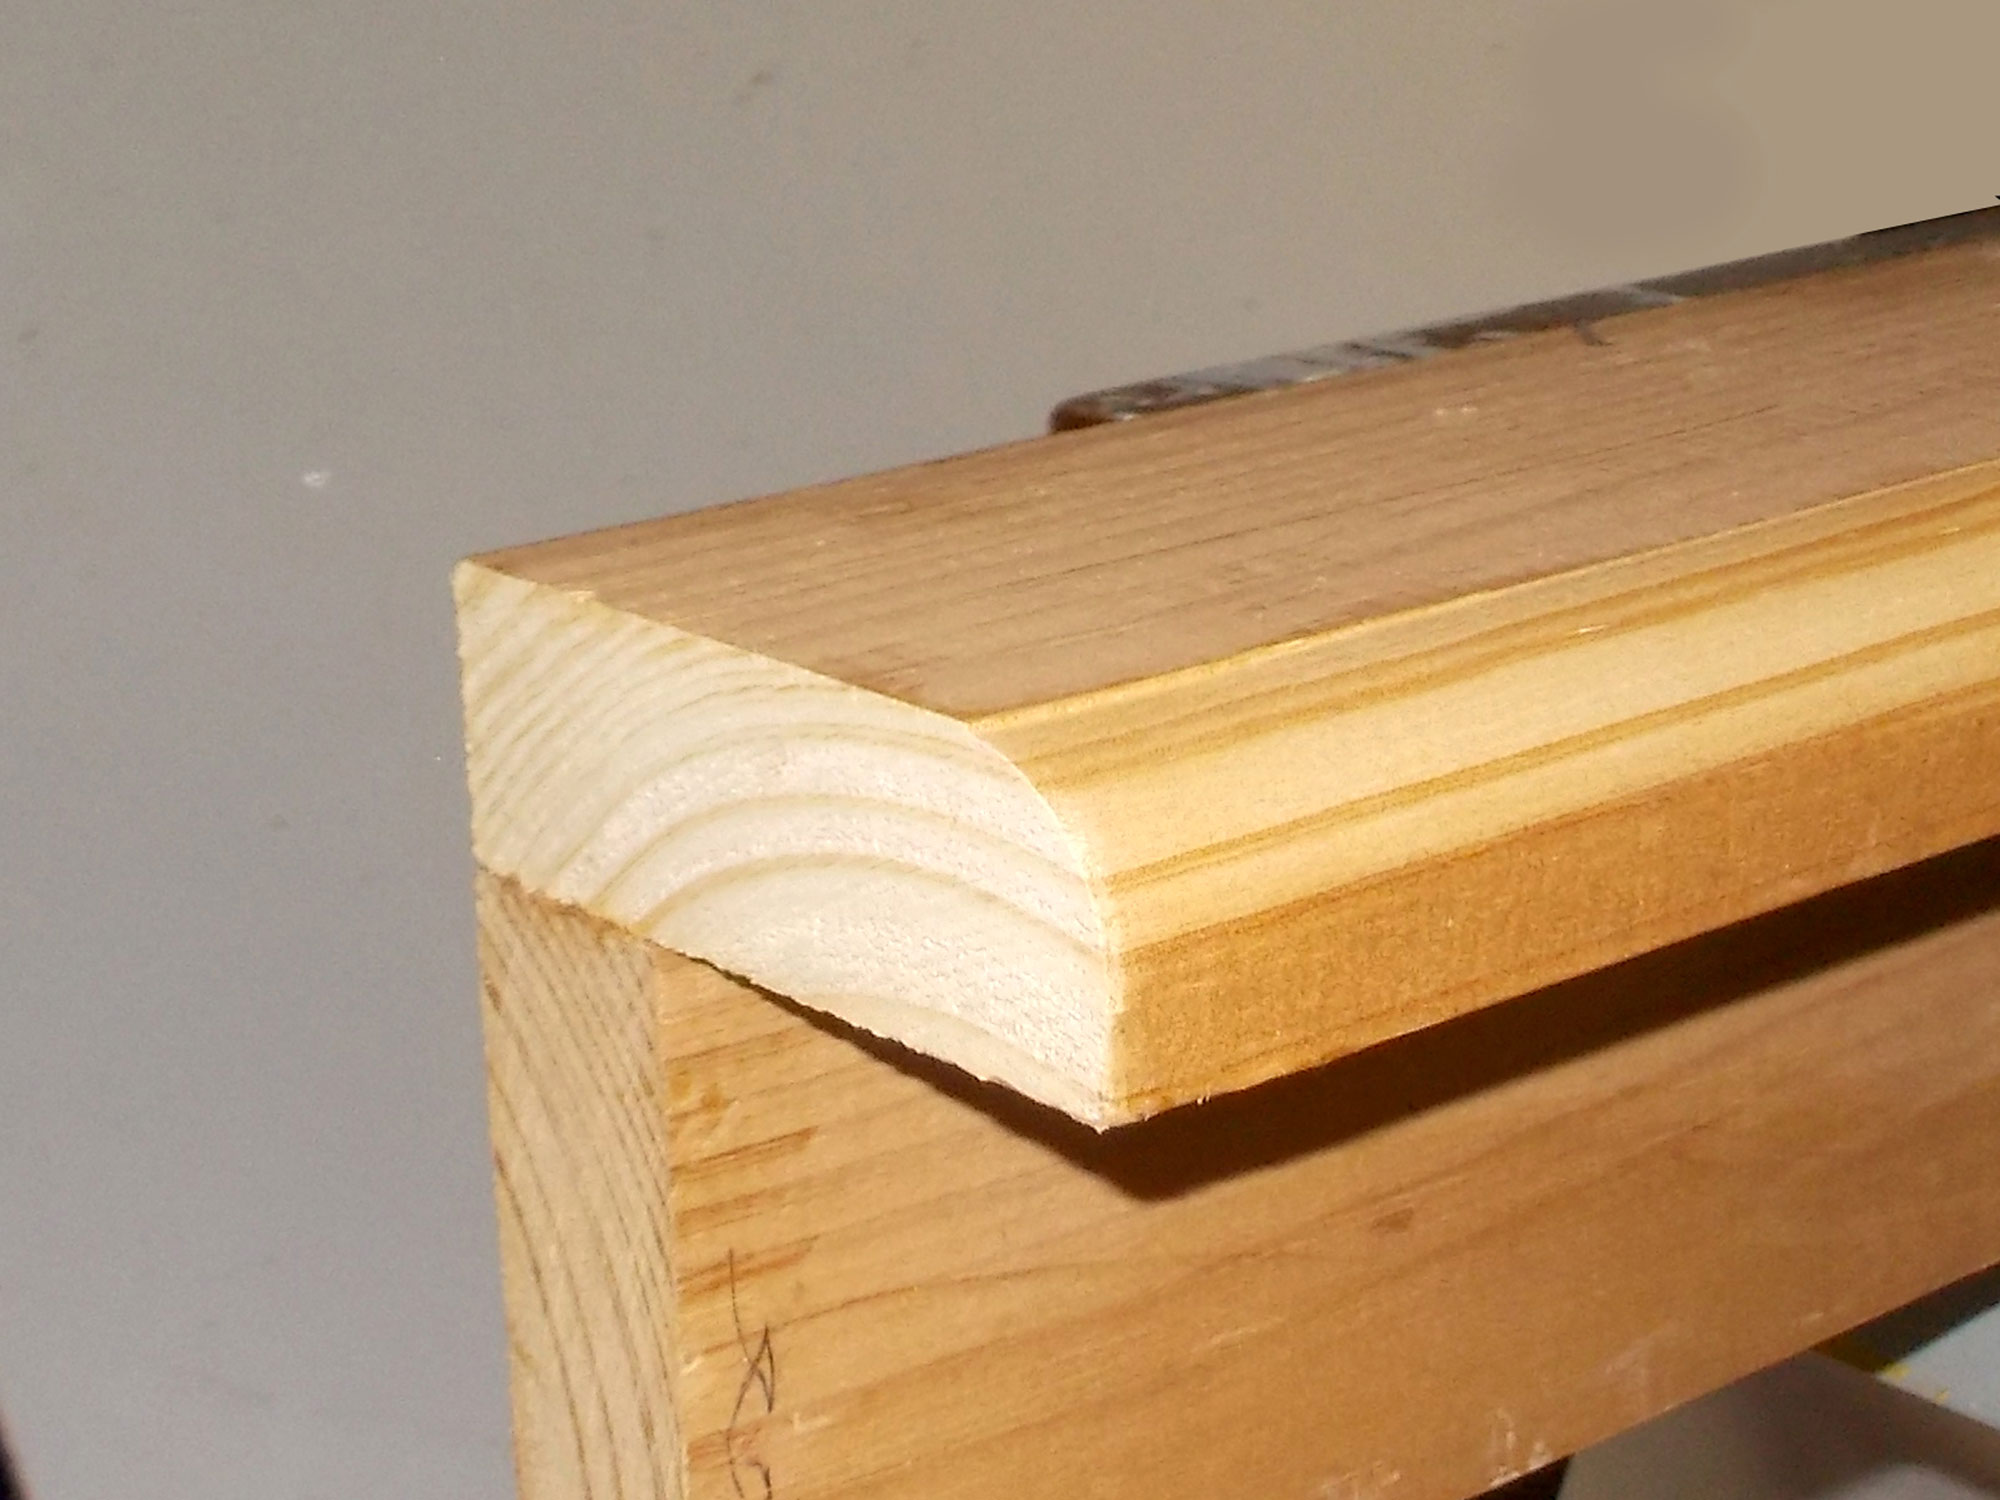
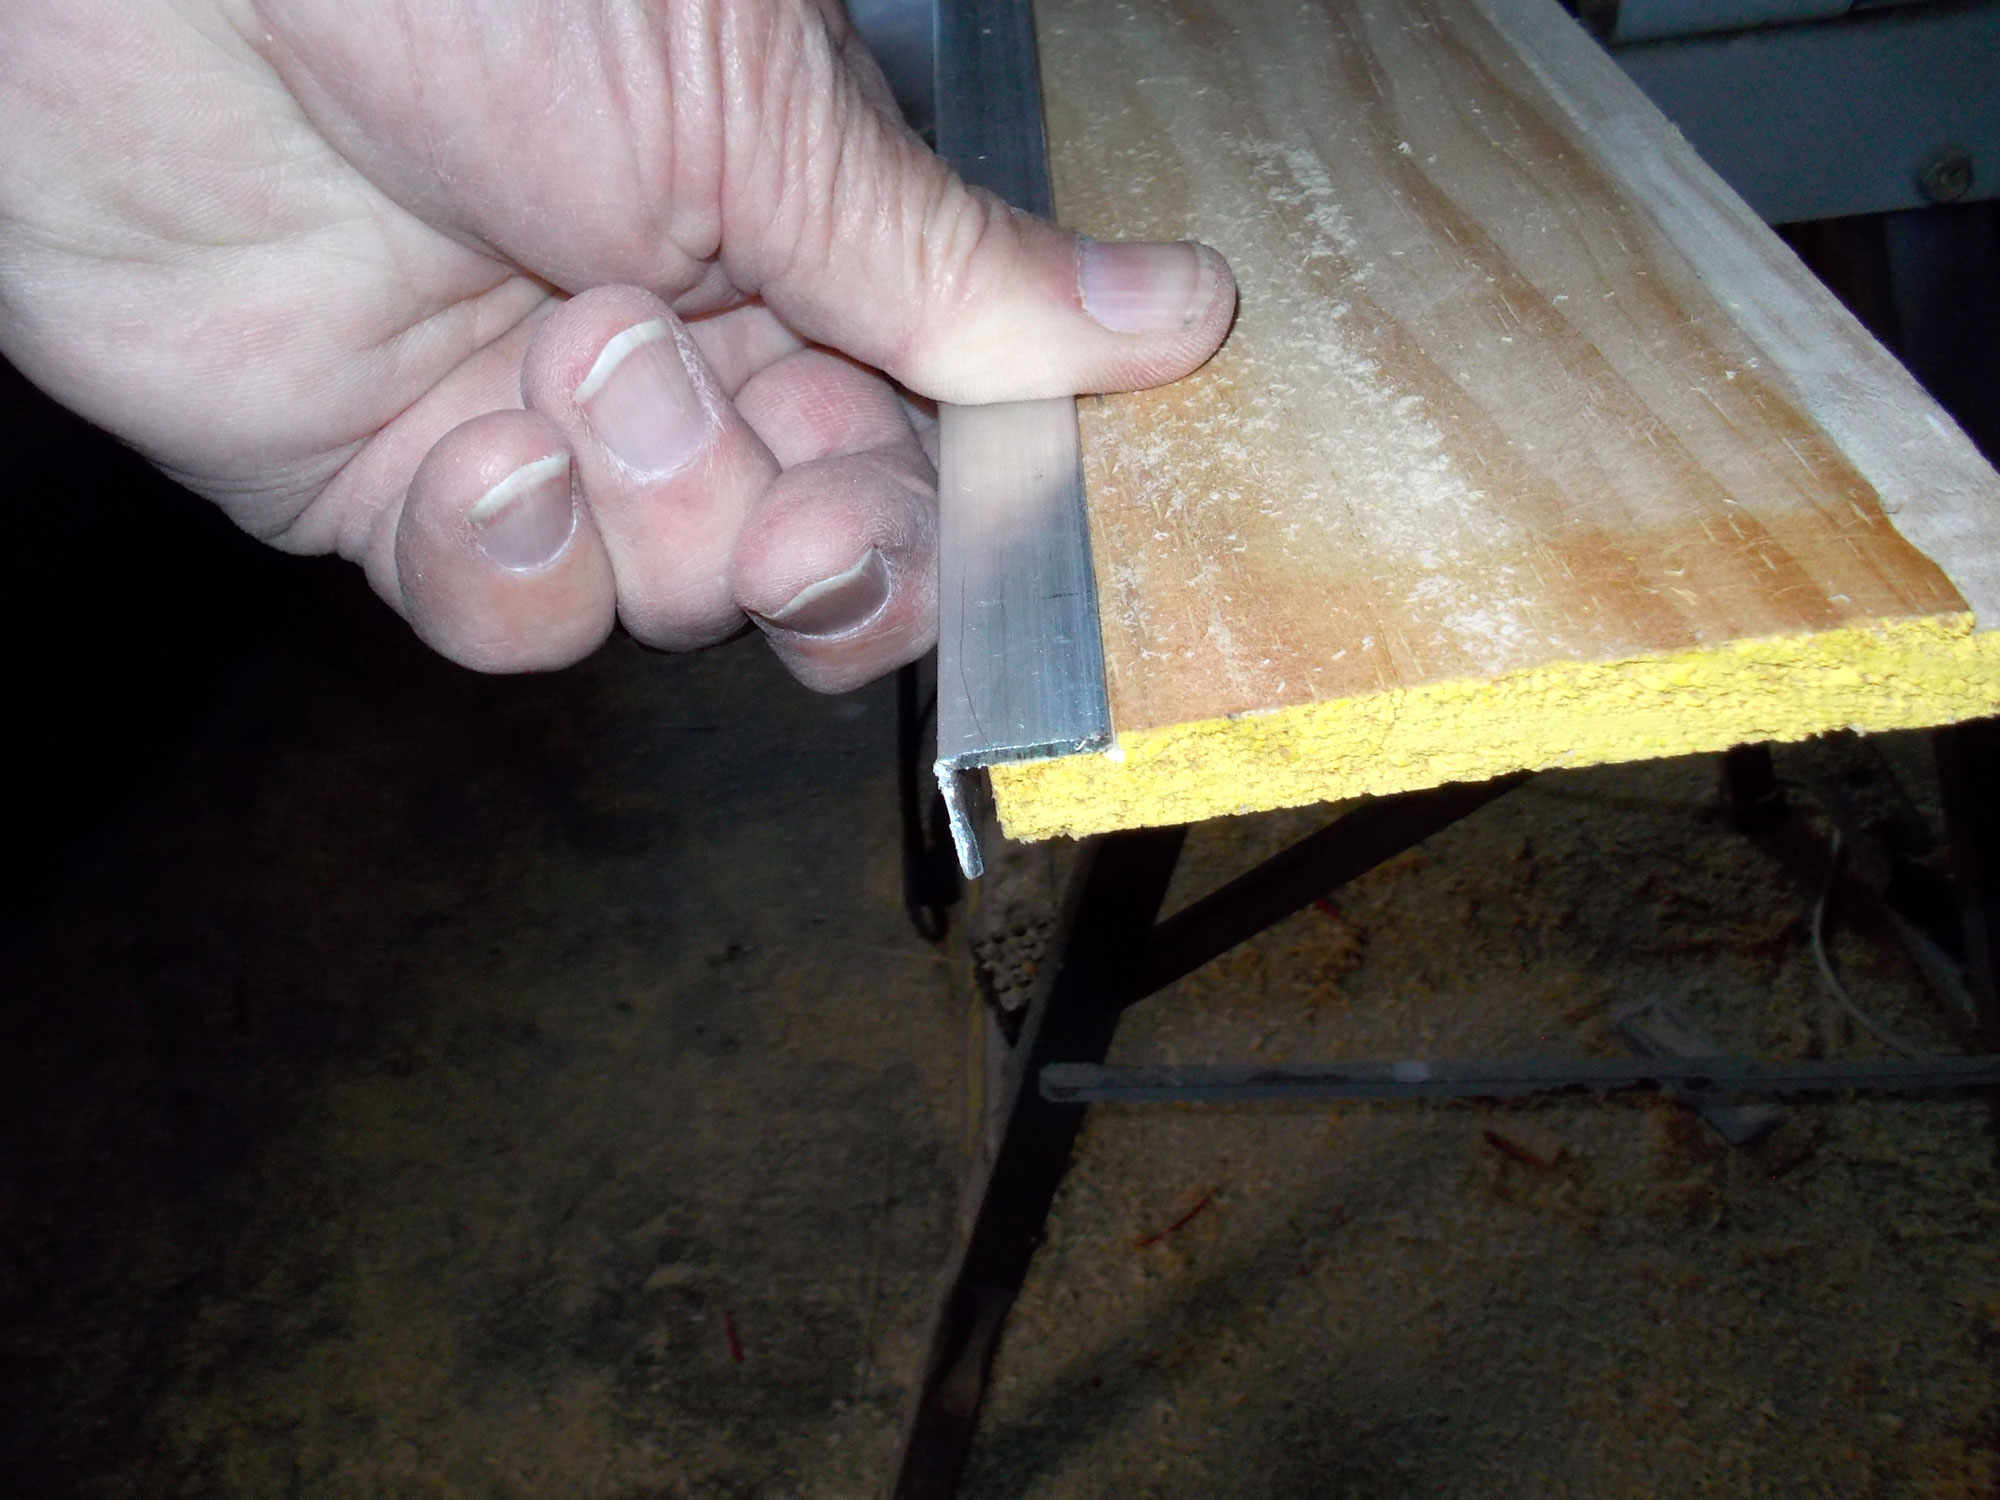
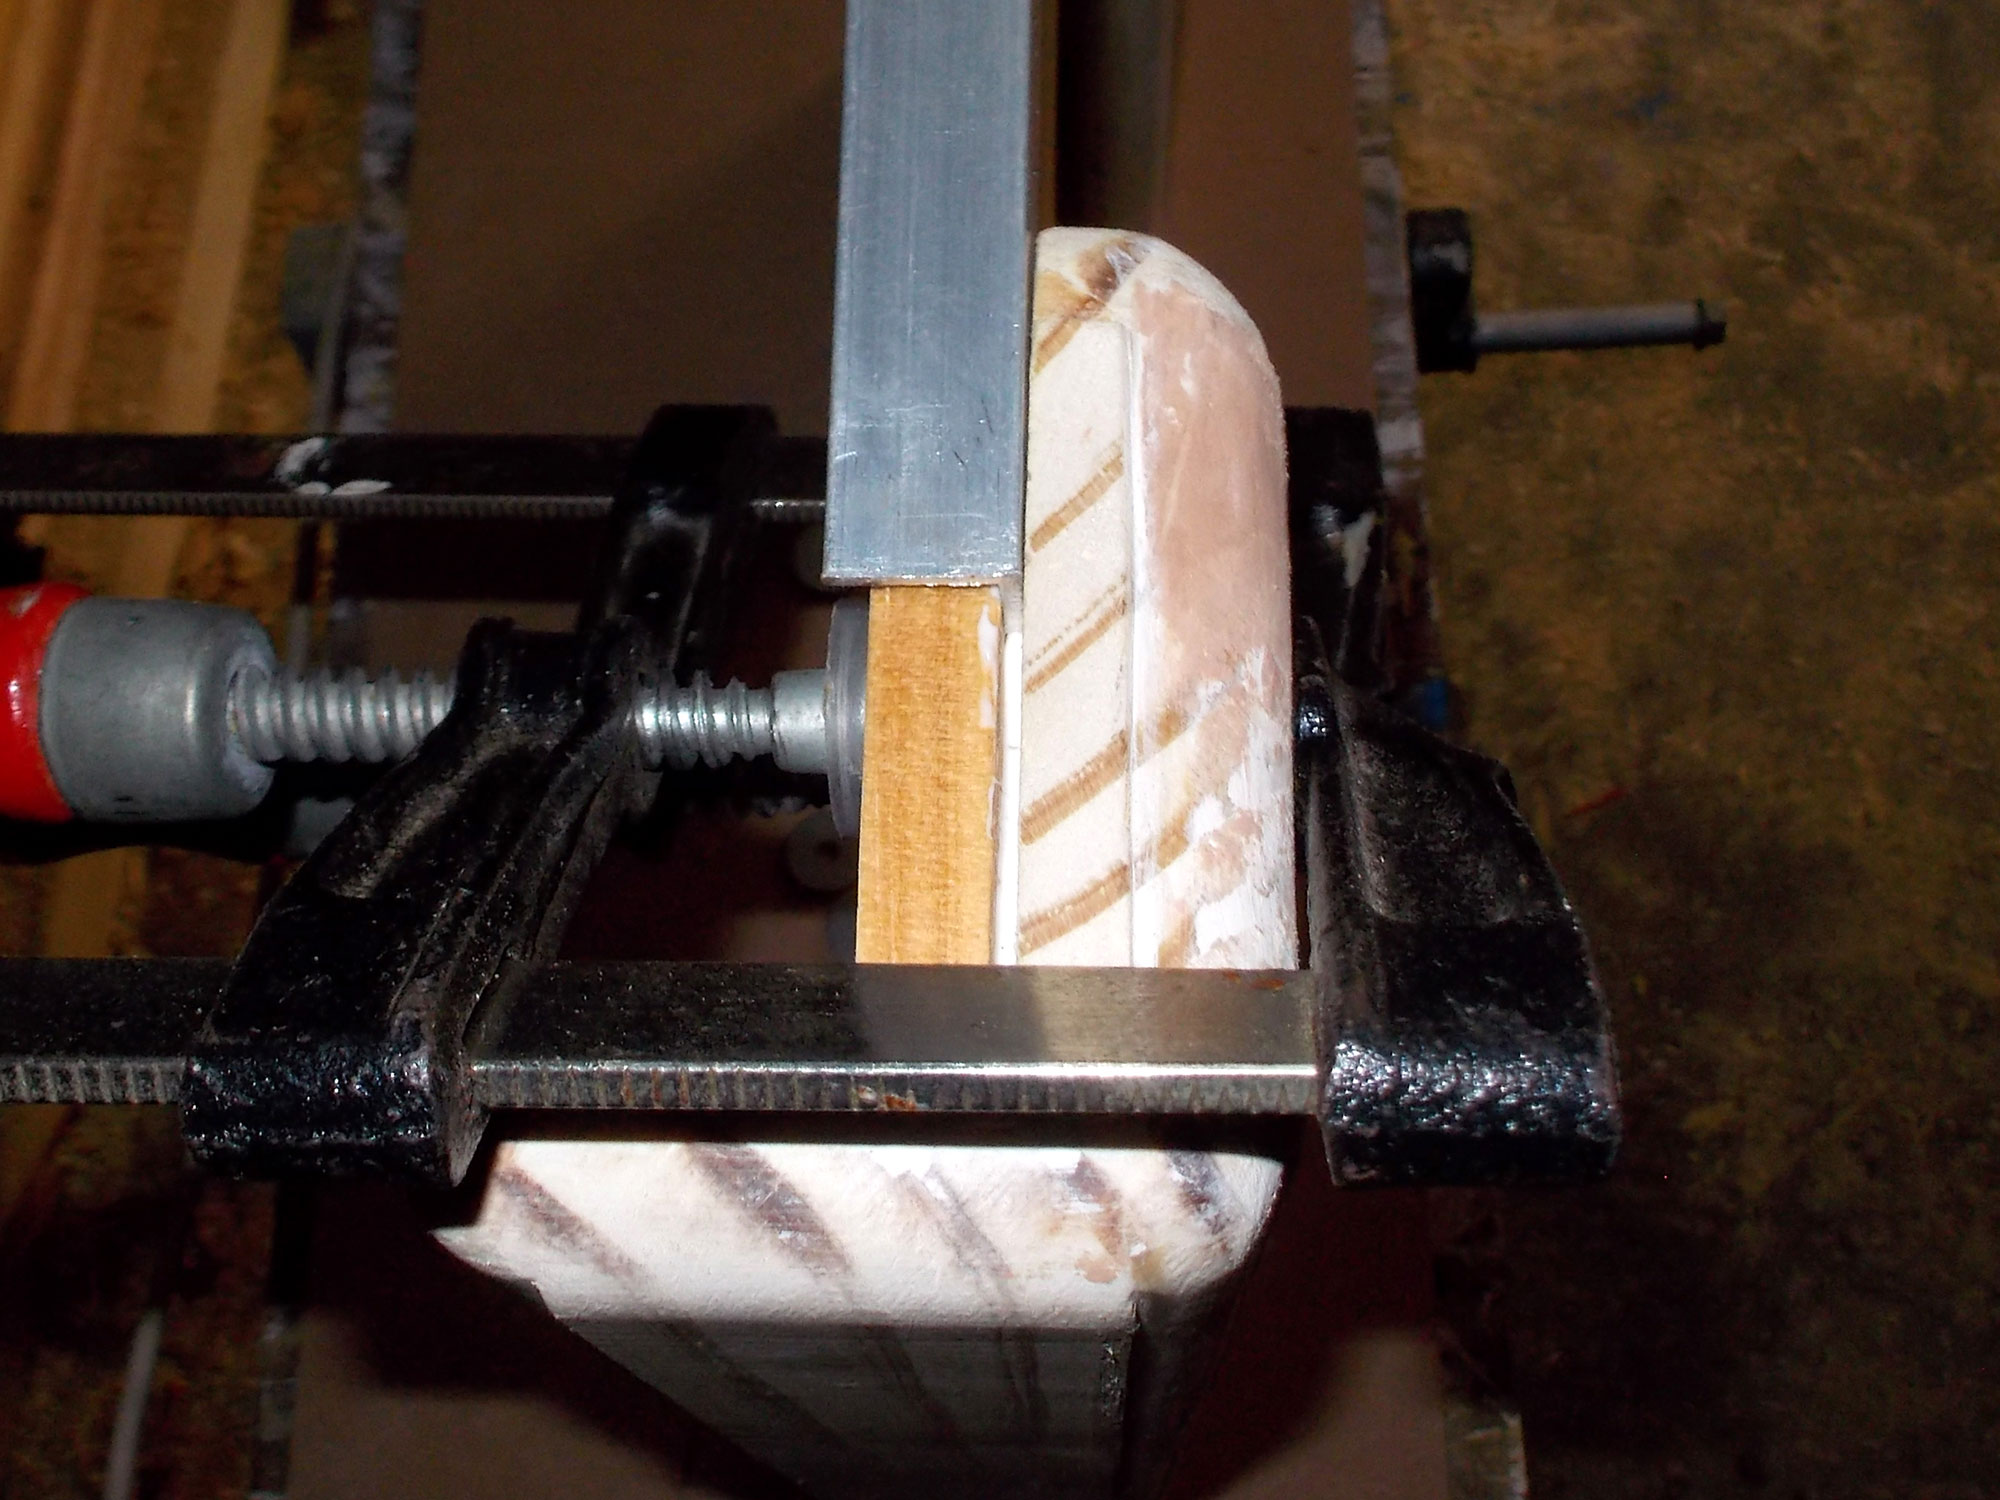
Here is the aluminium angle being checked for fit on the top, glass surround, edge of the side. Note the gap between the inner edge of the extrusion, and the timber – this allows space for the glass.
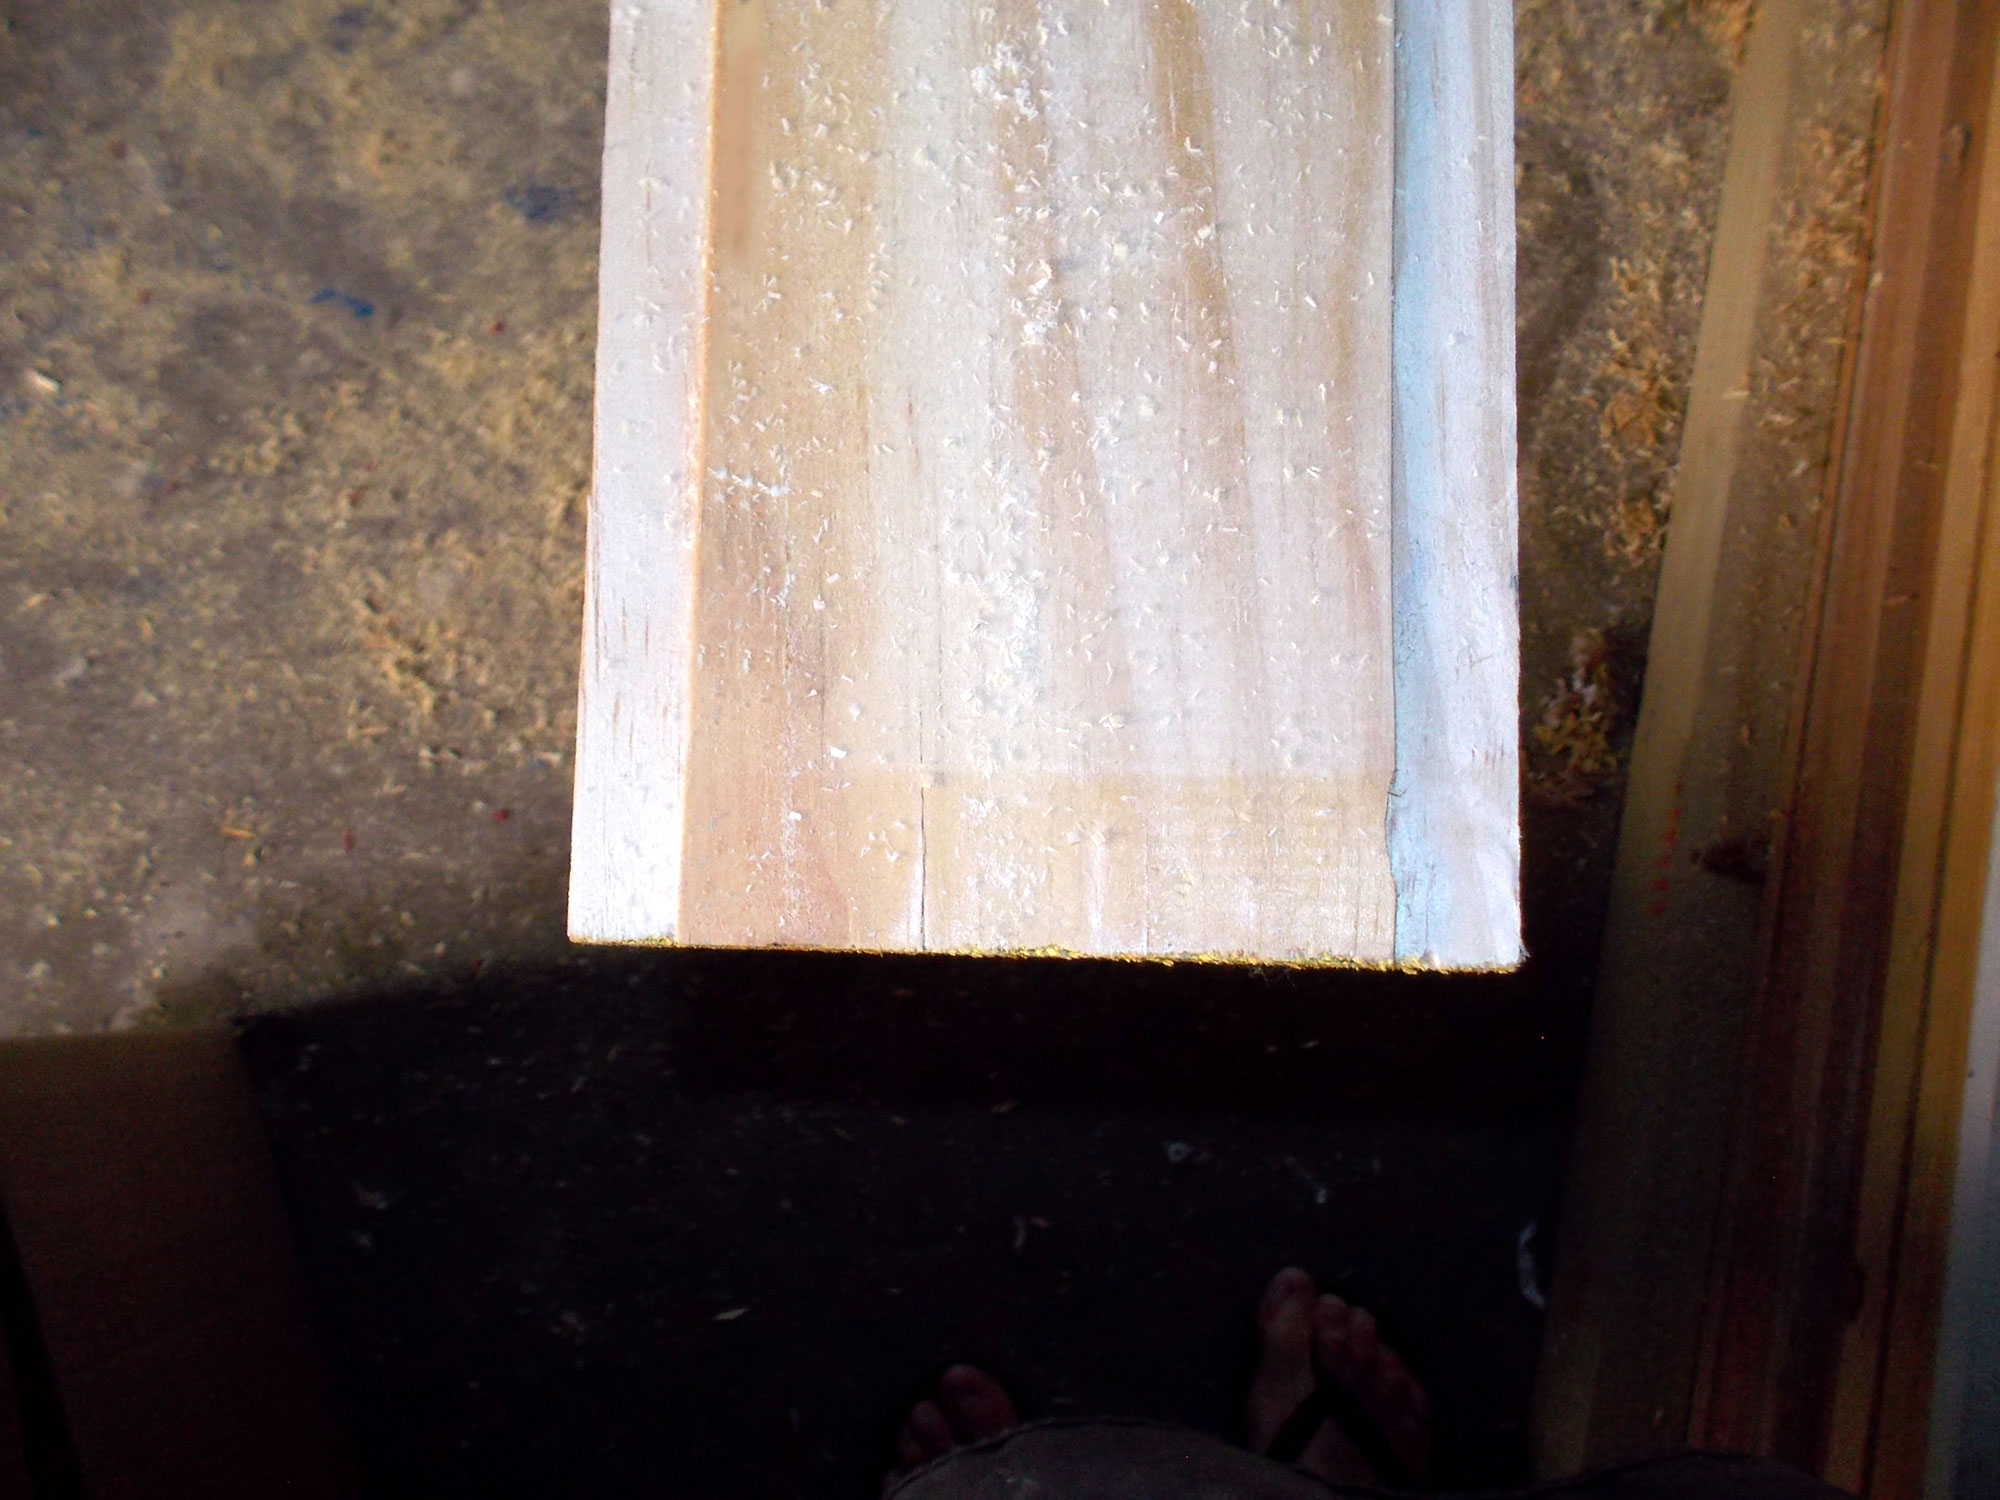
Here are both sides routed to the correct width, and both to precisely 1.2mm. On the left, the narrower recess for the glass surround, and on the right, the full depth of the aluminium trims for the bottom edge of the sides.
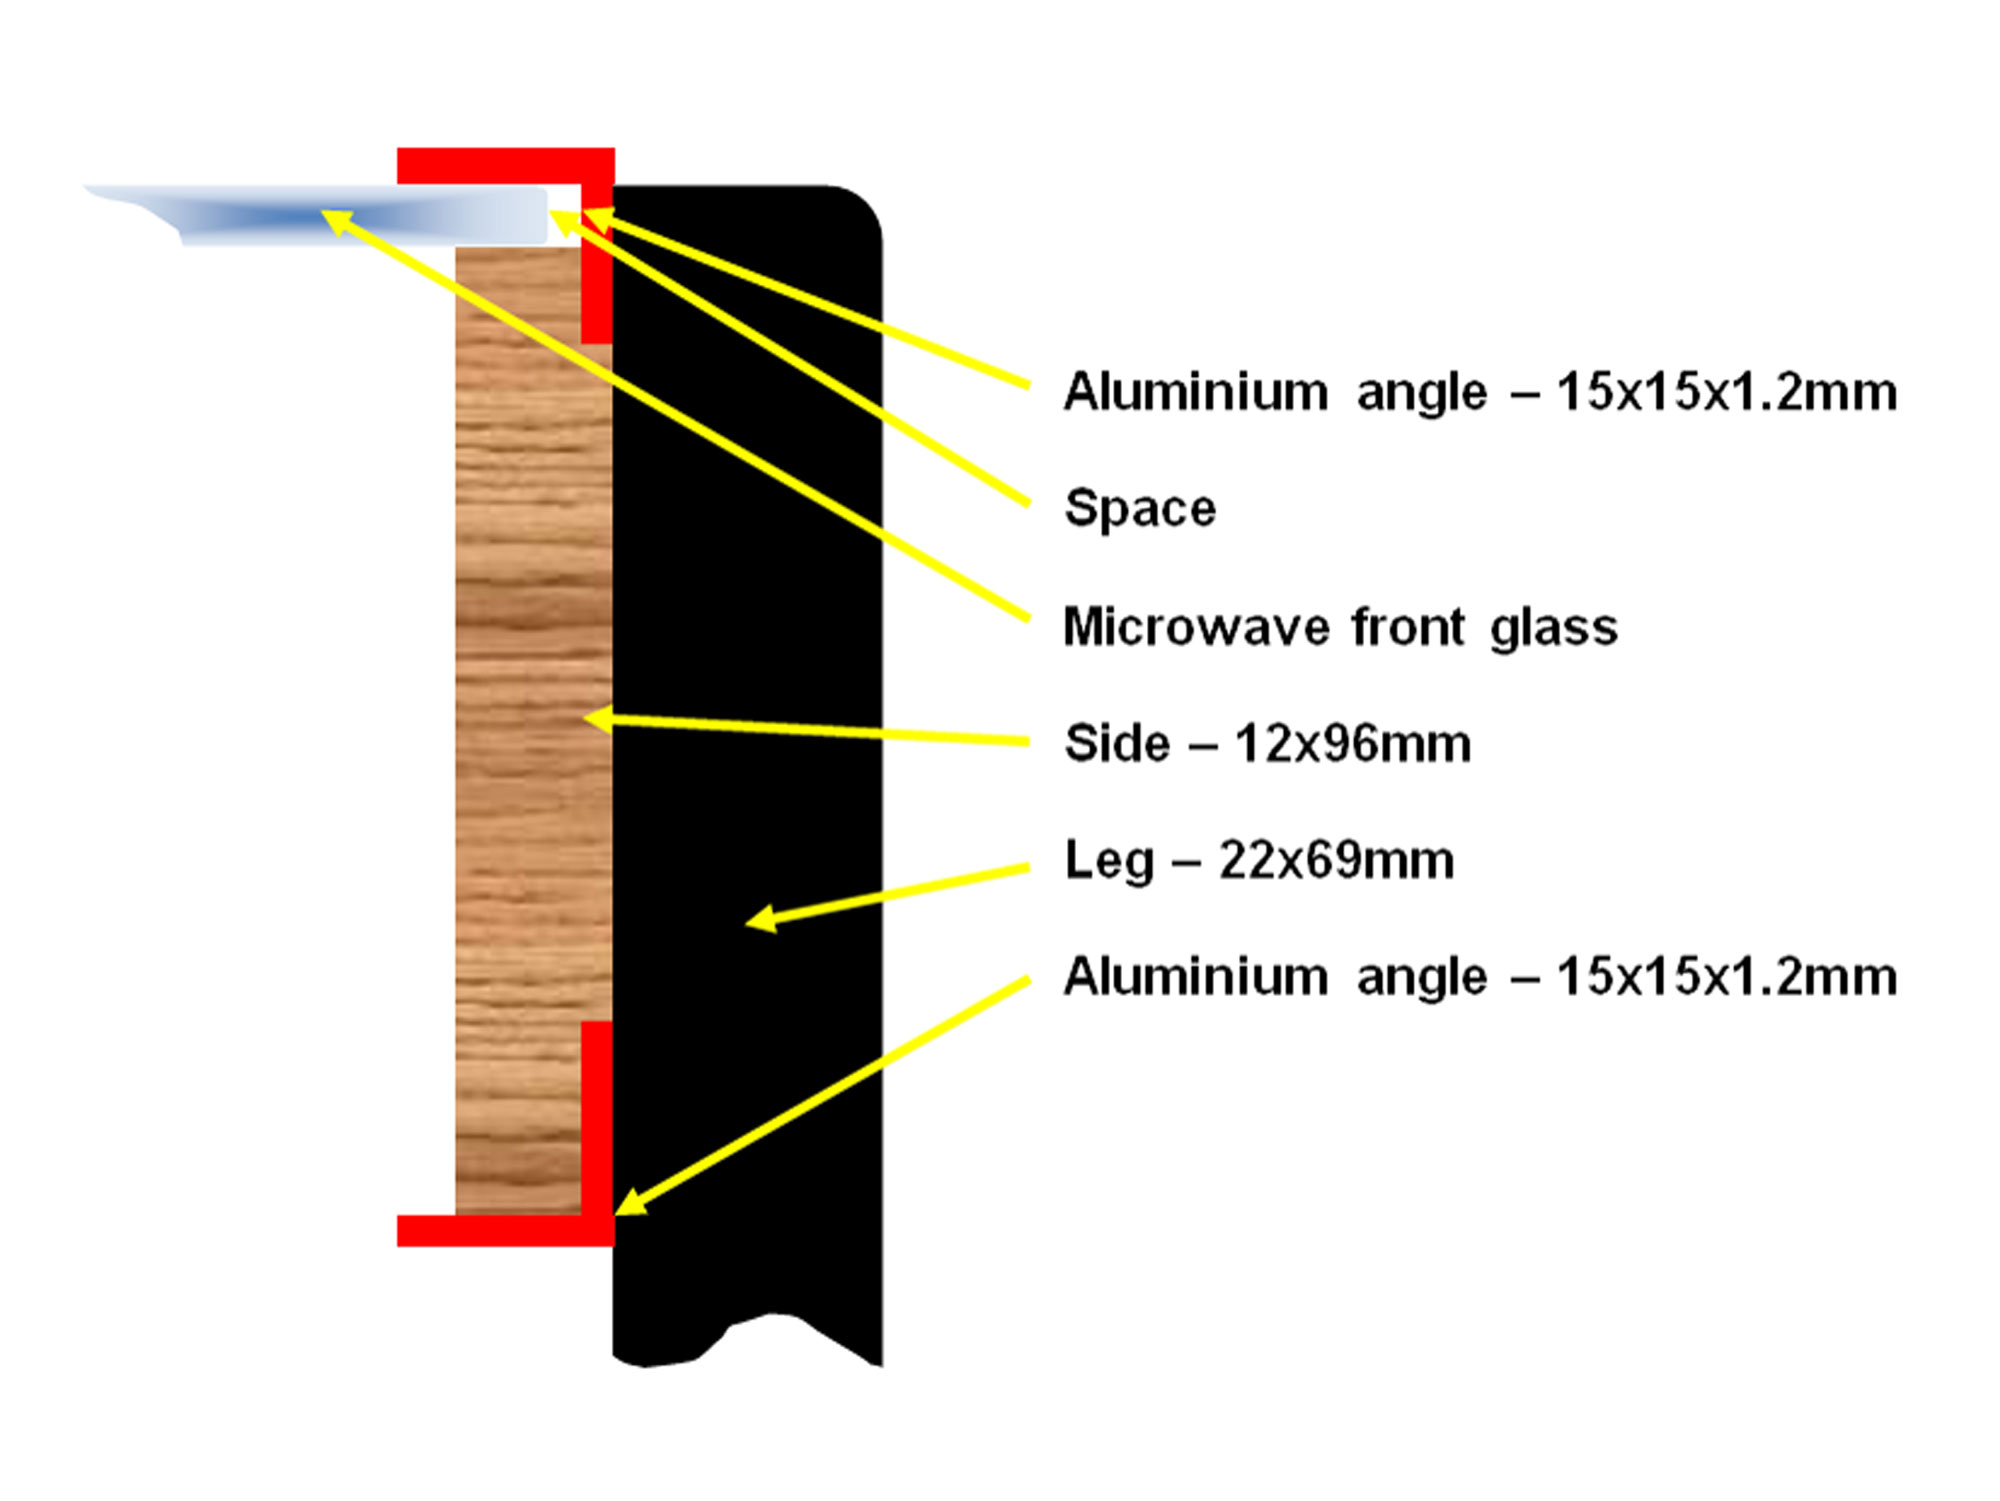
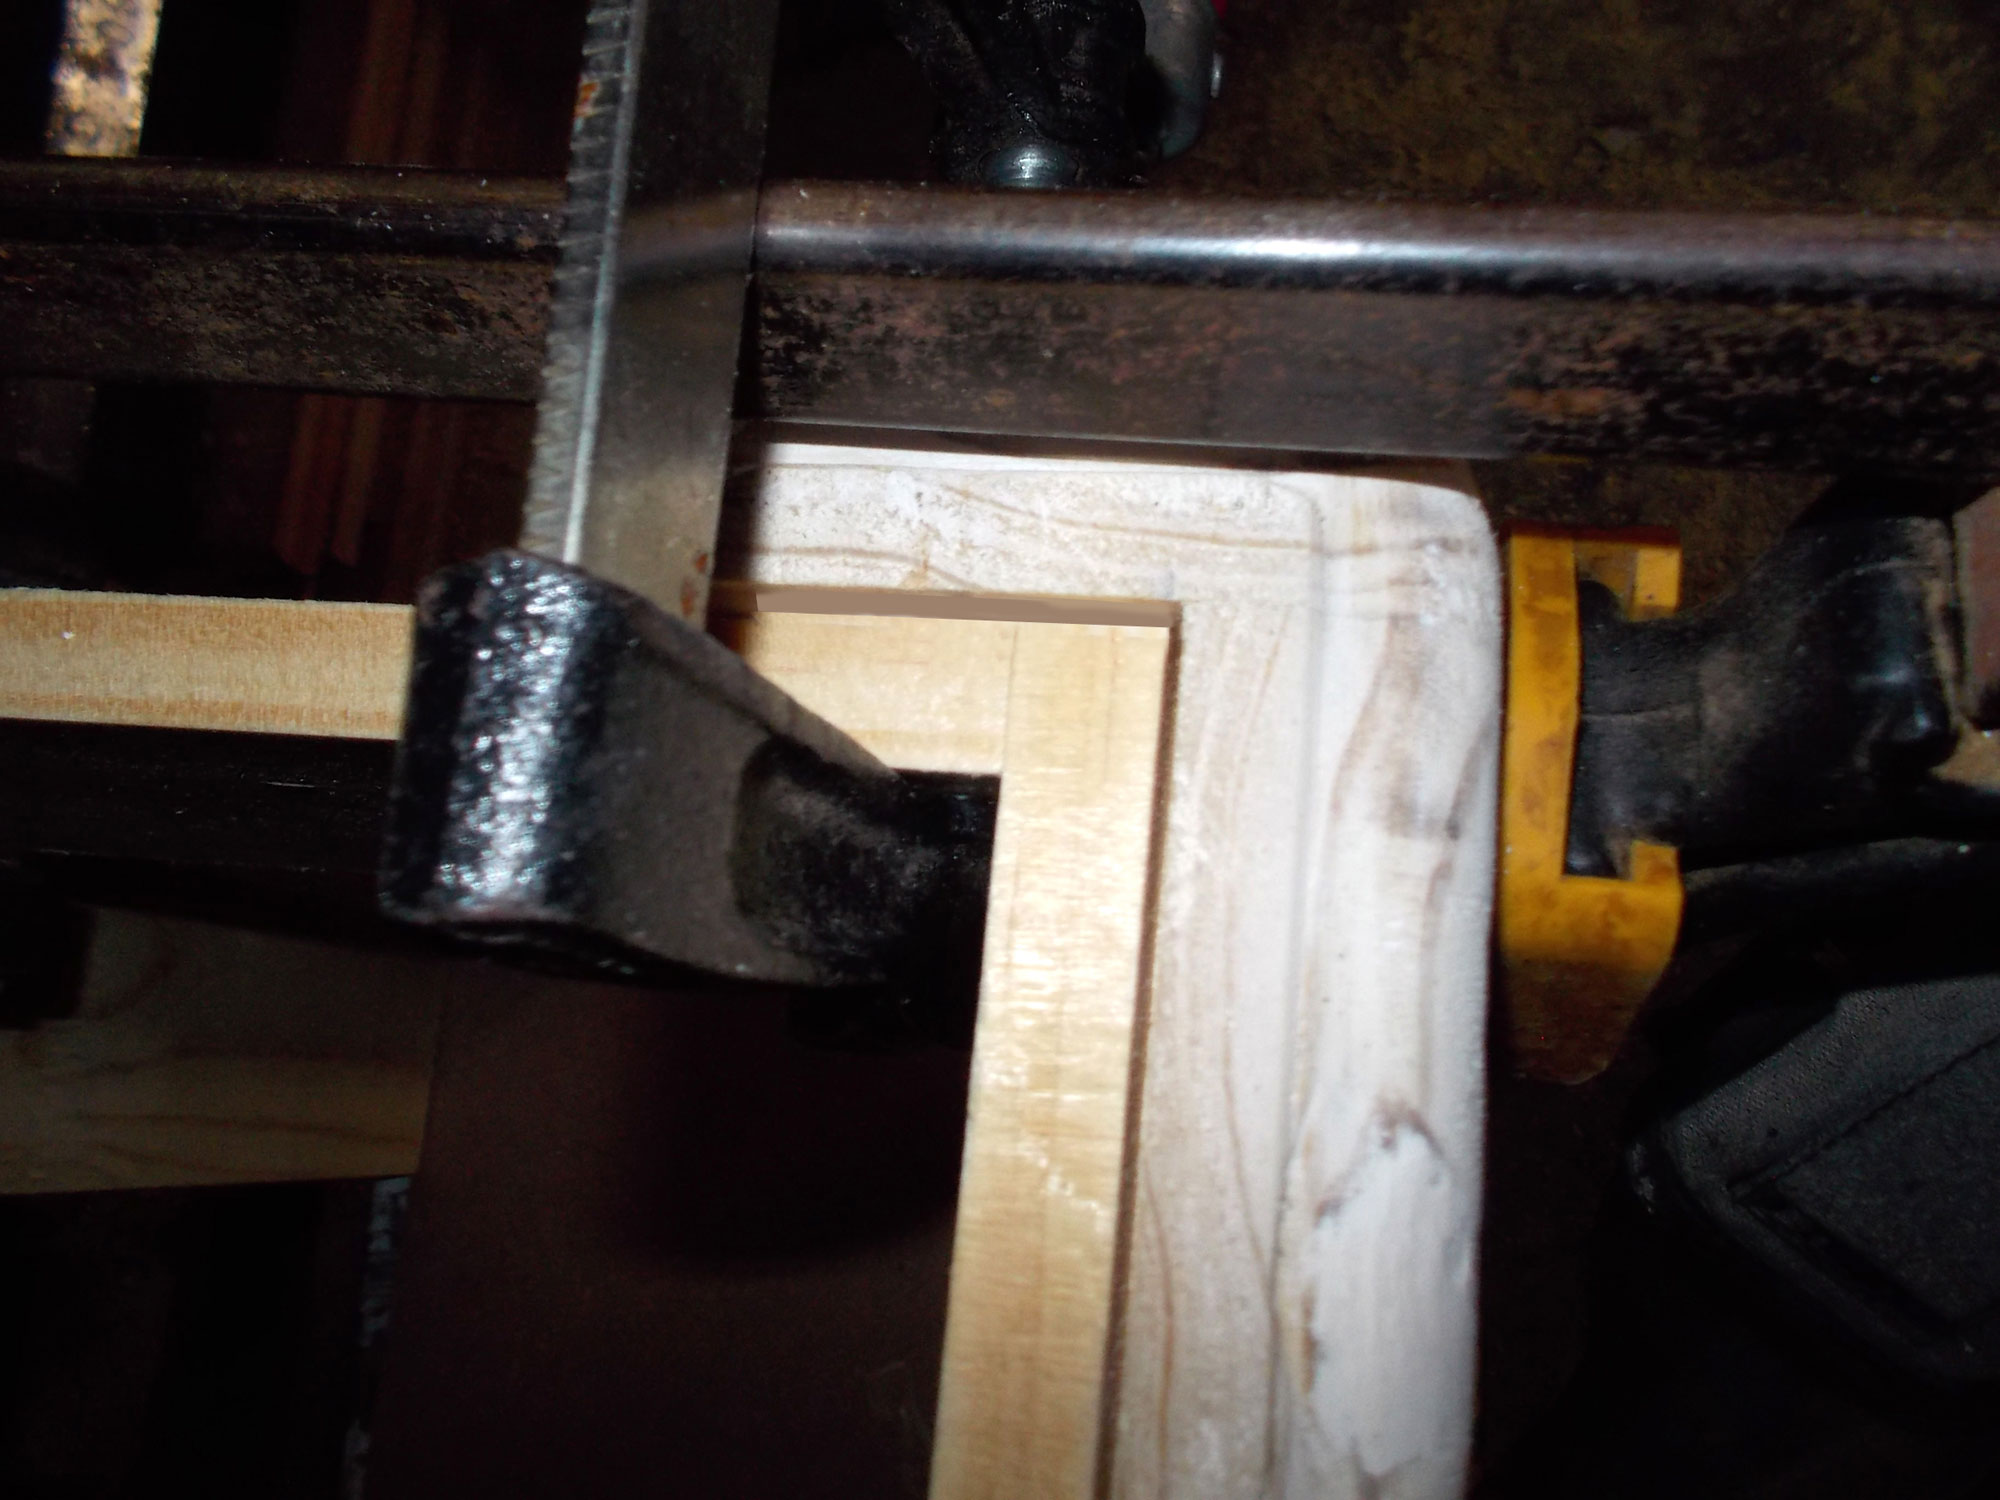
This illustration shows clearly how everything fits together. Note that without the recess for the aluminium, the side would not be able to be glued to the leg.
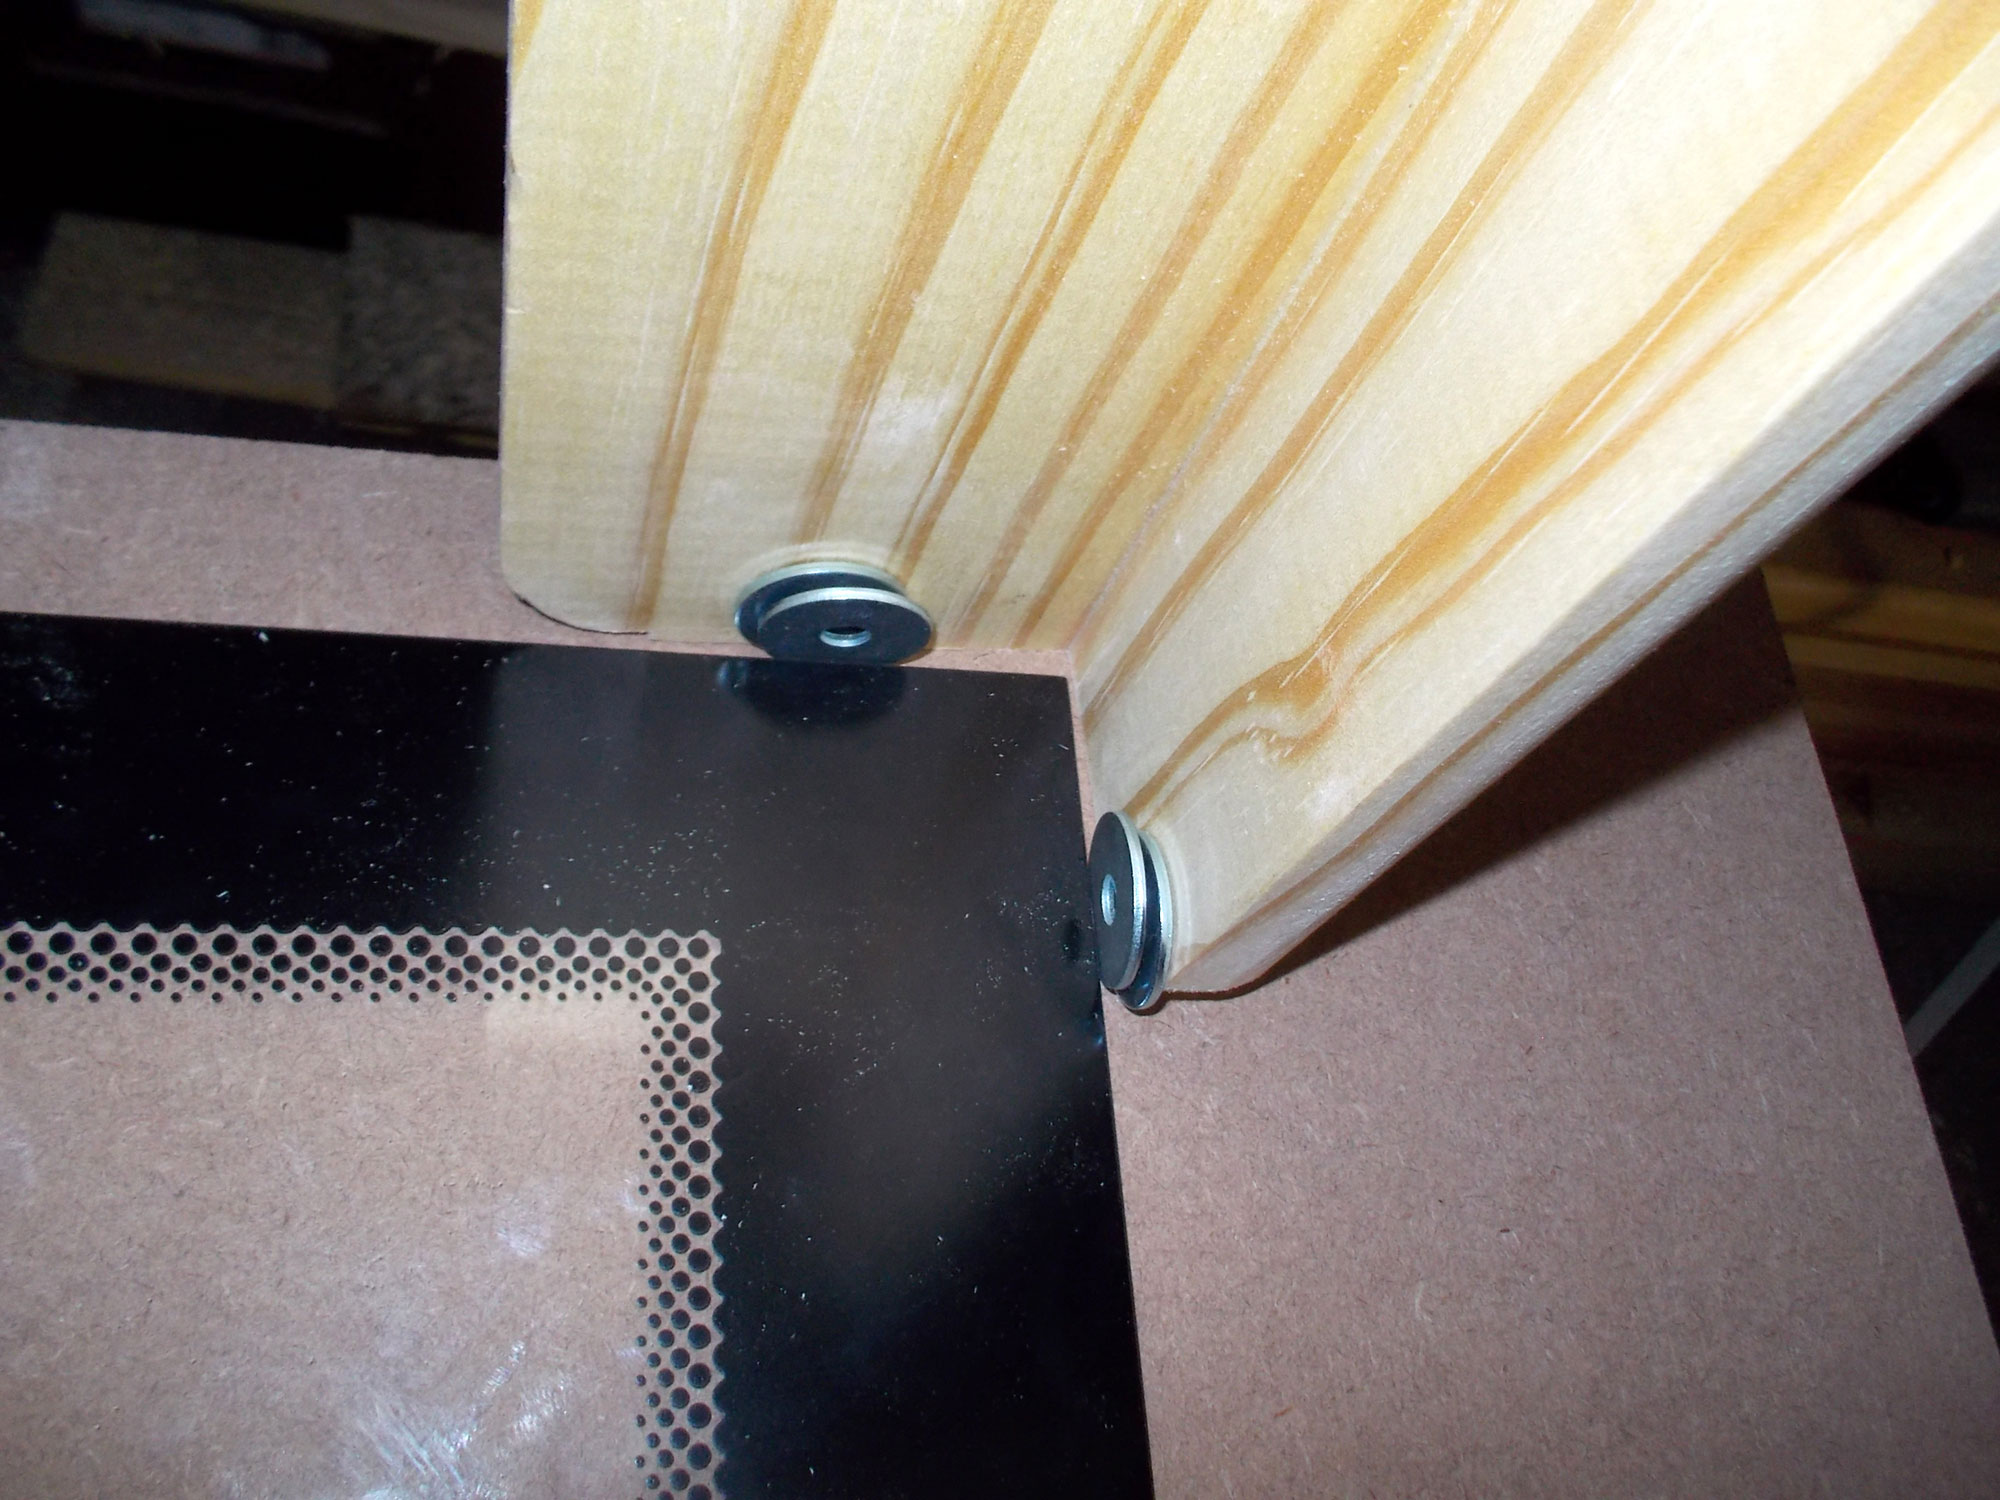
In order to set the legs to the correct spacing, I used a couple of washers on each edge of the glass, as shown here, and on all four corners, to set the length and width. It is important that there be a small amount of ‘play ‘between the glass panel and the aluminium frame; if there is none, or too little, you could find that the glass panel will not be able to fit within the legs, and hence the frame will not either. Or in forcing it, you will crack the glass and say some naughty words.
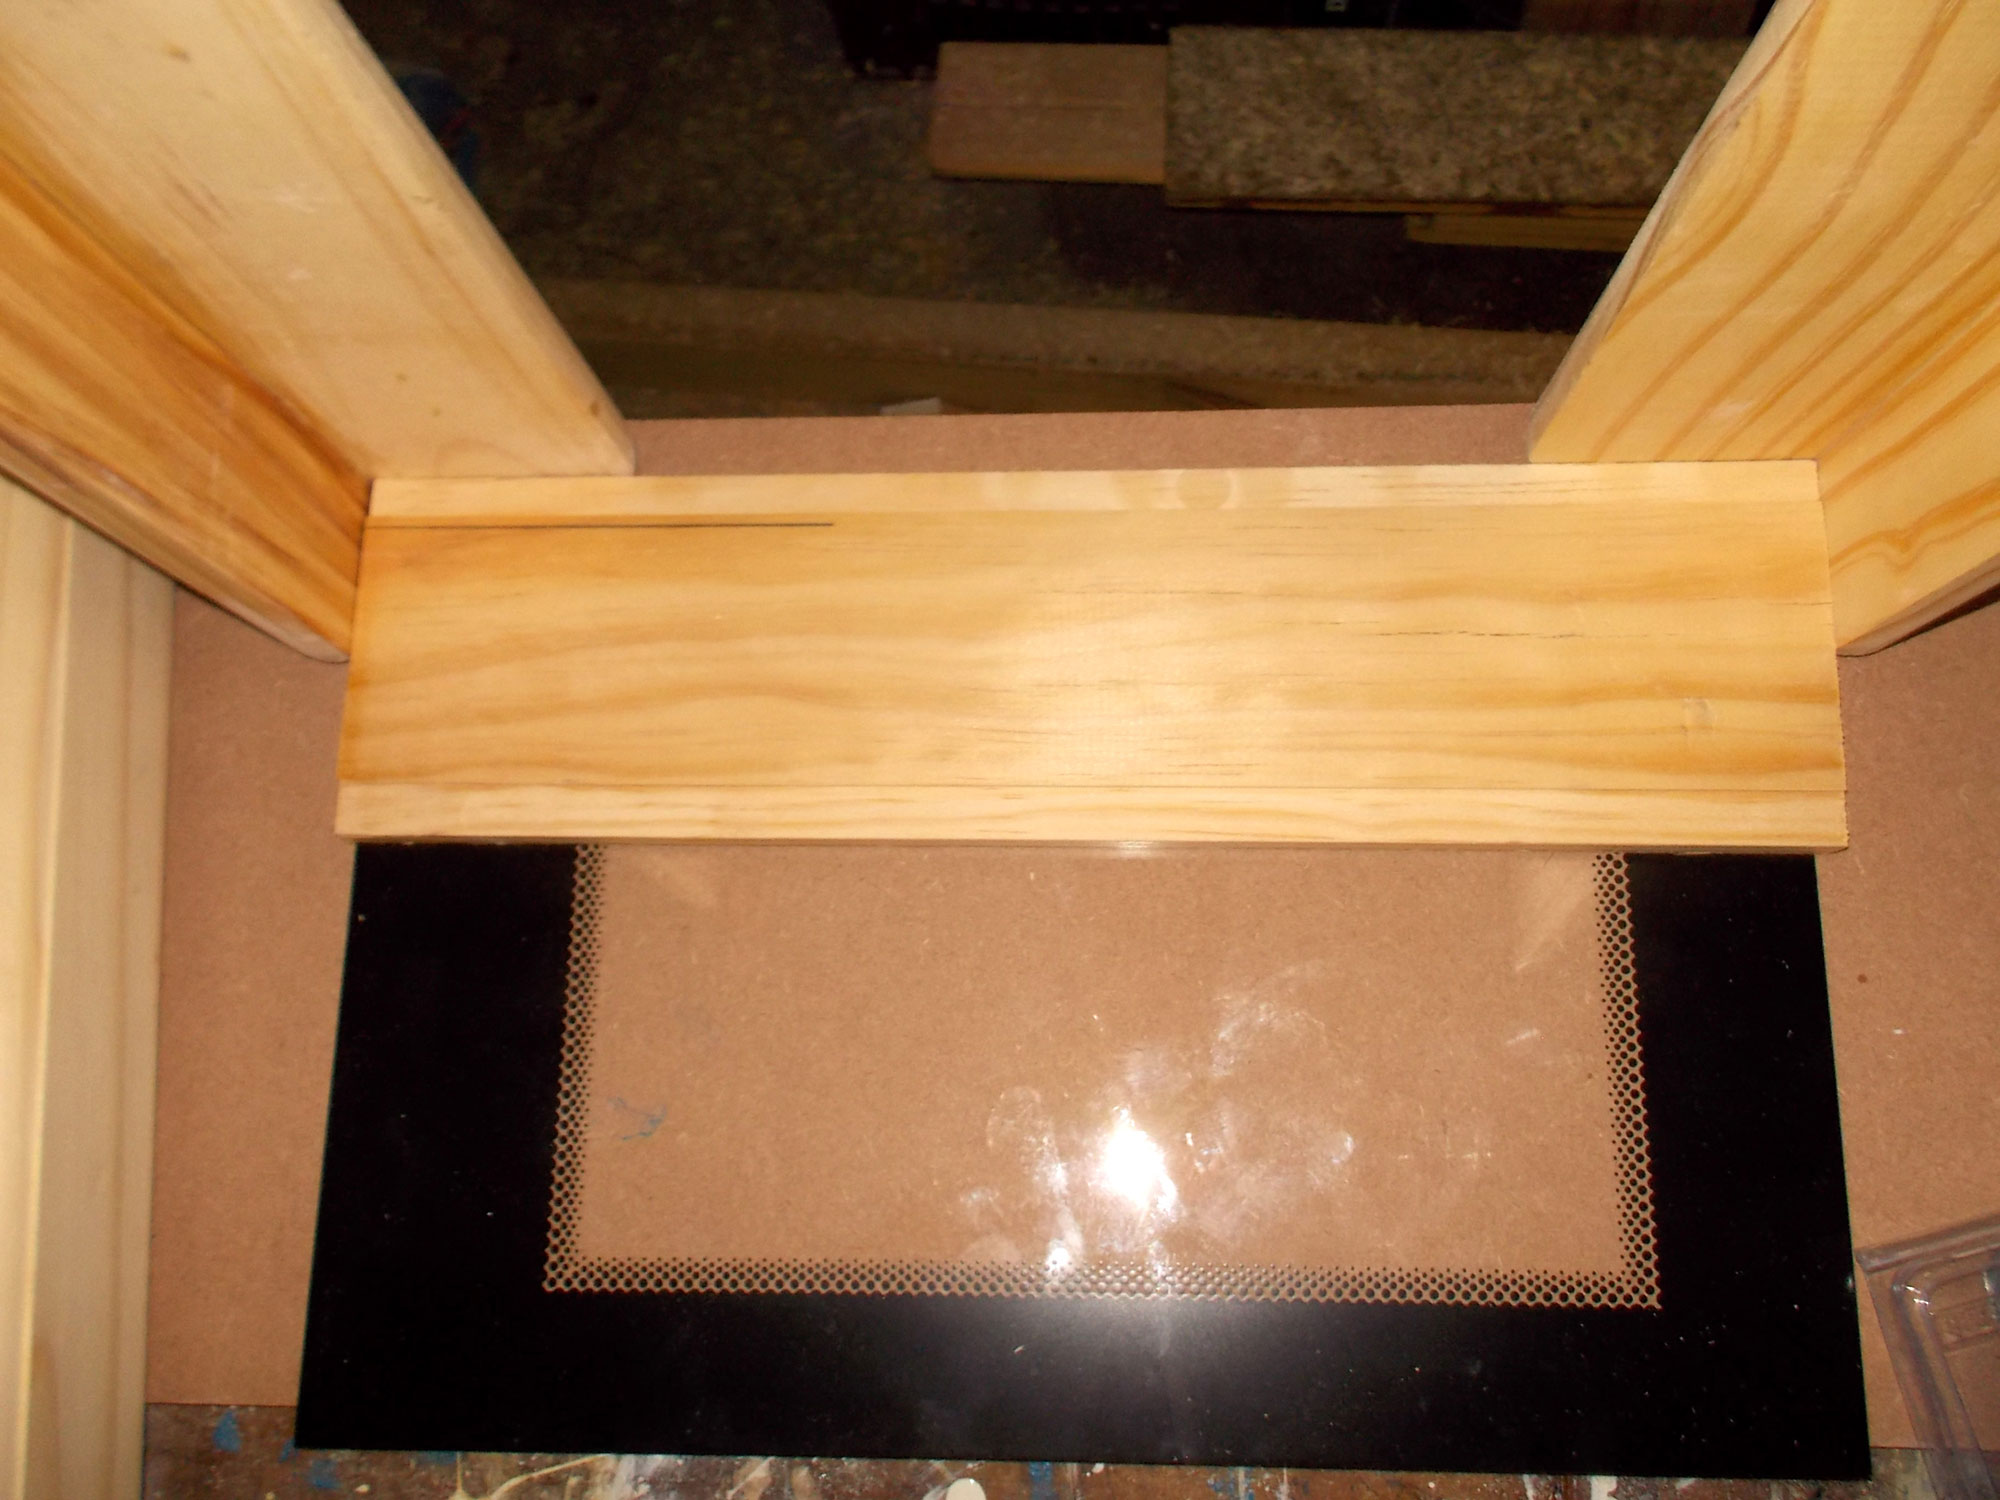
Cut the sides to fit.
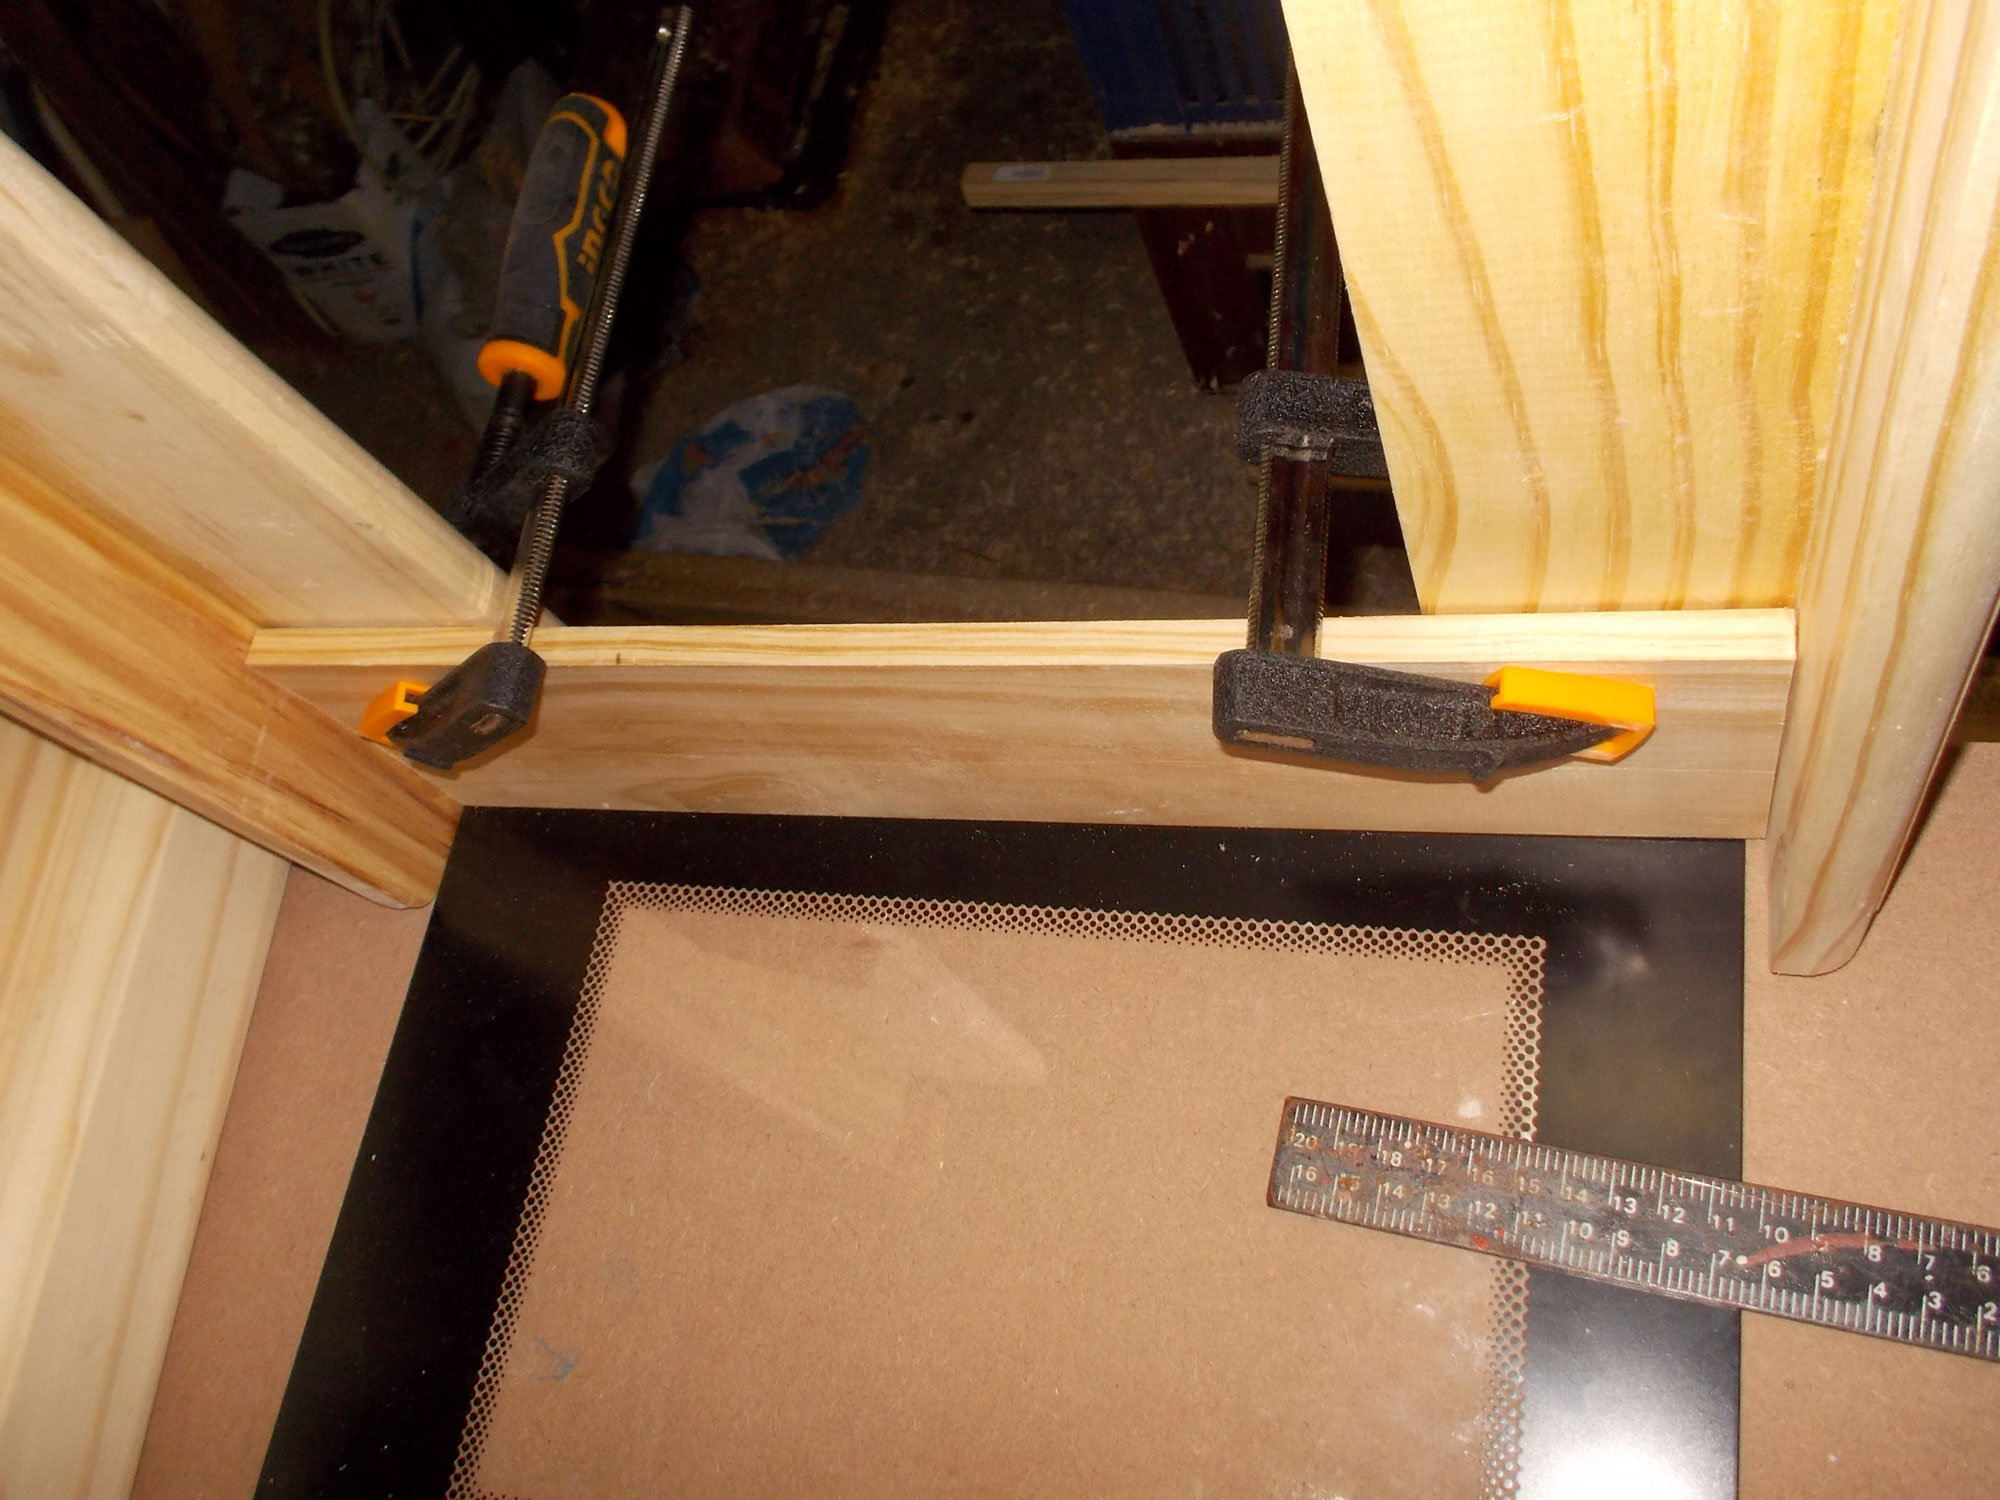
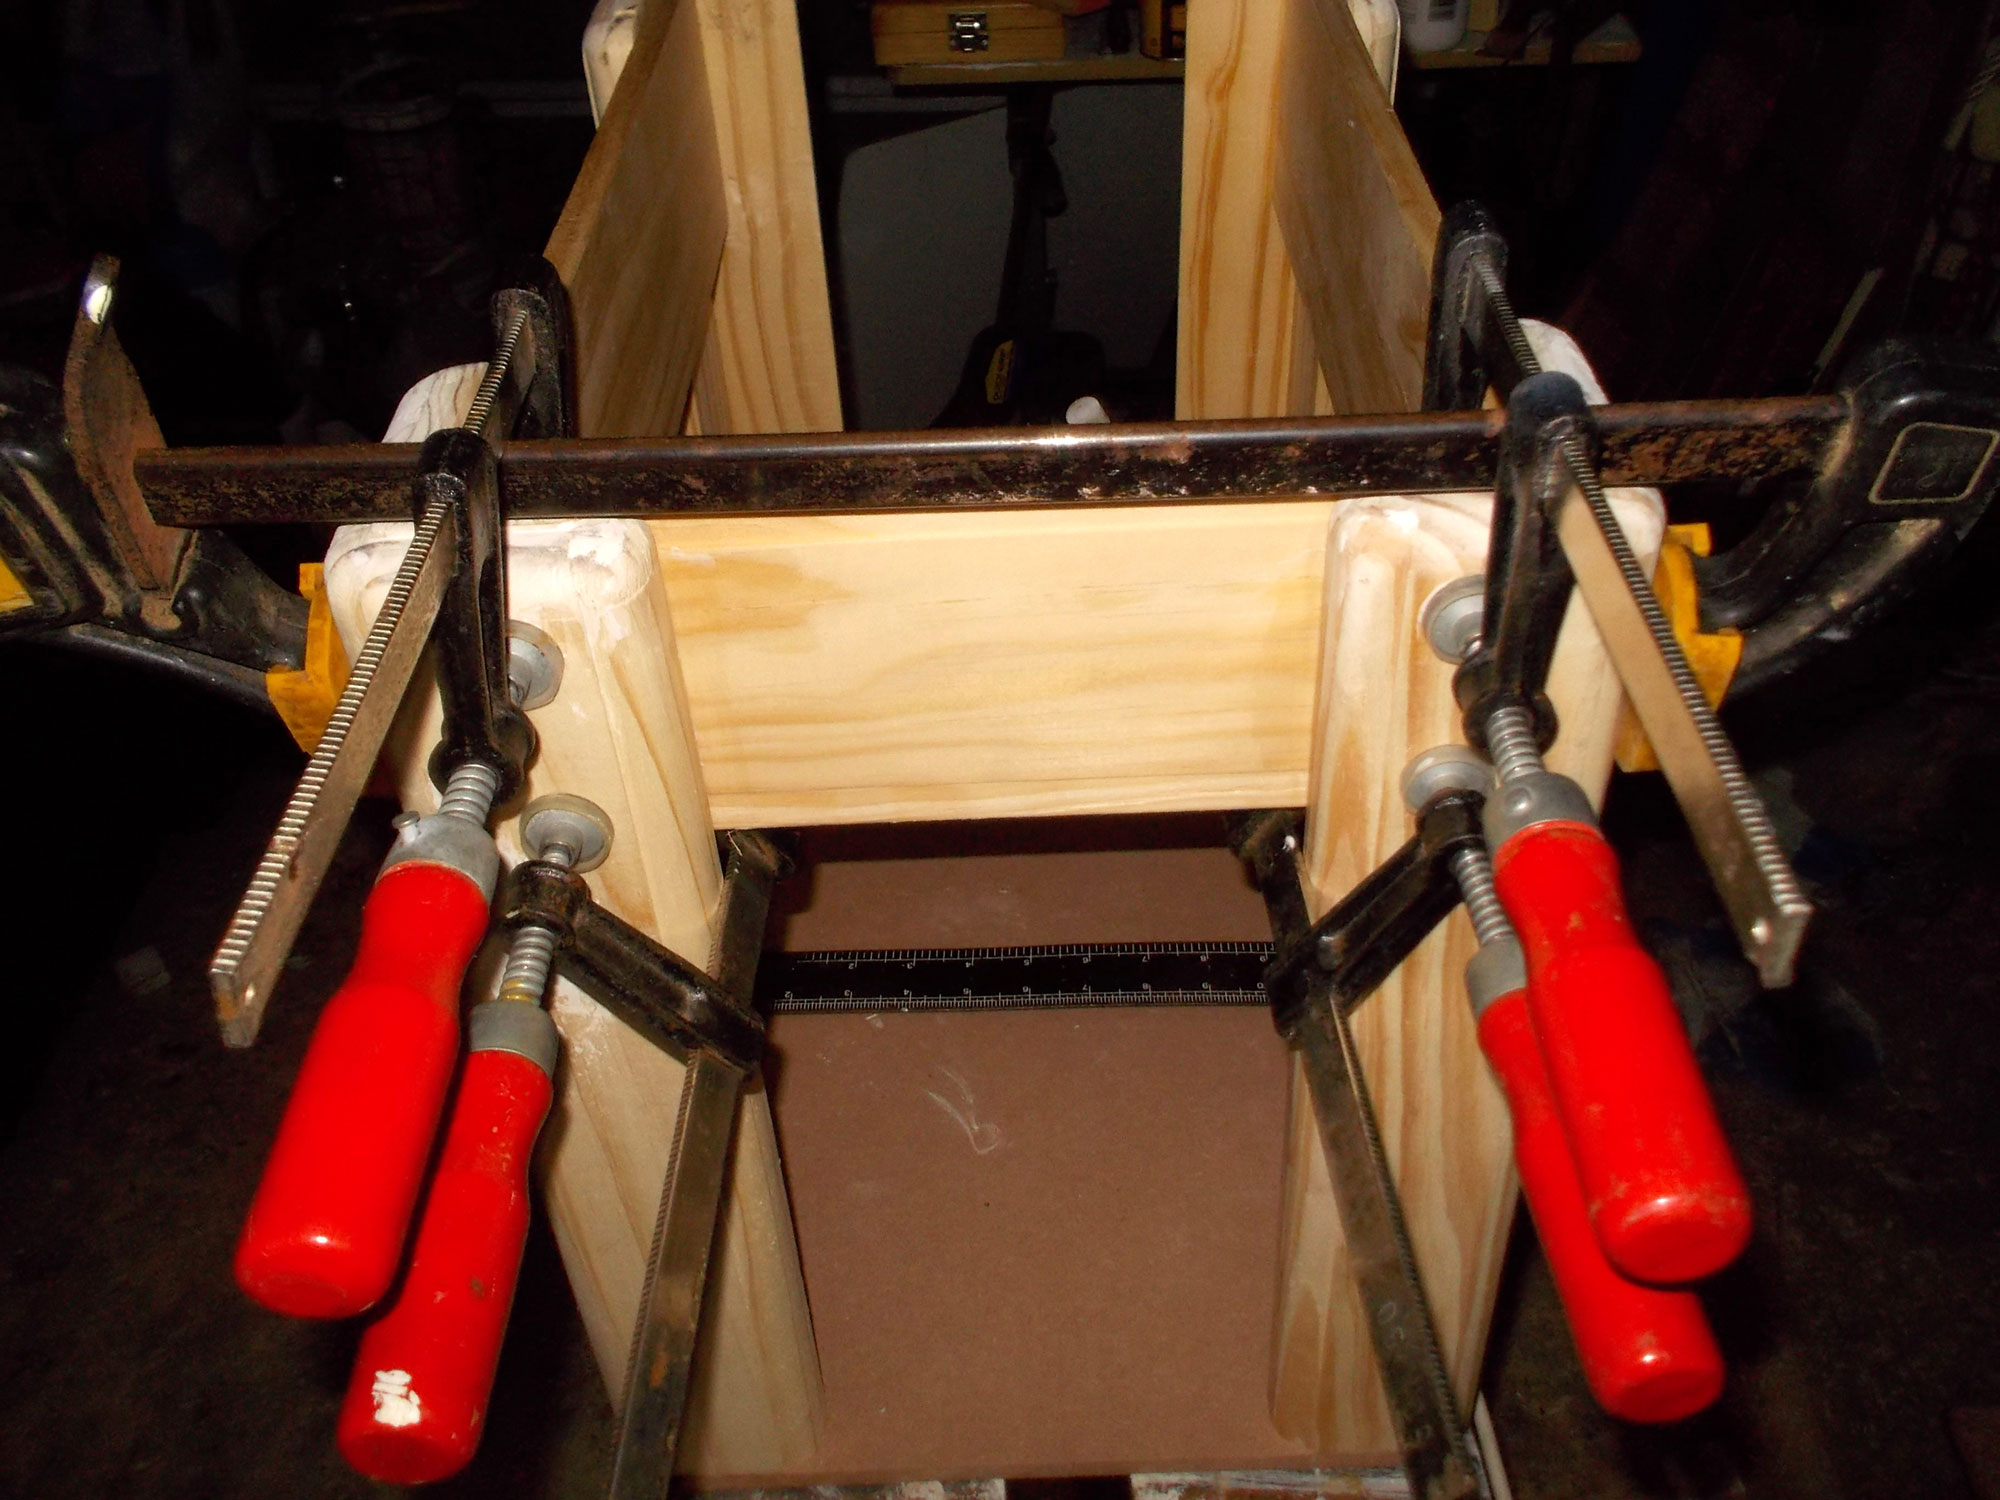
Apply glue and clamp them into position… note that they rest on the glass panel, as the sides have to allow the panel to sit properly on the legs. Apply the glue in an adequate amount, but sparingly towards the recesses as any glue oozing out into them and setting, with tend to block the recess you took so much time and effort to get right.
A view from the outside; clean excess glue off the surfaces.
This shows how the aluminium equal edge extrusion fits into the recess you routed in the side for it.
Repeat the same process for all sides and then clamp everything together for the glue to set.
A top view showing very clearly how the recesses in the sides allow space for the aluminium glass surround frame to slot into position.
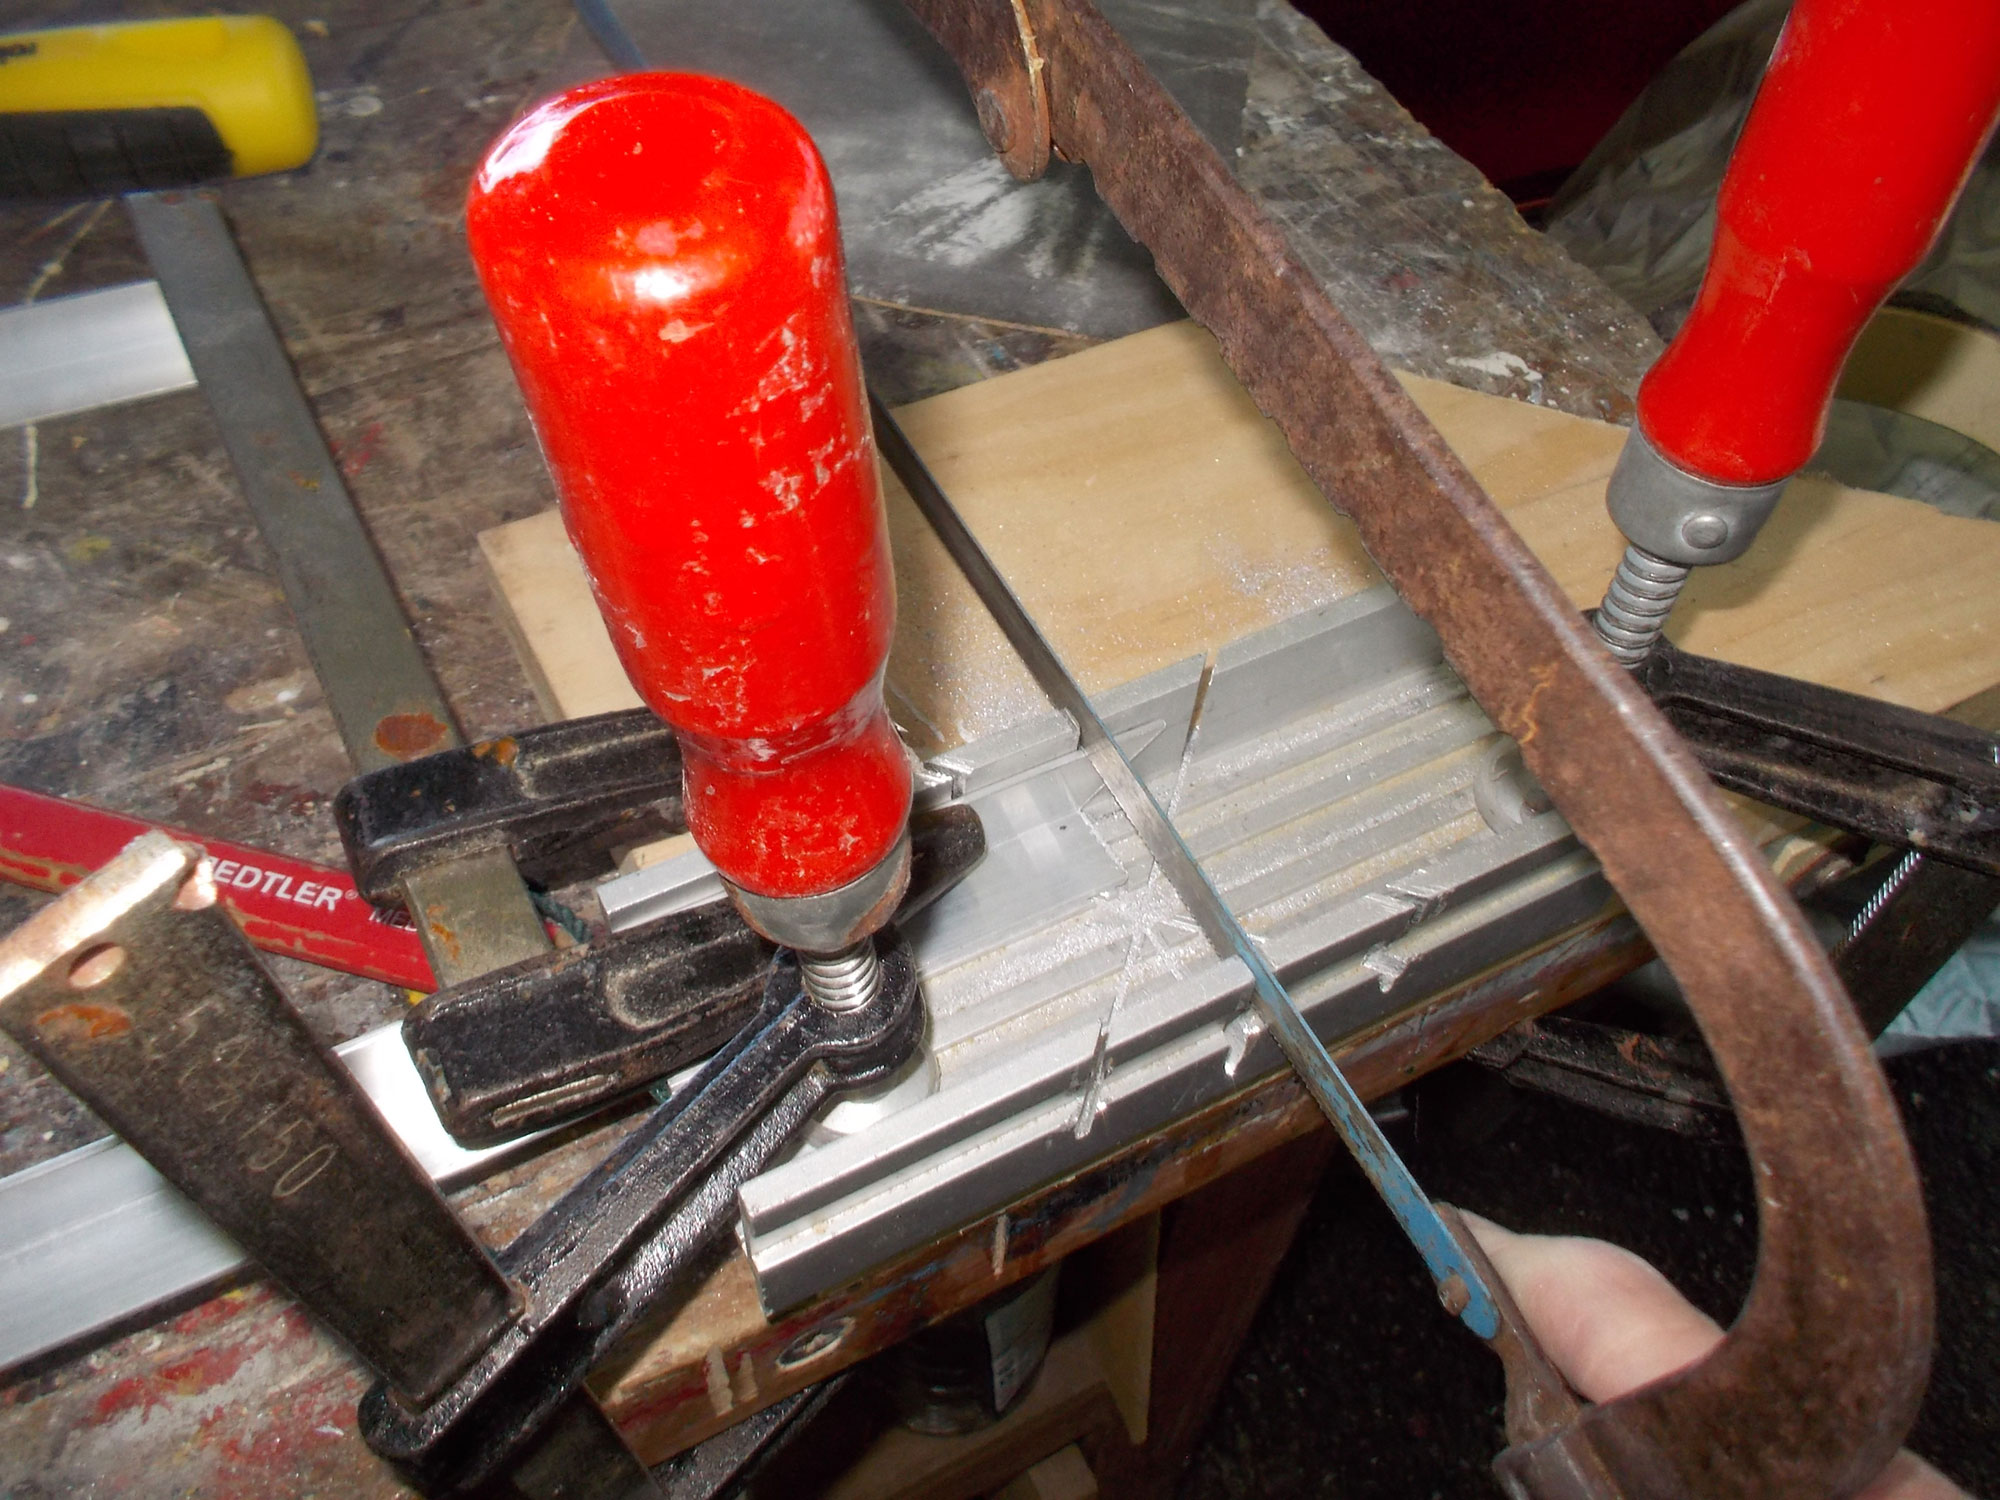
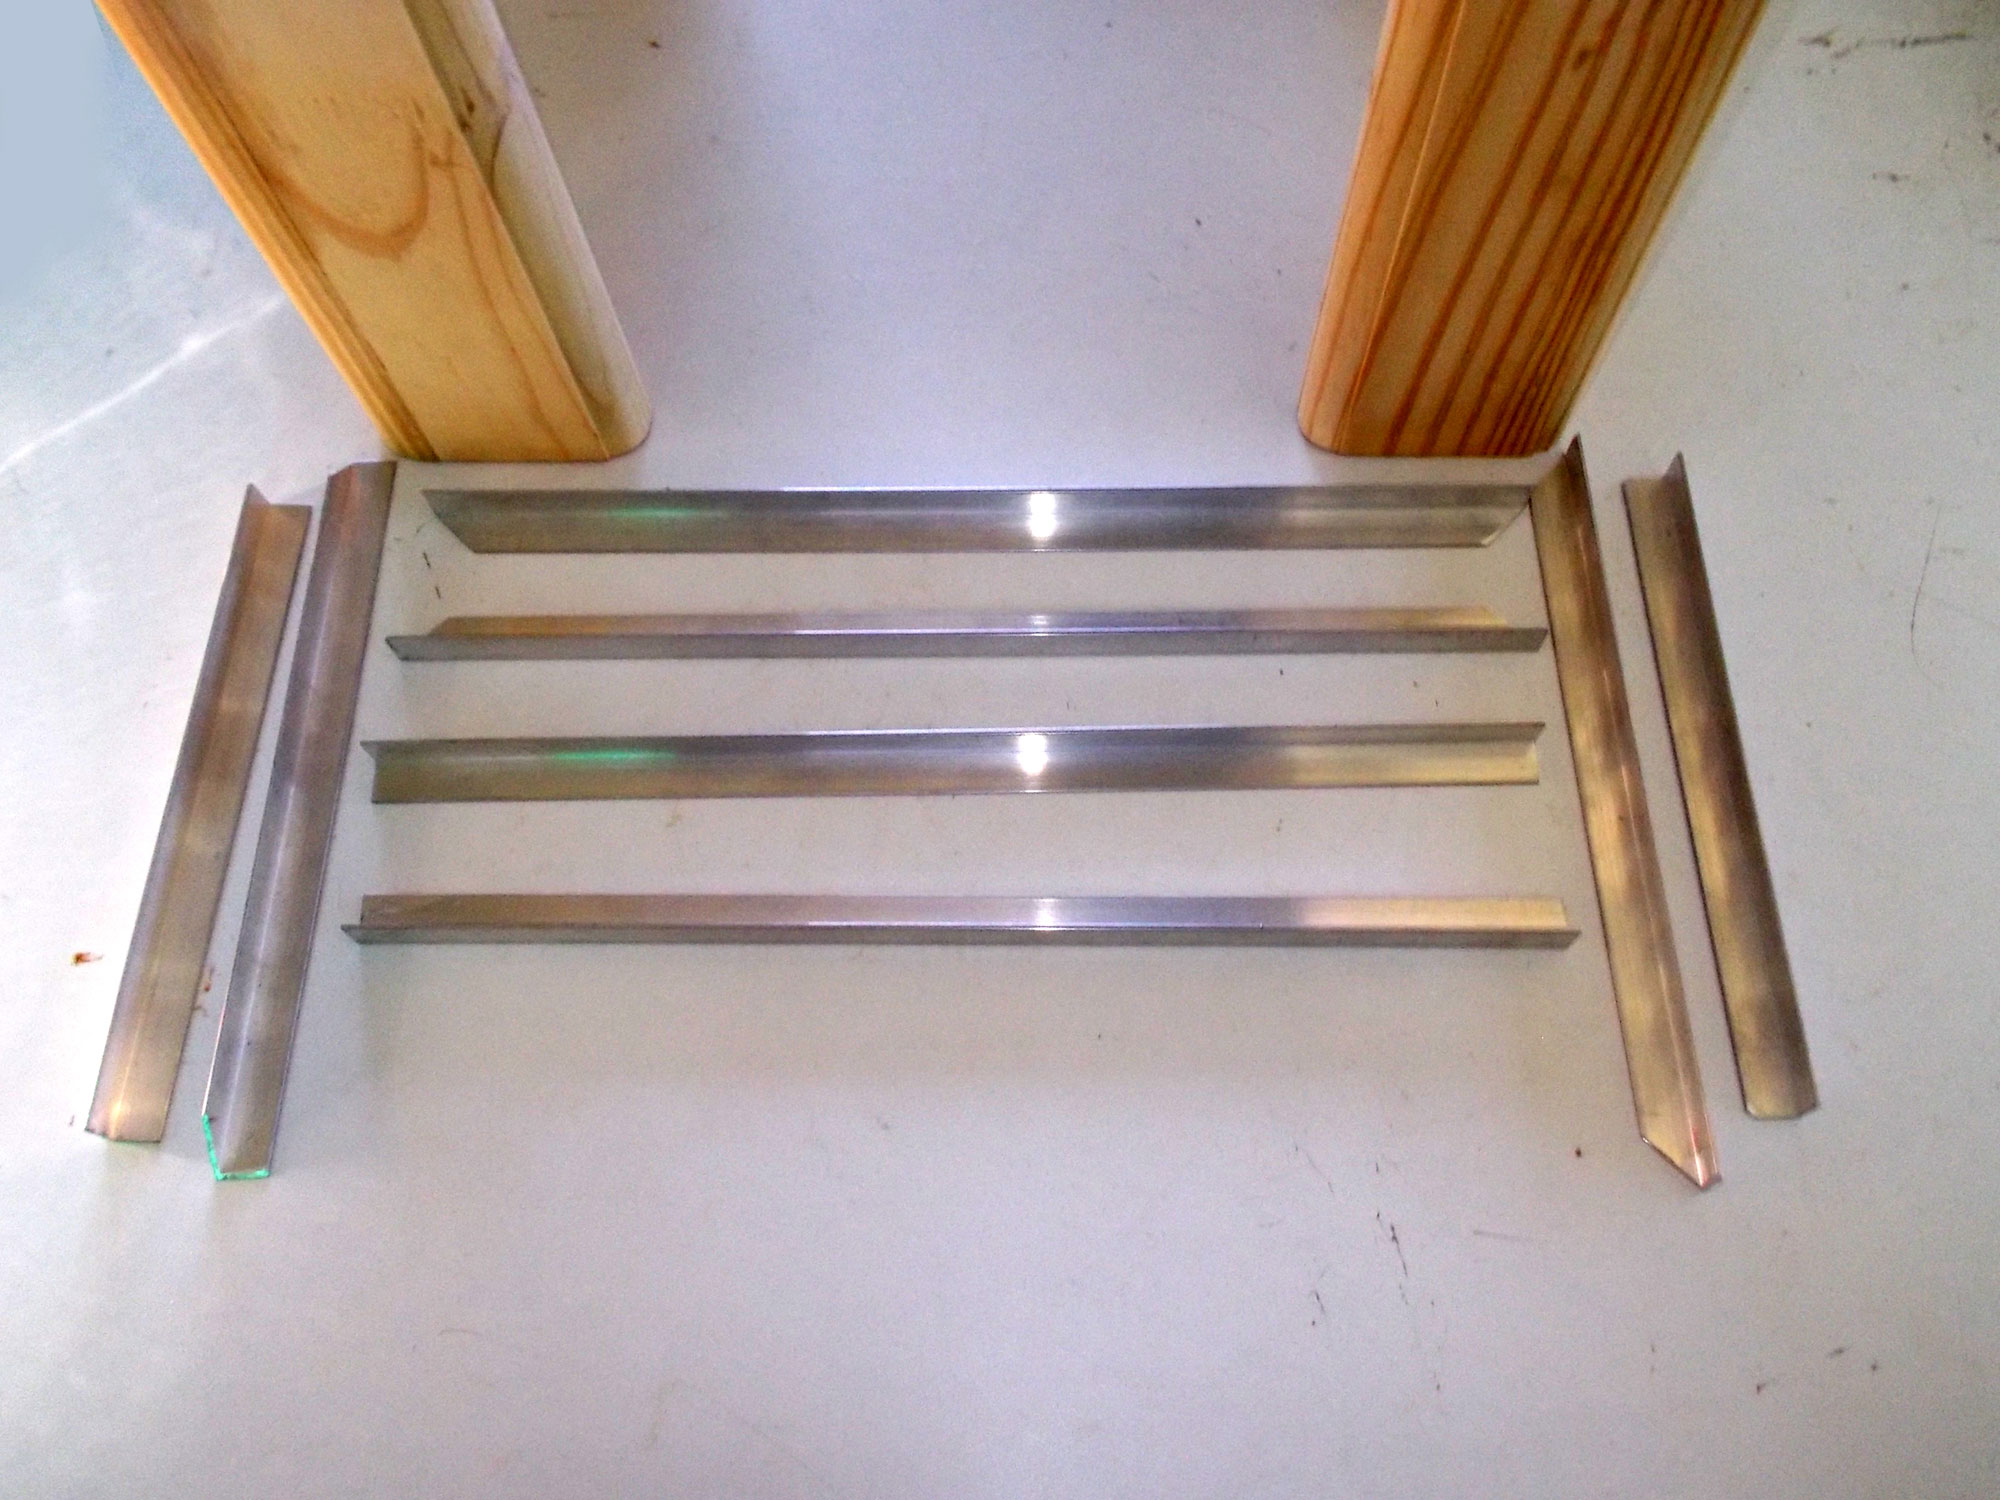
I used a hacksaw and mitre box to cut the various pieces of aluminium to length. Note that I mitred the top frame, but squared off the pieces for the sides’ underside trim. There’s no particular reason for that other than to show the two effects and the fact that mitred corners look rather cool – well, I think so!
The eight lengths of aluminium cut and dry-fitted (very lightly!) and then filed very carefully to ensure a neat fit.
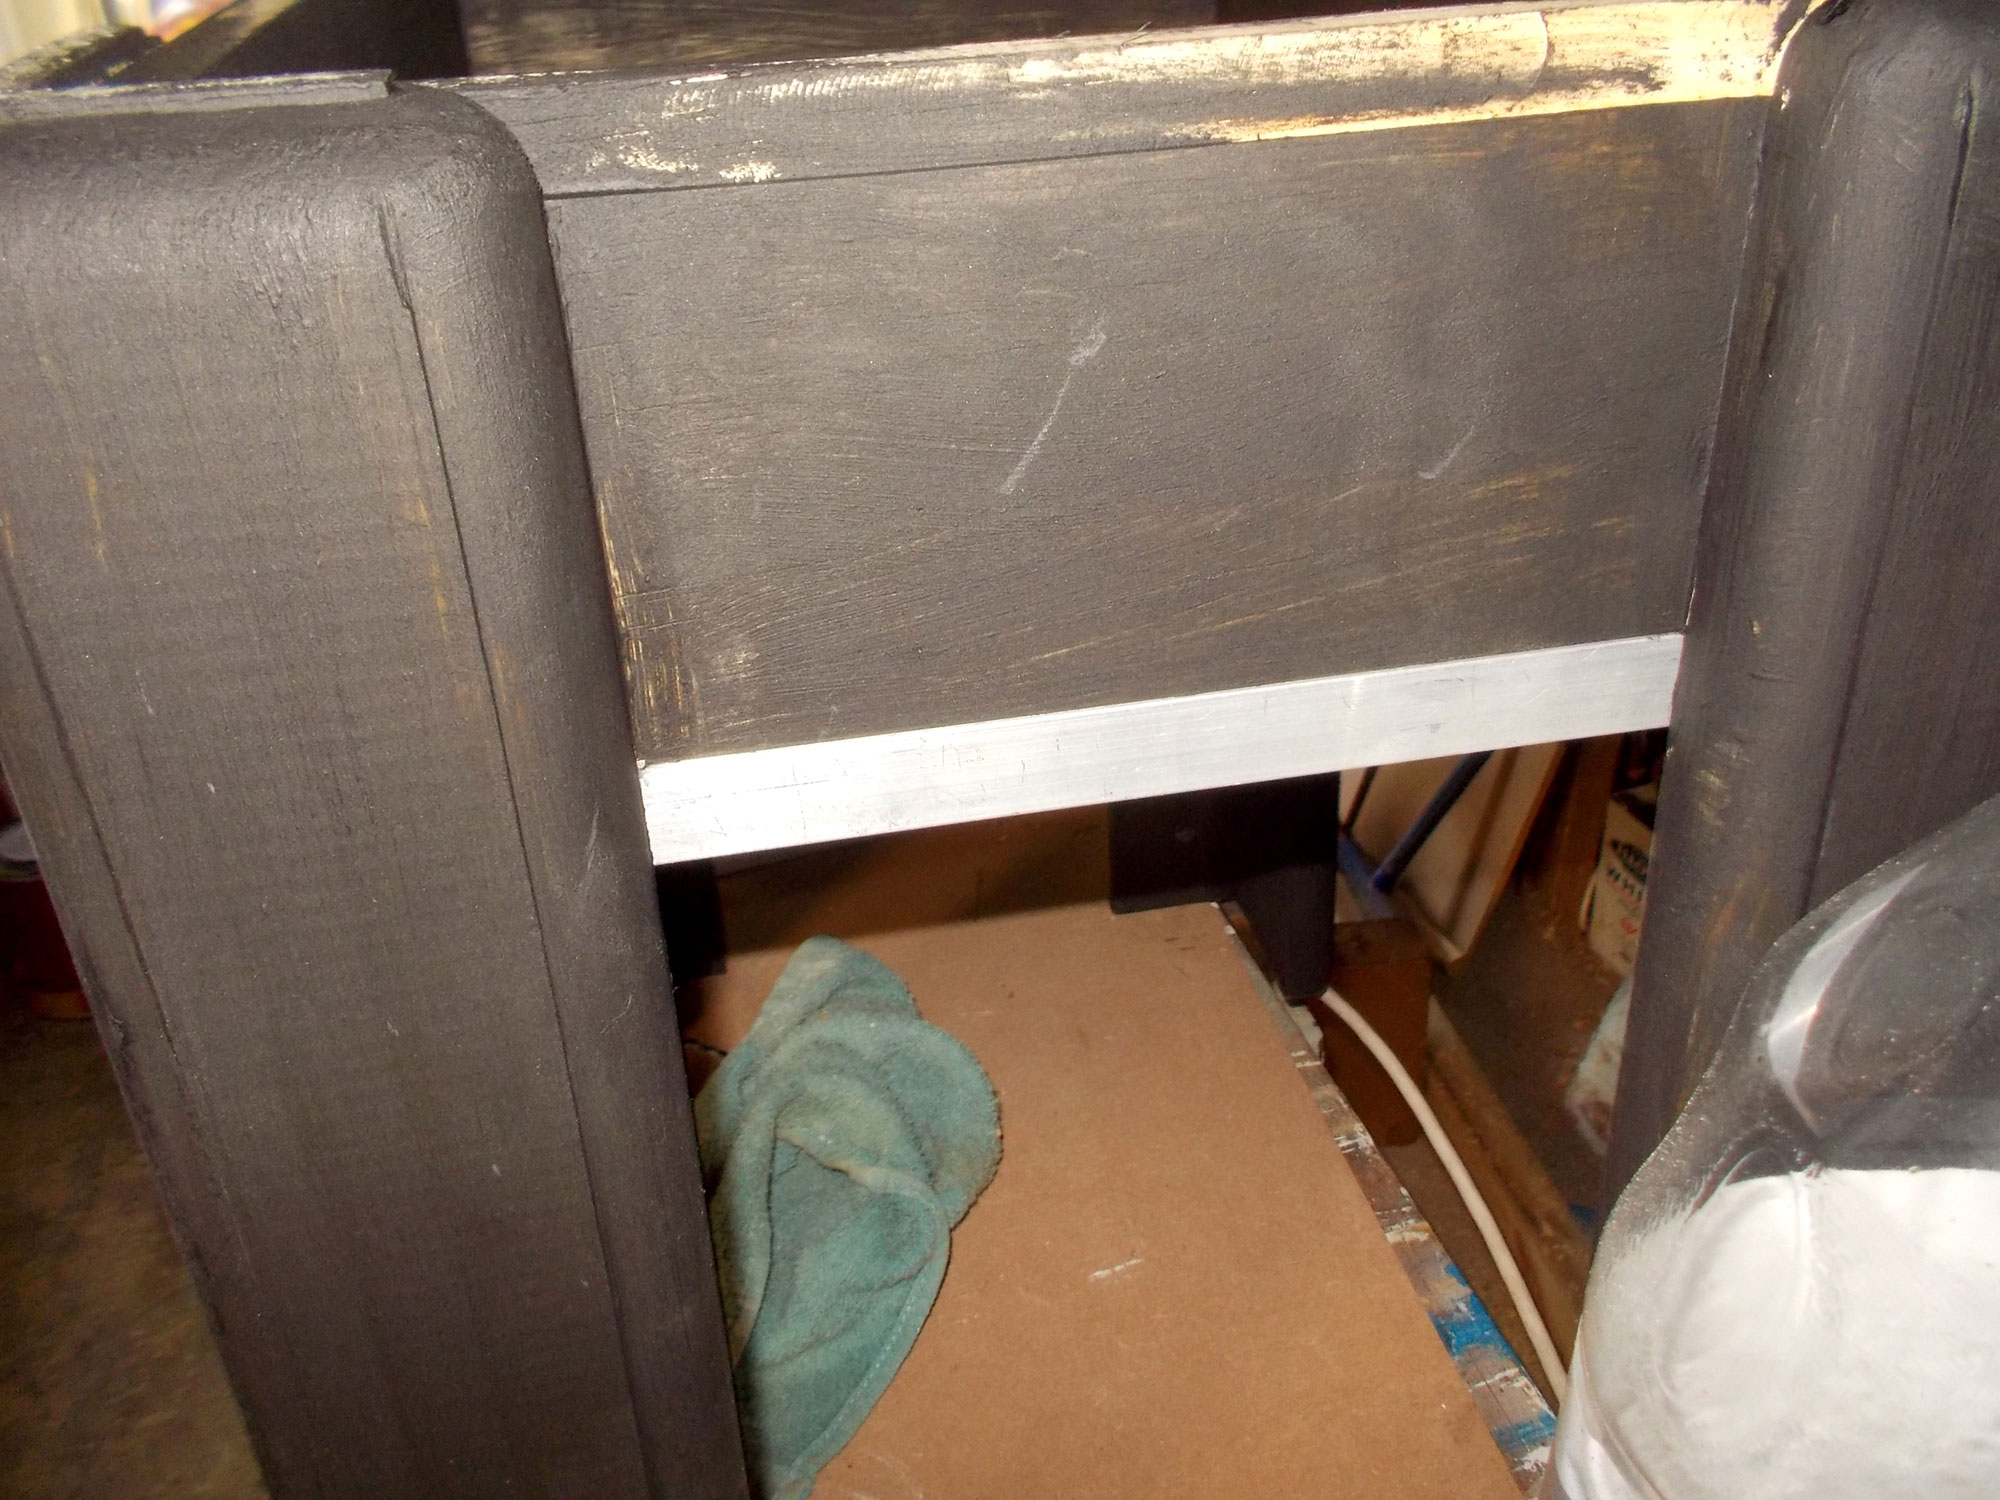
This is how the sides’ underside trim pieces fit together.
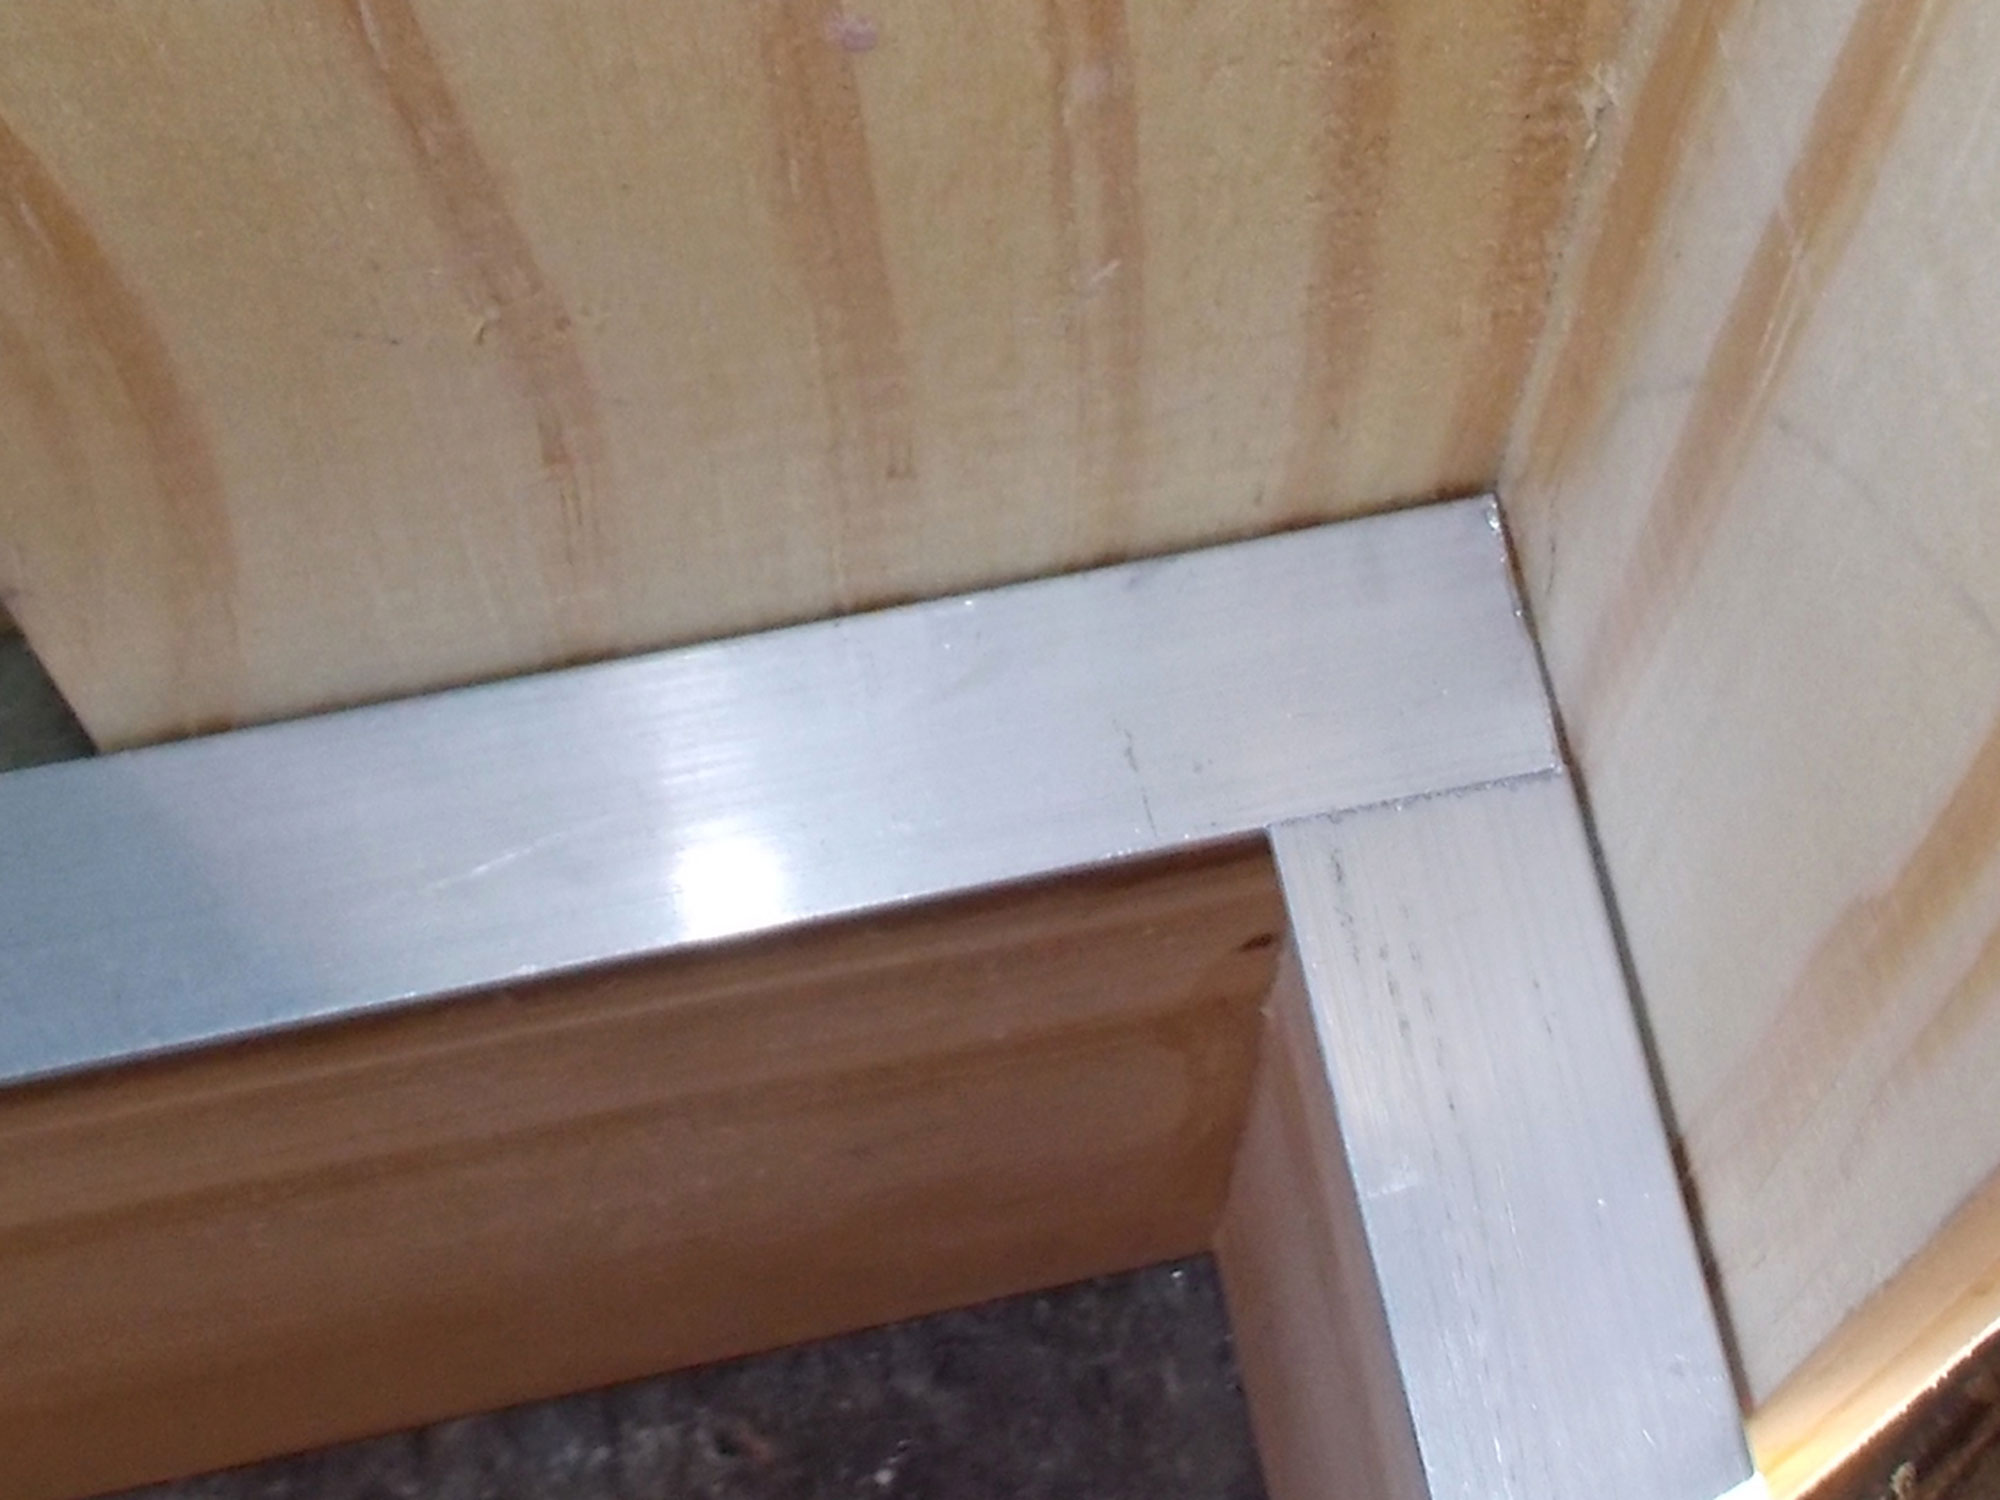
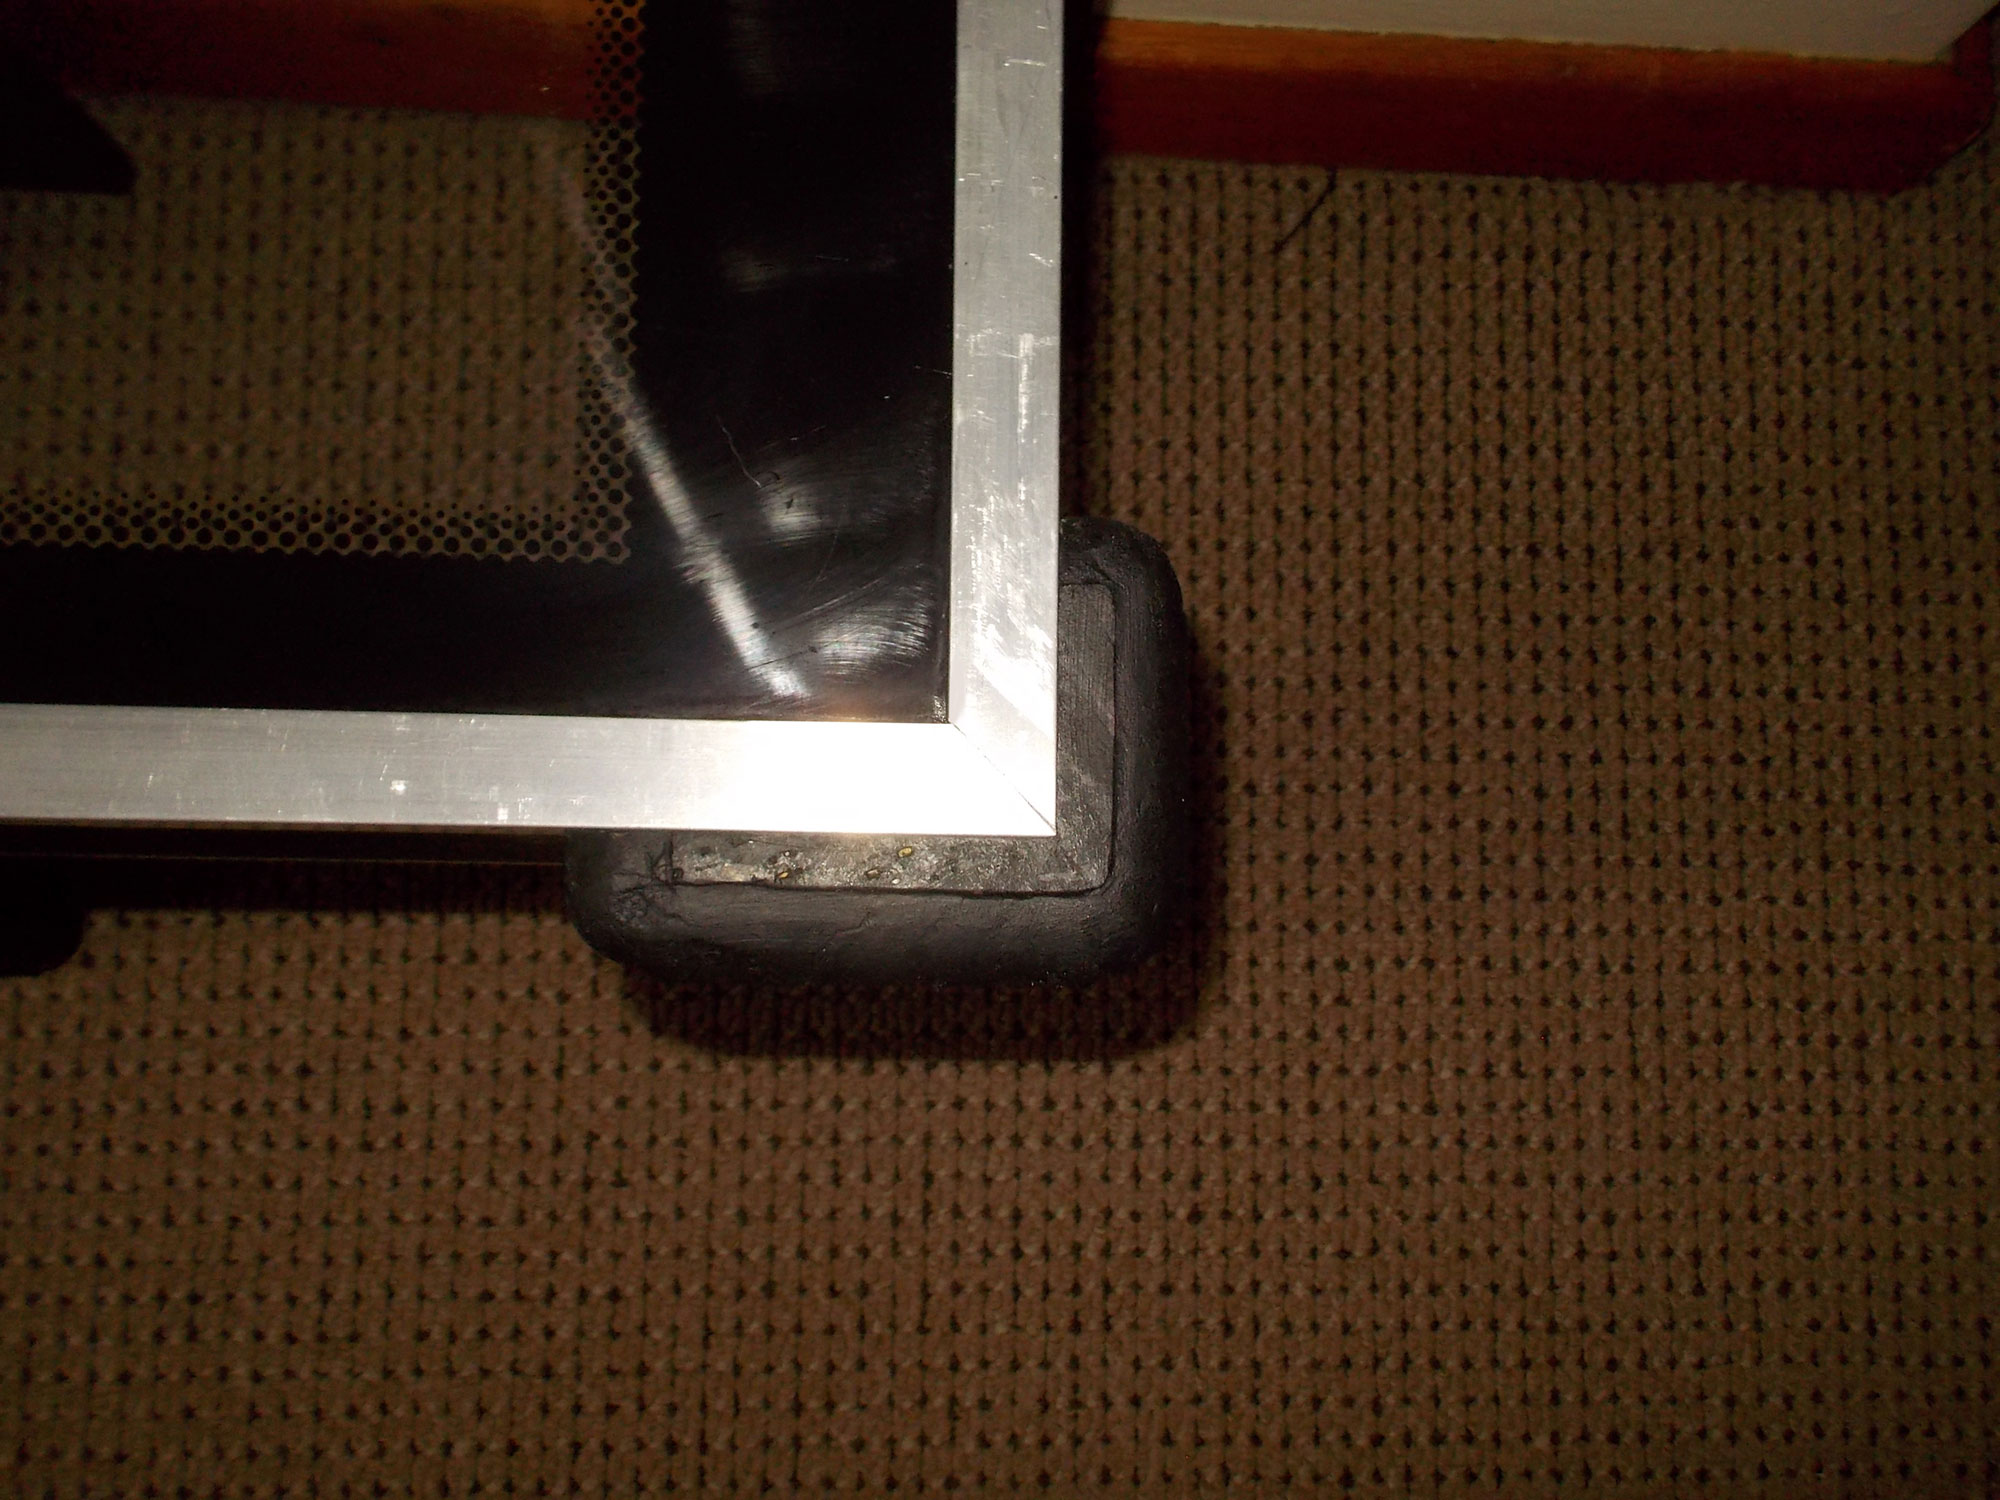
And this is a mitred corner. At this stage, I set the aluminium strips aside and applied the finishes to the wood frame to achieve an ‘ebony look’.
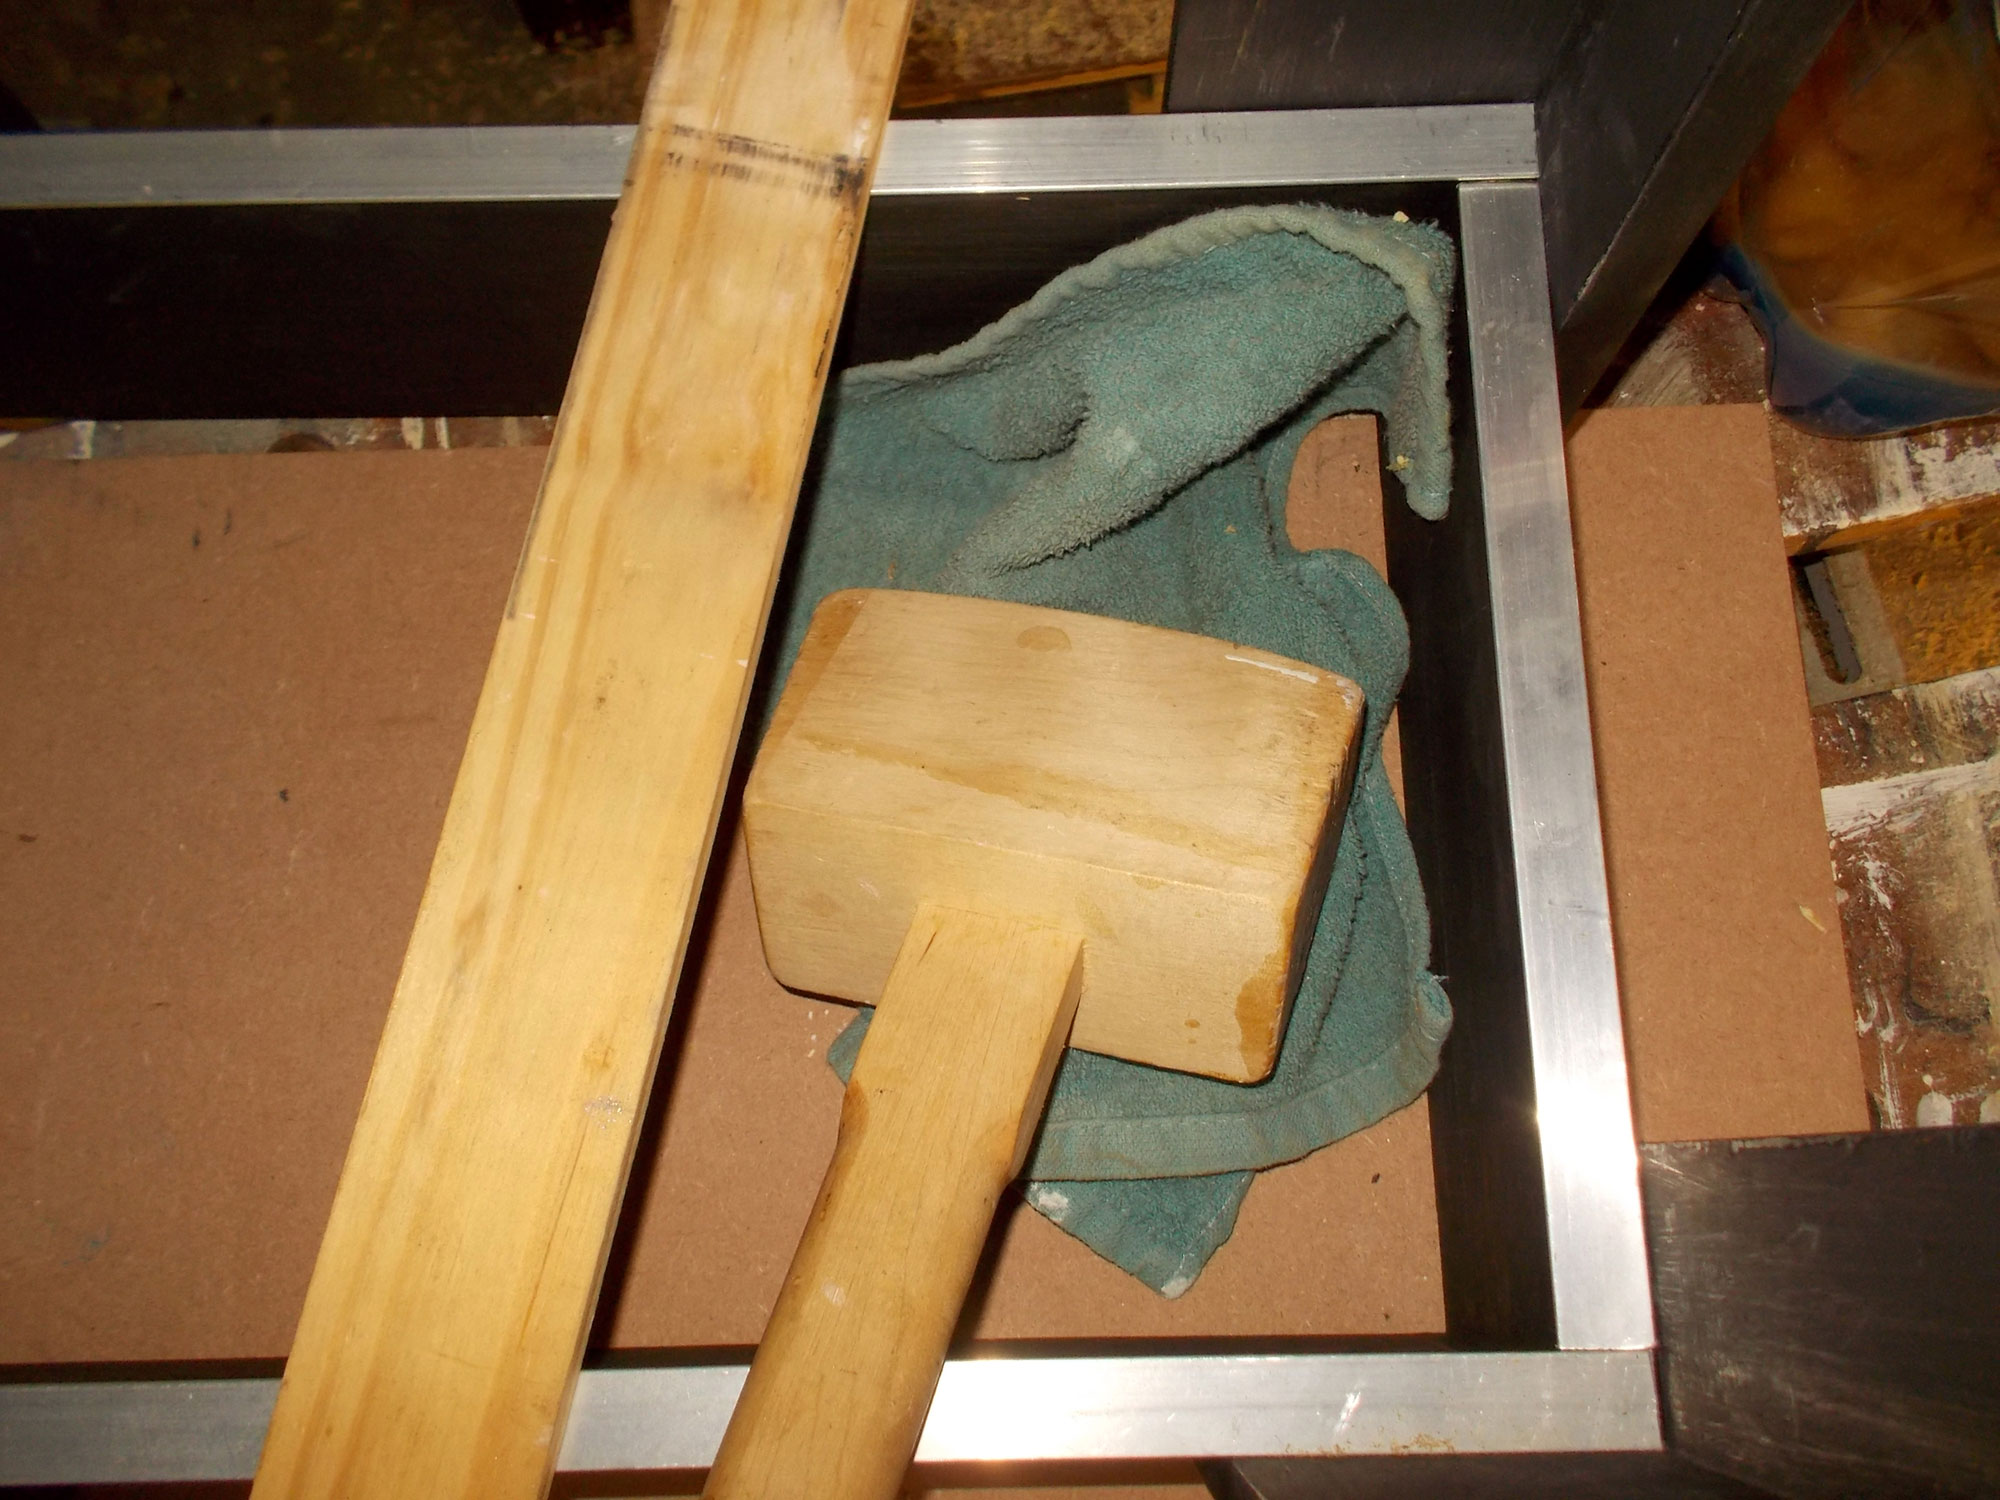
I used a length of wood, plus an old facecloth (to avoid any marring of the aluminium surfaces) and a mallet to gently tap the underside trim pieces into their position. If your recess and measuring is up to par, they are held very snugly and won’t come loose.
A side view of how the underside trim finishes off ‘the look’.
Then I positioned the glass panel on the legs and very carefully, and using a length of wood to ensure the top frame pieces would not be distorted or bent, clamped the top frame pieces into position. When doing this it is important to ensure that even clamping pressure is applied at all times, so a quarter turn on the left and right simultaneously, then repeat until the frame side piece is fully seated. Then repeat the process on the other three pieces – ensuring you position them precisely before applying clamping pressure.
One of the corners. I mitred them for a better look but it requires very precise cutting and filing to achieve the result you want so a squared-off join is equally acceptable.
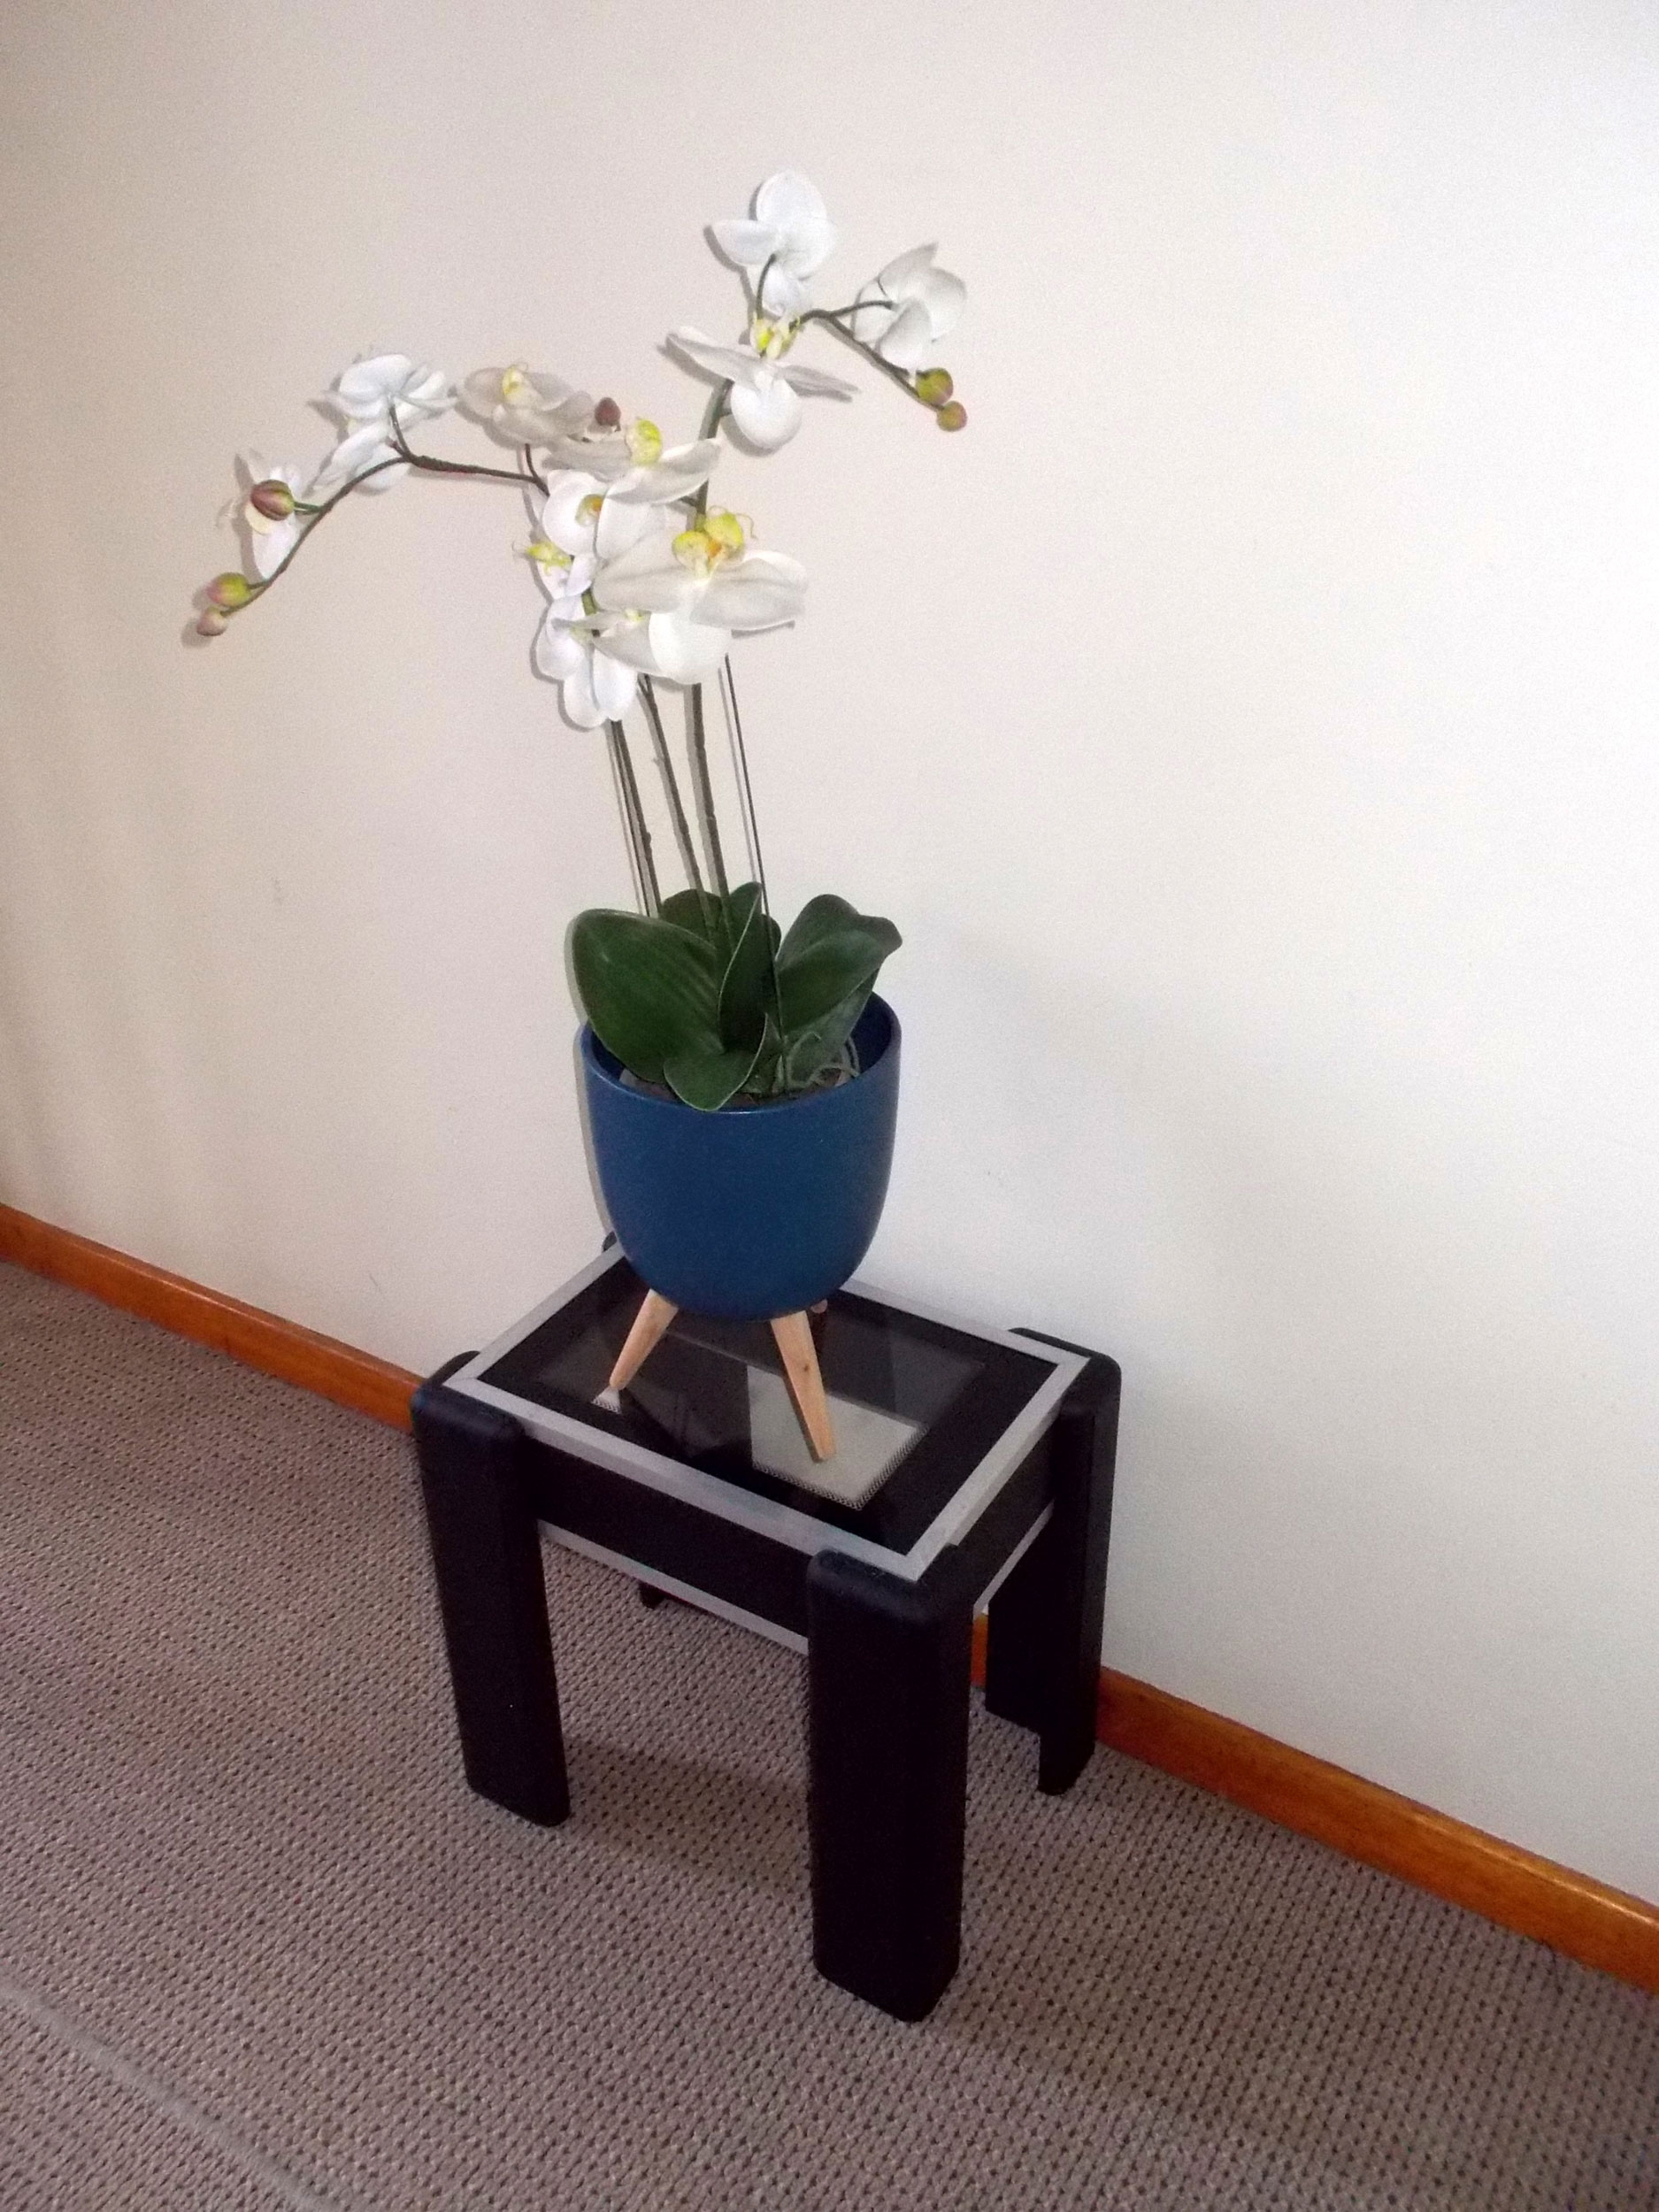
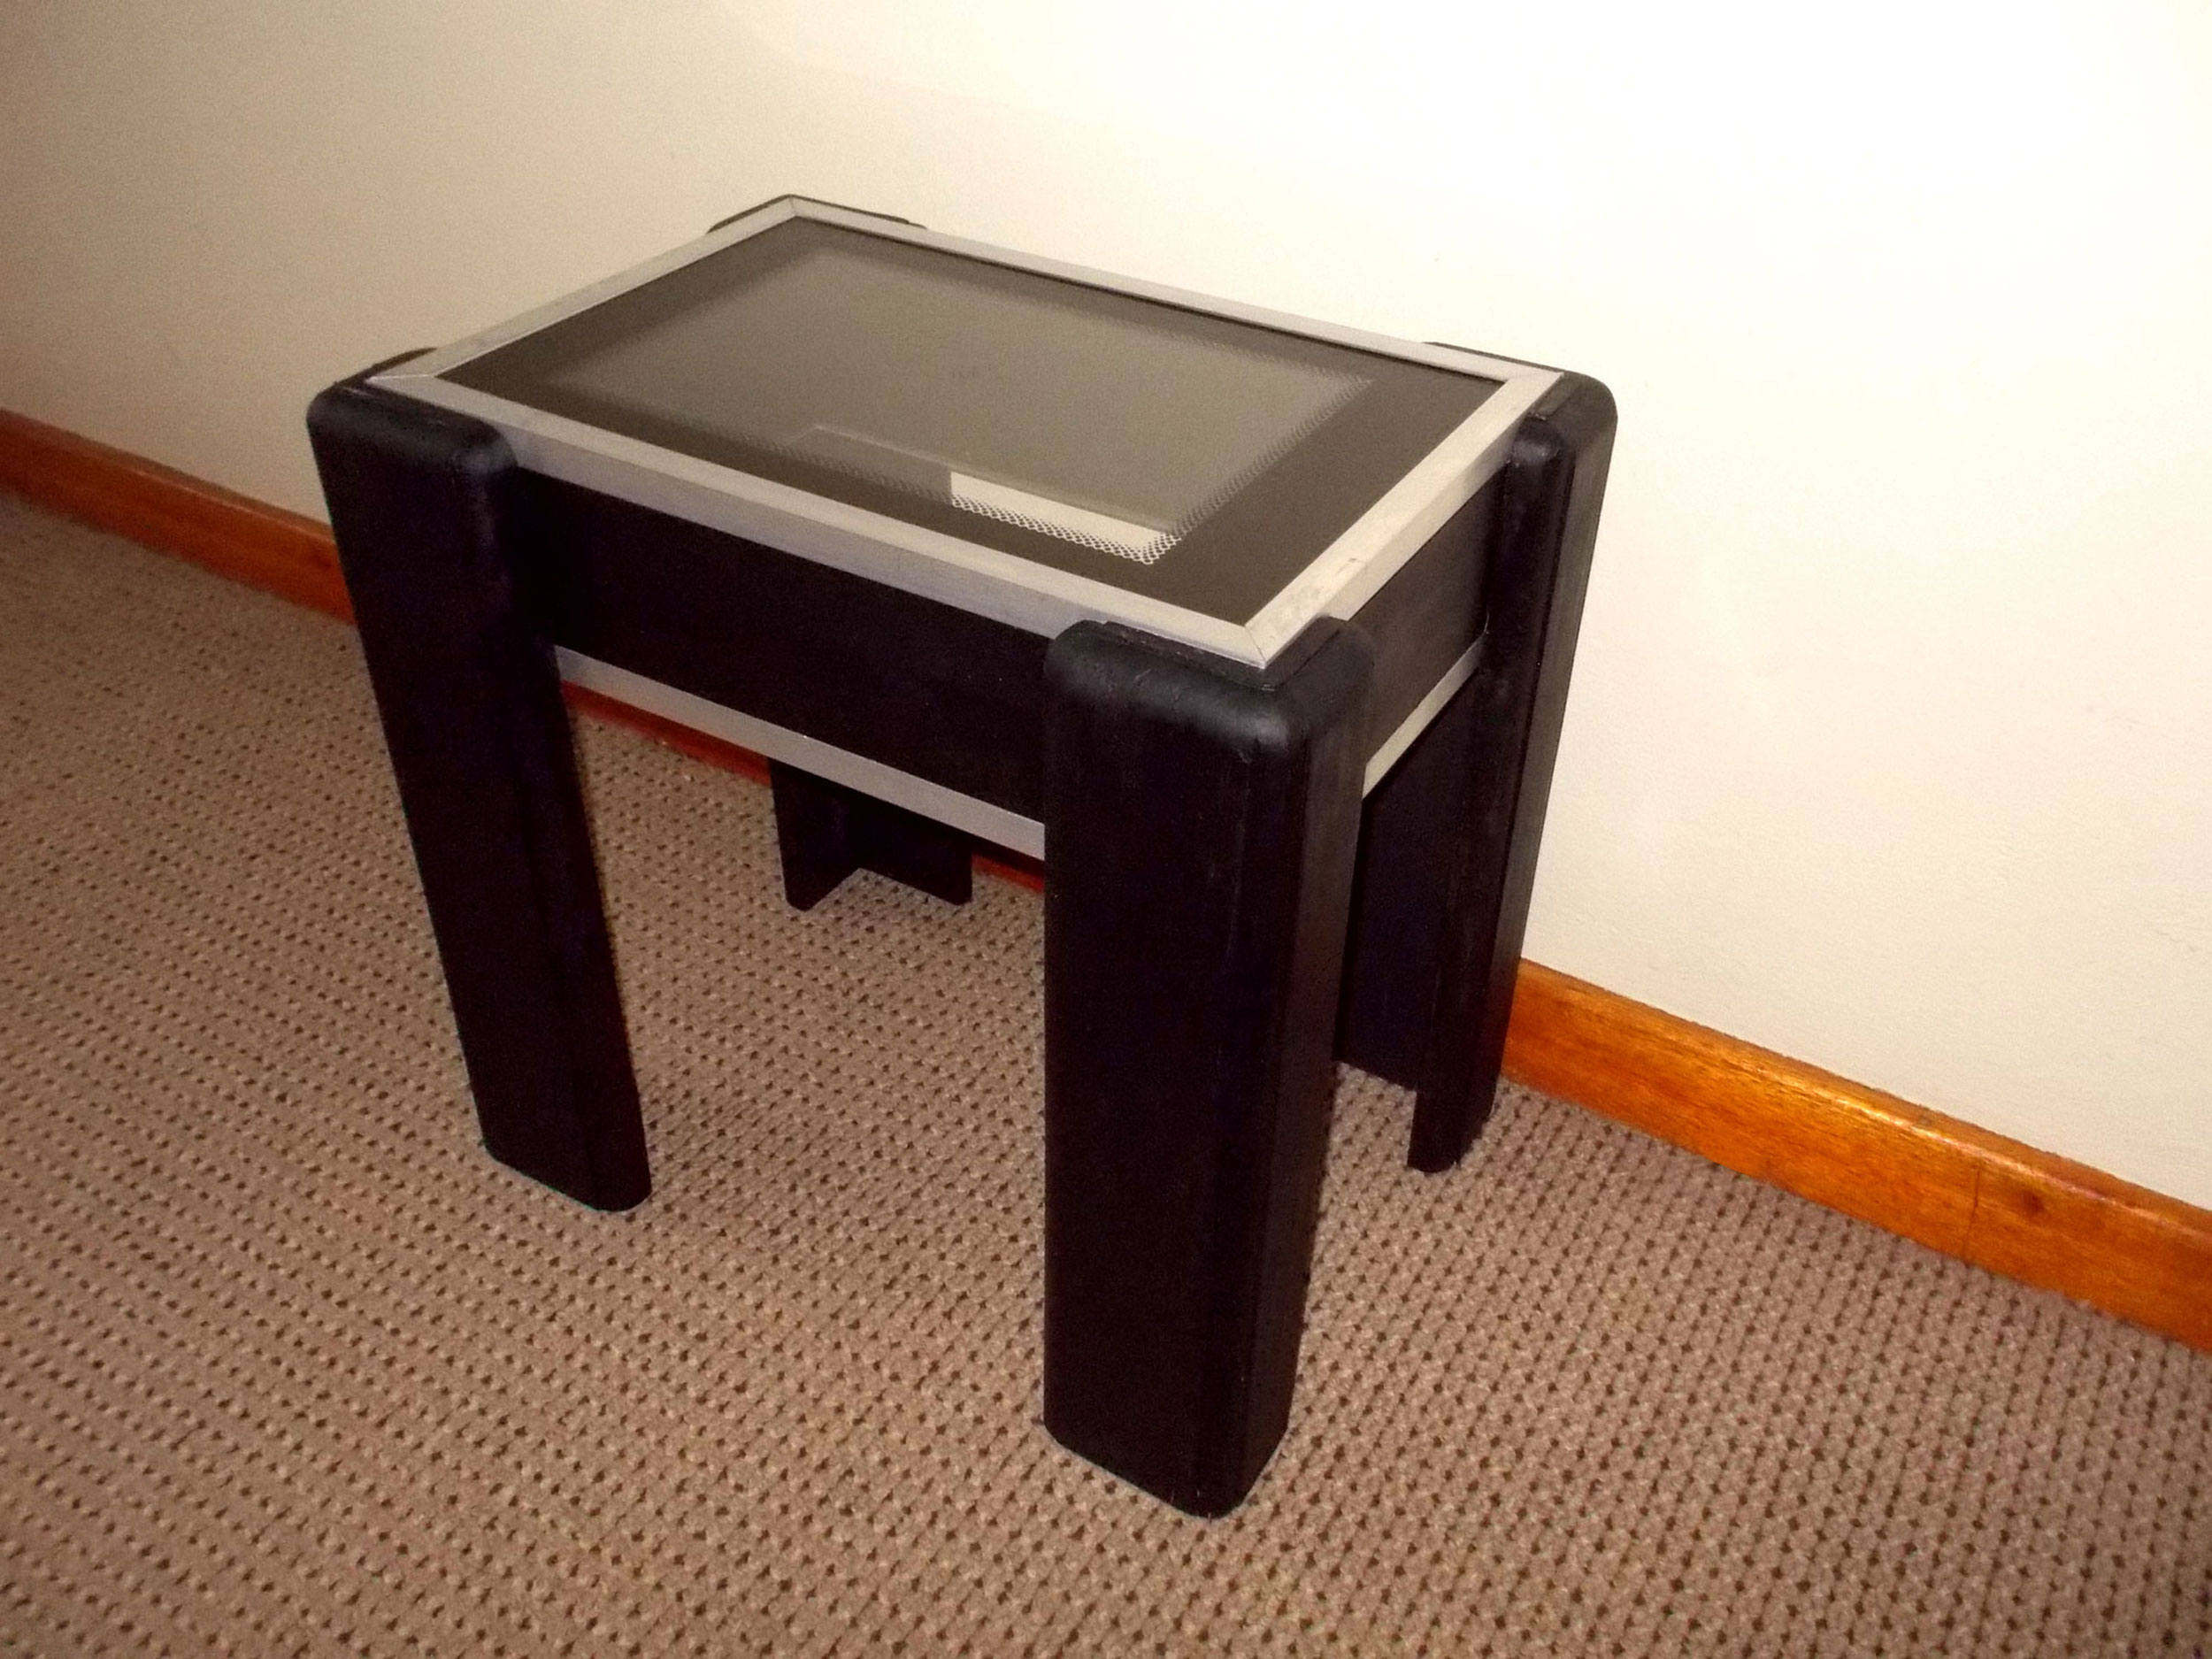
The completed table. For stability it is slightly lower than a standard side table (350mm as compared to the usual height of circa 400mm for a standard table) for greater stability.
Apart from serving as a side table for that mug of coffee or glass of wine, this small table makes a rather nice stand for a pot plant – in this case an ornamental (replica) orchid.
Project guide
Skill level: 3
Estimated time: weekend
Cost: R350
Assistant: No
Tools required:
Hacksaw, mitre box, circular cut-off saw or jigsaw, router, sander,
Panel:
These materials (other than the microwave oven glass, naturally) are available at Selected Mica Stores. To find out which is your closest Mica and whether or not they stock the items required, please go to www.mica.co.za, find your store and call them. If your local Mica does not stock exactly what you need they will be able to order it for you or suggest an alternative product or a reputable source.
Mica is one of the largest hardware groups in Africa with over 160 stores nationwide and growing. Mica is member owned and managed by a small team of retailers who are passionate about the success of members in everything they do, providing a full support system in training, marketing, finance, merchandise and store development.
The Mica format is based on voluntary trading which allows for ease of buying and the stimulation of entrepreneurial flair and decision making at store level. With the backing of over 400 National Supply Partners that allow for the best value to shelf for the member in everyday quality hardware products that make the members more profitable and able to deliver the best to their customers at a relative market price.
Click here to enquire about owning a Mica Hardware store.

